How to remove the existing wireless network profile in Windows Vista
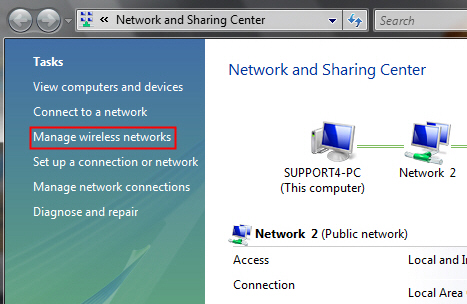
Step 1
Click start button on the task bar, open Control Panel -> (click Network and Internet, if you can´t find it, please go next) -> double click Network and Sharing Center.
Step 2
In the task list, please choose Manage wireless networks.
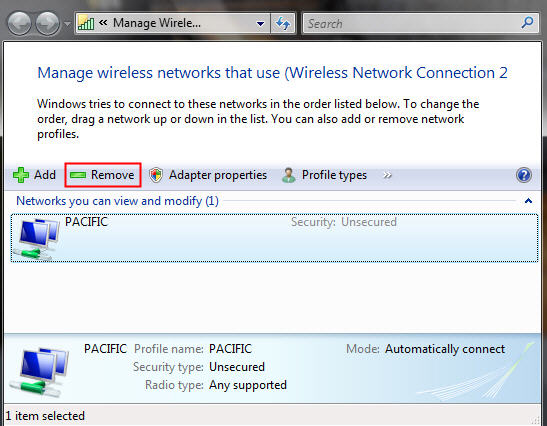
Step 3
In the Network table, please select the existing profiles and click Remove.
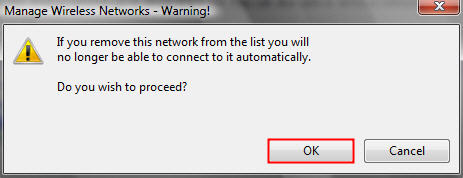
Step 4
You may see a warning dialog box, just click OK.
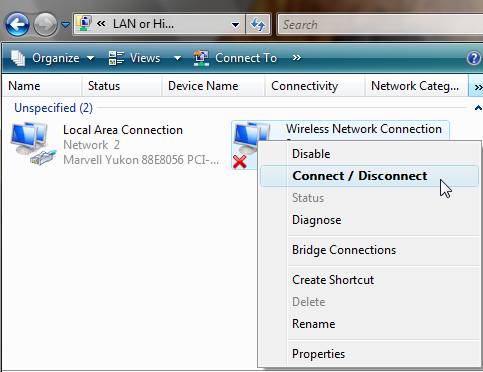
Step 5
Then you go back to Network and Sharing Center dialog box, and choose Manage network connections -> right click Wireless Network Connection -> click Connect/Disconnect.
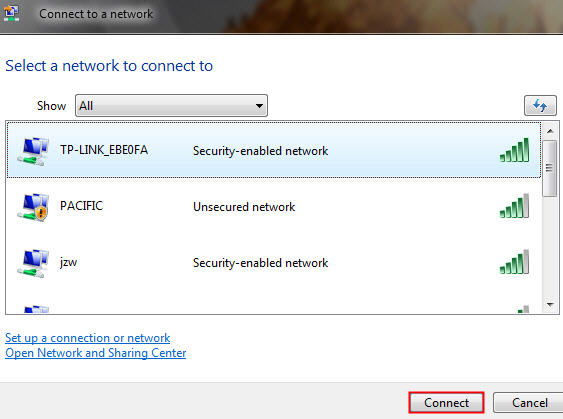
Step 6
Click the refresh button to view available wireless networks. Select the correct network which you want to connect, double click it or click Connect button.
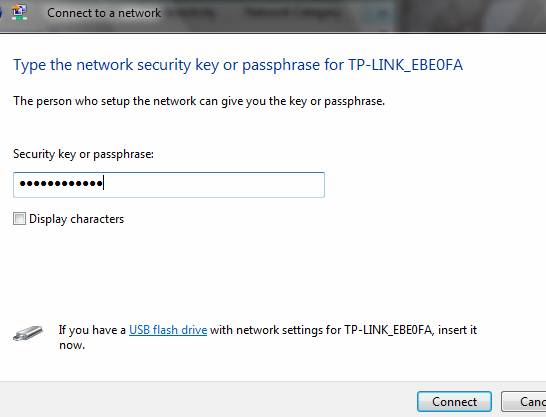
Step 7
If the wireless network is secured, it will pop up a window asking for the security key or passphrase. Enter the correct key then click Connect.
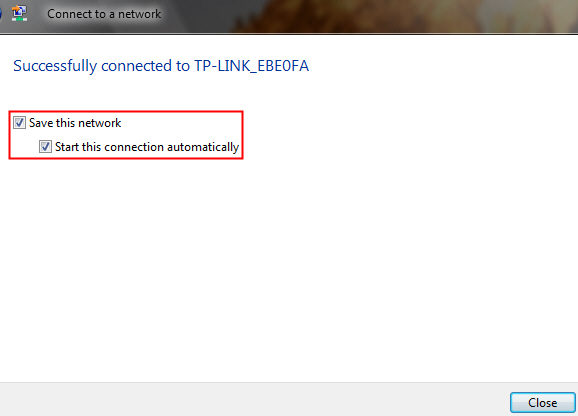
Step 8
Save the network and connection, and click Close.
Note:
1. If it keeps connecting to the network or acquiring IP address, please check if you had entered the correct security key/passphrase.
2. If it shows that the connection is Limited or no connectivity, please ensure that you had enabled DHCP server on the wireless router/access point.
Is this faq useful?
Your feedback helps improve this site.
TP-Link Community
Still need help? Search for answers, ask questions, and get help from TP-Link experts and other users around the world.