How to implement 2FA in VIGI Products
Contents
Objective
Two-factor authentication (2FA) is a security feature that requires an additional verification step for account access. This provides enhanced security and protection for accounts and management systems, keeping unauthorized accounts from access. There are various 2FA methods, including hardware and software tokens, SMS and email verification, voice-based authentication, push notifications, etc.
Software tokens are time-based one-time passwords generated by software applications, acting as a secure 2FA method for the VIGI management system to enhance the security of your TP-Link ID.
Requirements
- VIGI Cloud VMS
- Mobile Phone
Introduction
Configuration
Enable 2FA
Step 1. Download an Authenticator application from the app store of your mobile phone or PC and log in. Here we use Google Authenticator for example.
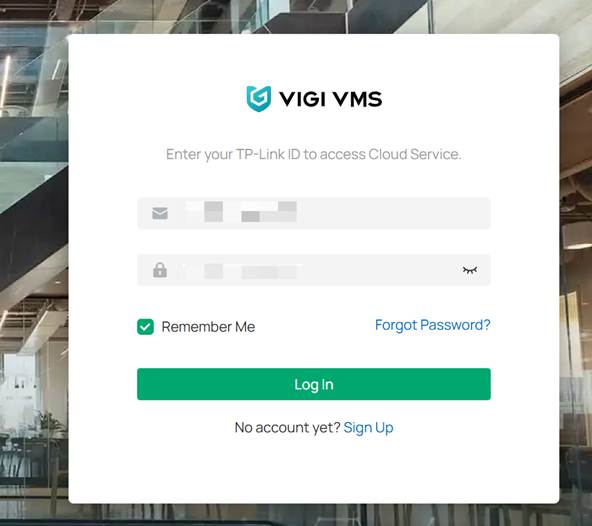
Step 2. Log in to VIGI Cloud VMS (https://vms.tplinkcloud.com/) with your TP-Link ID and password.
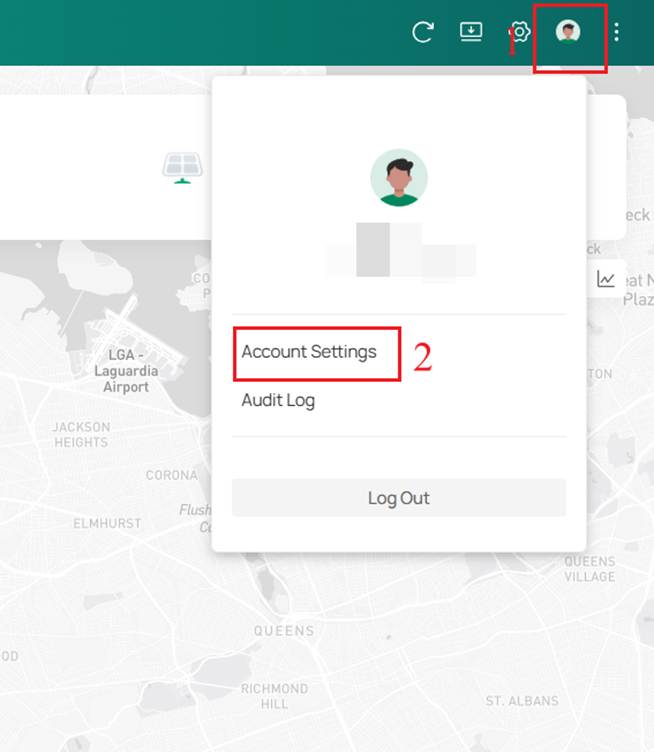
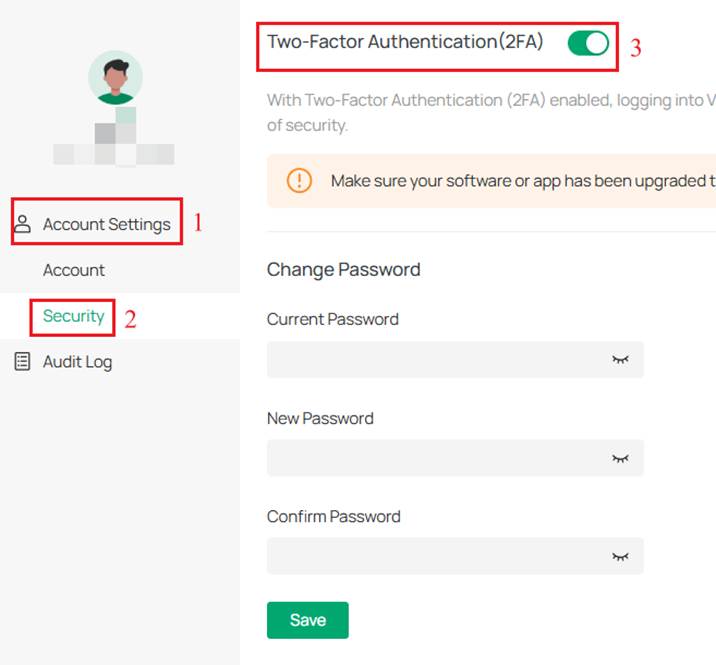
Step 3. Click the profile icon in the upper right corner, then click Account Settings from the dropdown menu that appears.
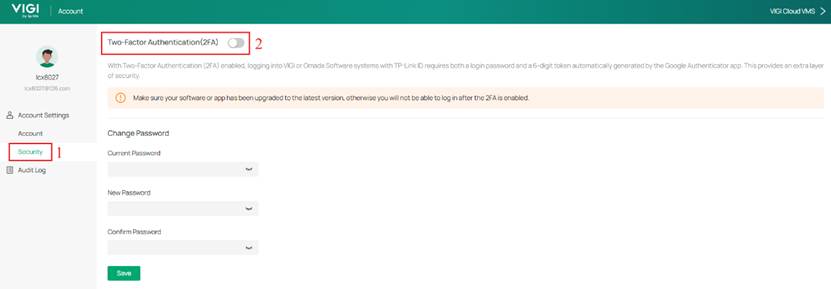
Step 4. Within Account Settings, click Security and then enable Two-Factor Authentication (2FA).
Step 5. Click Confirm to close the confirmation prompt.
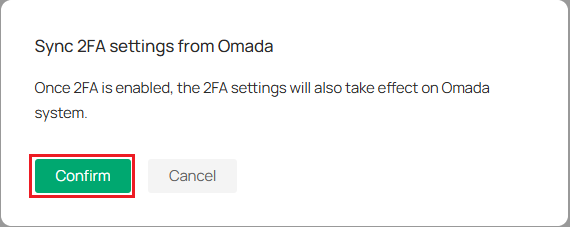
Note: Once 2FA is enabled, the 2FA settings will also take effect on Omada Settings with same TP-Link ID.
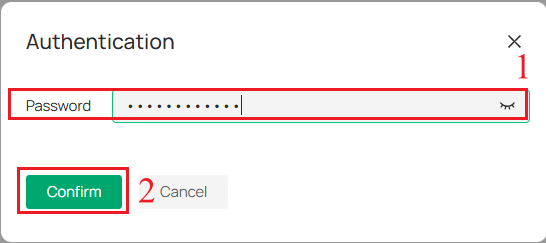
Step 6. Enter your TP-Link ID’s password, then click Confirm.
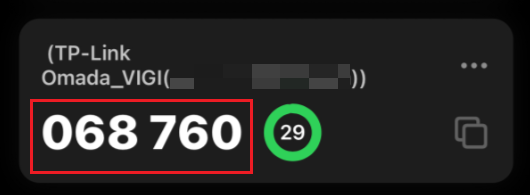
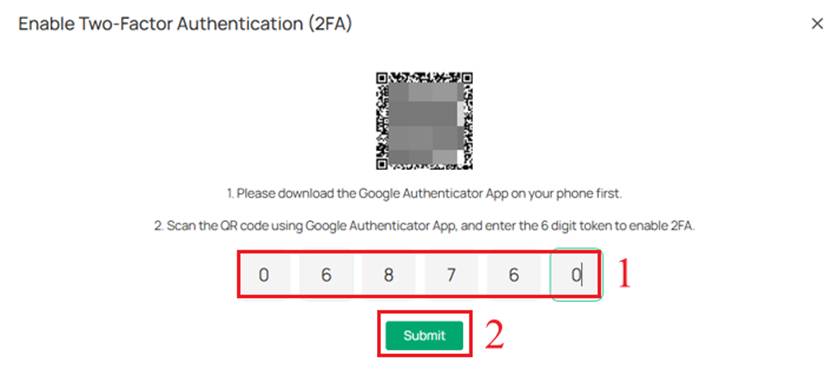
Step 7. Open the Google Authenticator app on your mobile device and scan the QR code in the pop-up window. Enter the 6-digit token shown on the App and click Submit.
Disable 2FA
You can disable 2FA in the following three methods.
Via the VIGI Cloud VMS’s login page
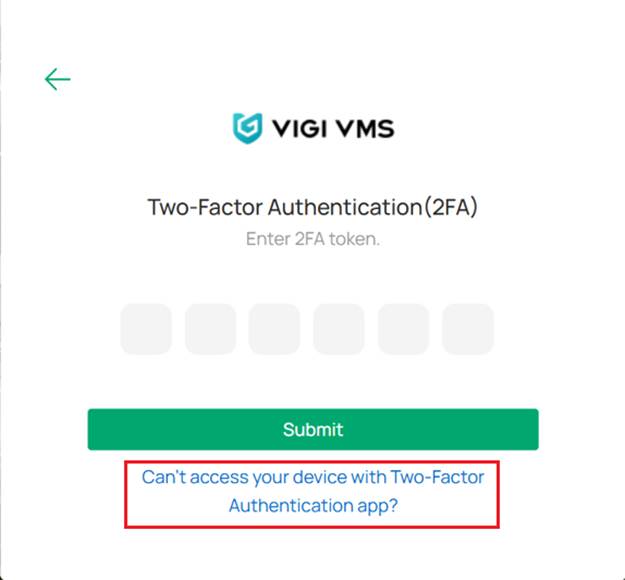
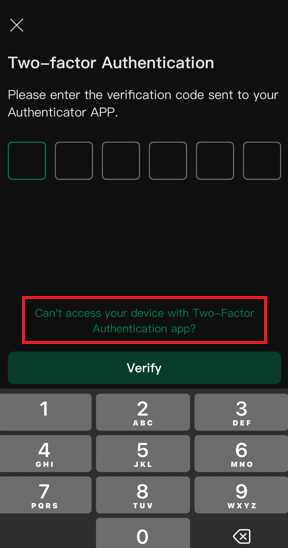
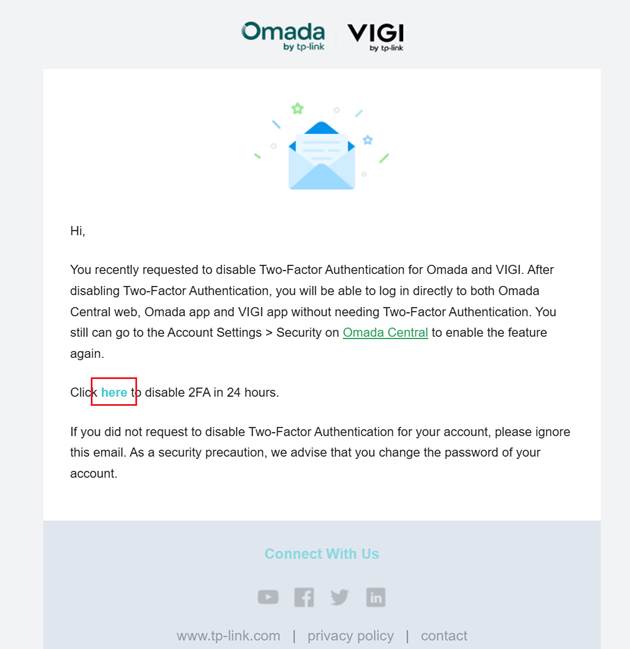
Step 1. Log out your account and Log in your account again. Click the link below on the page where you enter the 2FA token.
Step 2. Go to your mailbox and find the email about disabling 2FA. Click Here to disable 2FA. You will be redirected to a page telling you that 2FA has been successfully disabled.

Via the VIGI Cloud VMS’s Account Settings page
Step 1. Click the profile icon in the upper right corner, then click Account Settings from the dropdown menu that appears. Navigate to Account Settings > Security > Two-Factor Authentication(2FA), disable the 2FA.
Step 2. Click Confirm to close the confirmation prompt.

Note: Once 2FA is disabled, the 2FA will also be disabled on Omada with same TP-Link ID.
Step 3. Enter your TP-Link ID’s password, then click Confirm.

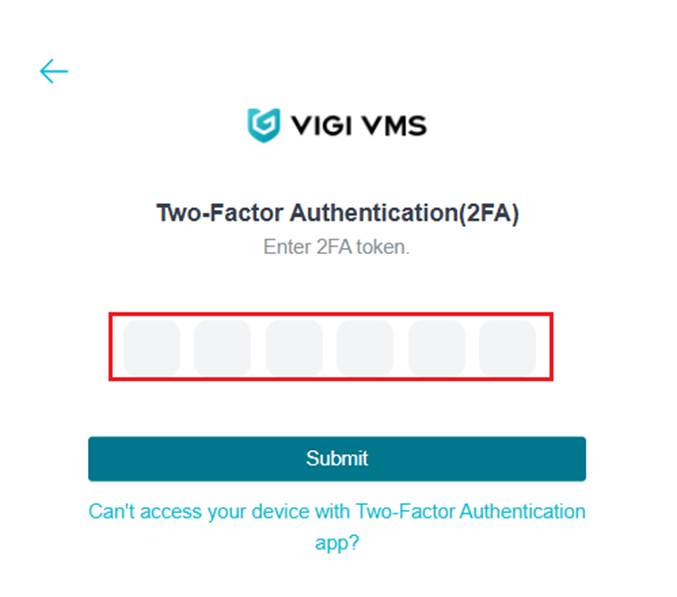
Step 4. Open the Google Authenticator app on your mobile device, enter the 6-digit token shown on the App and click Submit.

Via the VIGI APP
Step 1. Login your account on VIGI APP, click the link below on the page where you enter the 2FA token.
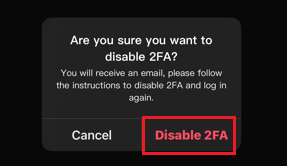
Step 2. Click Disable 2FA to close the prompt.
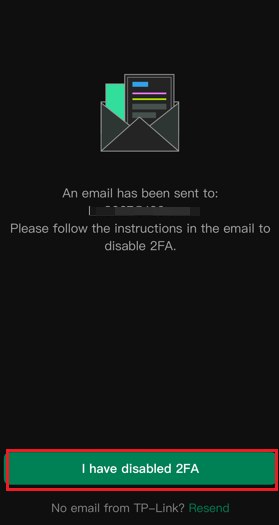
Note: You will receive an email to disable 2FA.
Step 3. Go to your mailbox and find the email about disabling 2FA. Click Here to disable 2FA.
Step 4. Click I have disabled 2FA to finish the operation.
Verification
When 2FA is enabled for your TP-Link ID on VIGI Cloud VMS, you will be required to complete a two-step verification process when using the following management systems to access the account.
VIGI VMS:
- When you log in to VIGI VMS with your TP-Link ID (The TP-Link ID is bound to VIGI VMS via Cloud Access.)
VIGI Cloud VMS:
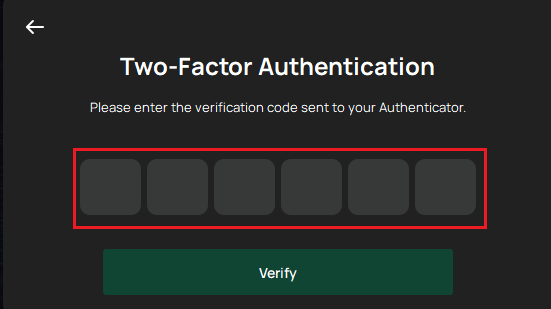
- When you log in to VIGI Cloud VMS with your TP-Link ID
VIGI APP:
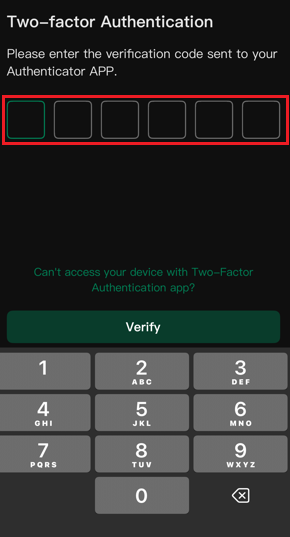
- When you log in to VIGI APP with your TP-Link ID
- When you log in to VIGI VMS via VIGI APP with your TP-Link ID (The TP-Link ID is bound to VIGI VMS via Cloud Access.)
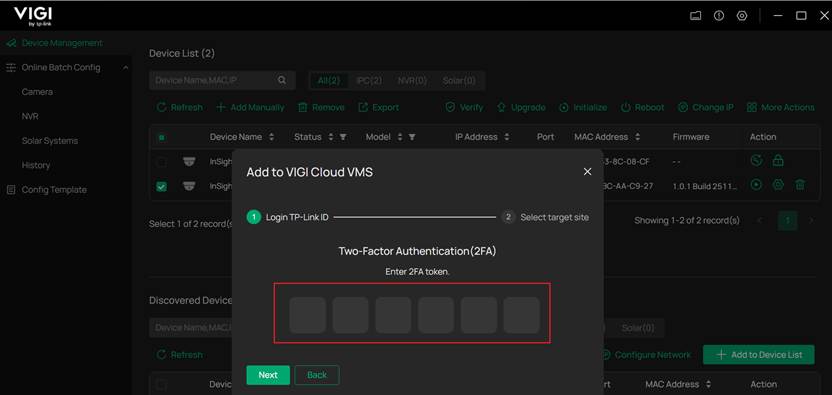
VIGI Config Tool:
- When you add VIGI devices to VIGI VMS via VIGI Config Tool
VIGI PC Client:
- When you log in to VIGI VMS PC Client with your TP-Link ID
Conclusion
You have successfully enabled and disabled 2FA.
Get to know more details of each function and configuration please go to Download Center to download the manual of your product.
Полезен ли этот FAQ?
Ваши отзывы помогают улучшить этот сайт.


From United States?
Получайте информацию о продуктах, событиях и услугах для вашего региона.