How to configure TL-PS310U to print by queue
Why need to set up printing by queue
Generally, to use the print server TL-PS310U, the users need to run a utility named Launch MFP and Storage Server.exe to search the print server then connect to the printer or other USB devices. The utility seems very easy to use, but it has a very inconvenient shortcoming: it does NOT allow the users print/scan/copy simultaneously, that means once a user is connected to the print server by the utility, the other users can't use the print server unless the first user finished his/her job and release the print server from the utility.
The limitation is caused by the Virtual USB technology, which supplies support for MFP and general USB devices. To fix the problem mentioned above, we can choose another way to configure TL-PS310U to print by queue (also called LPR print). In this way, the users don’t need wait and print one by one, the printer would print by queue if multiple users were submitting the print jobs.
Before we configuring the TL-PS310U for print-by-queue function, PLEASE NOTE:
(1) In this mode, only print function of MFP (Multi Function perherial) is available. For example, if user A wants to use MFP’s other functions, such as scan function, he/she has to run the utility and connect it to the MFP. While the MFP(scanner) is working, the other users can’t print by queue unless the user A finished the scan job and released the MFP from the utility, by when the print-by-queue function is available again for all users.
(2 ) If the user just need to connect only one common printer to TL-PS310U, the users can set the print server by following the methods below and abandon the utility.
(3) If a printer and other USB devices are connected to T L-PS310U at the same time, the users has to run the utility to access these USB devices, and o nly one user can use them one time, which does not affect printing by queue.
In a word, the following print-by-queue settings is just for the print function of the printers, the other functions of MFP and other USB devices both depend on the utility to connect and release.
To configure TL-PS310U to make printer “print-by-queue”, there are two available methods.
Method 1 (recommended) : The software Network Printer Wizard is offered to help users automatically configure the printer server. Please follow the step wizard of the software to finish all the settings.Click here to download the software;
Method 2 : This a manual way for the advanced user or the user can’t download the software in the method 1 . What a user needs to do is to install the printer’s driver and add a standard TCP/IP port for the printer. In fact, the setup s ettings are just the same as any general print server (such as TP-Link TL-PS110U/WPS510U) which supports LPR as well.
For the Method 2, if necessary, please refer to the settings below (The following settings are for Windows XP, but they are quite similar in Windows Vista):
Step 1 Install the utility Launch MFP and Storage Server.exe from CD, and change the printer server’s IP to suit with your network. Then please right click the printer to connect to the print server and click Details.
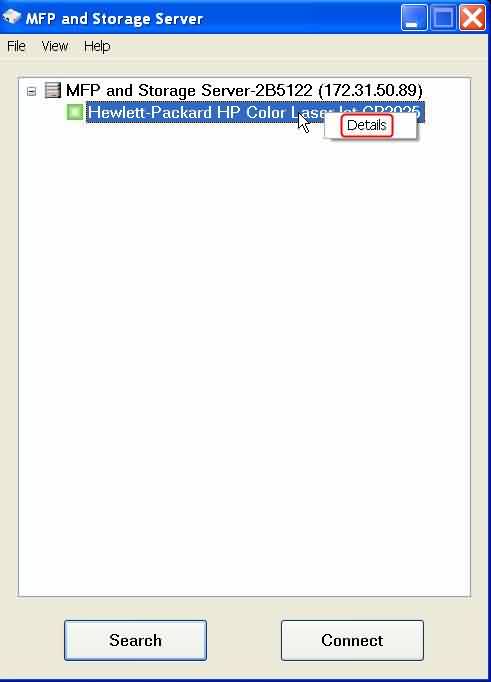
Step 2 Please write down the Queue Name and release the printer then exit the program.

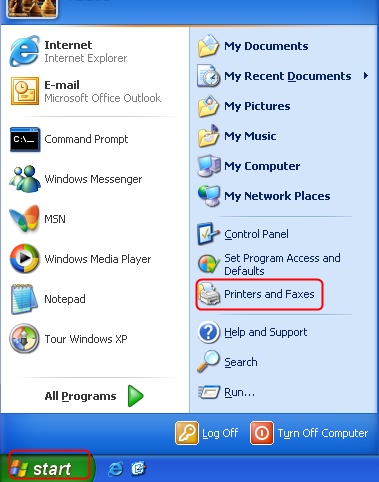
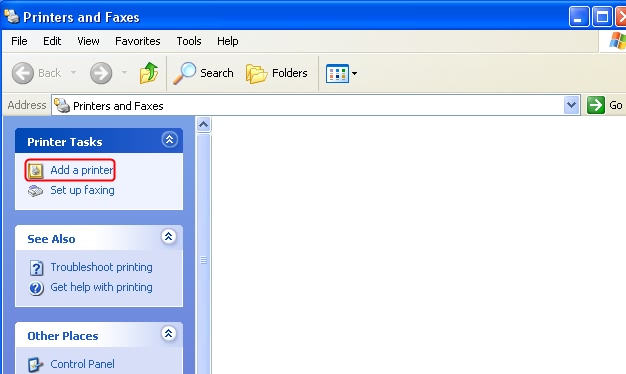
Step 3 Please open the start menu and click Printers and Faxes (it is also can be found in Control Panel).
Step 4
If you have installed the printer and driver, please go to Step 5;
If you havn´t installed the printer and driver, please skip to Step 6;
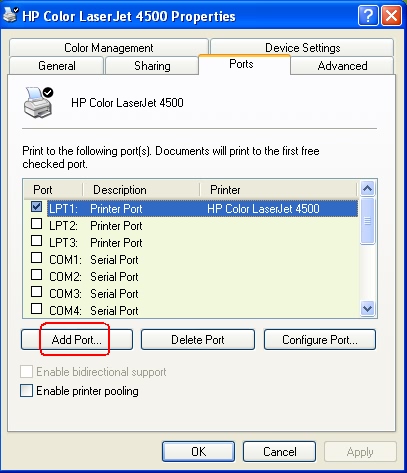
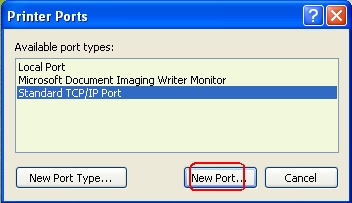
Step 5 Right click the printer icon and select Properties -> Ports -> Add Port -> select Standard TCP/IP Port and click New Port button. Then please go to Step 8 to continue your settings.
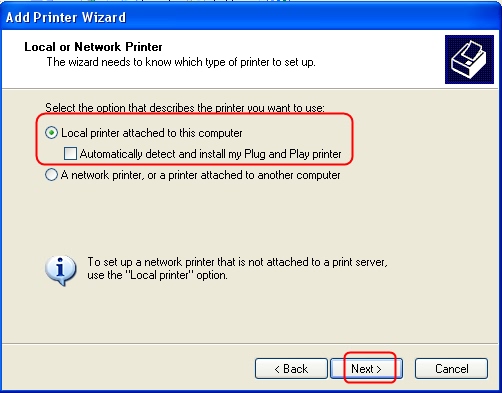
Step 6 Click Add a Printer
Then Add a local printer.
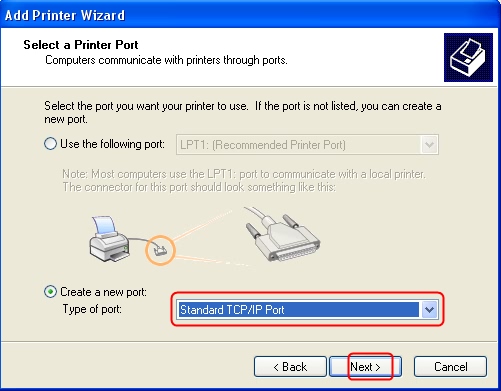
Step 7 Create standard TCP/IP port for printer.
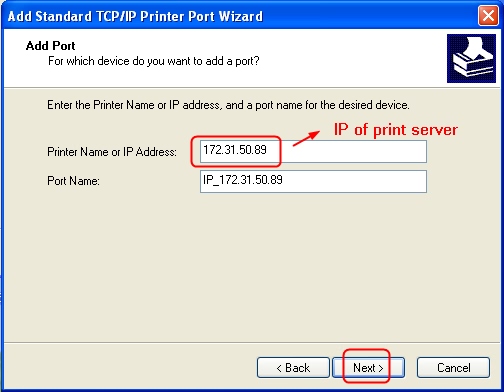
Step 8 Enter the IP address of print server.
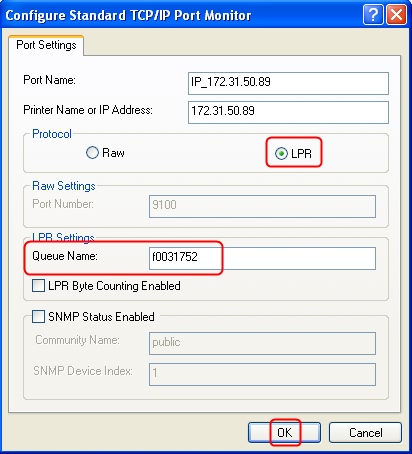
Step 9 Please select LPR protocol and type into the queue name of the printer you have gotten from Step 2.
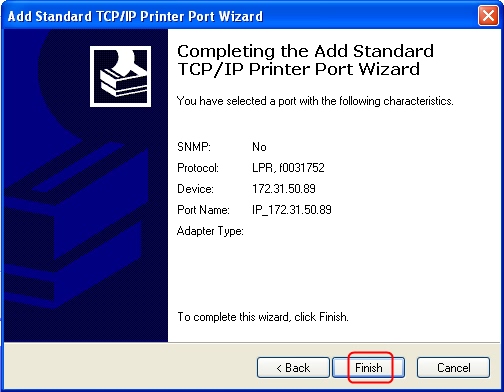
Step 10 Finish the wizard of adding standard TCP/IP printer port.
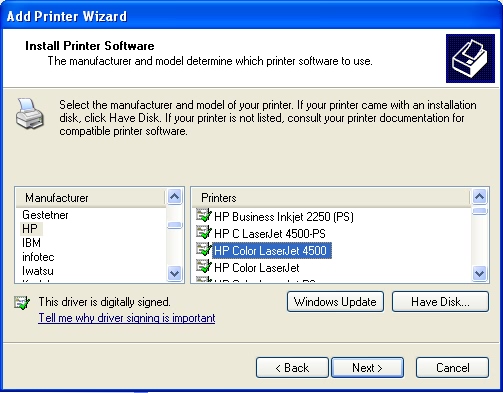
Step 11 If Windows don’t list your printer model here, please click Have Disk button and install the driver from CD or the driver file you have saved on your hard disk.
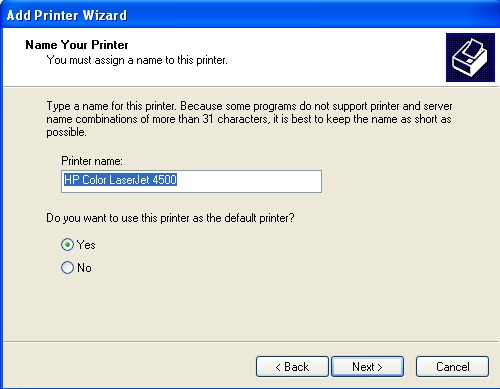
Step 1 2 Please go through the following settings to finish the whole installation.
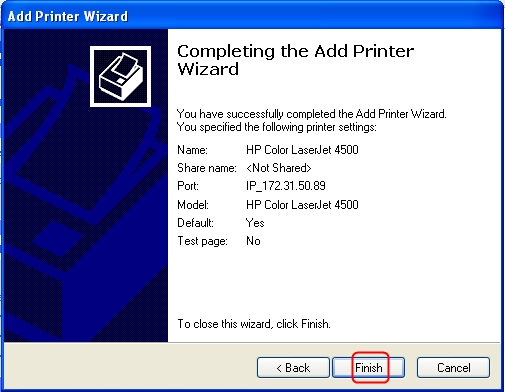
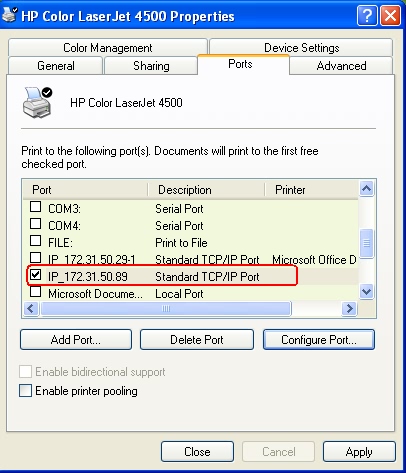
Step 13 Now the printer driver has been installed on your computer, and a standard TCP/IP port for LPR is created. You can check the ports as follow:
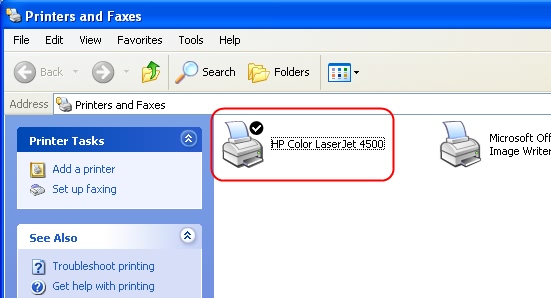
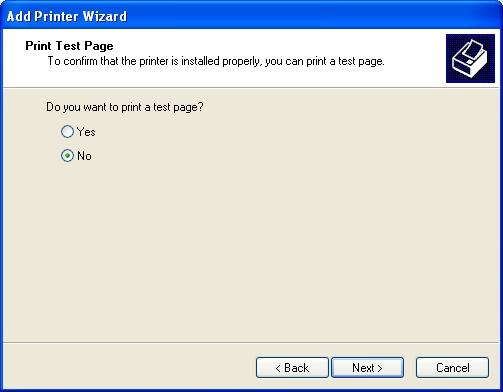
Now you can set the printer as the default printer and use the print function as usual.
Is this faq useful?
Your feedback helps improve this site.

TP-Link Community
Still need help? Search for answers, ask questions, and get help from TP-Link experts and other users around the world.