Setting up HomeCare on your TP-Link Router
This guide will walk you through the process of setting up HomeCare on your TP-Link Router
Step 1: Launch a Web Browser (Example: Internet Explorer, Google Chrome, or Safari) and click on the address bar and type either “tplinkwifi.net” or “192.168.0.1”


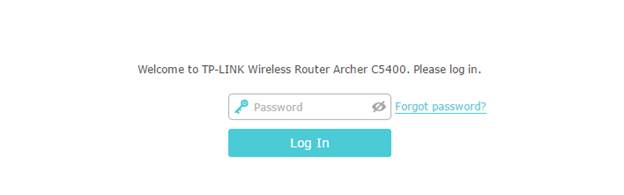
Step 2: Log into your router. The default password is “admin”
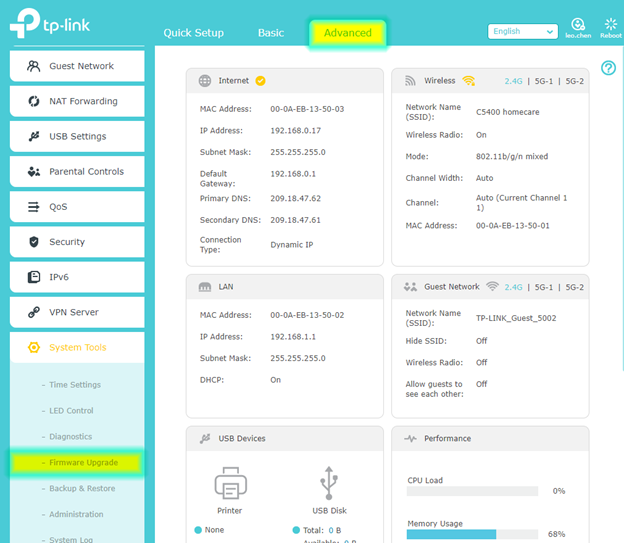
Step 3: Check your firmware. Click Advanced – System Tools – Firmware Upgrade
Step 4: Upgrade to the HomeCare is supported on ‘Build 20170504’ or later. If your router requires a firmware upgrade, click here.

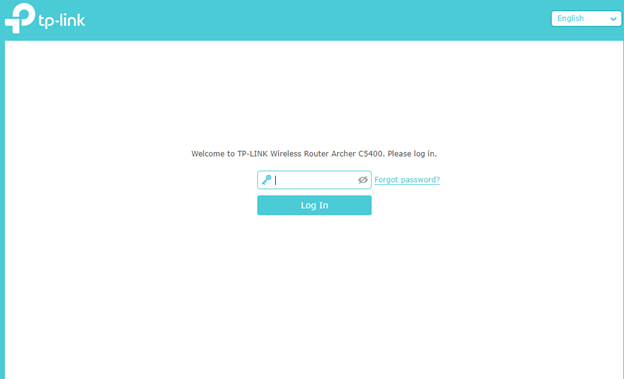
Step 5: Once you are on a compatible firmware, you will need to log back into your router. Use the log in password for your router. The default is “admin”.
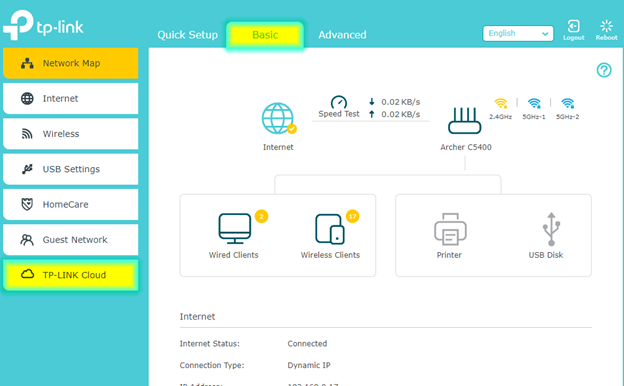
Step 6: Now to use the new enhanced features you will need to log into a TP-Link cloud account. Click on “TP-Link Cloud” under the “Basic” tab.
Step 7: Log into you TP-Link cloud account or if you do not have one, click “Register Now”. For steps on how to create a TP-Link cloud account click here.
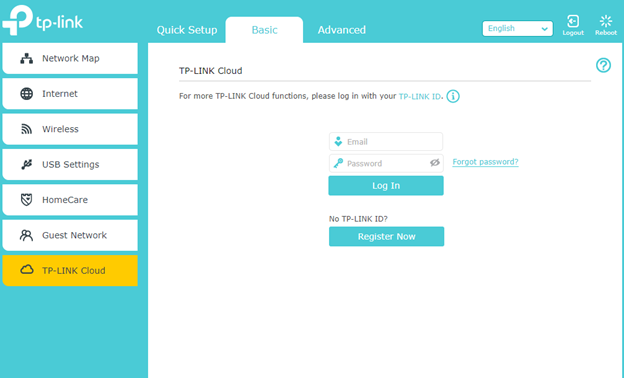
*Note: Future access to your router’s management page will require you to use your TP-Link Cloud email and password.
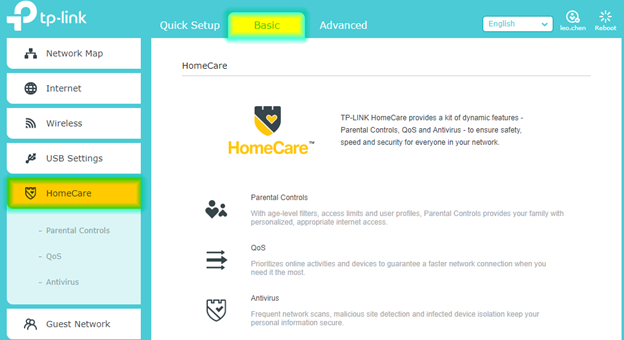
Step 8: Setup of Homecare services is now complete. From the “Basic” tab you can click on “Homecare” to check and configure your Homecare features.
Get to know more details of each function and configuration please go to Download Center to download the manual of your product.
Is this faq useful?
Your feedback helps improve this site.

_normal_1584496904769f.png)

TP-Link Community
Still need help? Search for answers, ask questions, and get help from TP-Link experts and other users around the world.