How to setup and provide access to your local storage drive with the Archer C7/C5
Αυτό το άρθρο ισχύει για:
This article applies to Archer C7 V2/V3 with firmware published on 2014/9/29 and later, Archer C5 V1 with firmware published on 2014/9/12 and later.
Take Archer C7 as an example.
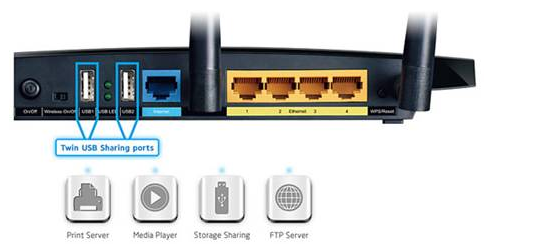
The File sharing feature allows you to share a USB storage device that’s connected to the router, (USB Drive or mobile Hard Disk Drive) to other wired or wireless users on the same network.
Step 1
Plug a USB Storage device into the USB port, make sure the USB light lit up on the router.
Step 2
Access the web interface of Archer C7.
Step 3
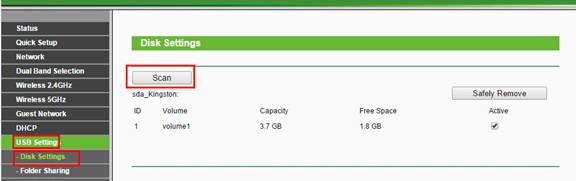
Click USB Settings -> Disk Settings on the left side menu. Check whether the USB device is identified by C7.If there is no device listed on this page, please click Scan and you may try unplug the USB device and plug it back in .

If the USB device is identified, the Storage Sharing function will be enabled by default, and it is set to share the whole device by default.
Step 4
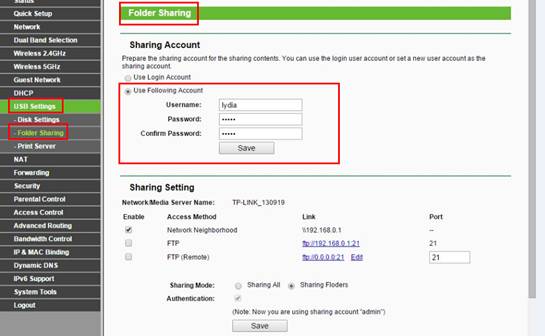
Go to USB Settings-> Folder Sharing->Here you can create a separate login account for the USB device or Use Following Account to use the same account as the router’s management page login account ->Save
Step 5
If you want to share the whole USB device, select Sharing All ->Save
If you want to customize the shared content, select Sharing Folders->Create Share Folder
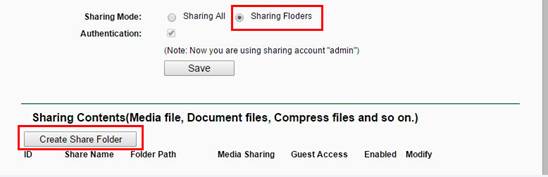
Set up the folders one by one on this page->Save
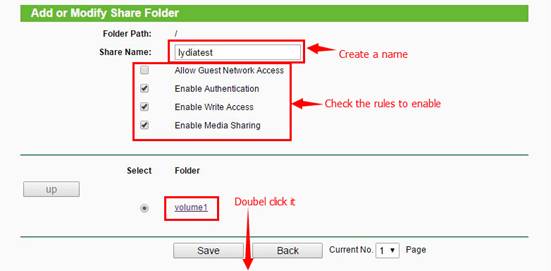

Below are explanations for the options:
Folder Path - Path to the folder is determined by where the file is saved.
Share Name - Name of the shared folder, customized by users.
Allow Guest Network Access - Select the check box to allow the Guest Network to have access to the shared folder.
Enable Authentication - Select the check box to require users to log in with a username and password.
Enable Write Access - Select the check box to allow users to make changes to the folder content.
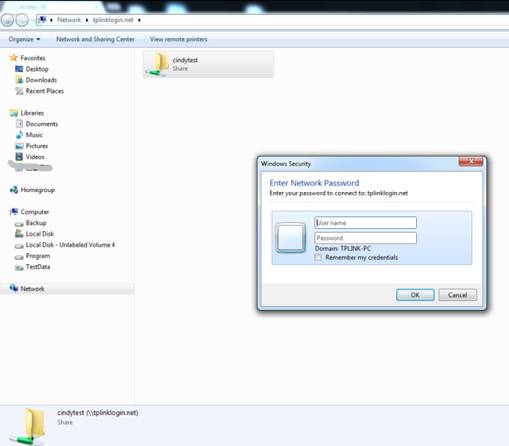
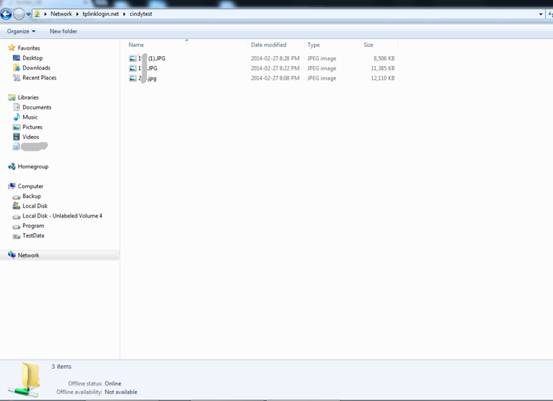
Step 6
Access the USB Storage.
For your reference:
For Windows Users:
|
Press Windows key
 and Rkey on the keyboard at the same time to open the Run application, and Rkey on the keyboard at the same time to open the Run application,Input \\tplinklogin.net or \\192.168.0.1in the dialog box.
Click OK
|
 |
|
|
For Mac OS X Users:
|
On the top tray, go to Go > Connect to Server
Input Server Addresssmb://tplinklogin.net orsmb://192.168.0.1
Click Connect
|
 |
For Linux Users:
|
On the top tray, go to Places > Connect toServer
Choose Service type:Windows share
Input Server tplinklogin.netor 192.168.0.1
Input the corresponding Folder name e.g. Volume9
Click Connect
|
 |
Note:
Some USB storage devices may require using the bundled external power.
Είναι χρήσιμο αυτό το FAQ;
Τα σχόλιά σας συμβάλλουν στη βελτίωση αυτού του ιστότοπου.