How to Install TP-Link Wireless Adapters by Running the CD
Αυτό το άρθρο ισχύει για:
This article gives you instructions on how to install TP-Link wireless adapters by using the enclosed resource CD. Please prepare the CD in advance of the installation.
NOTE: This article just takes TL-WN727N as an example. The installation procedures of other TP-Link wireless adapters are almost the same
as of TL-WN727N.
Step 1
Insert the enclosed CD in to your CD drive.
Step 2
The Setup Wizard will be automatically displayed on your screen. Find the model of your adapter and click Install Driver & Utility on the dropdown menu.
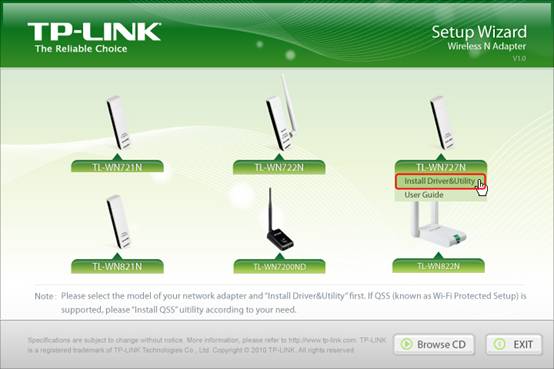
NOTE: If the Setup Wizard does not come out, please browse the CD and run “Autorun.exe”.
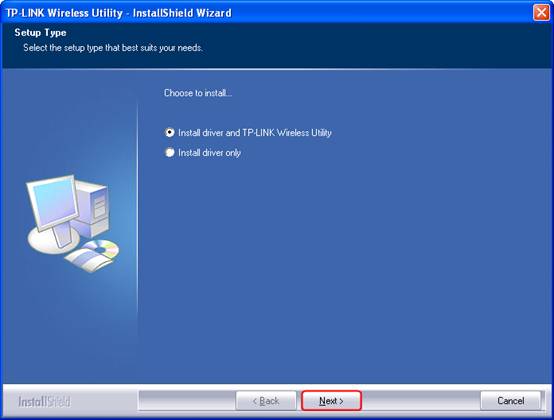
Step 3
If you want to install the driver and TP-Link wireless utility, please select Install driver and TP-Link Wireless Utility; if you just want to install the driver, please select Install driver only. Then click Next.
Step 4
If you select Install driver and TP-Link Wireless Utility in step 3, you will need to select the default wireless configuration tool. If you select Install driver only in step 3, please just skip to step 6.

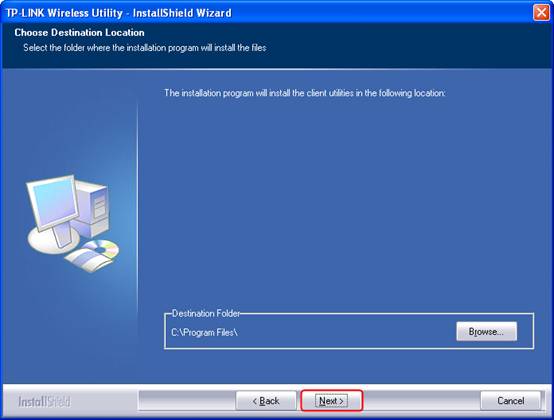
Step 5
Choose the destination folder where you want to install the TP-Link wireless utility. Then click Next.
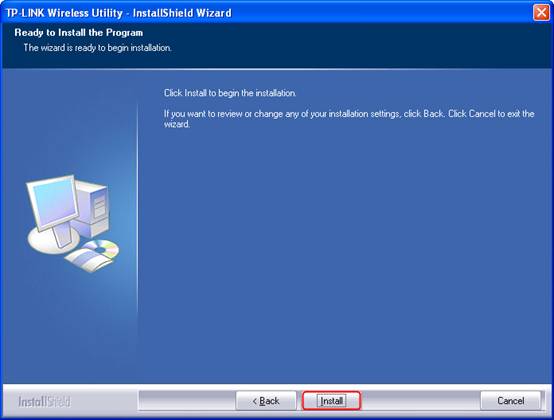
Step 6
Click Install to start the installation.
Step 7
During the setup process, there will be a warning. Please click Continue Anyway.
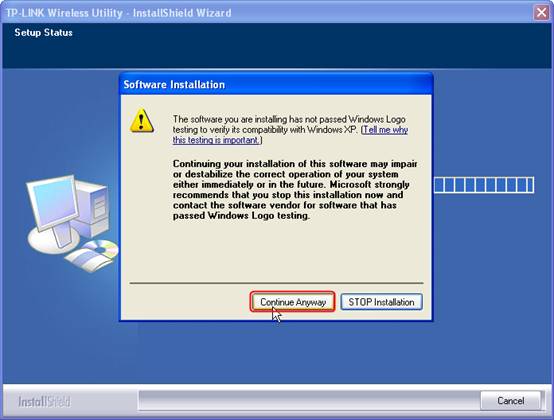
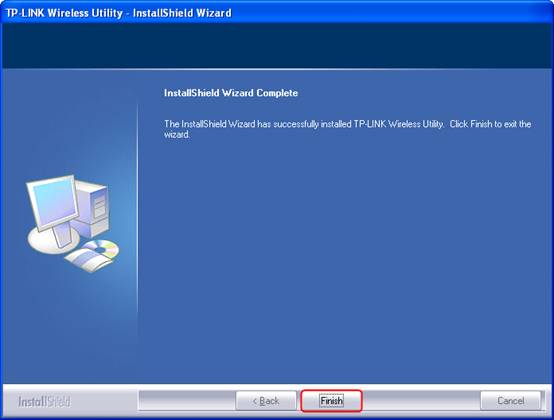
Step 8
Click Finish after the wizard is completed.
Είναι χρήσιμο αυτό το FAQ;
Τα σχόλιά σας συμβάλλουν στη βελτίωση αυτού του ιστότοπου.


