How to share a printer on your local network through the Archer C8, C9, C5 V2, router
Este artículo se aplica a:
If your printer has Ethernet port or Wi-Fi function please ignore this article, and contact technical support of your printer's company.
This article is applied to Windows OS, for MAC OS please click here
Definition: Print server is a function embedded in your Router. It allows you to share your printer with computers that are connected to the Router.
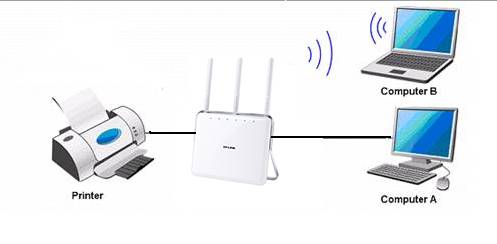
Note:
Make sure you have already installed the printer’s driver on your computer. Otherwise, please install it first.
Any computer in your LAN must first install the software if it wants to share the print server via the router.
Print Server Function is not compatible with Linux since there is no Printer Controller Utility for Linux at the moment.
Installation
Step 1
Please click the link below and choose the model of your print server, then download the setup software TP-Link USB Printer Controller Utility from our website.
Step 2
Double-click TP-Link USB Printer Controller Setup.exe you’ve downloaded.
Step3
Click NEXT to start installing the printer share software.
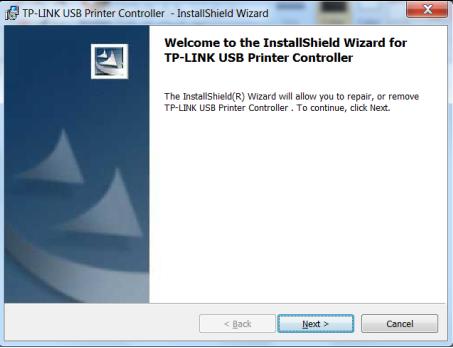
Step 4
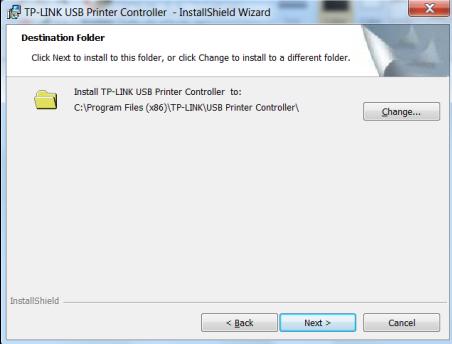
Click Change…to select another destination folder, or leave it default and click Next
.

Step 5
Click Install to begin the installation.
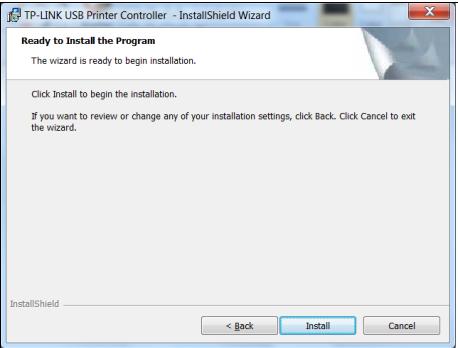
Step 6
Please wait a while, Click Finish to complete and exit the Install Shield Wizard.
Application
After successful installation, the icon will appear on the desktop of your computer.
Step 1
Double-click the icon To Launch the TP-Link USB Printer Controller
Step 2
Highlight the printer you want to set as auto-connect printer.

Note:
In your LAN, each computer that wants to share the print server should also install the TP-Link USB Printer Controller. Please follow the previous steps to configure other computers in your LAN.
Step 3
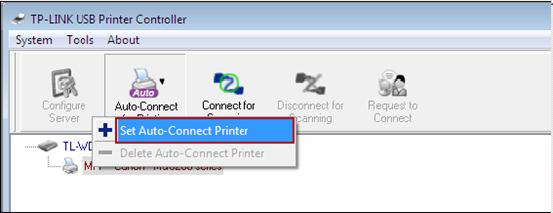
Click the inverse triangle mark on the Auto-Connect for printing tab to pull down the list, where you can select Set Auto-Connect Printer.
Step 4
Tick the name of the printer you would like to set as auto-connect printer, and then click Apply.
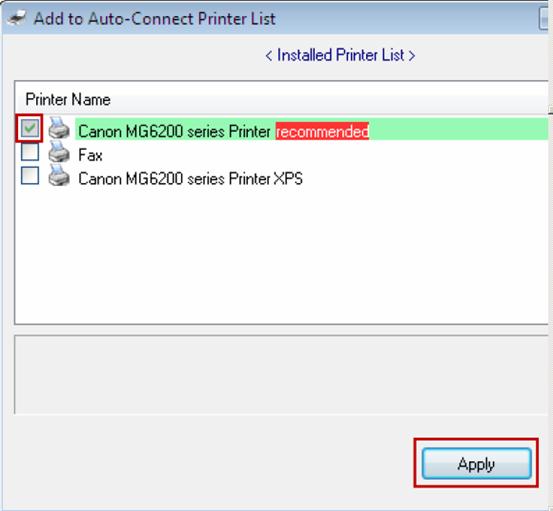
After successful setting, you will see the printer marked as Auto-Connect Printer. You can execute your printing tasks automatically.
Step 5
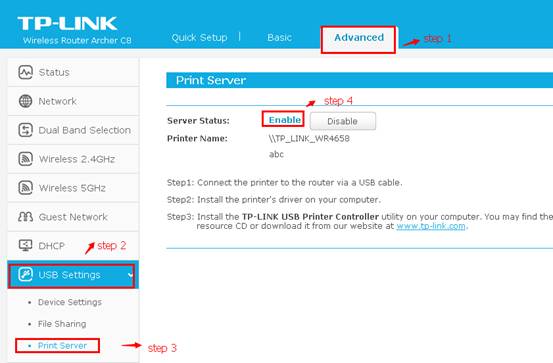
If it cannot print, please log into the management page of the Archer C8/C9 and make sure the Pinter Server Status is Enable.
Please click here to access the web interface.
¿Es útil este artículo?
Tus comentarios nos ayudan a mejorar esta web.