How to configure the TP-Link 11N wireless router as Access Point (new logo)
This mode transforms your existing wired network to a wireless network.
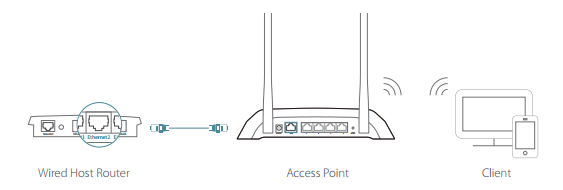
1. Connect the power adapter to the router and turn on the router.
2. Connect the router to your wired host router’s Ethernet port via an Ethernet cable as shown above.
3. Connect a computer to the router via an Ethernet cable or wirelessly by using the SSID (network name) and password printed on the bottom label of the router.
4. Enter http://tplinkwifi.net in the address bar of a web browser. Use admin for password, and then click Login.
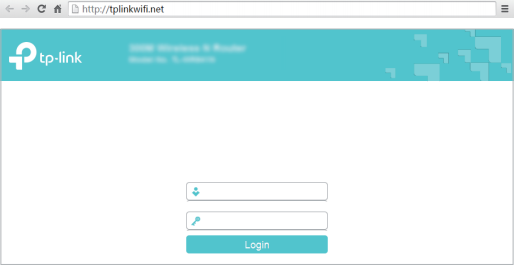
Note: If the above screen does not pop up when you use IE Web-browser, it means that your IE Web-browser has been set to a proxy. Go to Tools menu > Internet Options > Connections > LAN Settings, in the screen that appears, cancel the Using Proxy checkbox, and click OK to finish it.
5. After successfully login, select Access Point mode and follow the Quick Setup to complete the configuration.
Note: If you want to change the default SSID (network name) and the password, please follow Quick Setup to complete the configuration.
6. Enjoy! Connect to the wireless network by using the SSID (wireless name) and password of the router.
Get to know more details of each function and configuration please go to Download Center to download the manual of your product.
¿Es útil este artículo?
Tus comentarios nos ayudan a mejorar esta web.
14.0-A_normal_1584497163963a.png)