How to Manually Install Your TP-Link Adapter Driver on Windows 10 and 11
This guide walks you through manually installing the driver for a TP-Link adapter on Windows 10 and 11 using Device Manager. Before starting, download the latest driver from the TP-Link Download Center and extract the zip file to confirm your adapter has an .inf driver file available.
Key Takeaways
- This manual installation method is needed when the standard .exe installer fails. Download the driver from the TP-Link Download Center, extract the zip file, and locate the .inf file before starting.
- The process uses Windows Device Manager: right-click your TP-Link adapter, select Update Driver, choose Browse my computer, then select the extracted .inf file.
- This process works on both Windows 10 and Windows 11. Confirm your Windows version by going to Settings > System > About before starting.
- After installation, a restart may be required for the driver to take effect.
- If a previous driver is already installed but not working, uninstall it first before following these steps.
This guide applies when the standard .exe installer fails, and your TP-Link adapter has an .inf driver file available to download. (Please download the latest driver from TP-Link’s official site, and extract the zip file to see whether your adapter has an .inf file.)
If there already is a driver but it's not working, you may refer to How to remove old and useless drivers in Windows to uninstall the previous driver.
How to Check Your Computer's Operating System
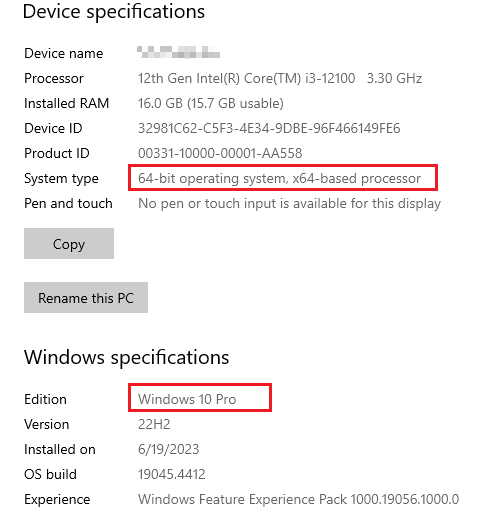
Please refer to the instructions below to confirm the operating system and system type of your computer.
1) Please click on “search” on the taskbar and type in “settings”, then you can find the Settings app.
2) Click on the Settings app, navigate to Settings > System > About.
3) Please confirm your operating system by referring to this picture:
How to Install Your TP-Link Adapter Driver on Windows 10 and 11
Step 1. Insert the adapter into your computer.
Step 2. Download the latest driver from the TP-Link Download Center and extract the zip file.
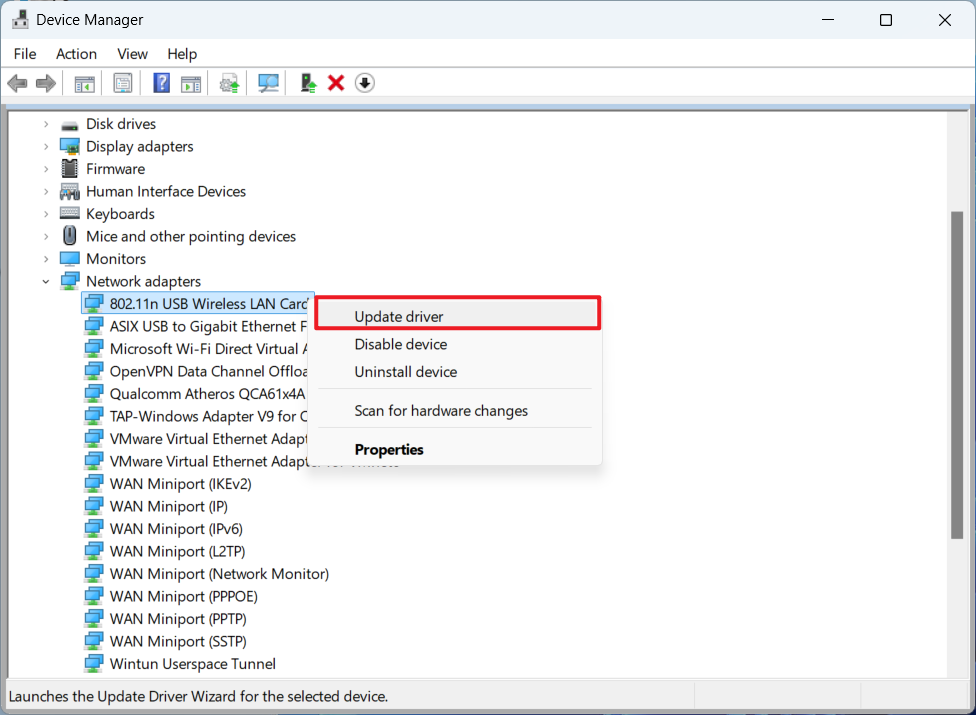
Step 3. Open Device Manager by right-clicking the Start button and selecting Device Manager.
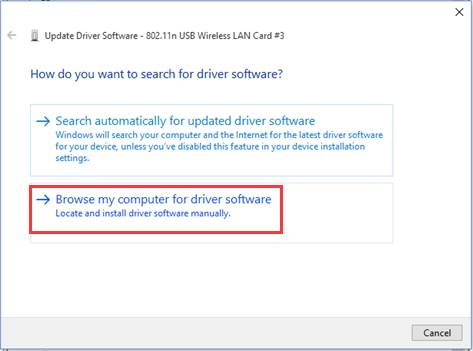
Step 4. Click Browse my computer for driver software.
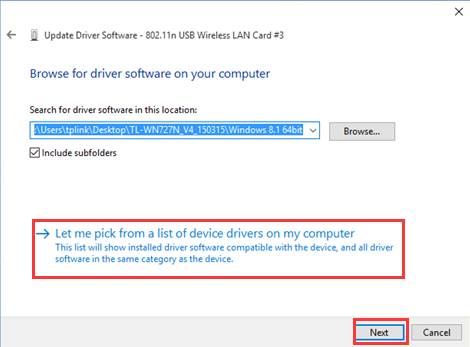
Step 5. Click Let me pick from a list of device drivers on my computer, then click Next.
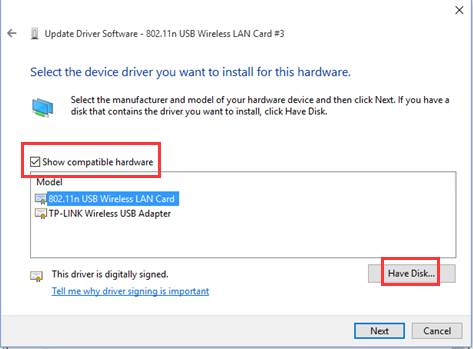
Step 6. Highlight Show compatible hardware and click Have Disk.
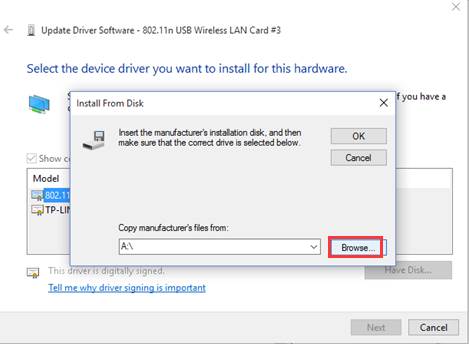
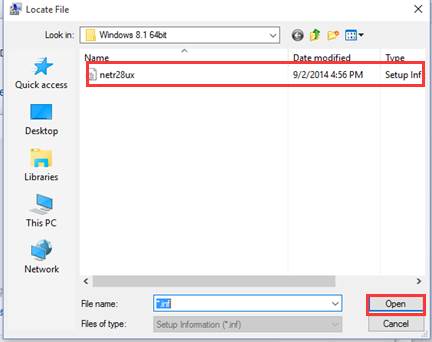
Step 7. Click Browse, then open the inf file you have already downloaded and extracted.
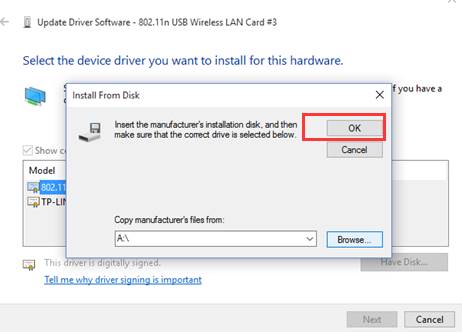
Step 8. Please click OK and go to Next.
Step 9. Then the adapter will be installed successfully, and click on Close.
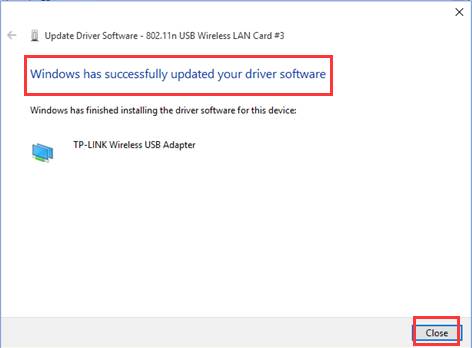
You may need to restart your PC for the driver to take effect.
Looking for More
Is this faq useful?
Your feedback helps improve this site.
TP-Link Community
Still need help? Search for answers, ask questions, and get help from TP-Link experts and other users around the world.