How to Access USB Storage on a TP-Link Router from Android or iOS
TP-Link routers with a USB port let you access a connected USB storage device from an Android or iOS phone. You can access the USB drive on your local network or remotely via File Transfer Protocol (FTP) from anywhere. This guide covers how to configure your TP-Link router USB settings to enable sharing and how to connect to the drive from your phone.
Note:
1. If you are unable to access the USB drive after following these steps, refer to Can't access my USB drive plugged into TP-Link router for troubleshooting help.
2. If you need to access the USB storage device on the computer, please refer to the FAQ: How to access USB storage device on the TP-Link Routers from Windows or MacOS?
Key Takeaways
- TP-Link routers with a USB port support two ways to access a connected USB drive from a phone: locally via Samba (SMB) and remotely via FTP.
- To access the USB drive locally, enable Samba sharing in the router's USB settings and use a third-party app such as ES File Explorer to connect.
- To access the drive remotely, enable Internet FTP in the router's USB settings and connect using the WAN IP address shown in the router interface.
- TP-Link recommends enabling the Secure Sharing option to require a username and password before anyone can access the USB drive.
- Only FTP is supported for remote access. Samba is for local network access only.
This article tells you how to access the USB storage device on Android and iOS phones via Samba, FTP locally and remotely.
Step 1: Configure USB Settings on Your TP-Link Router
1. Plug the USB storage device into the USB port of the TP-Link router.
2. Connect your device to the router via Wi-Fi or an Ethernet cable, open a browser, enter https://tplinkwifi.net/, and log in with your credentials.
3. Go to USB settings. (Advanced > USB> USB storage Device). If the router recognizes the USB storage device, it will show in the status.
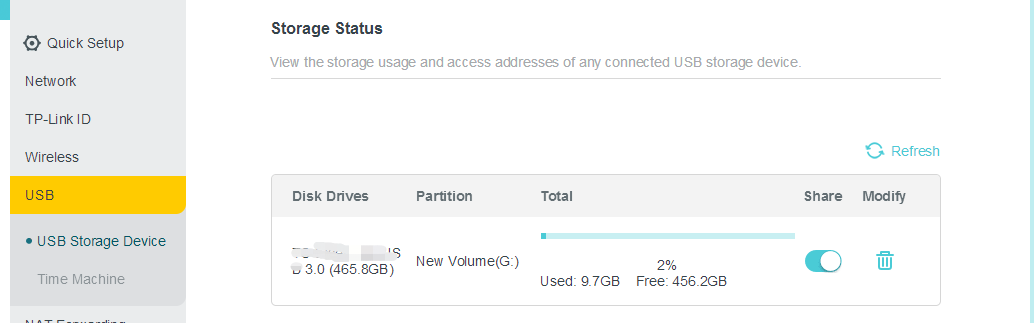
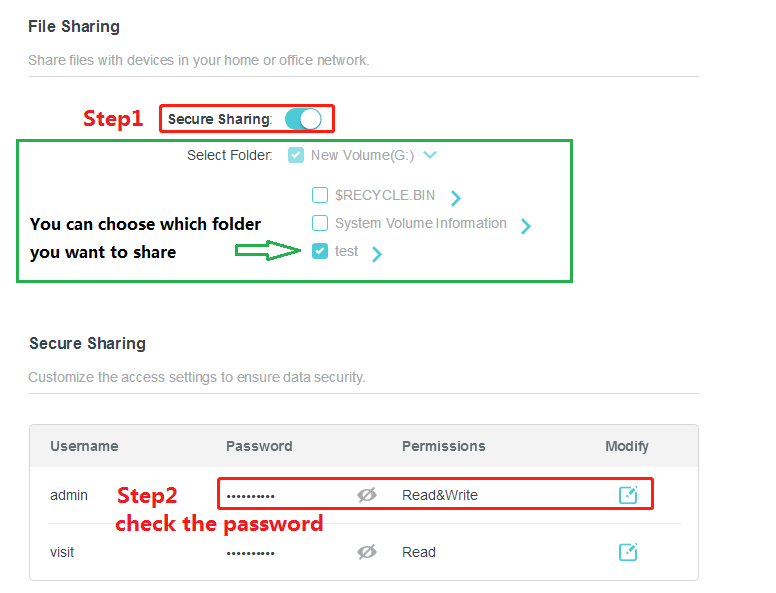
4. Considering the safety, we suggest you enable the Secure Sharing option to prevent others from accessing your USB drive without login.
Step 2: Access the USB Drive from Your Android or iOS Phone
If you are on the same Wi-Fi network as your router, use Option 1. If you are away from home and want to reach your files remotely, use Option 2.
Option 1: Access the USB Drive Locally (Samba)
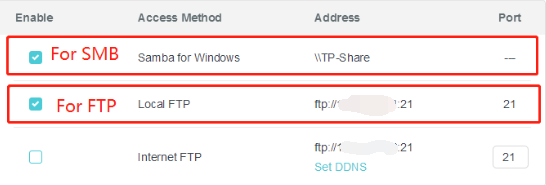
First, please ensure that Samba for Windows and Local FTP are enabled.
We recommend using a third-party APP like “ES File Explorer” to access the USB drive. Here we take the “ES File Explorer” as an example.
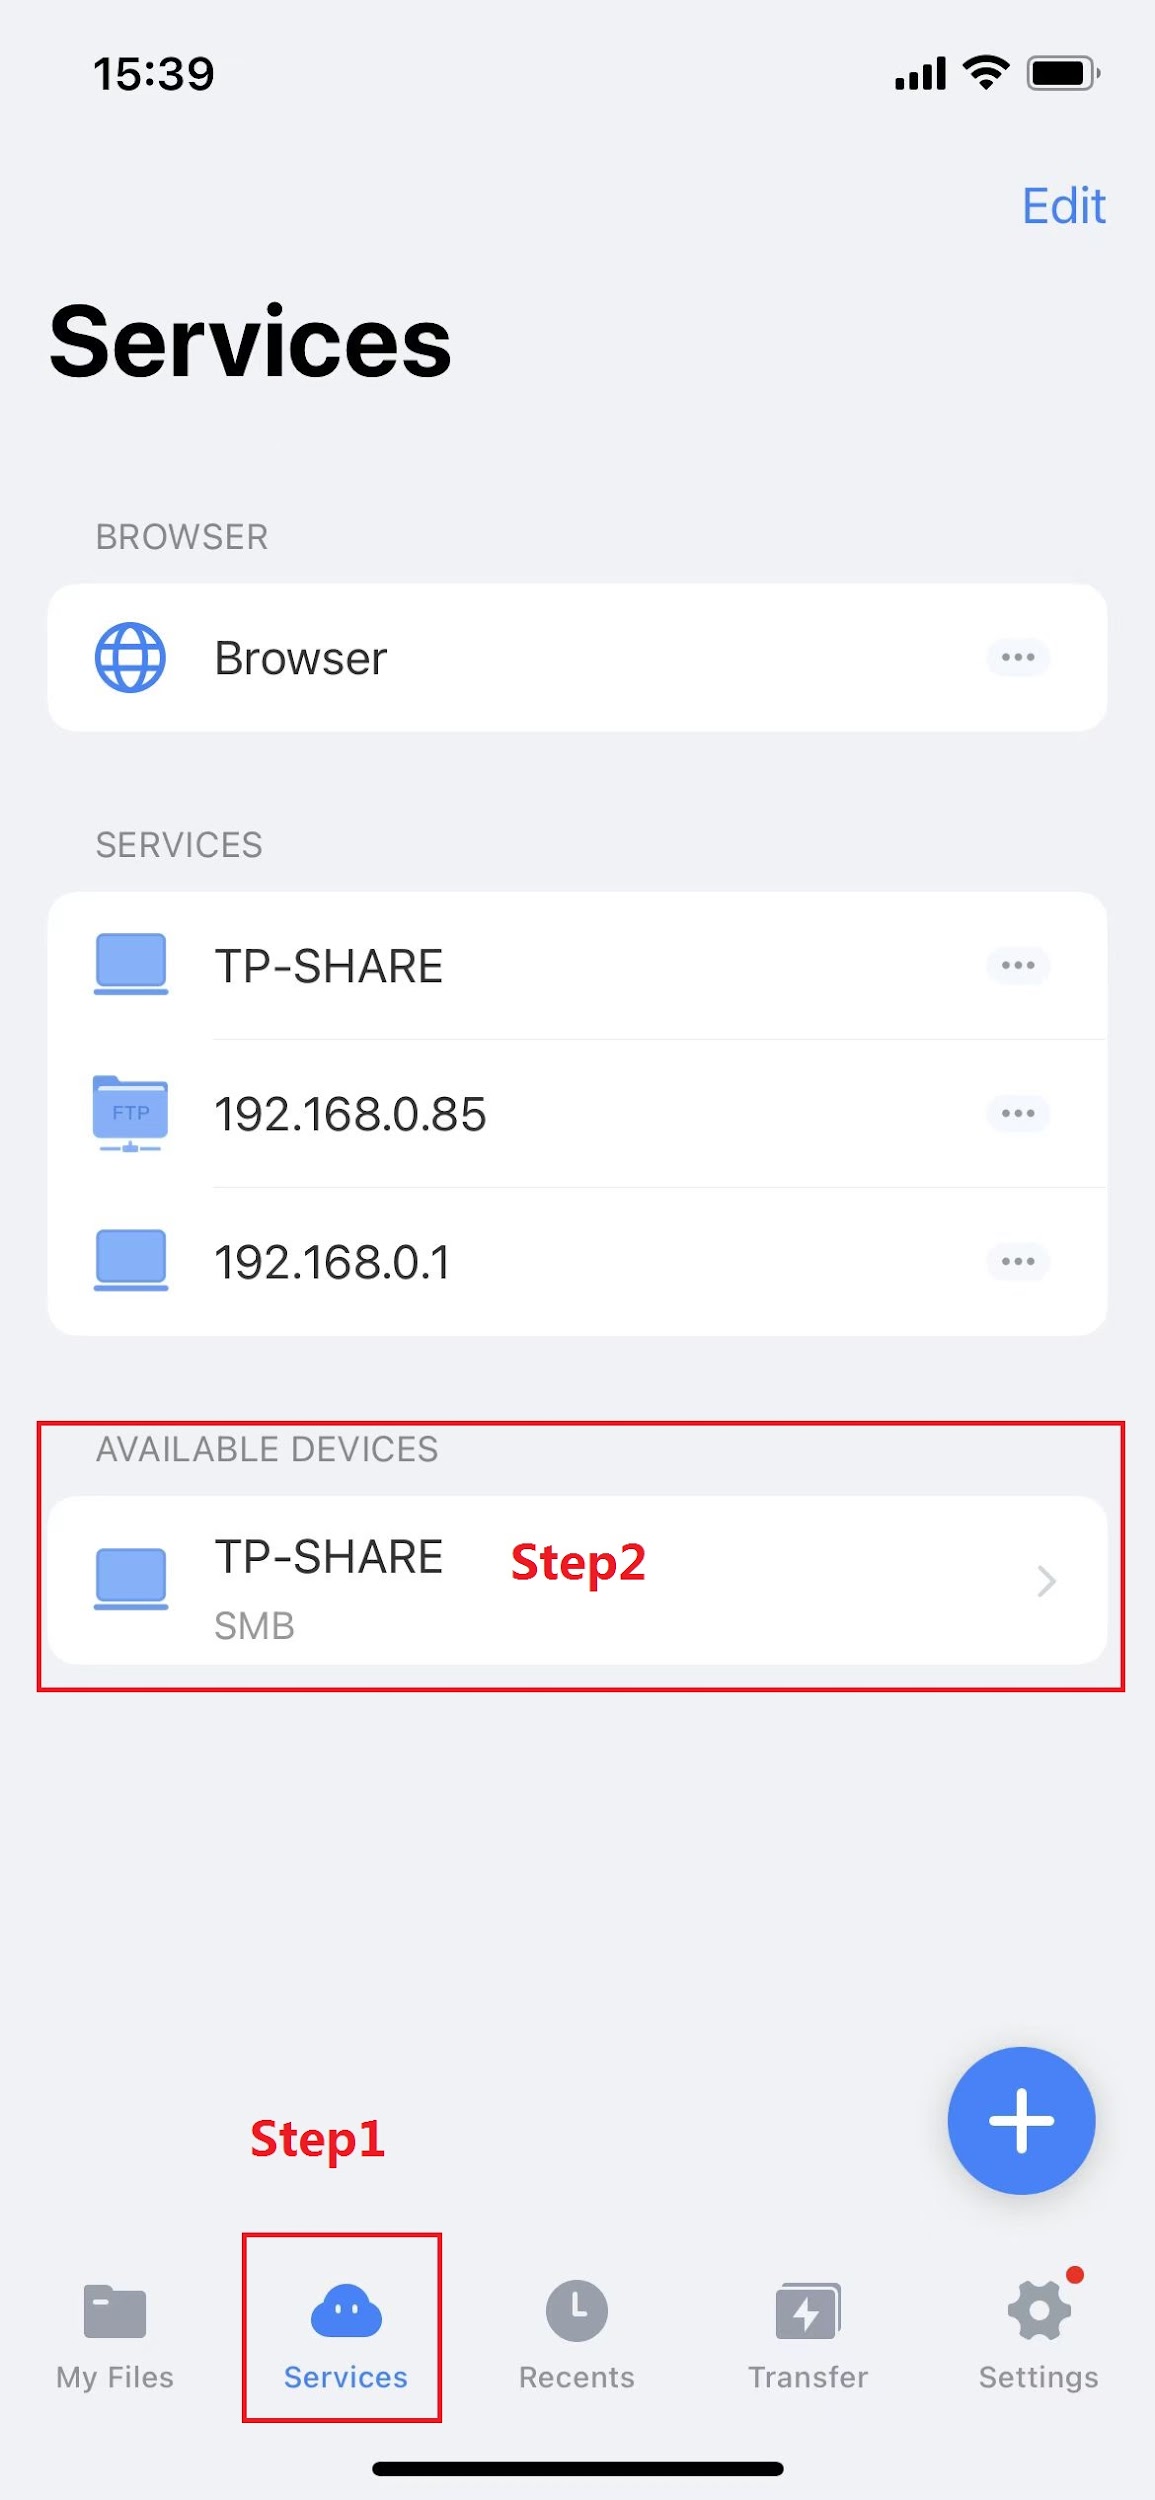
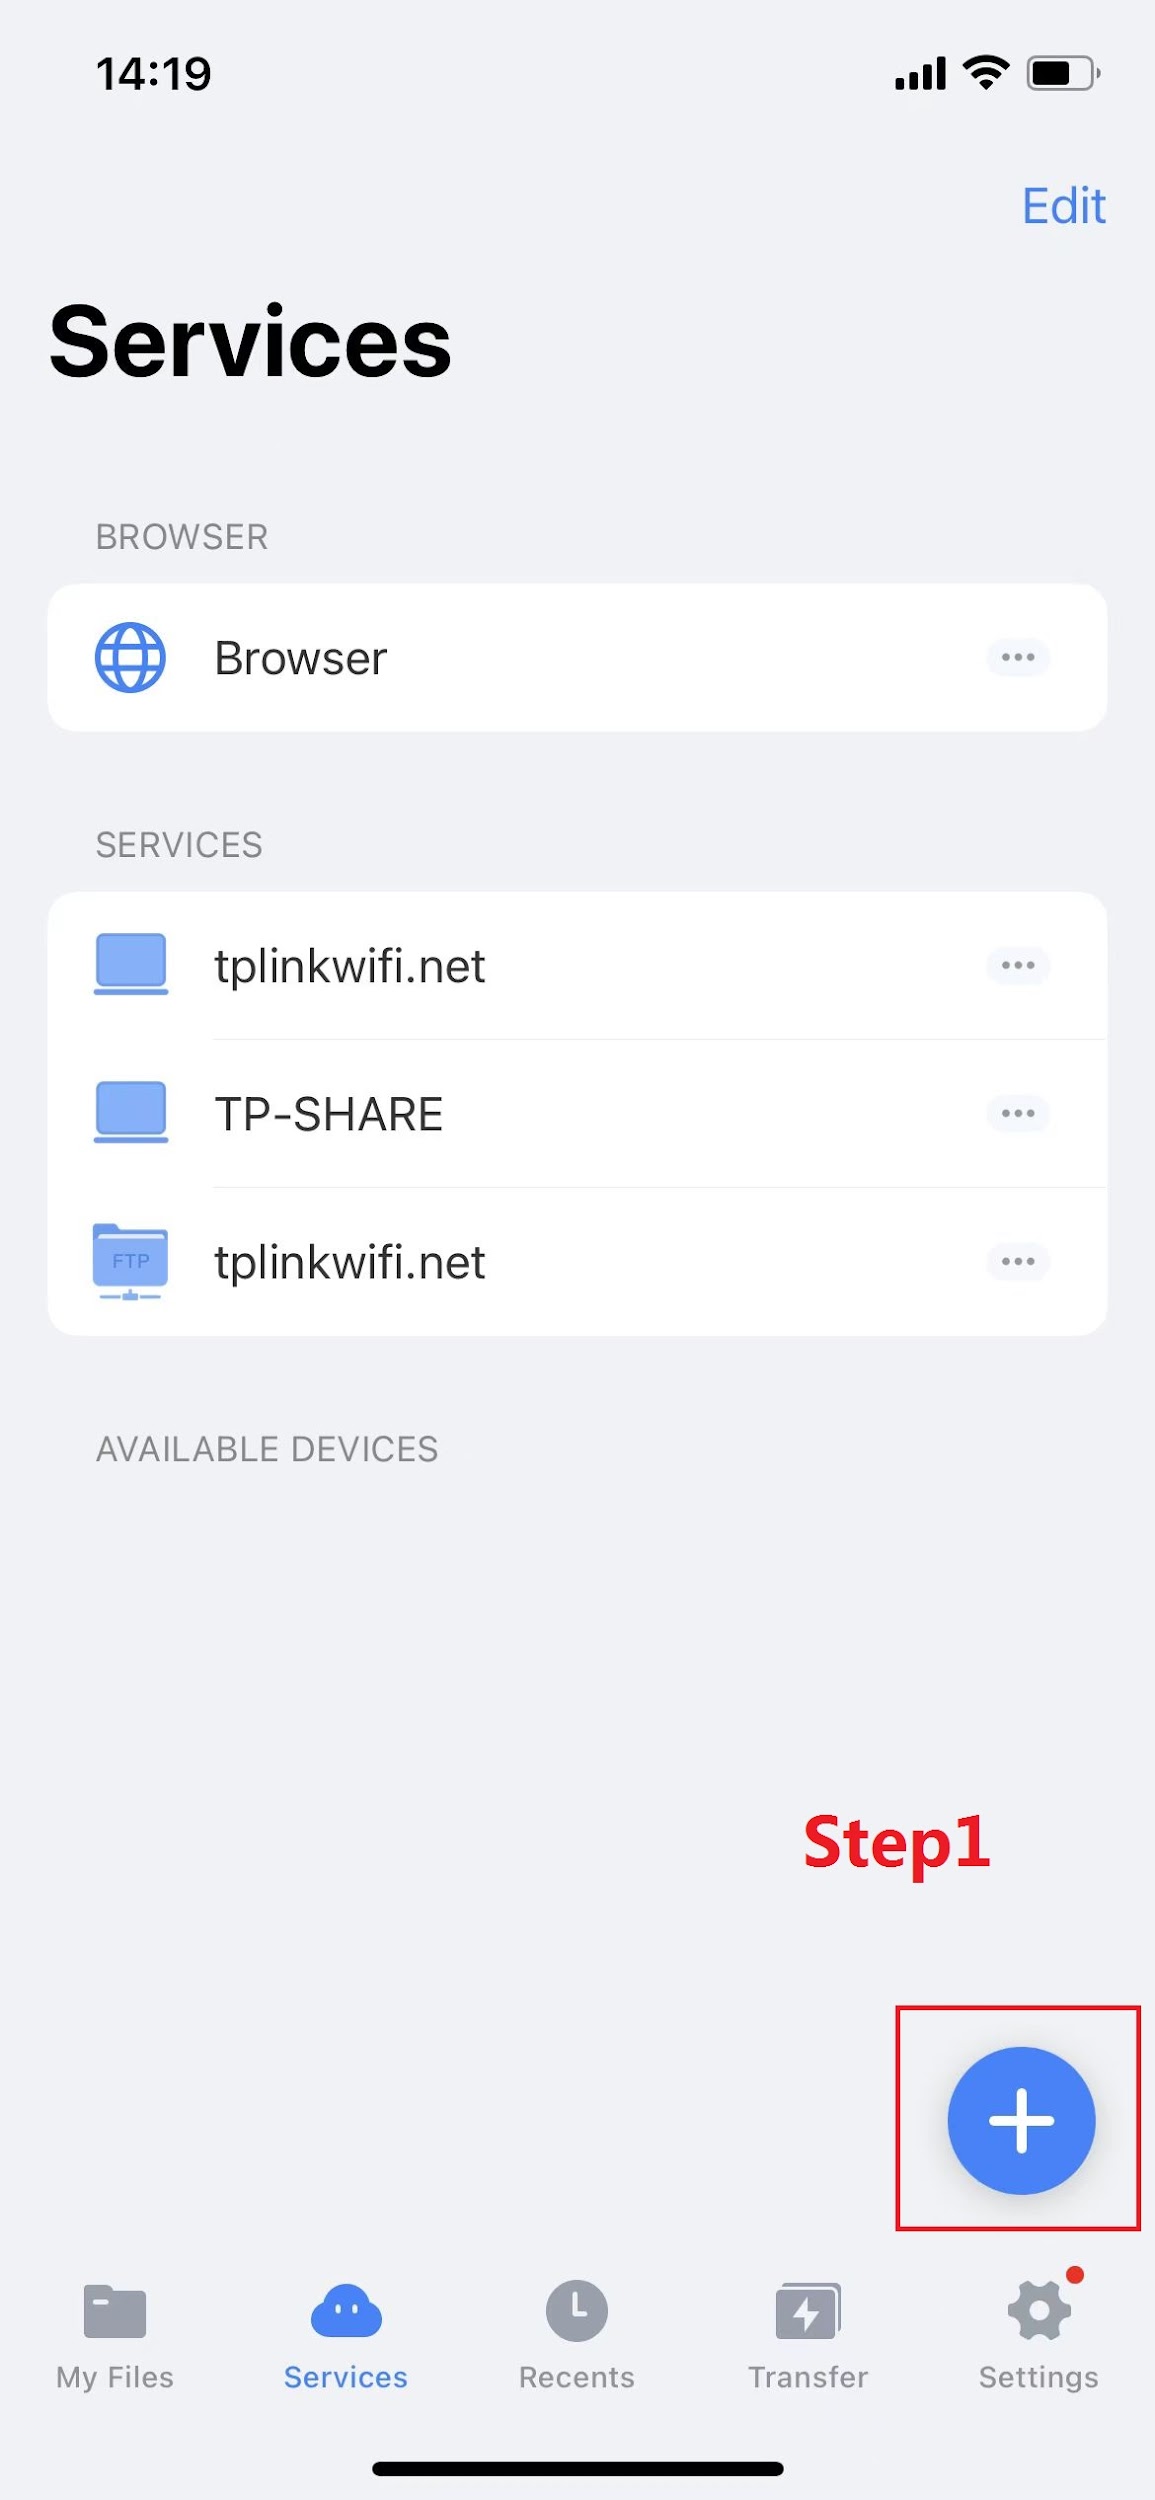
Open the APP, and click “Services” at the bottom. Normally, the APP will discover the smb services in the local network.
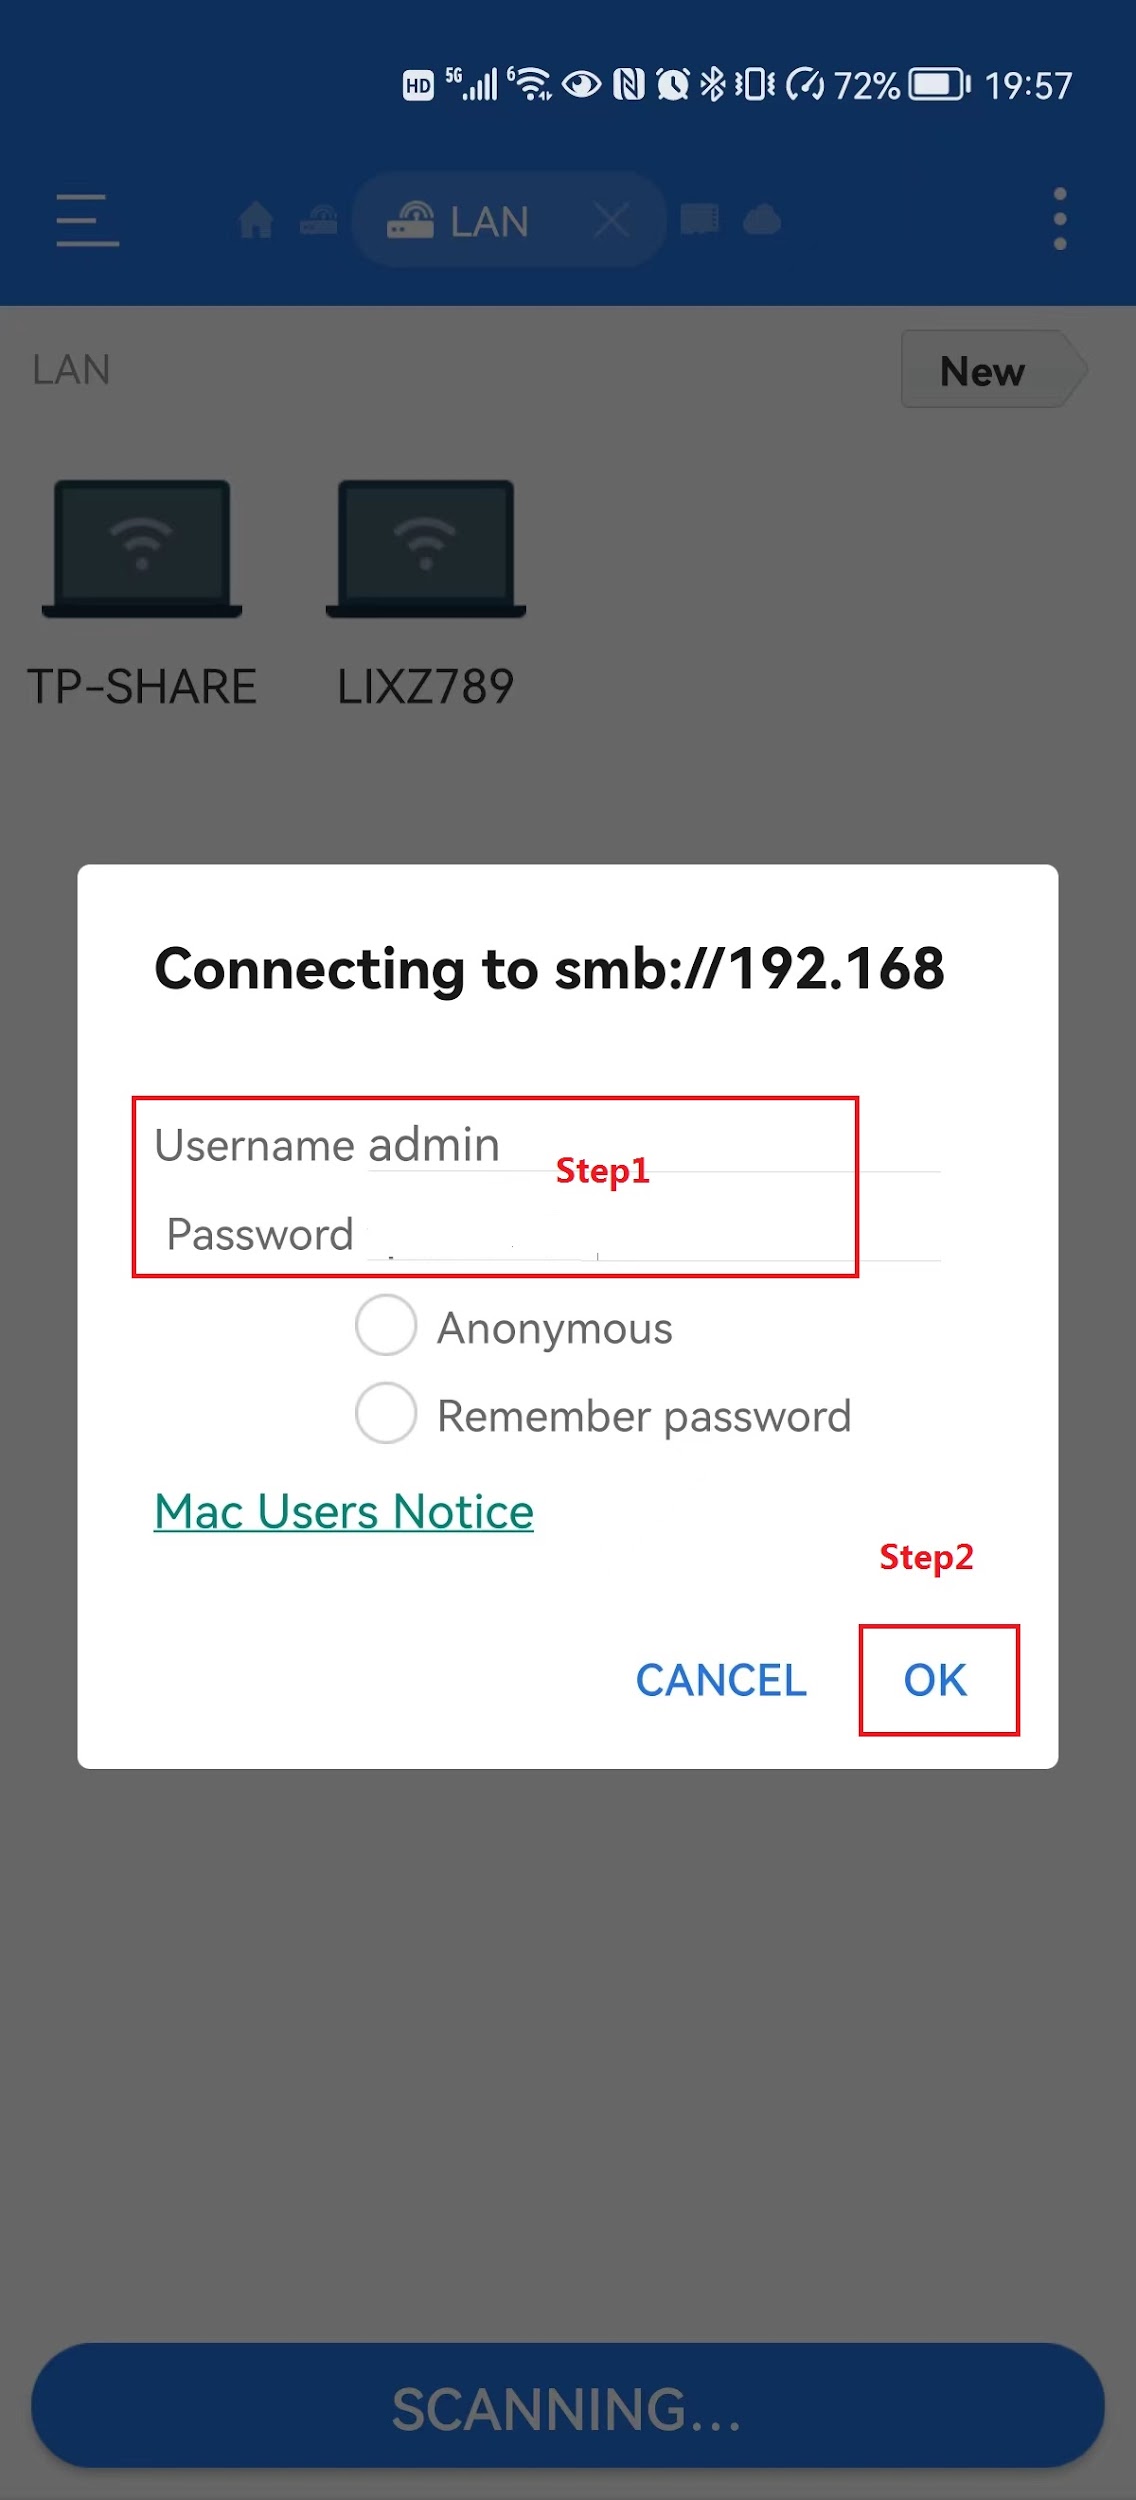
Click “TP-SHARE” on available devices, then enter the username and password.
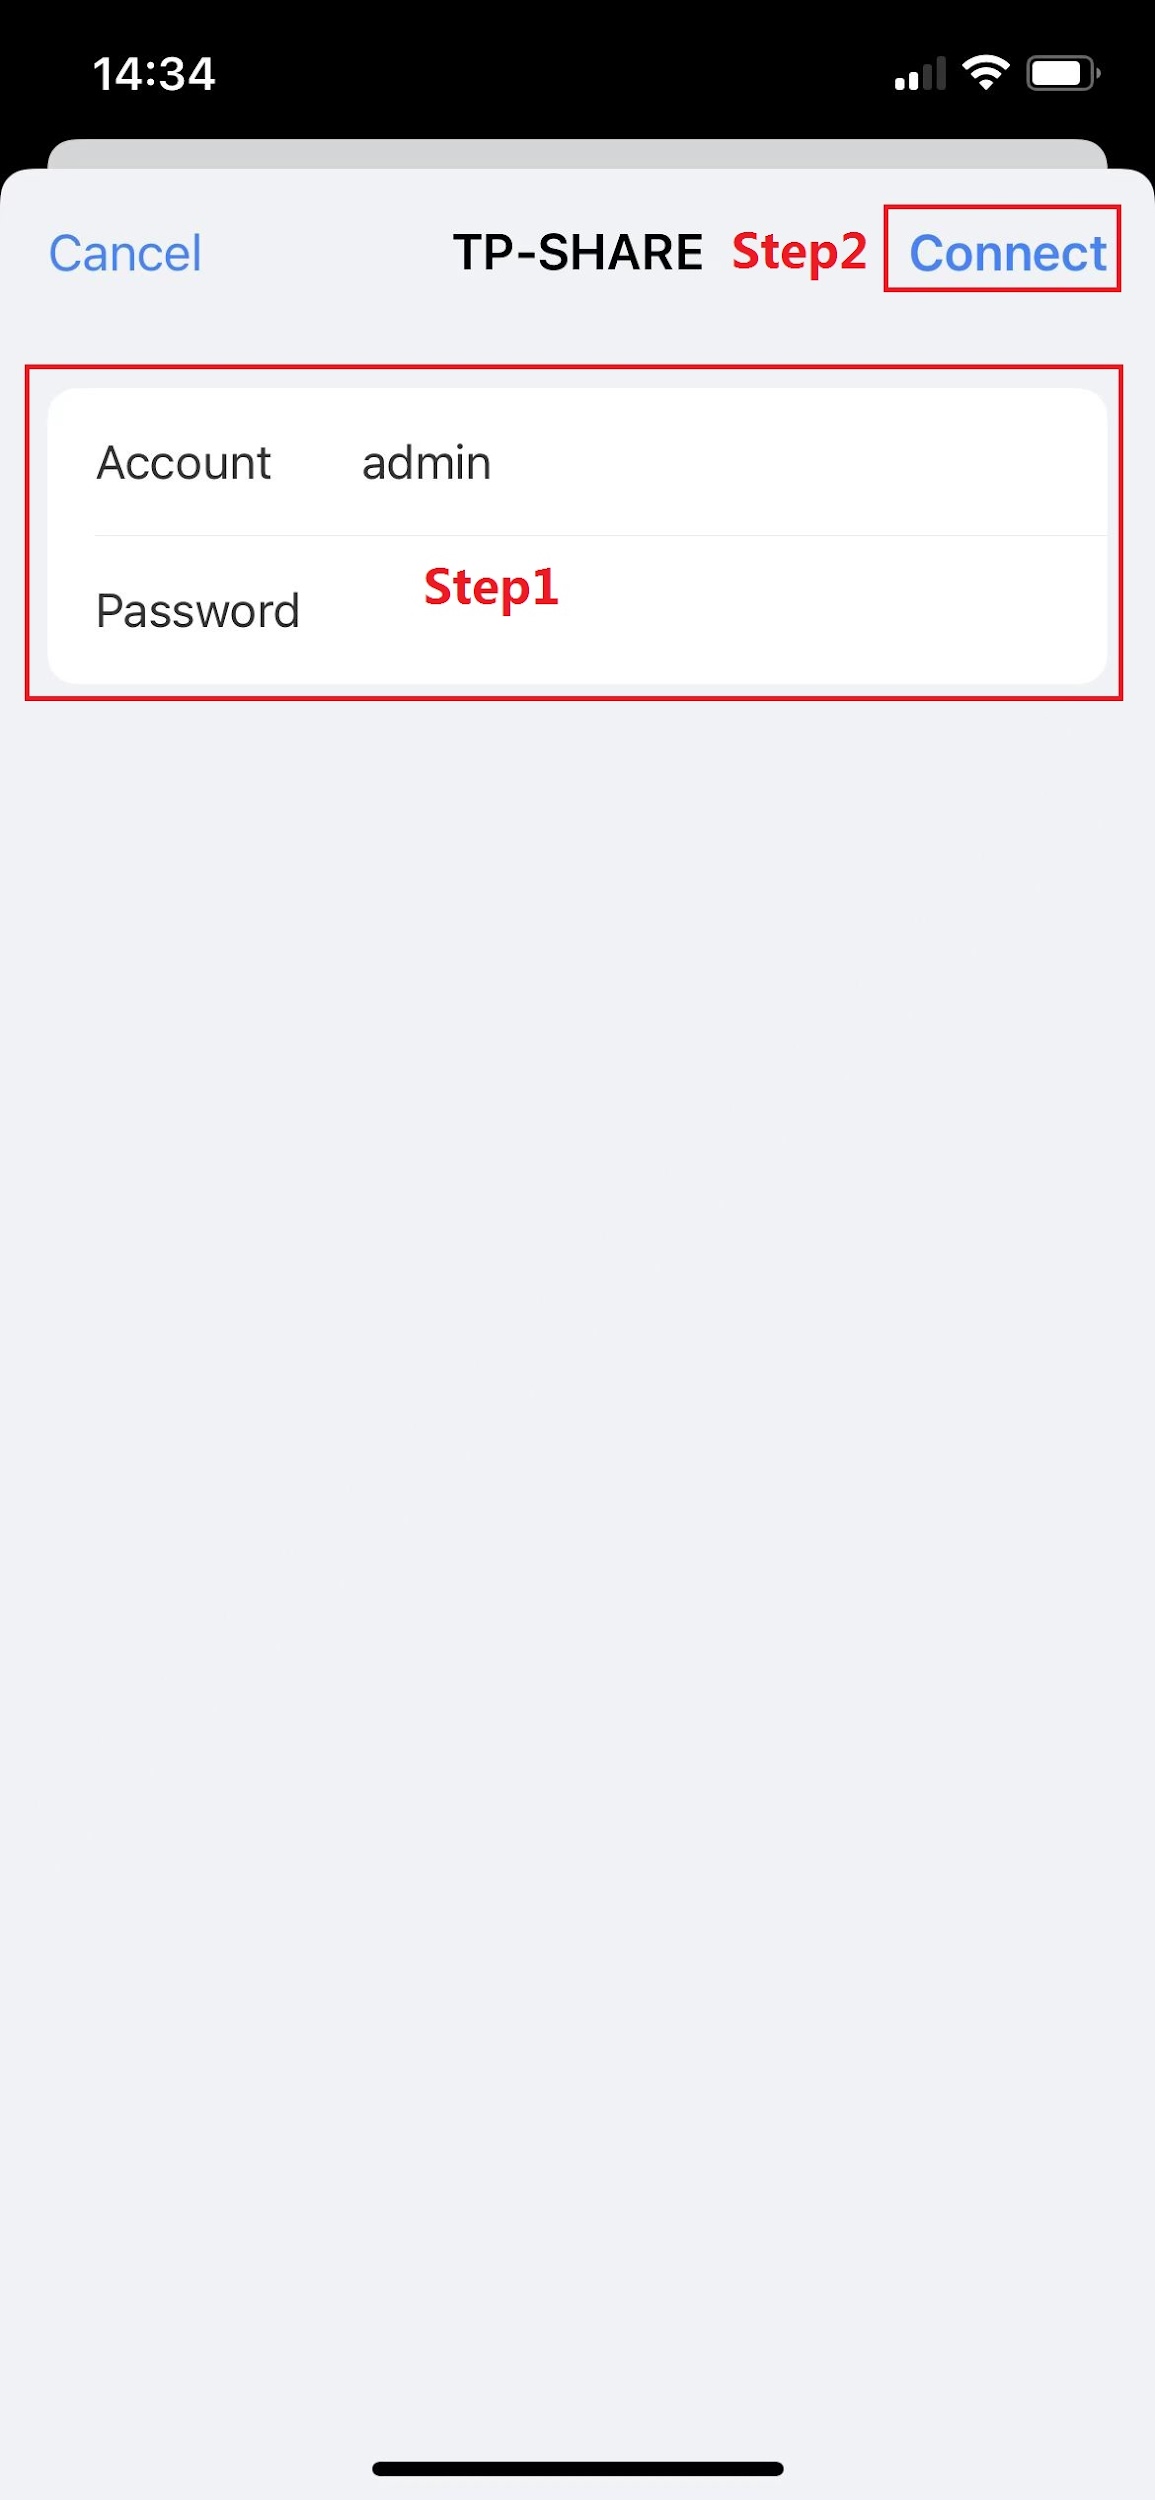
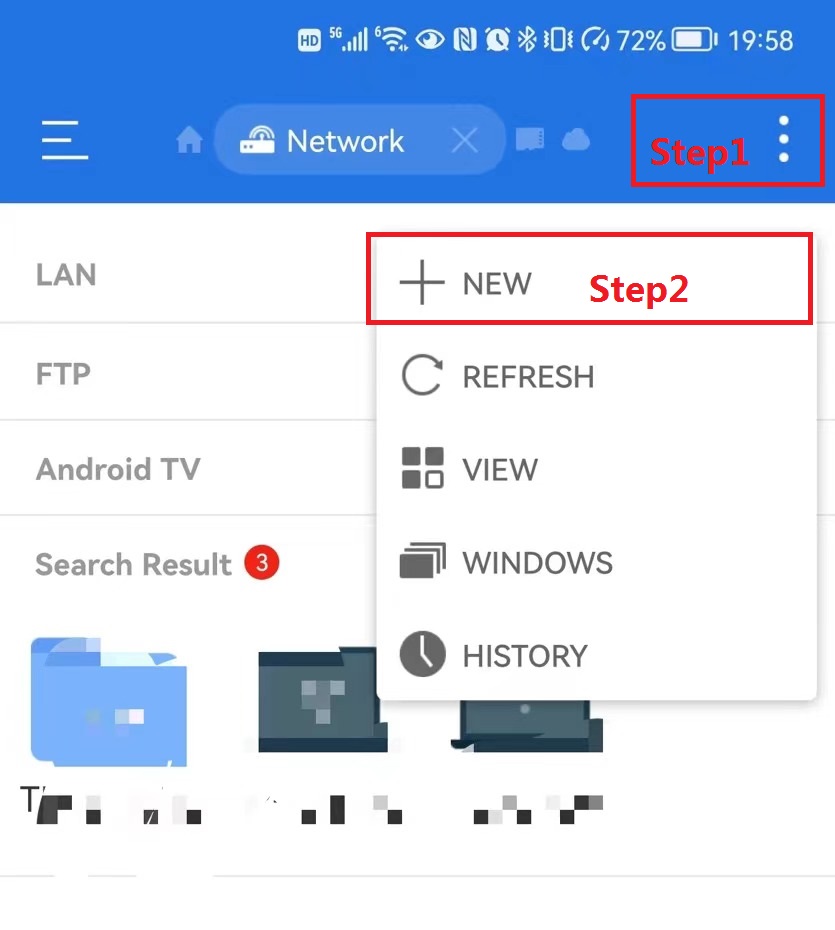
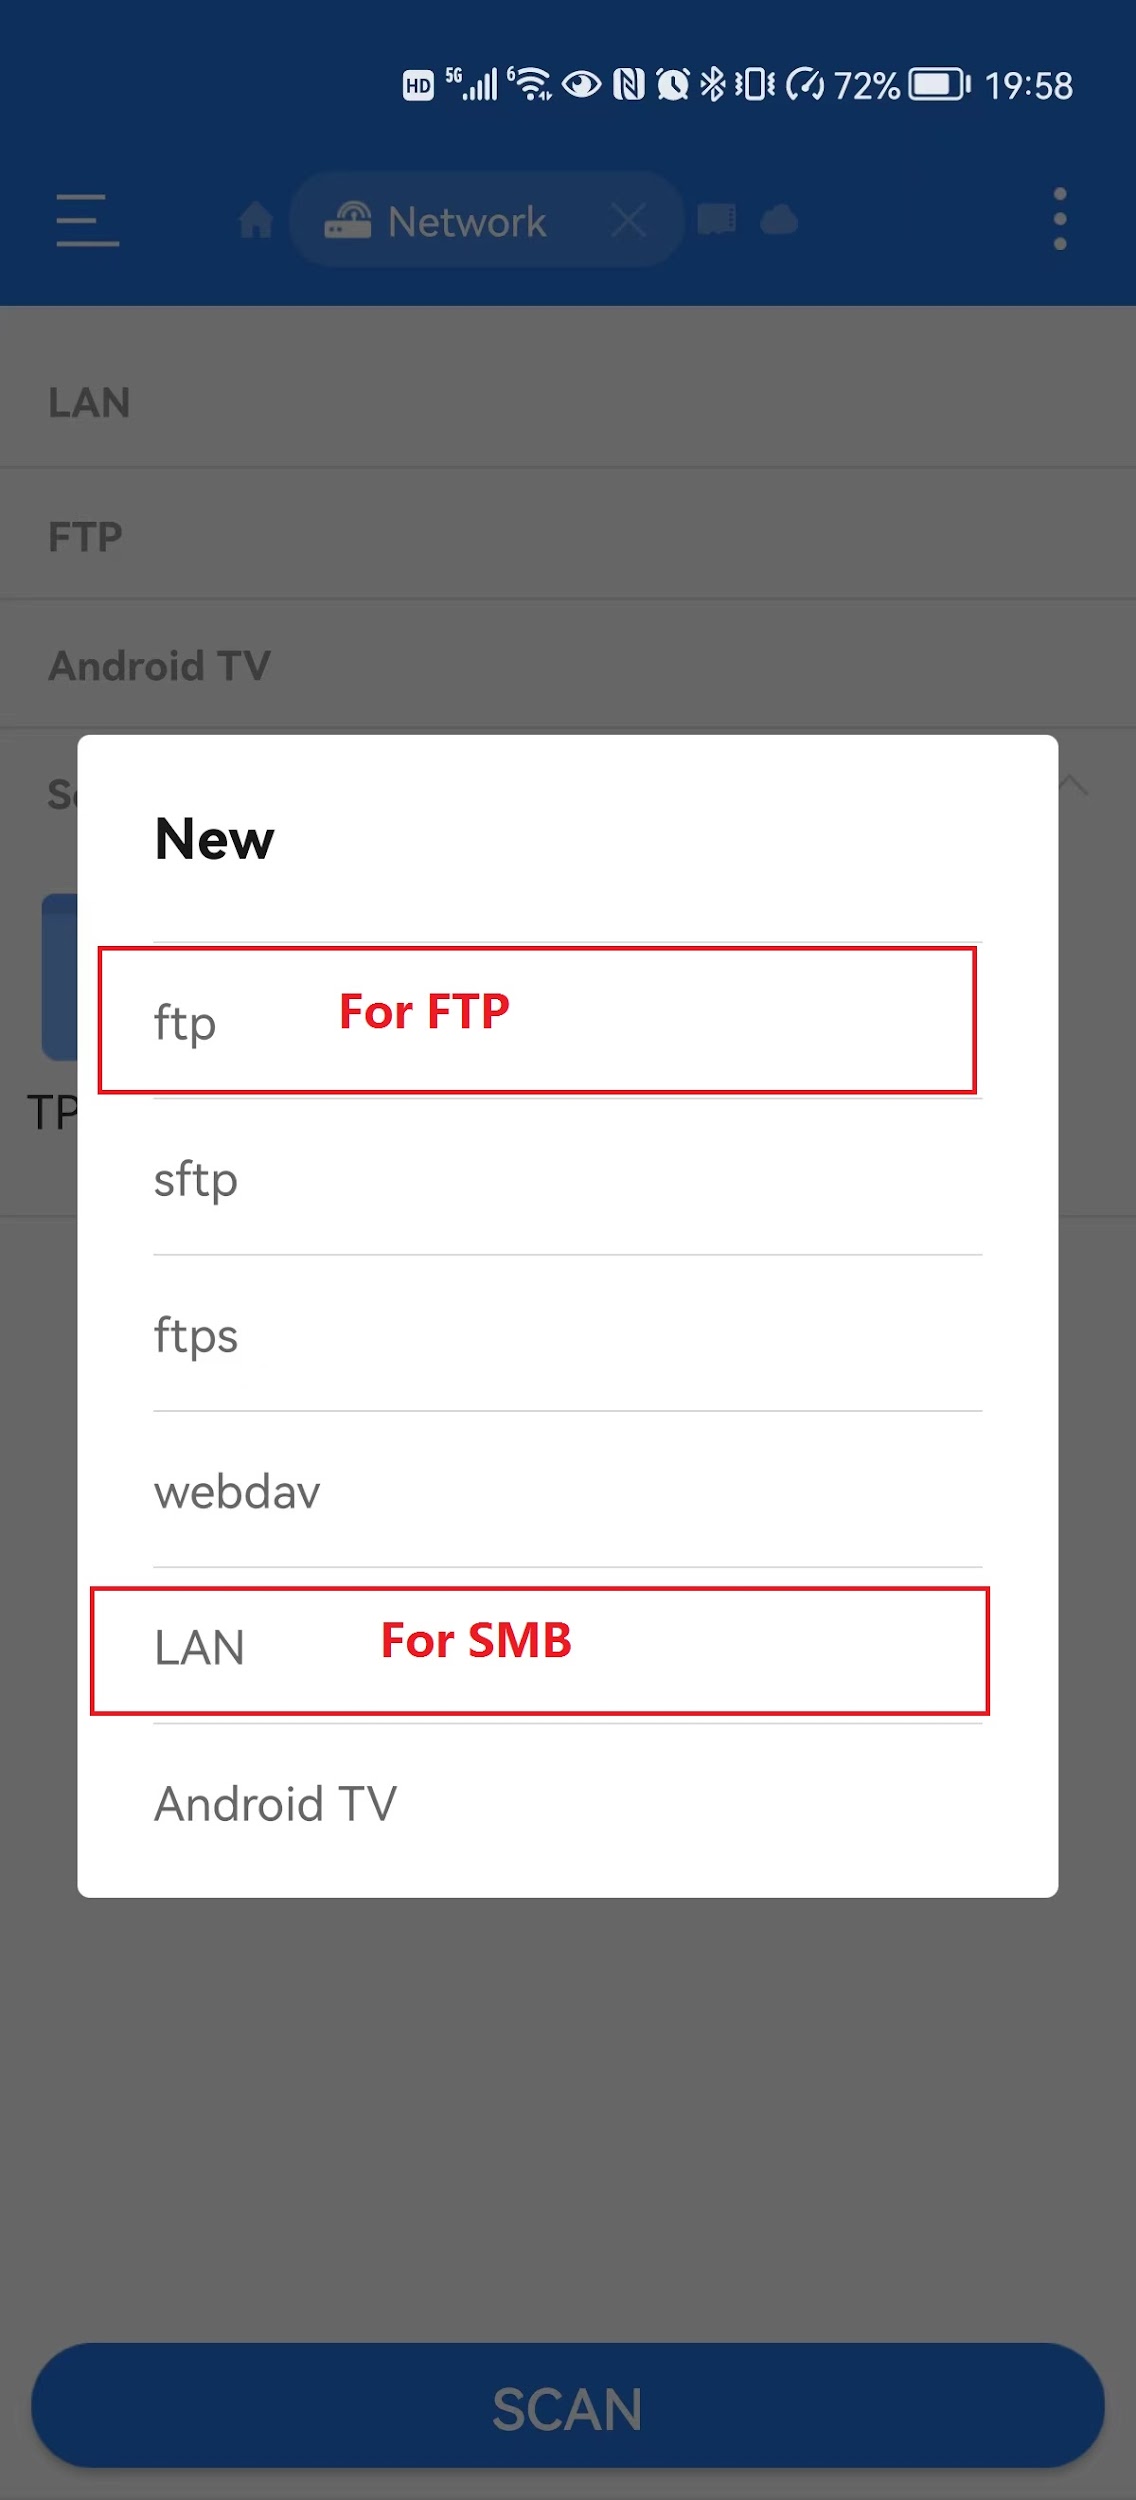
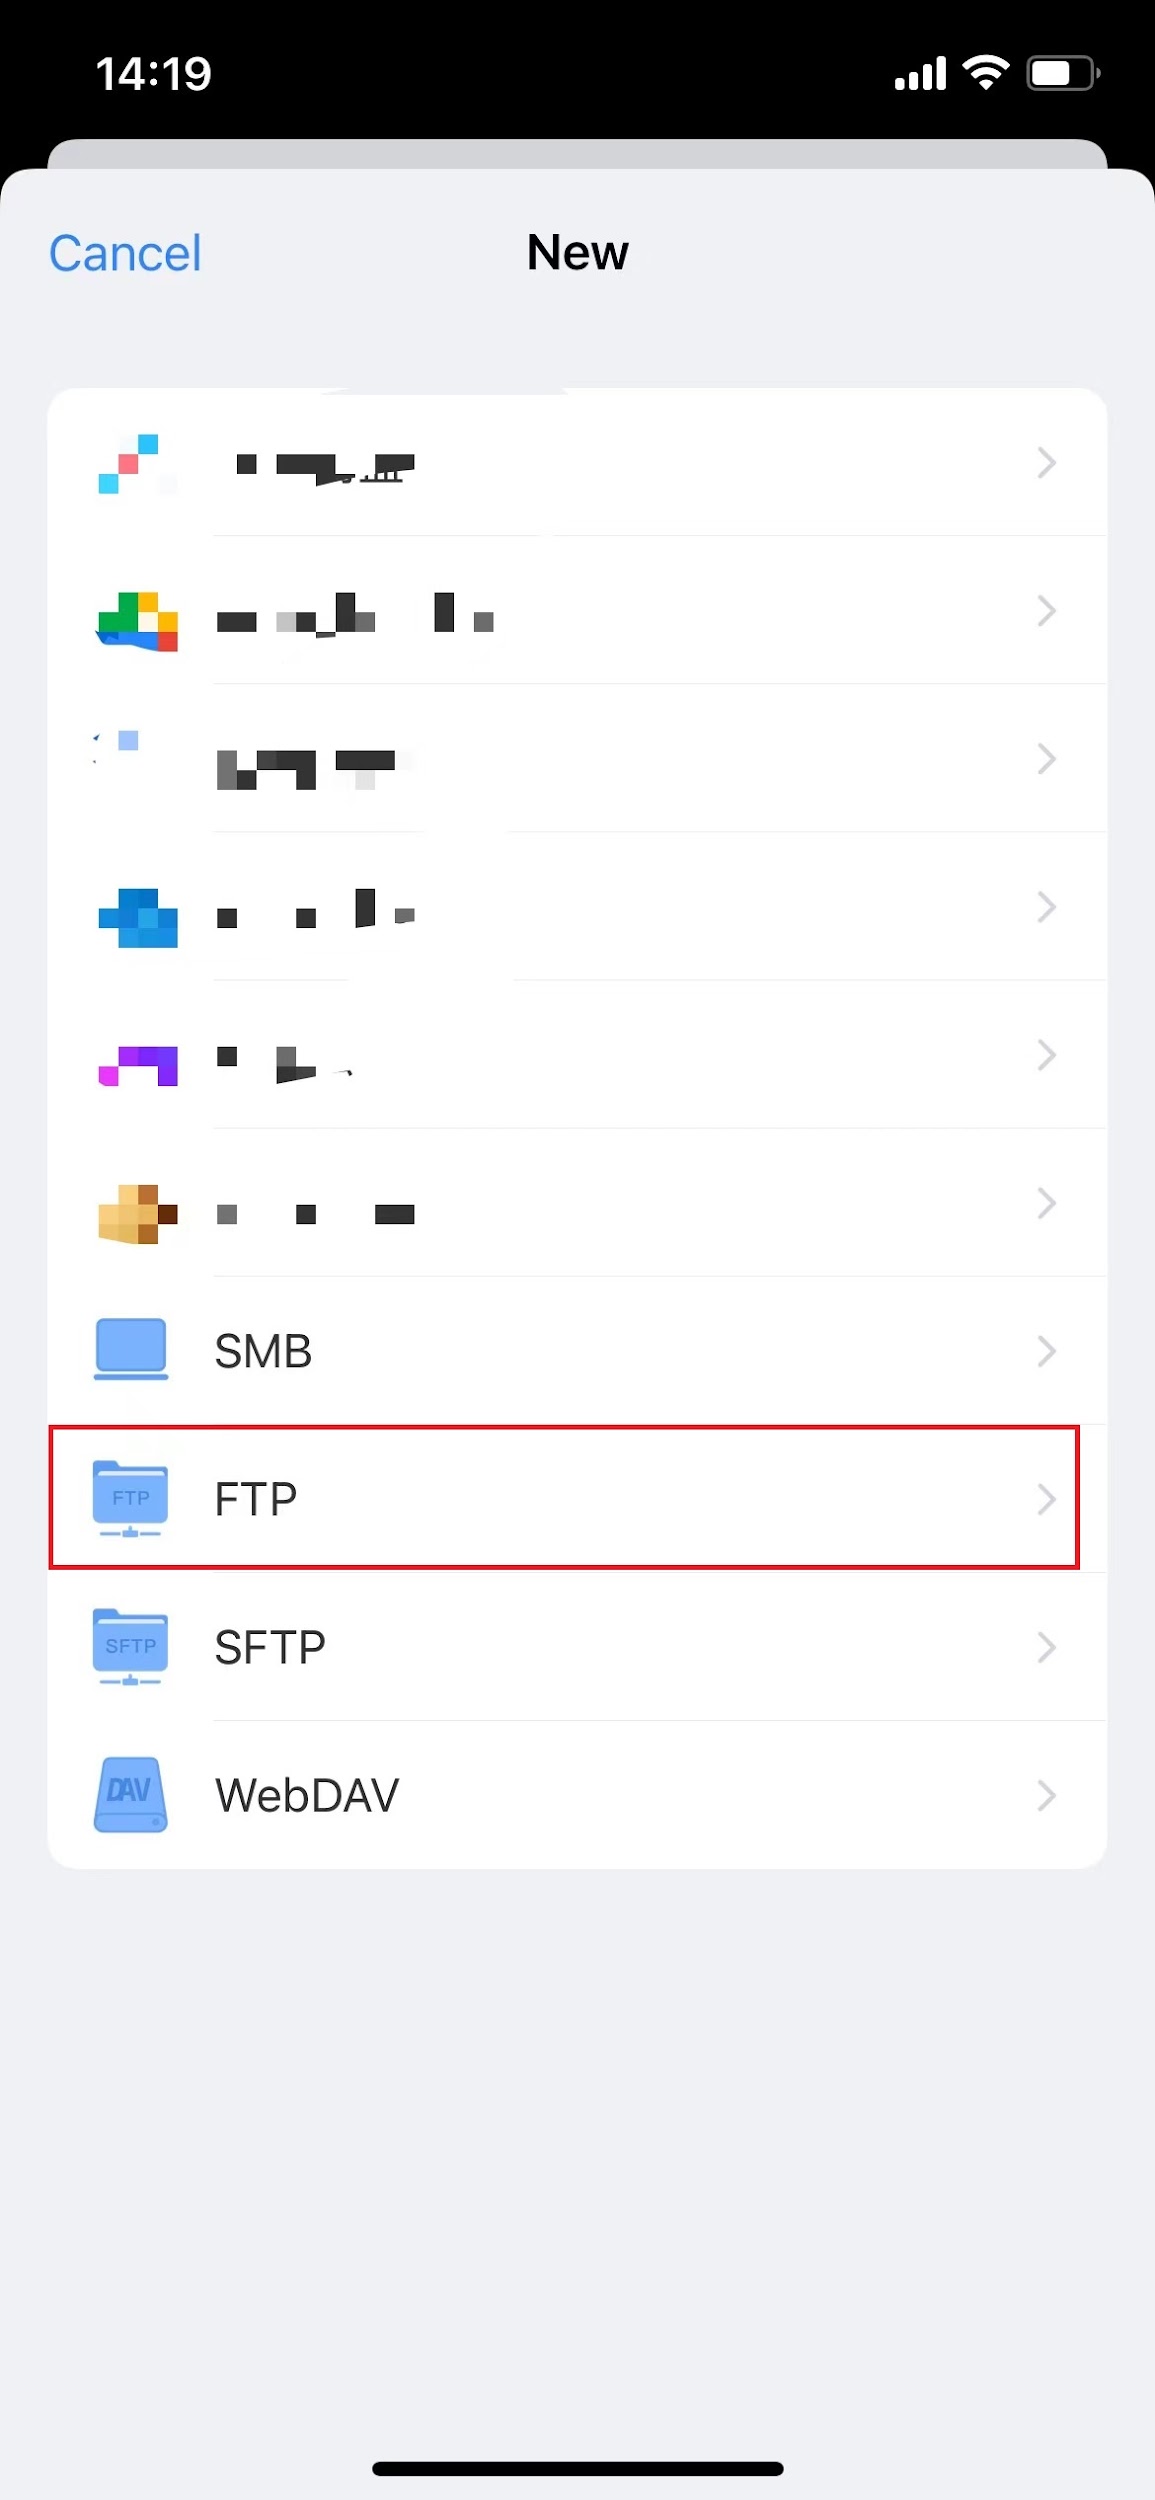
If the APP is not showing available devices, please click the “+” button.
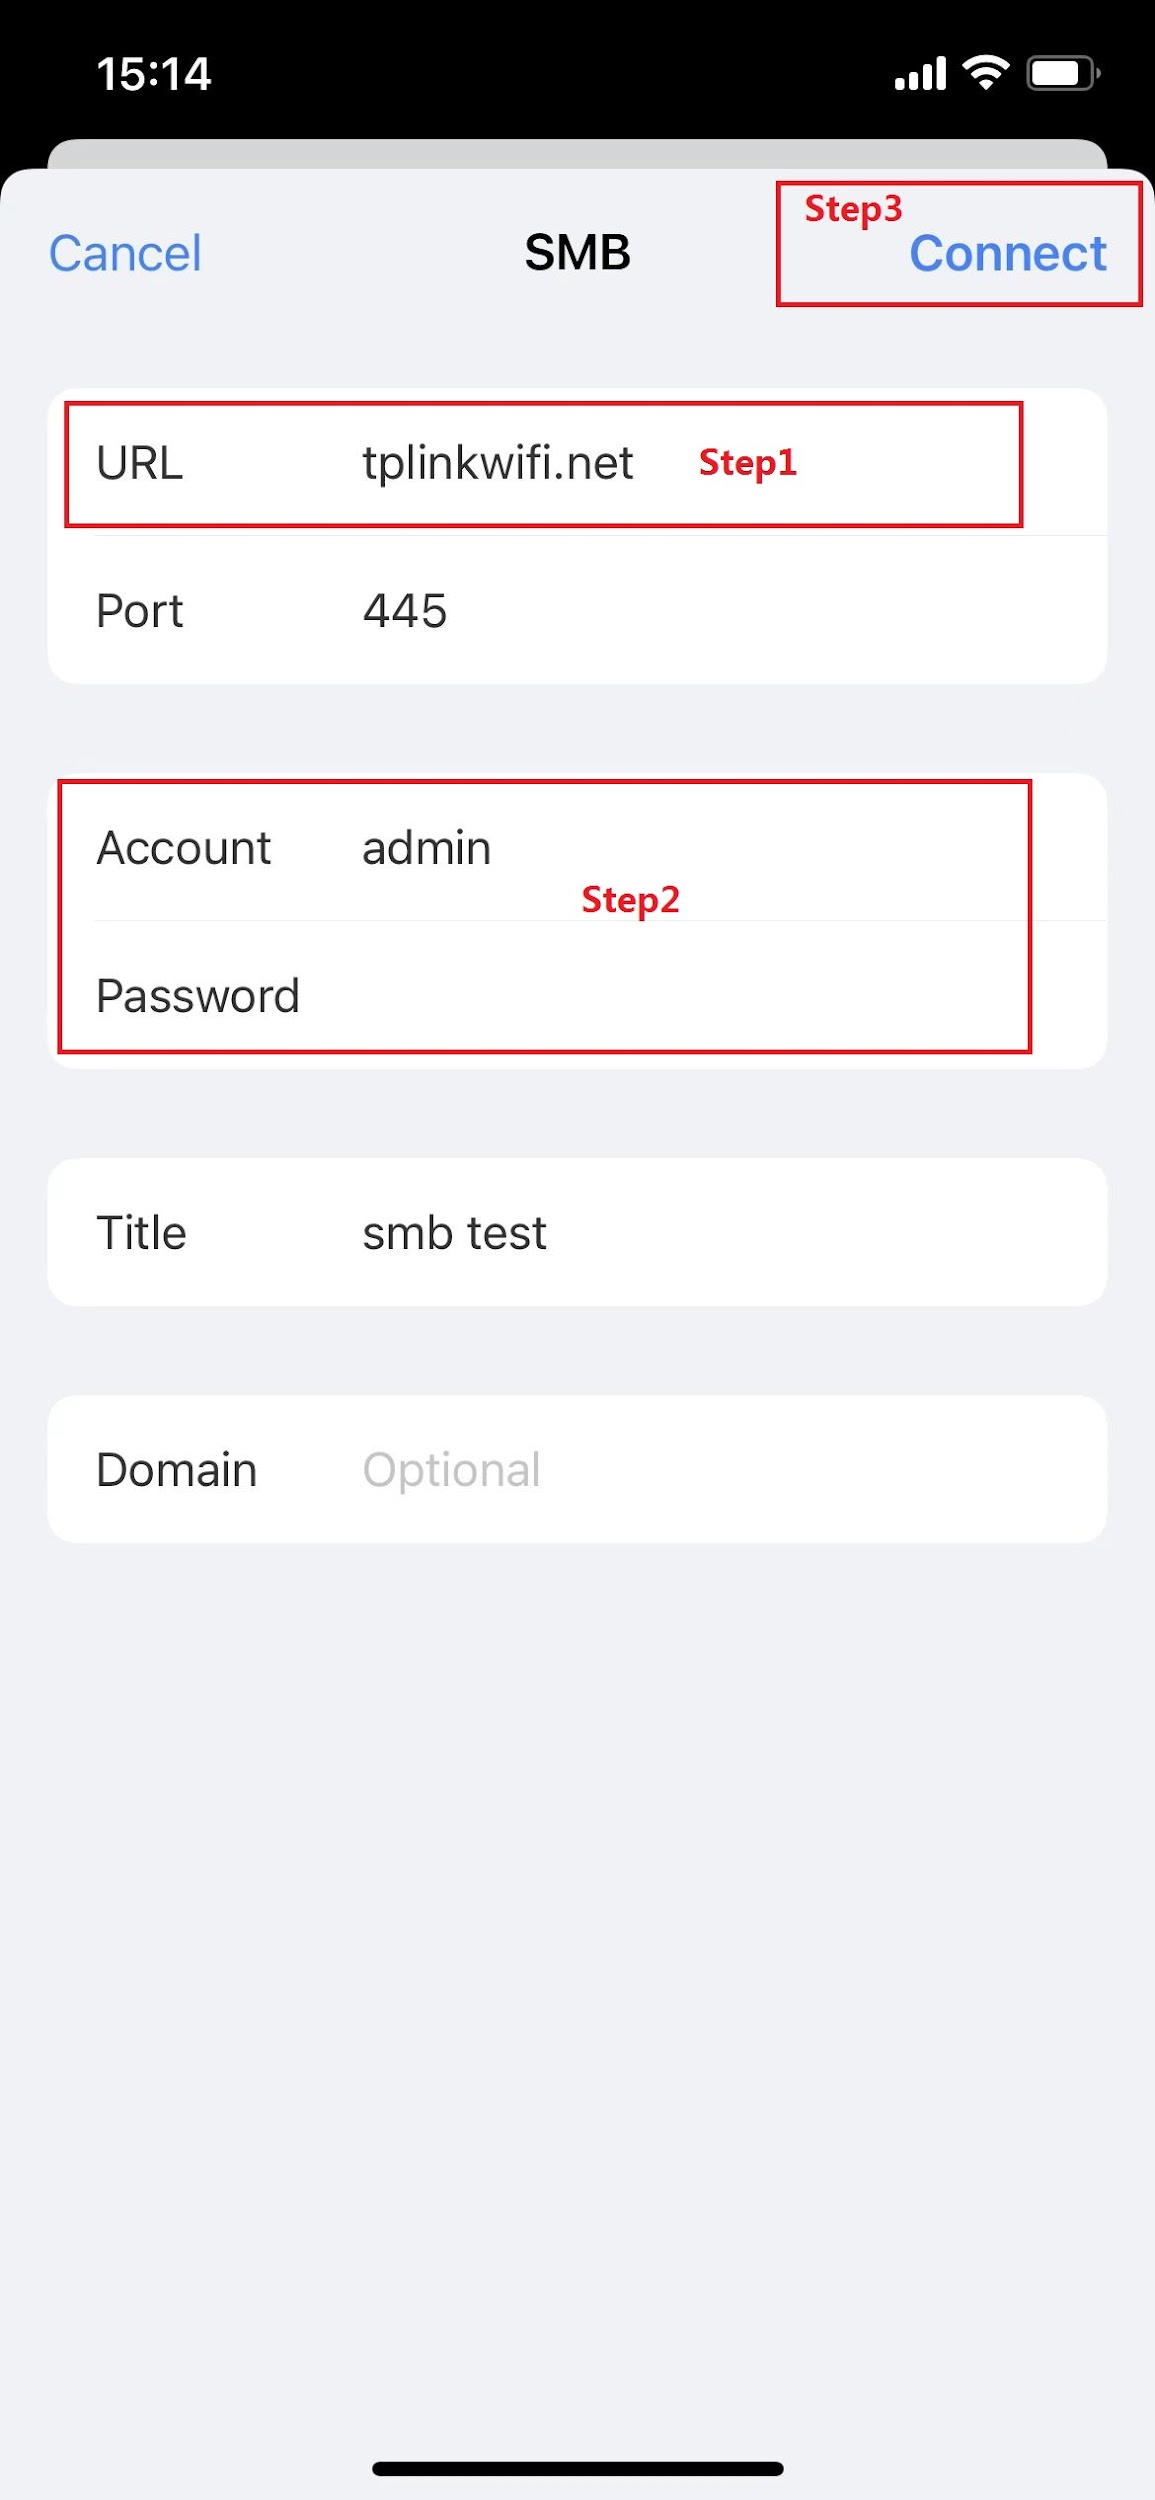
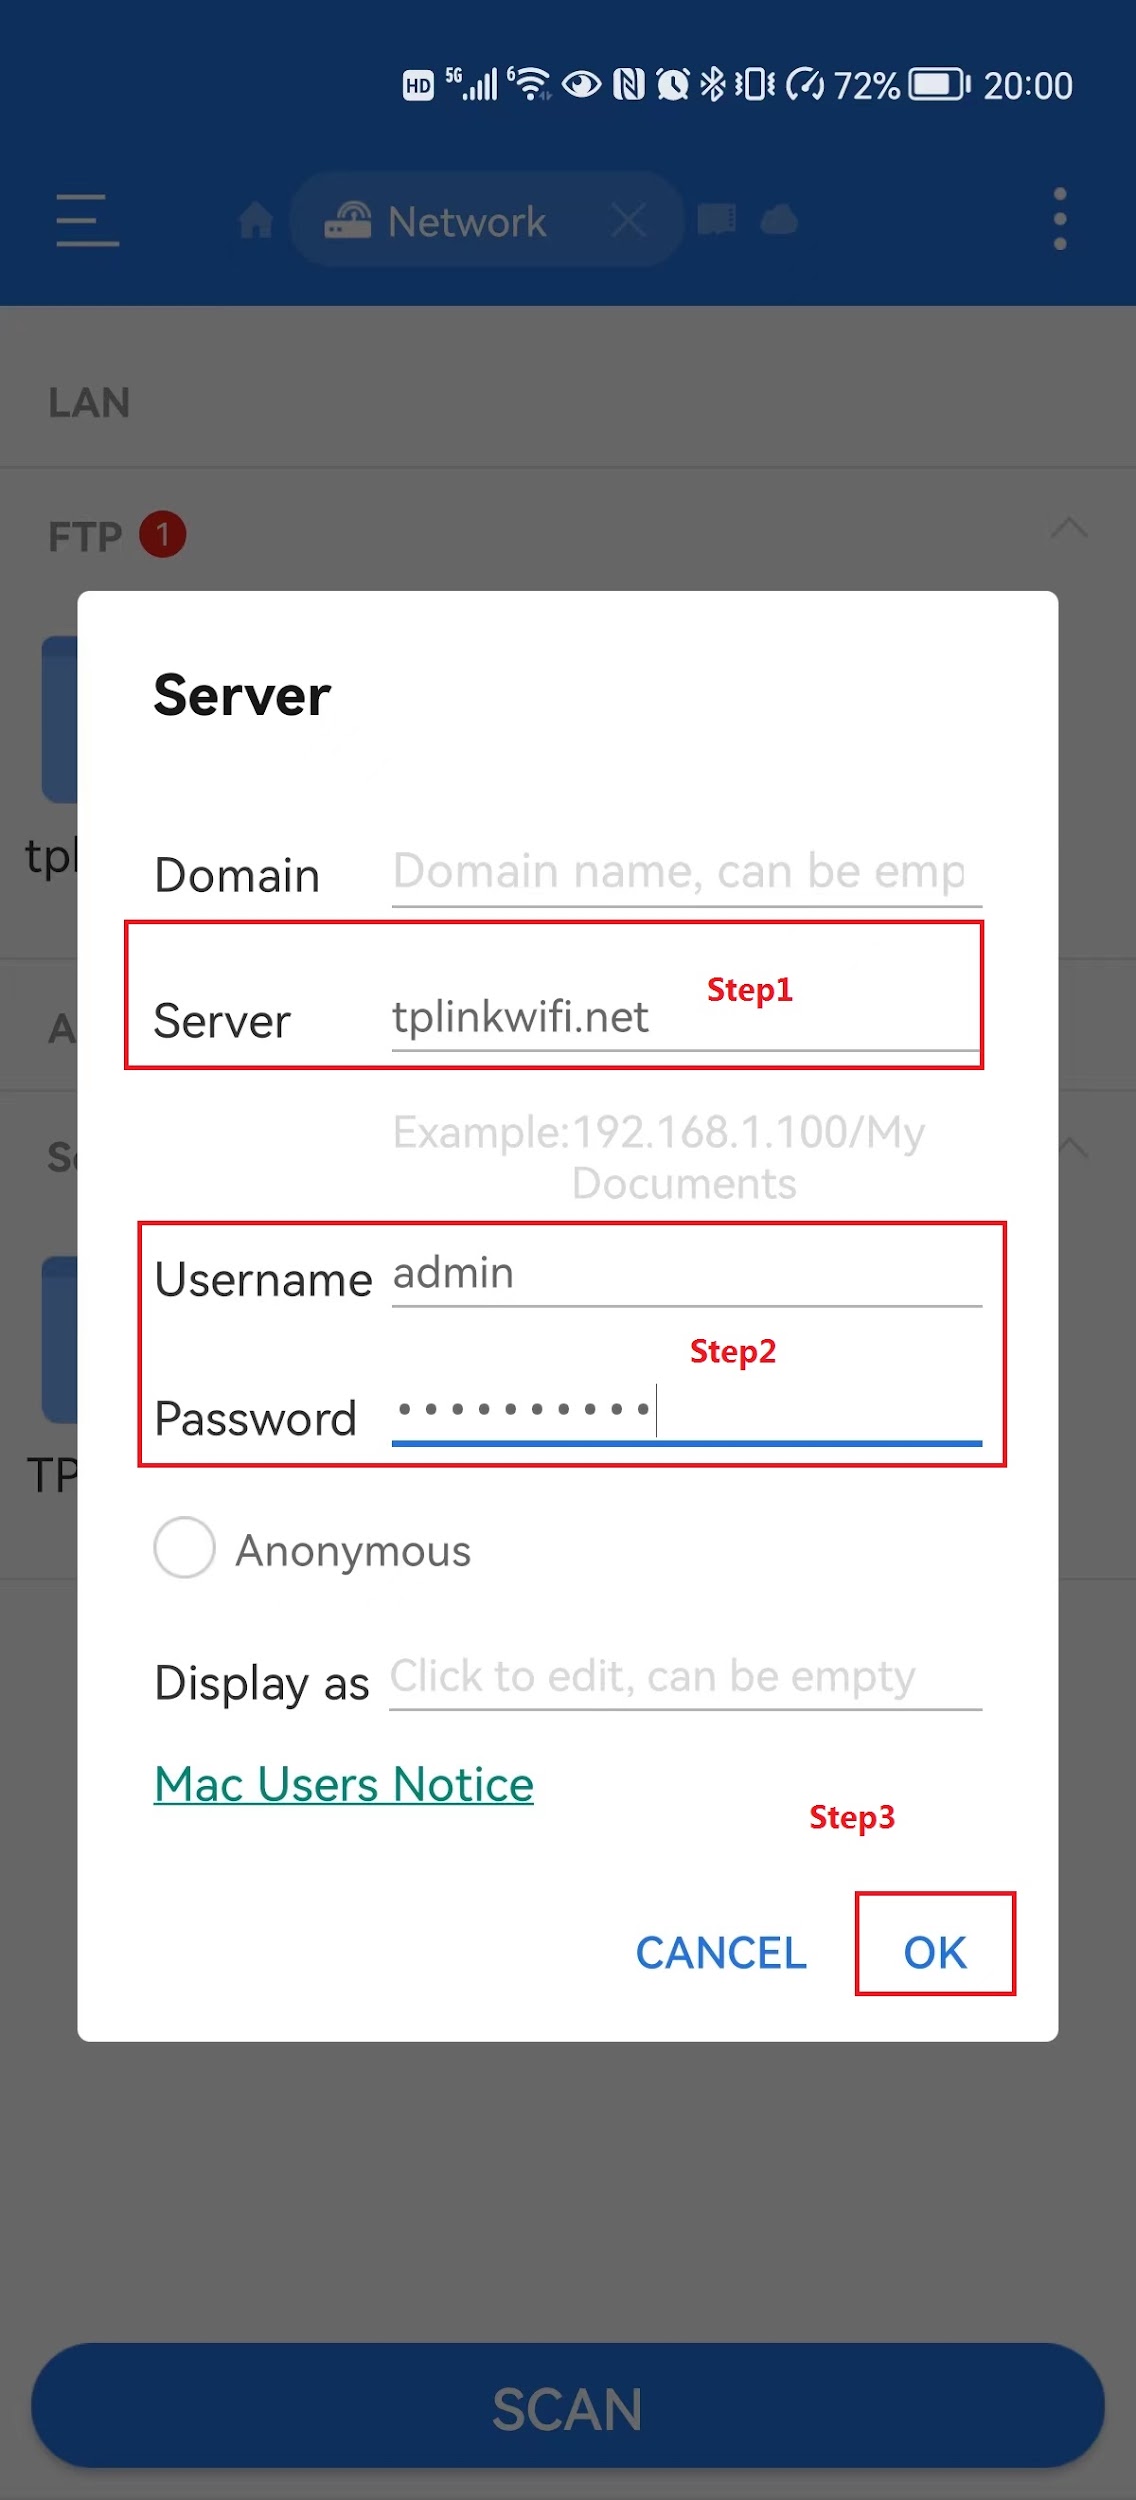
Then type “tplinkwifi.net” in the URL option.
Type your username and password to connect.
We recommend using a third-party APP like “ES File Explorer” to access the USB drive. Here we take the “ES File Explorer” as an example:
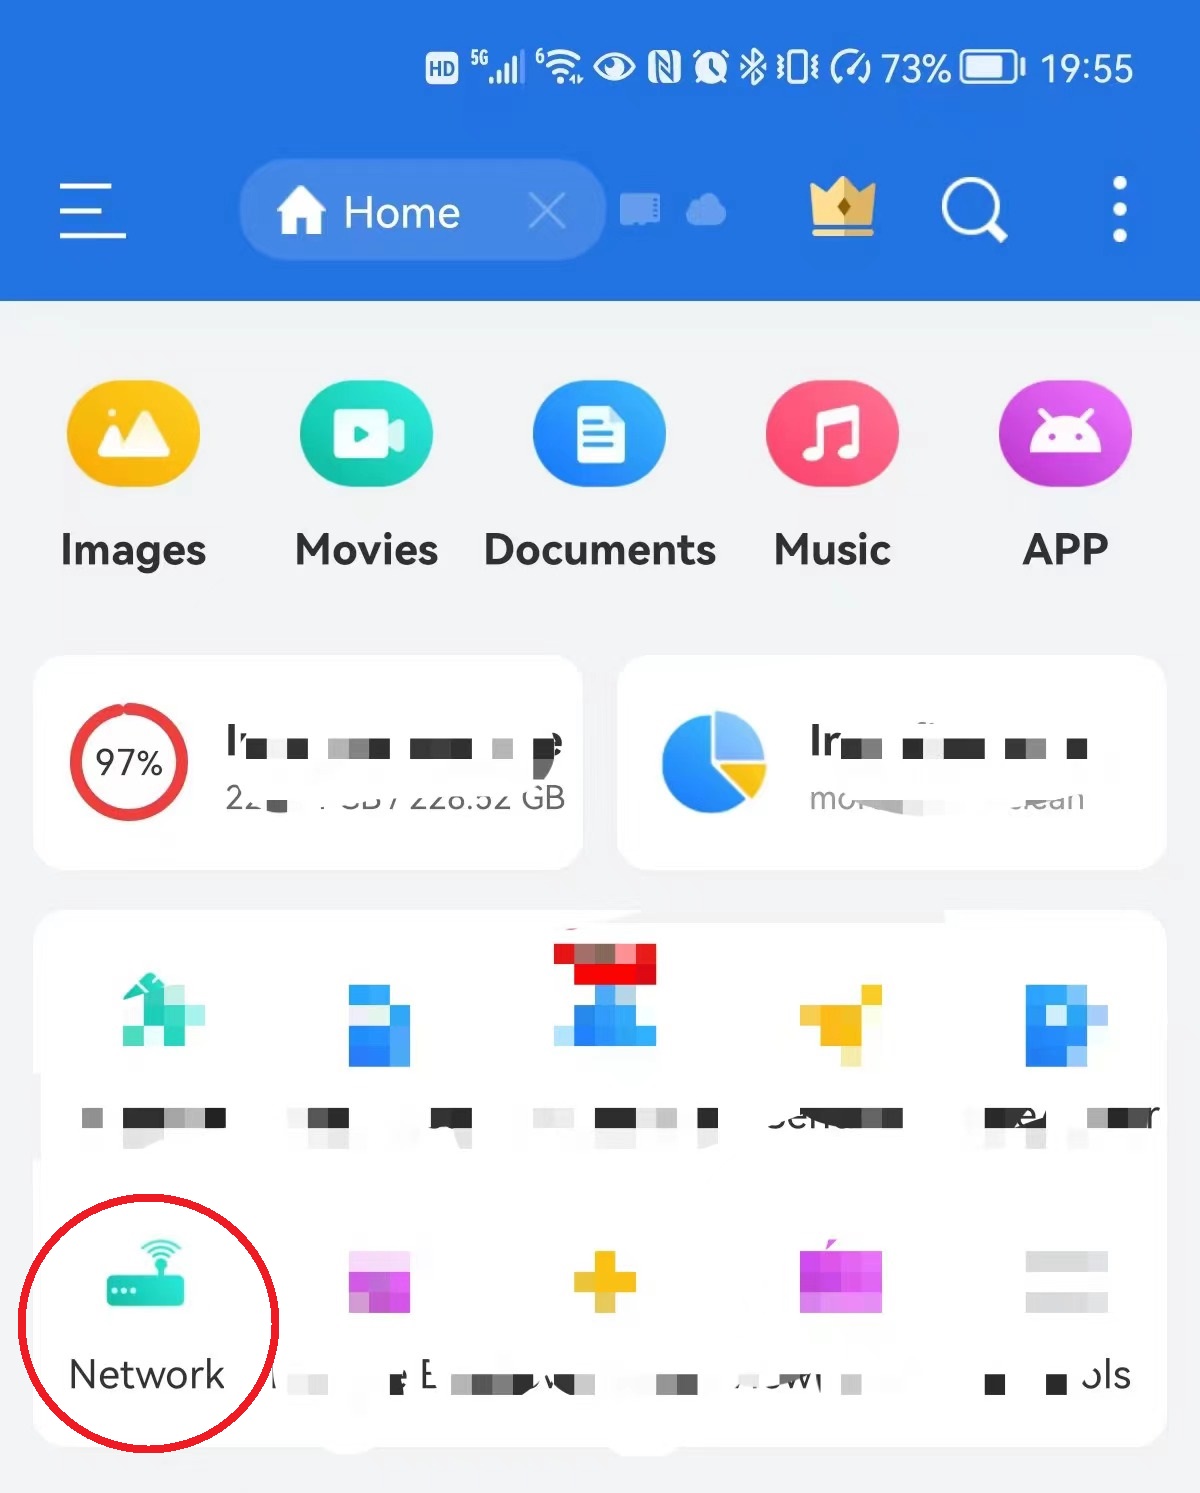
Open the APP, and click “Network”.
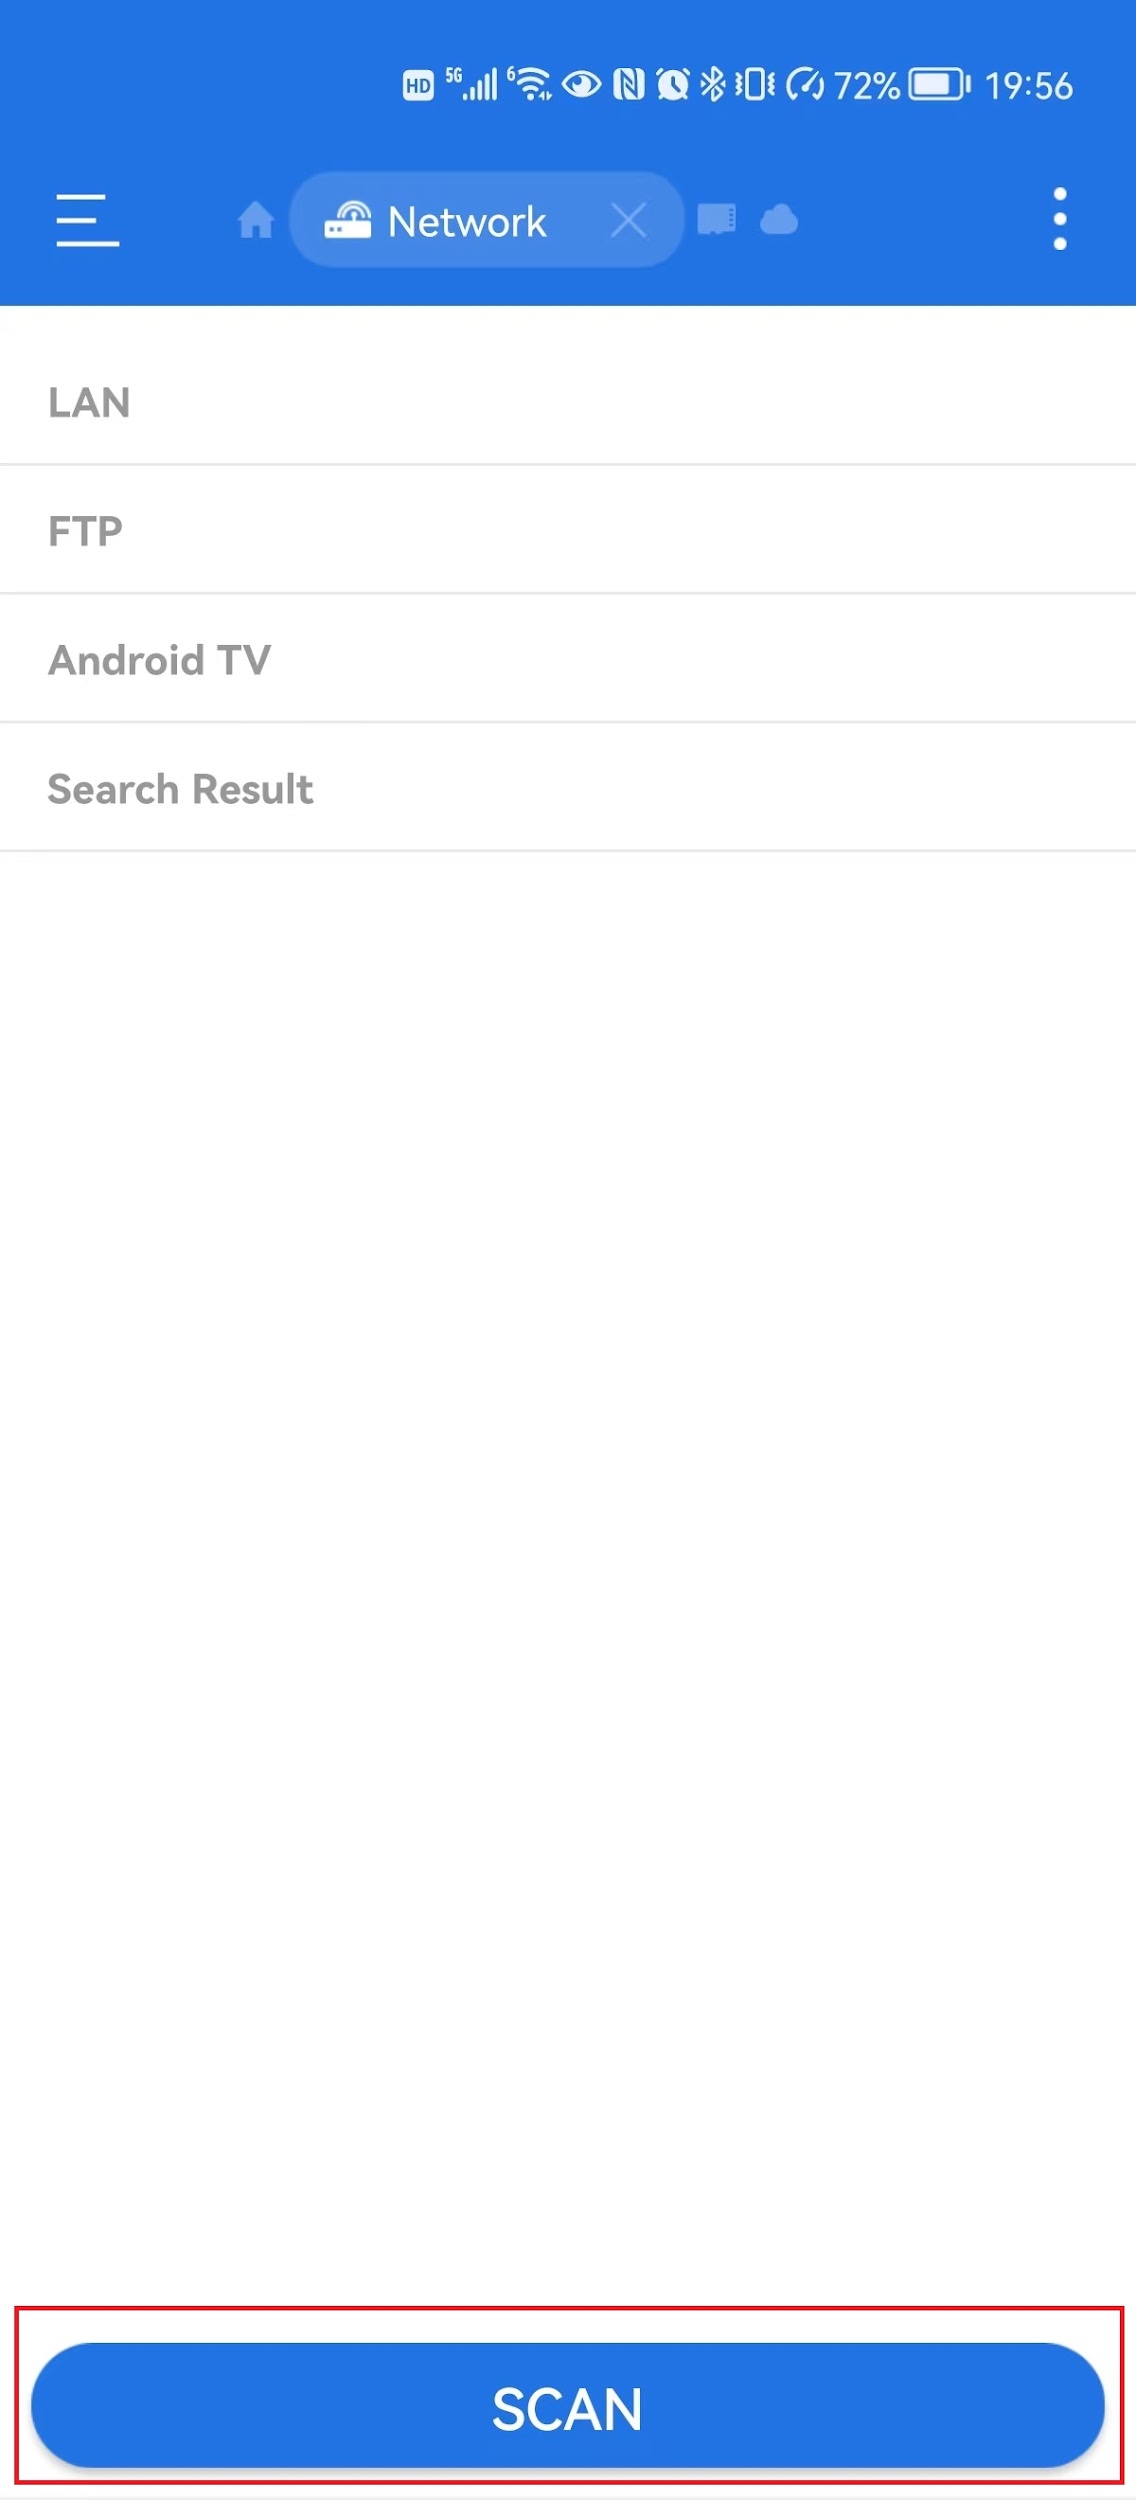
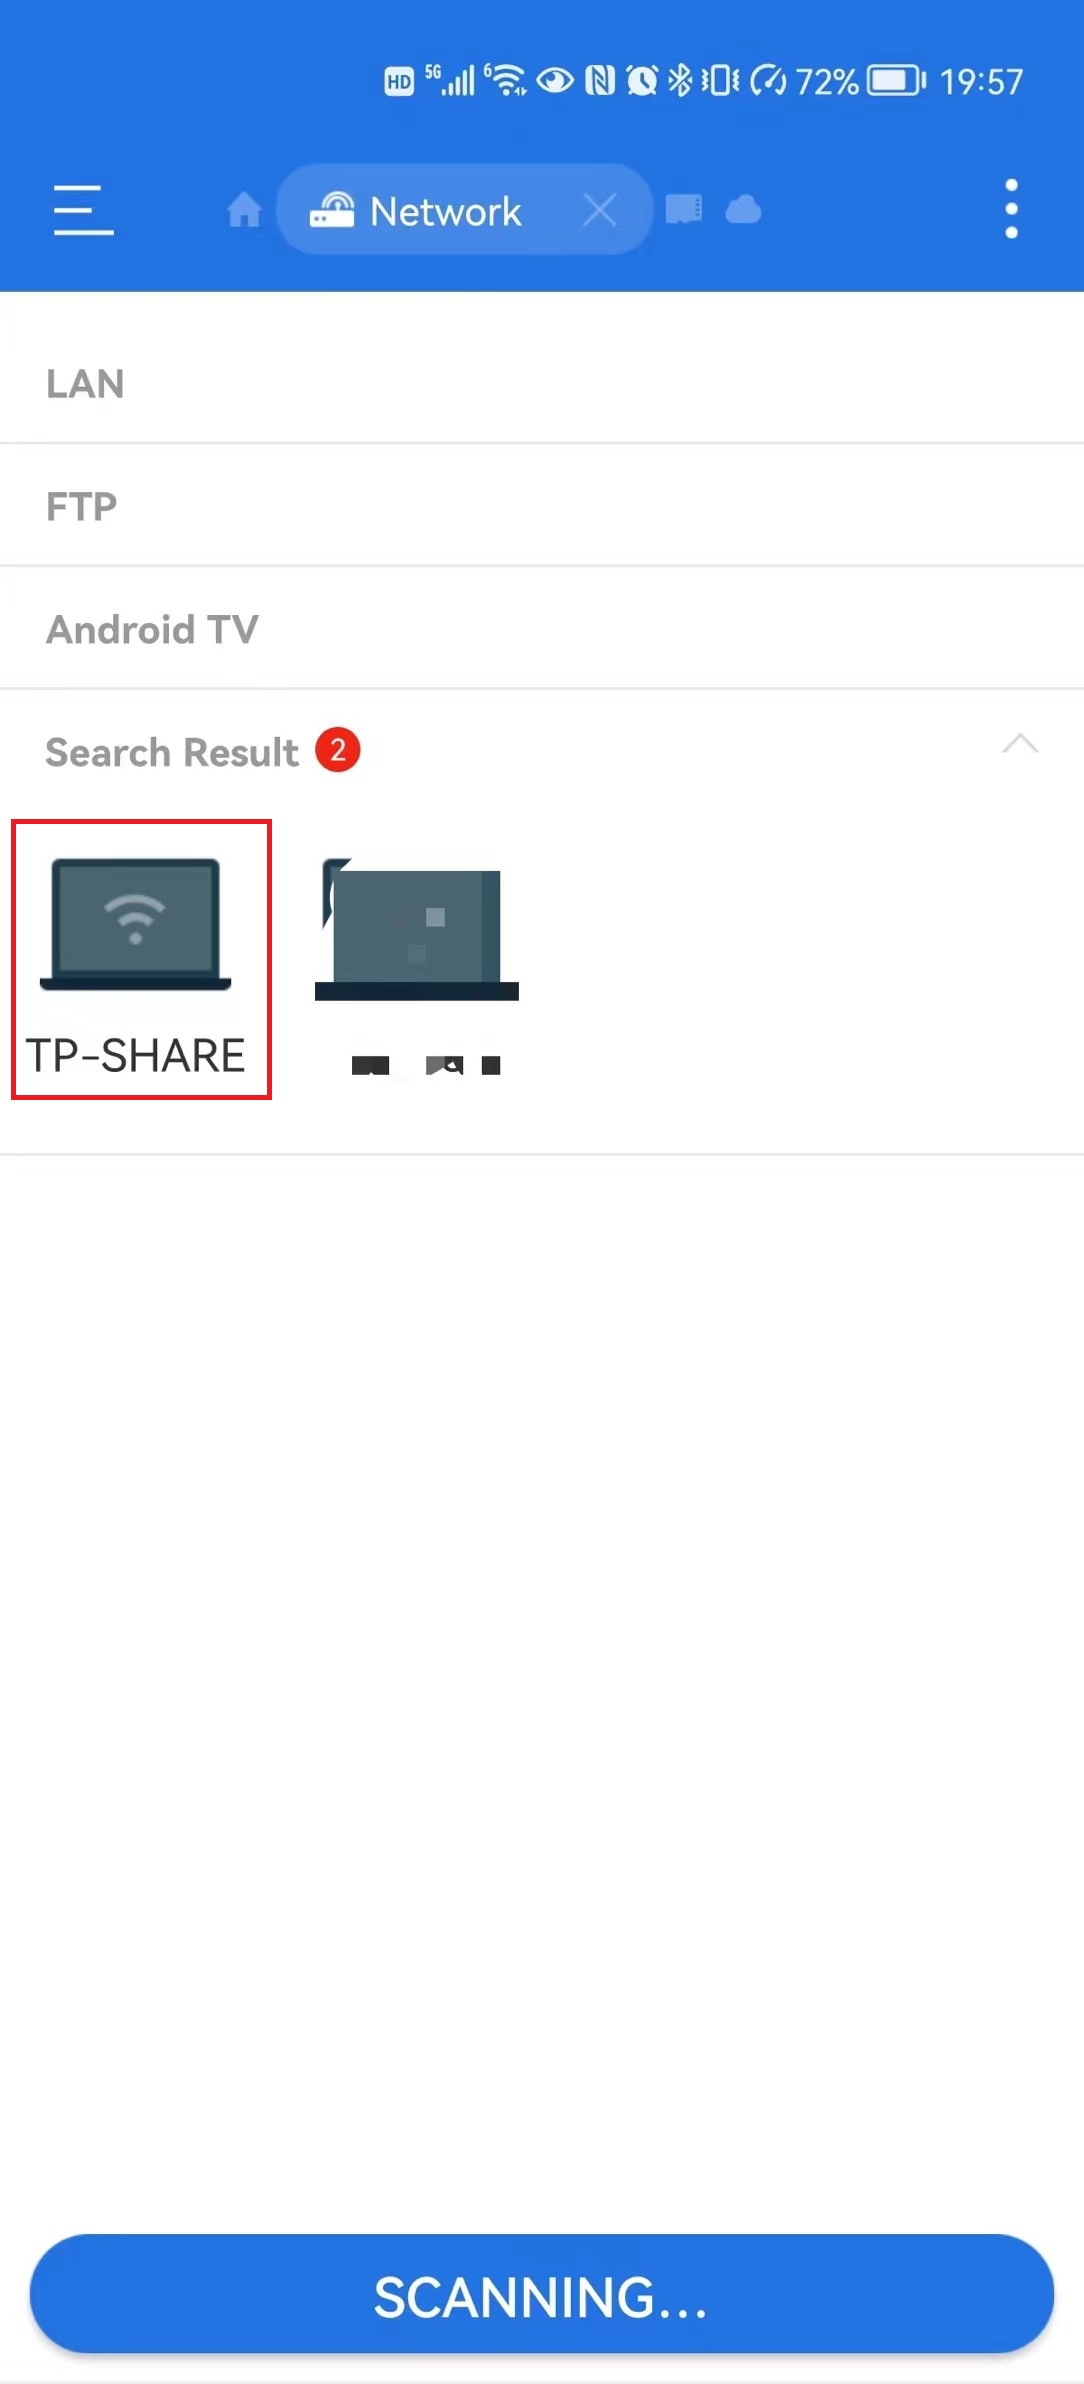
Click the Scan button to detect the SMB server. Then click “TP-SHARE” in the scan result.
Type the username and password to log in.
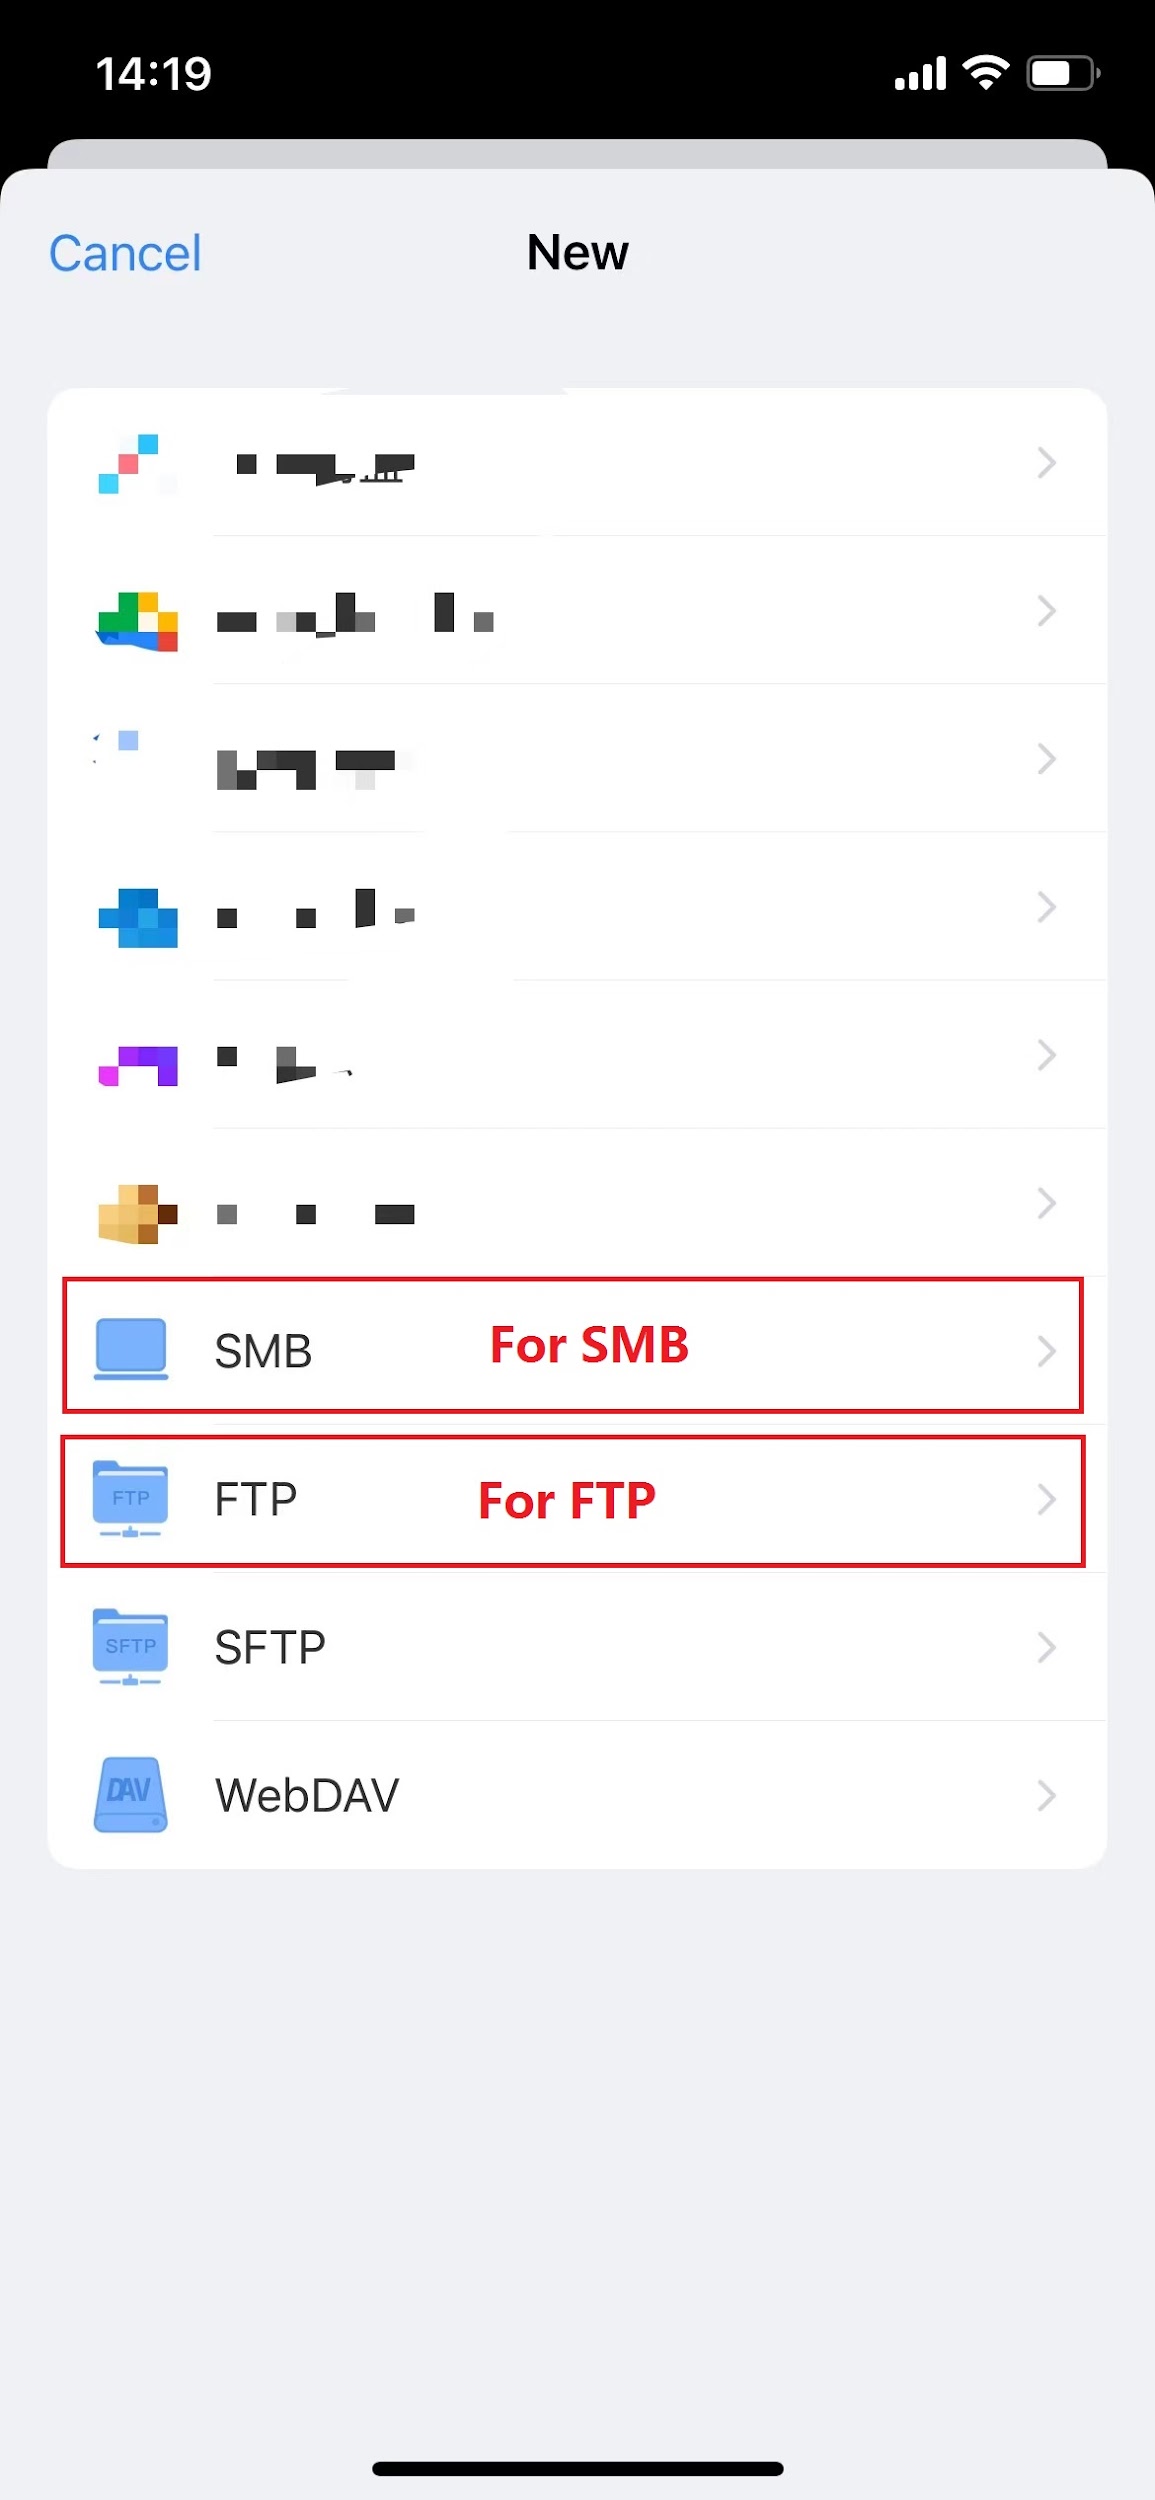
If the app doesn’t detect it, we can also add it manually.
Then type “tplinkwifi.net” in the URL option. Type your username and password to connect.

Option 2: Access the USB Drive Remotely (FTP)
Please note that only FTP is supported for remote access.
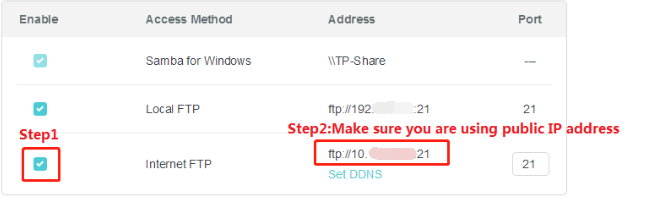
Check “Internet FTP”, then click " Save " to enable the Internet FTP service.
Use the address in the screenshot to visit the USB remotely.
Android/iOS
We recommend using a third-party APP like “ES File Explorer” to access the USB drive. Here we take the “ES File Explorer” as an example:
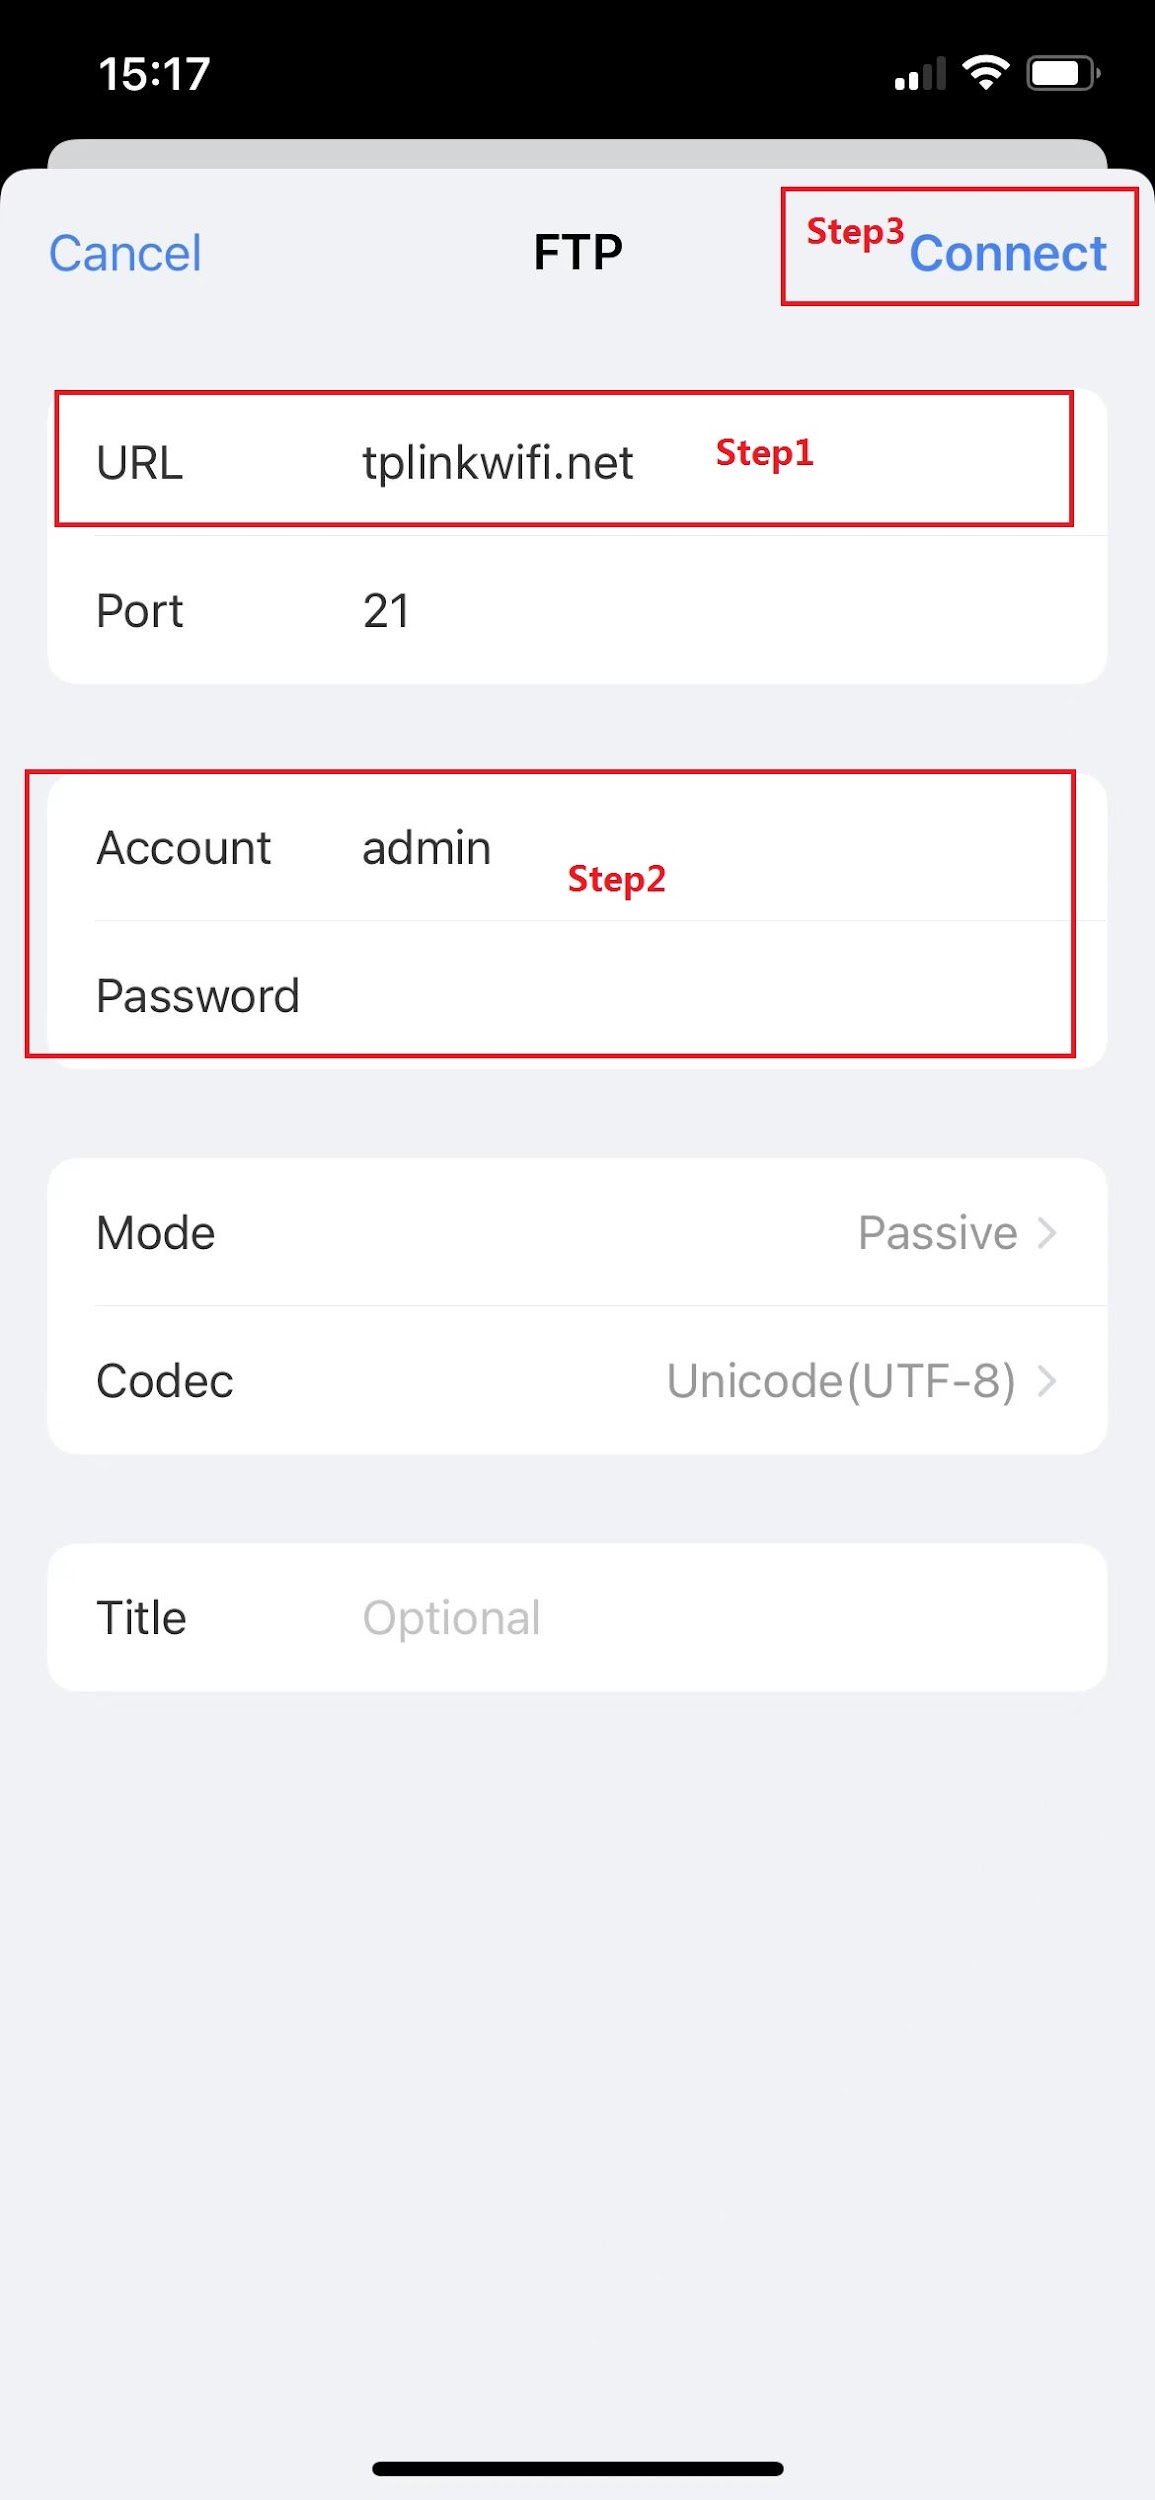
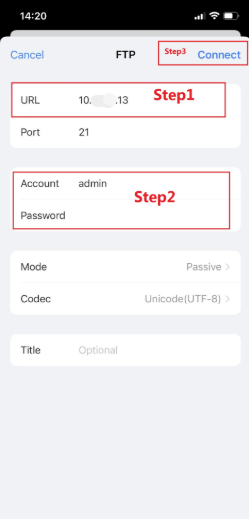
Click the “+” button to add the FTP server.
Type the IP address of the router’s WAN port. (Normally, the IP address should be a public IP address.)
Type your username and password to log in.
To get to know more details of each function and configuration, please go to the Download Center to download the manual of your product.
Looking for More
Is this faq useful?
Your feedback helps improve this site.

-3.0-package_normal_1584497266805j.png)

TP-Link Community
Still need help? Search for answers, ask questions, and get help from TP-Link experts and other users around the world.