How to configure Address Reservation on TP-Link wireless router
When you specify a reserved IP address for a PC in the LAN, the PC will always receive the same IP address each time it connects to the DHCP server. If there are PCs on the LAN that require permanent IP addresses, please configure Address Reservation on the router.
How to set up Address Reservation
Step 1. Connect a computer to the router via an Ethernet cable or wirelessly, and open a web browser to enter http://tplinkwifi.net in the address bar to log in the router’s management page.
Step 2. Go to Advanced > Network > DHCP Server> Address Reservation to do the settings
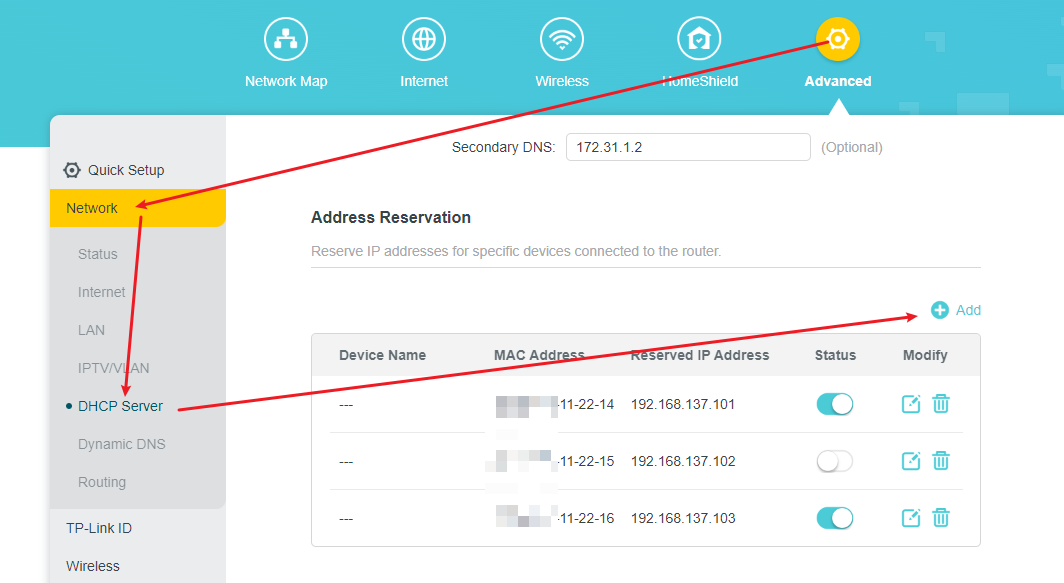
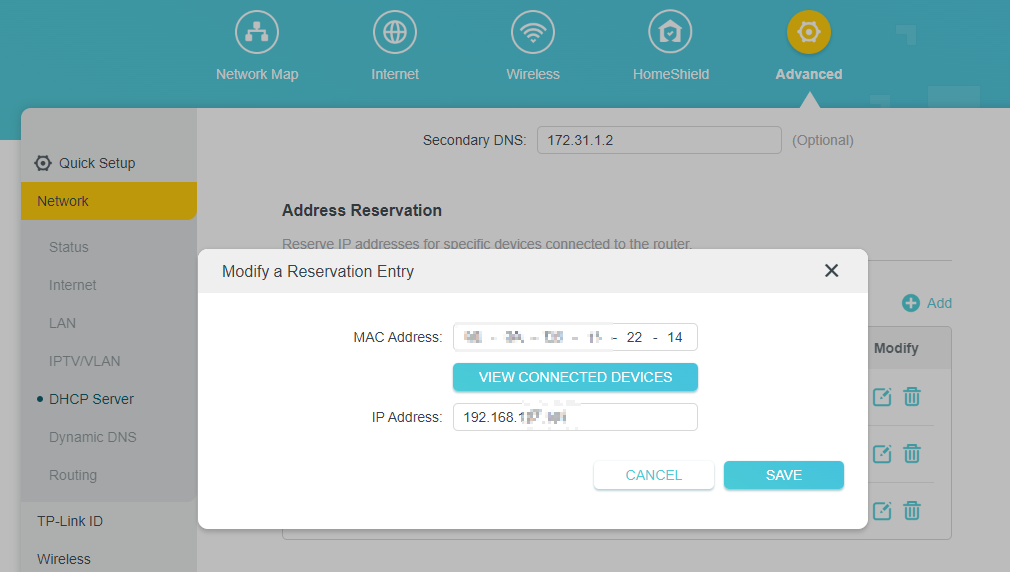
Step 3. Click the Add button and enter the device MAC address and the IP address you want reserve.
- The MAC address could be uppercase or lowercase. The format of the MAC Address is XX-XX-XX-XX-XX-XX
- The IP Address must be on the same subnet with the LAN IP, and it cannot be a reserved IP address. For example, the default LAN IP address is 192.168.0.1, so you can reserve the IP address from 192.168.0.2 to 192.168.0.254.
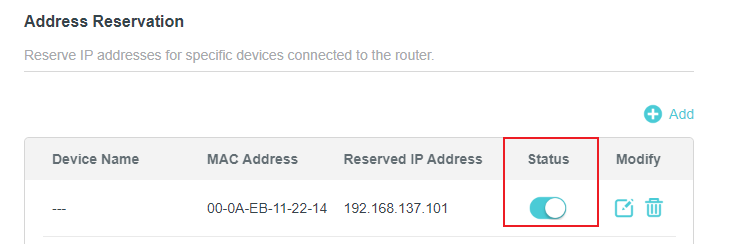
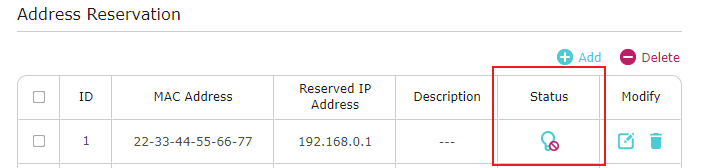
Step 4. Go back to the Address Reservation to turn on the Status.
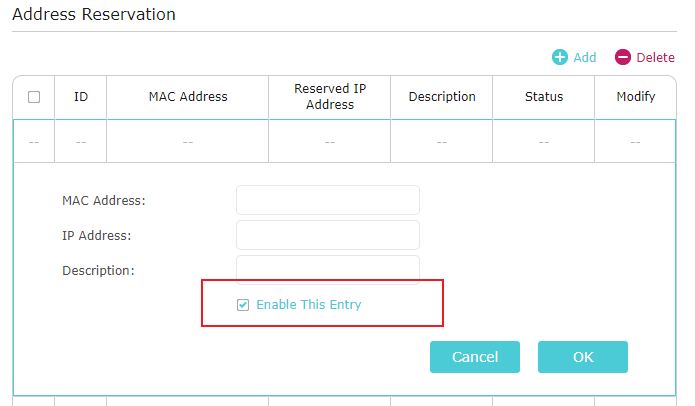
The configuration interface may vary slightly between different models. For some models, you need to tick the Enable This Entry to turn on the Status. If you forget to check Enable This Entry, then we can see a red circle below enable.
Step 5. Finally, please click on the Reboot button on the right top corner, then all the settings would take effect.

Get to know more details of each function and configuration please go to Download Center to download the manual of your product.
Looking for More
Is this faq useful?
Your feedback helps improve this site.
14.0-A_normal_1584497163963a.png)
3.0-A_normal_1584497102381x.png)
TP-Link Community
Still need help? Search for answers, ask questions, and get help from TP-Link experts and other users around the world.