Tapo P410M Setup Guide
Tapo P410M Setup Guide
Tapo P410M Smart Wi-Fi Outdoor Plug
Welcome to the setup guide.
To ensure equal access for all users, we offer this accessible setup guide. This guide is designed to meet accessibility needs, enabling a successful setup. It will introduce the appearance of the outdoor plug and then guide you through the setup process.
Step 1. Know about your smart plug
In this section, we will describe the smart plug's appearance, including its ports, buttons, and labels.
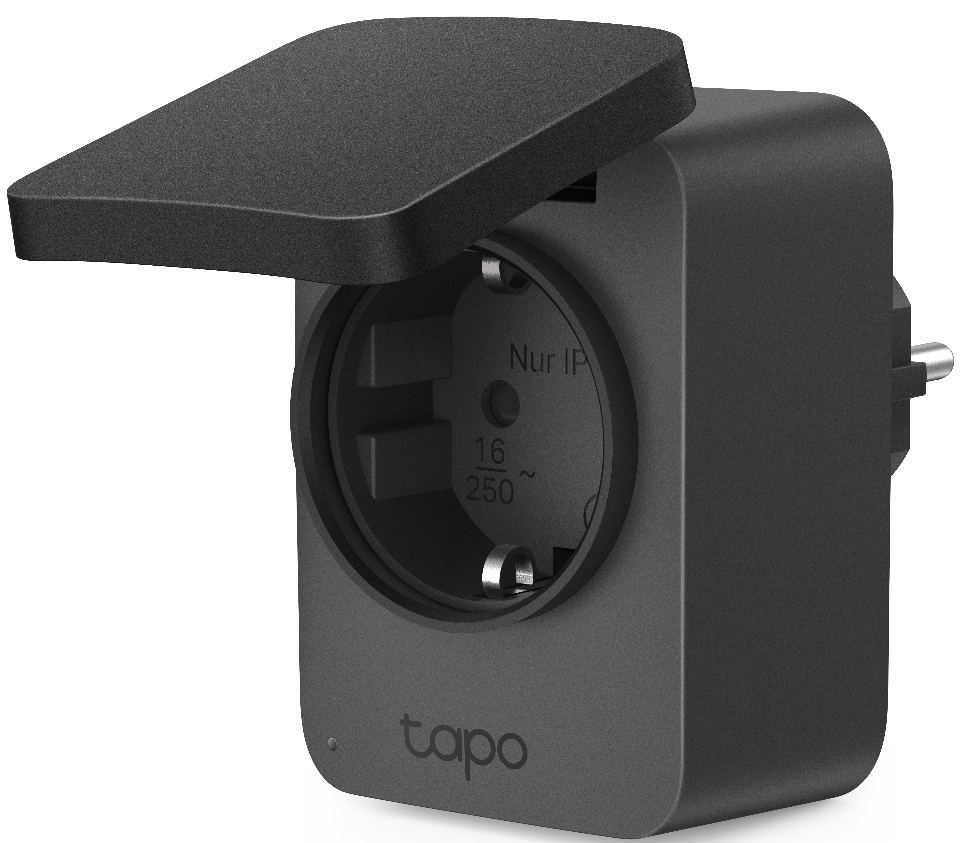
1. You can find your plug in the package.
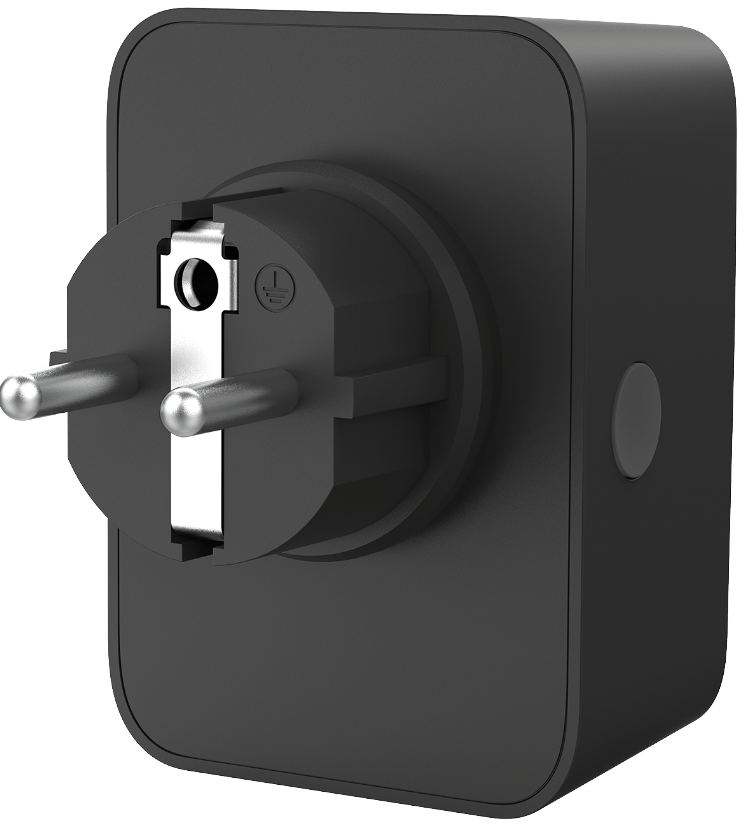
2. Next, place the product in front of you with the plug pins facing you. We will introduce the button and waterproof cover on your device in a certain order.
Power Button: There is only one button on the product, located on the side. When your plug is powered on, you can press the button to turn the smart plug on or off, or press and hold the button for 5 seconds to reset Wi-Fi while preserving other existing settings, or press and hold the button for 10 seconds to reset to factory default settings.
Waterproof cover: Located on the back of the product, used to prevent water from entering the socket. Lift the cover, and you can find the socket below the cover.
Step 2. Set Up
1. Get the Tapo app from the App Store or Google Play, then log in.

2. Plug in your smart plug. Wait 1~2 seconds for the plug to start up.
3. Tap the + button in the app and select your plug model. Follow app instructions to complete setup.
If you need help, please visit https://www.tapo.com/support/ for technical support, the user guide, FAQs, warranty & more.
For details on Tapo app accessibility, please check https://www.tp-link.com/support/faq/4496/.
Step 3. Waterproof your plug
It is recommended to use waterproof sockets and splashproof plugs to avoid the risk of water leakage. Waterproof sockets are equipped with protective covers and sealing rings to prevent water ingress. A splash-proof plug is designed with a waterproof structure, such as sealing rubber rings, to protect against water damage.
When using the plug, be careful not to soak the plug in water or spray water on it.
English: Safety Information
• Keep the device away from heat sources and enclosed spaces with poor ventilation.
• Electronic switch integrated in this product is only intended for functional purpose. Unplug the appliance before servicing
• Keep the device away from fire or hot environments. DO NOT immerse in water or any other liquid.
• Do not attempt to disassemble, repair, or modify the device. If you need service, please contact us.
• Do not use the device where wireless devices are not allowed.
• The socket-outlet shall be installed near the equipment and shall be easily accessible.
• For passthrough devices, plug the power strips into the integrated electrical sockets of the devices, but devices of the same or another type not be stacked in normal use. Do not plug in a row.
• Do not plug in one after the other.
• Only de-energize when the plug is pulled out.
• Do not operate covered.
• Plug the product into a grounded wall outlet.
• Install residual current protective devices with a rated residual operating current of no more than 30mA in building installations.
• Do not plug in any plug-in devices.
Please read and follow the above safety information when operating the device. We cannot guarantee that no accidents or damage will occur due to improper use of the device. Please use this product with care and operate at your own risk.