How to Configure Object Abandoned and Removal Detection on VIGI Cameras
Contents
Introduction
The Object Abandoned and Removal Detection function automatically monitors whether an object has been left behind or removed from a defined area, triggering alerts accordingly. It is suitable for warehouses, exhibition halls, corridors, entrances/exits, and other scenarios where object status needs attention.
Requirements
- VIGI Cameras
- Web Browser
Configuration
On the web UI of VIGI cameras, you can enable Object Abandoned / Removal Detection, and configure parameters such as sensitivity, detection area, and alarm schedule. The specific configuration is as follows.
Step 1. Log in to the IPC’s management web UI, and go to Settings > Event > Smart Event > Object Abandoned / Removal Detection. Then enable the button.
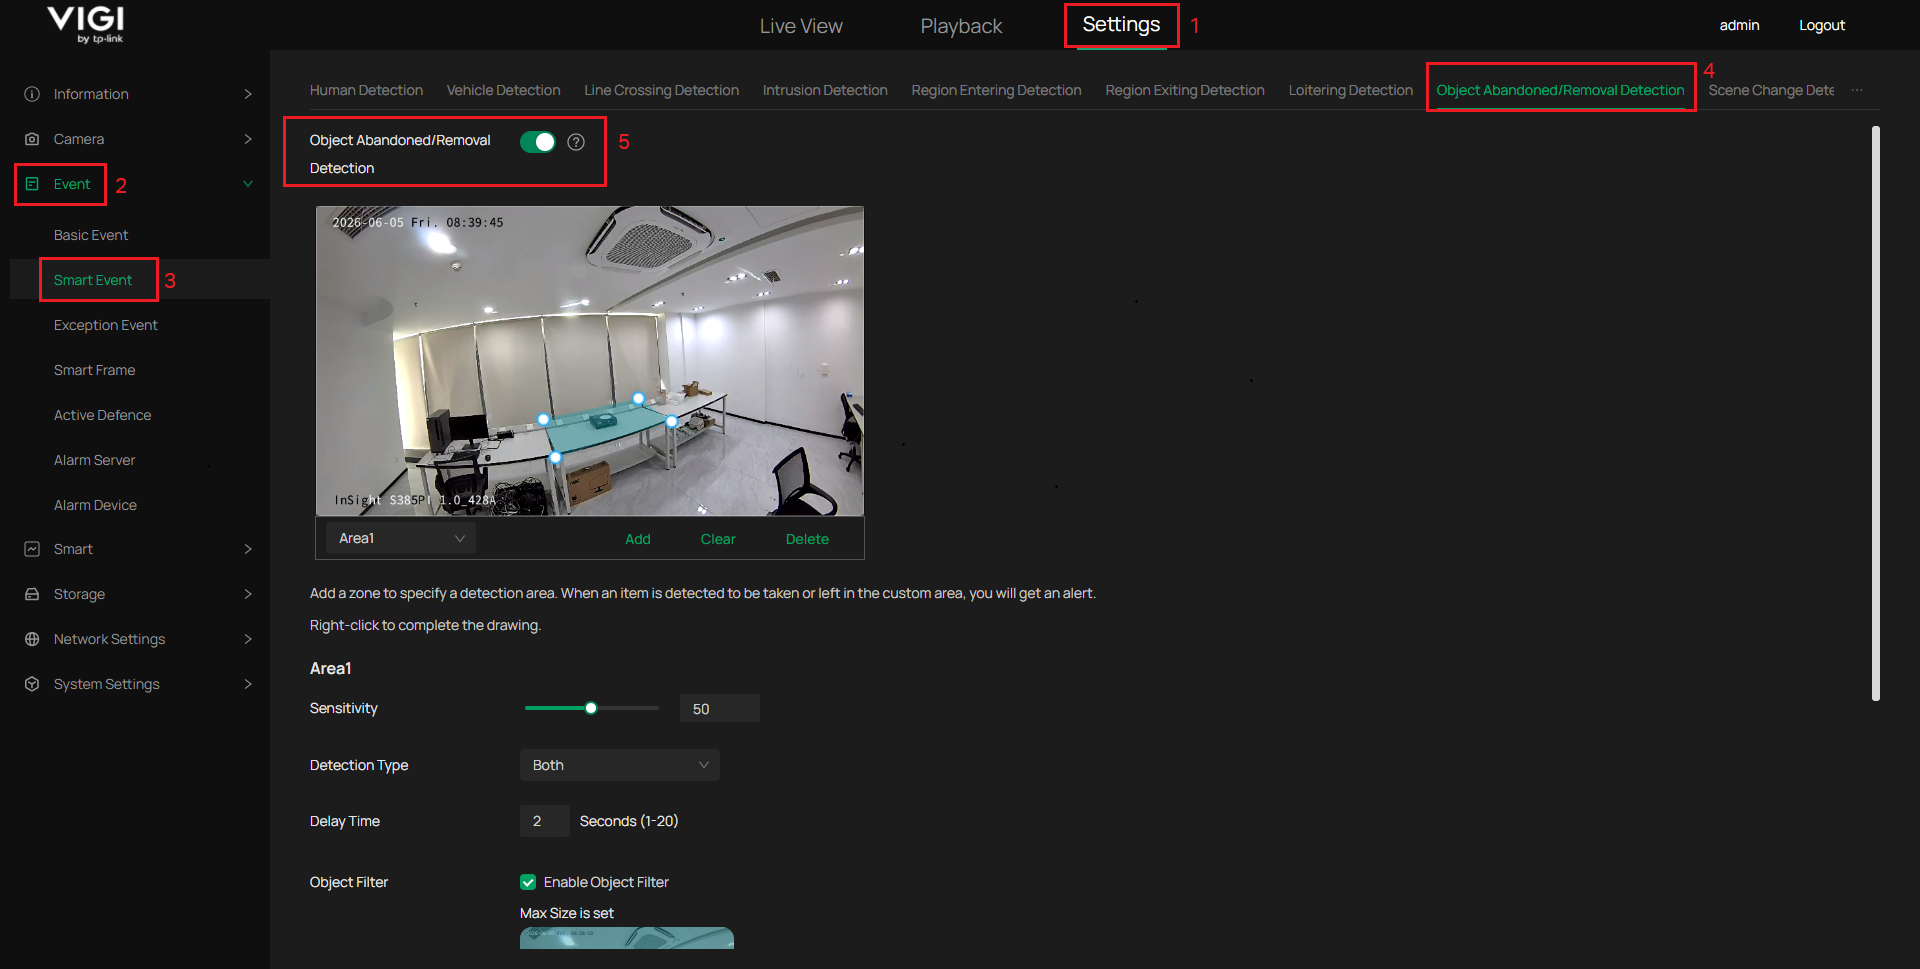
If the button will be green ![]() , which means the function is enabled.
, which means the function is enabled.
If the button will be grey ![]() , which means the function is disabled.
, which means the function is disabled.
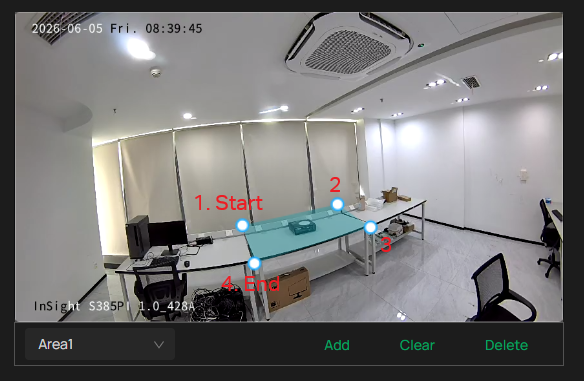
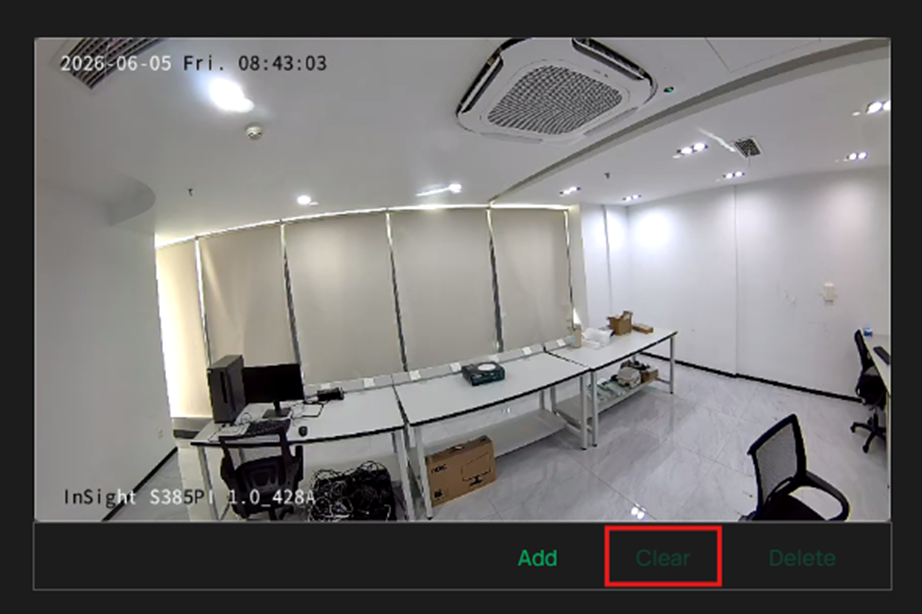
Step 2. Add a zone to specify a detection area. When an item is detected to be taken or left in the custom area, you will get an alert. Right-click to complete the drawing.
Note: The polygonal area must consist of at least four sides.
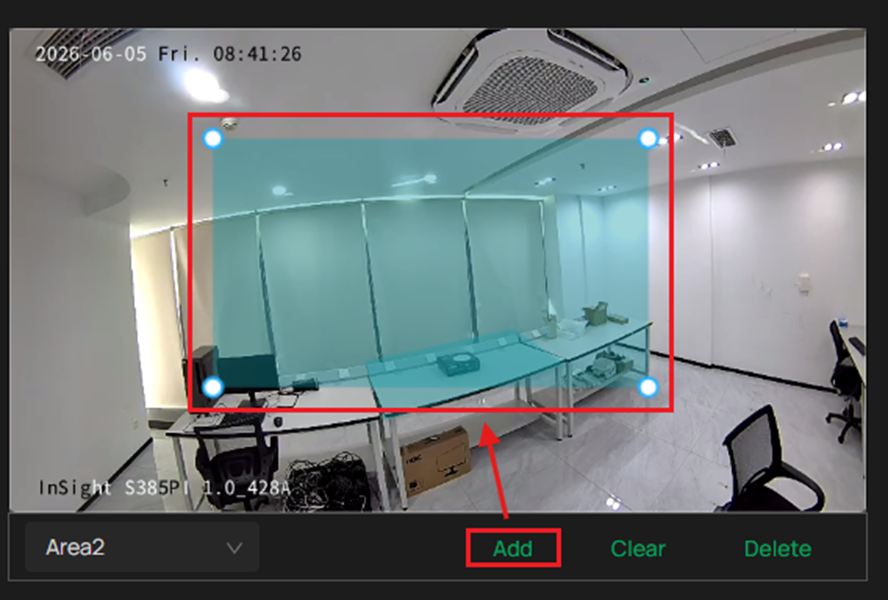
Below the preview window are shortcut buttons for Delete, Clear, Add, and clicking to switch regions.
Add: Click to add a new region directly.
Delete: Delete an area after selecting it.
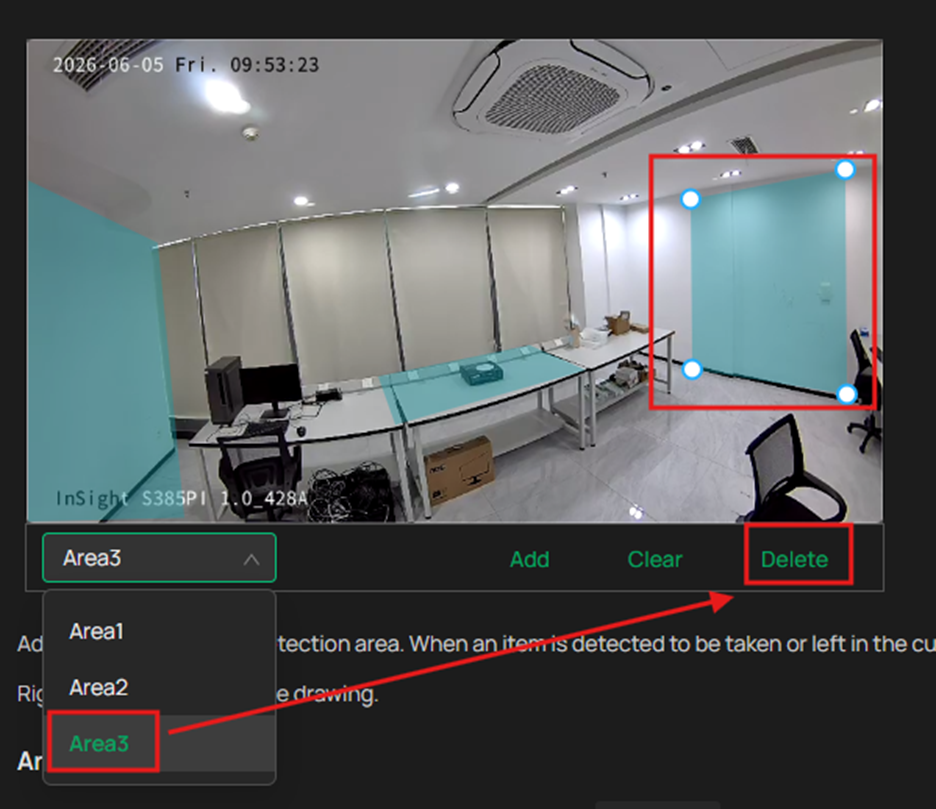
Clear: Delete all areas with one click.
Step 3. If you want to configure the parameters, first select the area where you need to adjust the parameters, and then you can configure each parameter.
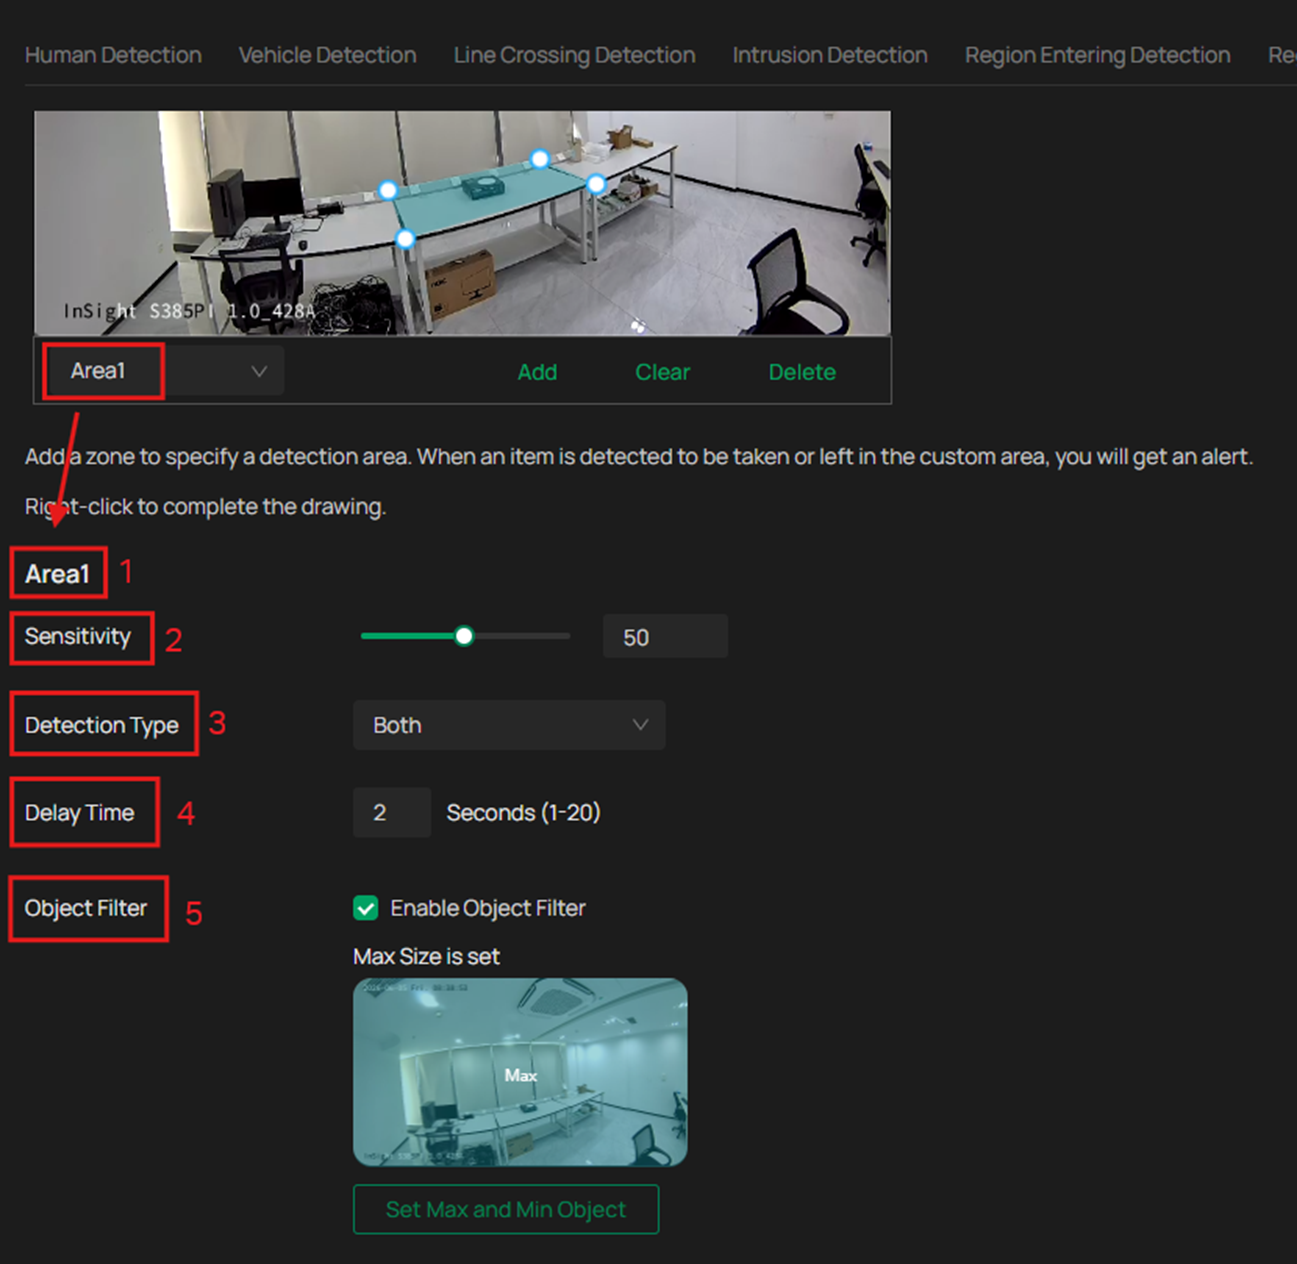
You can modify the value by entering a number or dragging the scroll wheel.

|
Sensitivity Setting |
Description |
|
Low Sensitivity (e.g., 20) |
A significant change in the detection area is required to trigger an alarm. |
|
Medium Sensitivity (e.g., 50) |
VIGI IPC defaults to a sensitivity of 50, suitable for the vast majority of usage scenarios. |
|
High Sensitivity (e.g., 80) |
Only a slight change in the detection area is needed to trigger an alarm. |
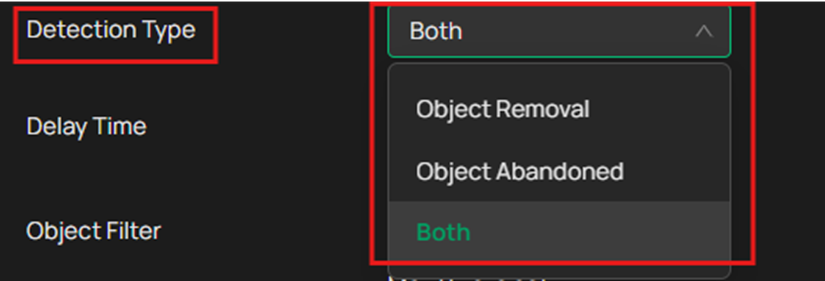
You can choose to detect only “Object Abandoned,” or only “Object Removal,” or Both.
- Delay Time
The core purpose of the Delay Time is debouncing. In simple terms, it means waiting for a certain period of time to confirm an event.
- For object abandoned detection: The system does not trigger an alarm as soon as an object enters the area. Instead, it waits for the object to remain stationary for the specified time before raising an alert. This prevents false alarms caused by pedestrians briefly staying or passing through.
- For removal detection: The system does not trigger an alarm as soon as an object disappears. Instead, it confirms that the object has been absent for the specified time before alerting. This avoids false detections due to temporary occlusion by passing pedestrians or minor camera shake.
- You can modify delay time from 1s to 20s.

- Object Filter
The core purpose of object filtering is to ensure that the camera only detects targets of a specific size by configuring the Max Object and Min Object parameters. This effectively filters out irrelevant small interferences and improves alarm accuracy. It is enabled by default.
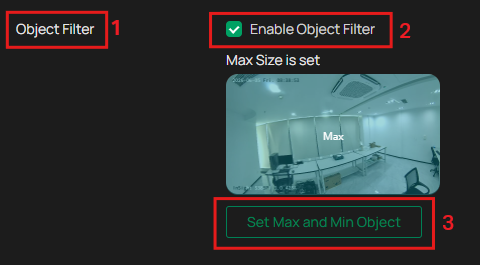
- Min Object – Serves as the entry threshold for detection. Objects larger than this value will be detected, while objects that are too small — such as distant pedestrians, small animals, fallen leaves, etc. — will be automatically filtered out.
- Max Object – Serves as the upper limit for detection. Objects smaller than this value will be detected, while objects that are too large — such as a person or vehicle moving close to the lens and filling the screen — will not be considered as valid targets.
First, click “Draw MAX Object” and “Draw Min Object,” then drag the mouse to draw the object range. Objects exceeding the Max Object range or falling below the Min Object range in length or width will be filtered out and excluded from detection.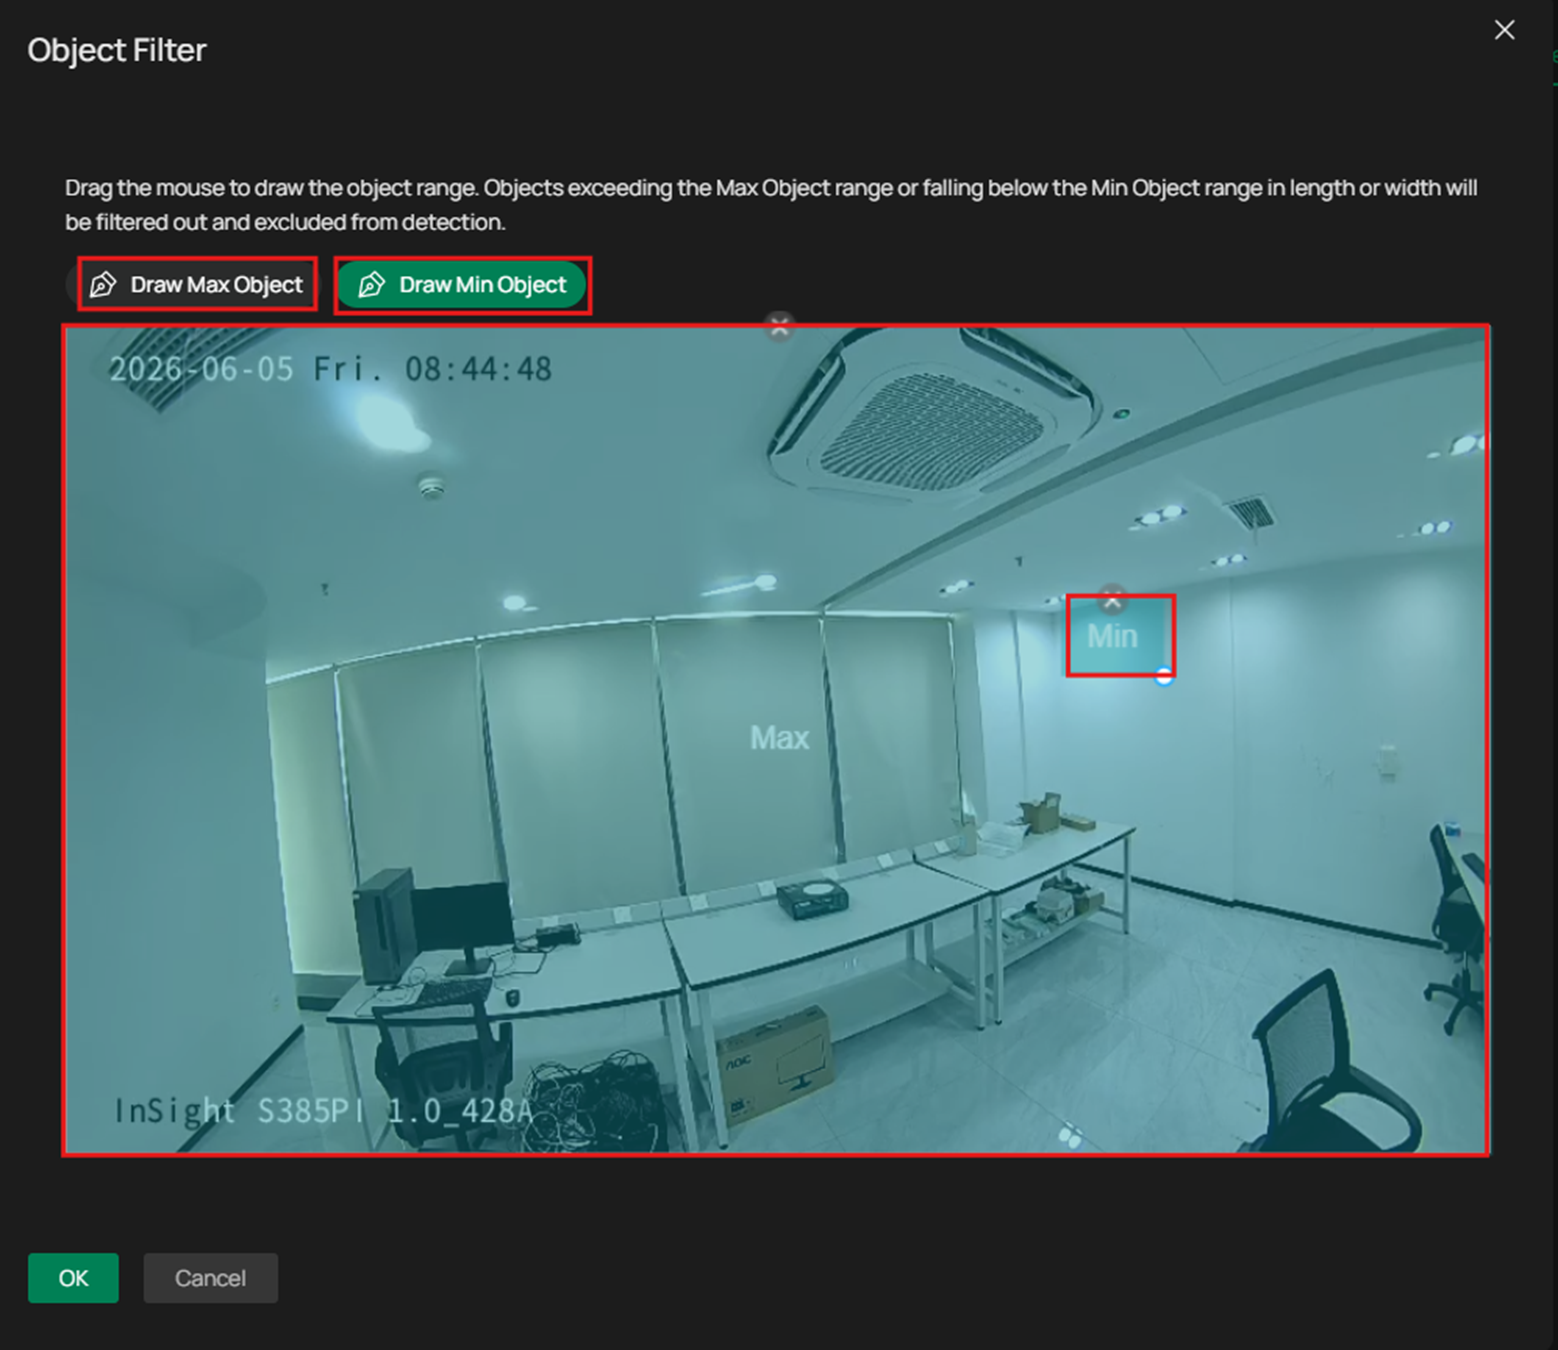
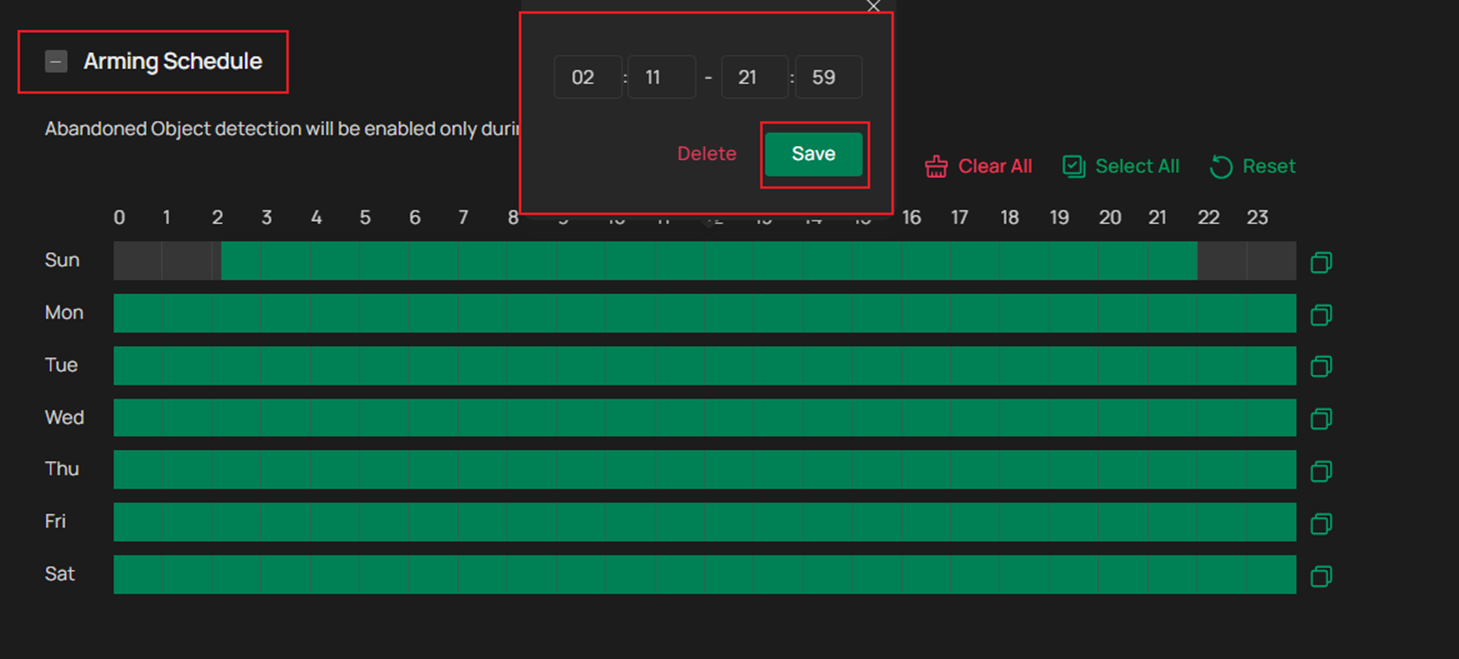
- Aiming Schedule
Abandoned Object detection will be enabled only during the specific periods.
Left click to slide and draw a time period. Click the period again to enter the start and end time. Then Click Save to modify the length of the time period. For more general Aiming Schedule settings, please follow How to Configure Intrusion & Region Entering & Region Exiting & Loitering Detection Function of My VIGI Camera | TP-Link
The VIGI IPC offers a wide range of alarm linkages that can be selected on demand.
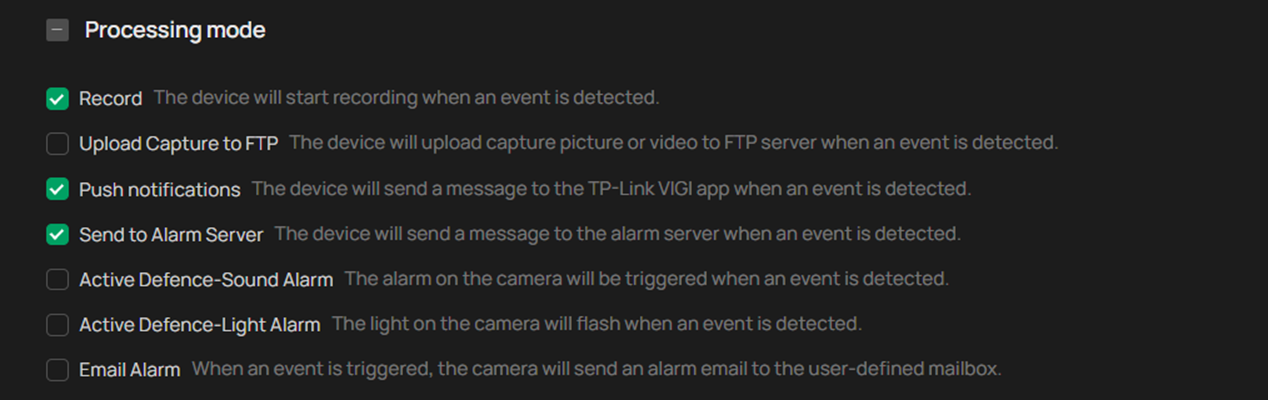
Note: If you need to set the linkage method, the functions of process mode should be enabled.
|
Linkage methods |
Description |
|
Record |
The device will start recording when an event is detected. Details can be found in Storage> Recording Schedule |
|
Upload Capture to FTP |
The device will upload capture picture or video to FTP server when an event is detected. Details can be found in Network Settings> FTP Settings |
|
Push notifications |
The device will send a message to the TP-Link VIGI App/ VIGI VMS Cloud/ VIGI VMS Local when an event is detected. |
|
Send to Alarm Server |
The device will send a message to the alarm server when an event is detected. Details can be found in Event> Alarm Server |
|
Active Defence-Sound Alarm |
The alarm on the camera will be triggered when an event is detected. Details can be found in Event> Active Defence> Sound Alarm |
|
Active Defence-Light Alarm |
The light on the camera will flash when an event is detected. Details can be found in Event> Active Defence> Light Alarm |
|
Email Alarm |
When an event is triggered, the camera will send an alarm email to the user-defined mailbox. Details can be found in Network Settings> Email |
Key Notes
For optimal detection results, please strictly adhere to the following requirements:
-
- Object Requirements
|
Requirements |
Specifics |
|
Size |
|
|
Shape |
|
|
Material |
|
|
Color |
|
|
Abandoned Duration |
|
-
- Lighting and Interference
- Avoid areas with glass, reflective floors/water, tree branches, shadows, or insects.
- Do not use backlit scenes or direct sunlight.
- Scene Requirements
- Prefer environments with sparse targets and stable lighting. Not recommended for crowded scenes or rapidly changing illumination.
- Avoid large‑scale single‑person occlusion, camera shaking, moving leaves/shadows, frequent opening/closing of sliding gates, or dense pedestrian flows in the frame.
Conclusion
You have learnt how to configure Object Abandoned and Removal Detection function.
Get to know more details of each function and configuration, please go to Download Center to download the manual of your product.
Looking For More
هل تجد هذه الأسئلة مفيدة؟
مشاركتك تساعدنا في تحسين الموقع


TP-Link Community
Still need help? Search for answers, ask questions, and get help from TP-Link experts and other users around the world.