How to Transfer Deco Ownership in the Deco App
This guide explains how to transfer Deco ownership by changing the owner account directly in the Deco app, without performing a factory reset or reconfiguring your network settings. It applies to anyone switching TP-Link accounts or transferring a Deco network to a new owner. Before you begin, update both the Deco app and your Deco firmware to the latest version.
Note: Some Deco models do not currently support this feature. Support will be added via firmware updates in the future. This process will only unbind the selected network. All other networks associated with your TP-Link ID will remain unaffected.
Key Takeaways
- You can change the Deco network owner account directly in the Deco app without performing a factory reset or reconfiguring the network.
- Before starting, both the Deco app and Deco firmware must be updated to the latest version.
- The new owner must already have a TP-Link ID created in the Deco app before the transfer can be completed.
- During the transfer, the current owner's phone must be connected to the Deco Wi-Fi network.
- After the transfer is initiated, the new owner receives a verification email from TP-Link (no-reply@email.tp-link.com) with steps to bind the Deco network to their account.
Steps to Change the Deco Network Owner Account
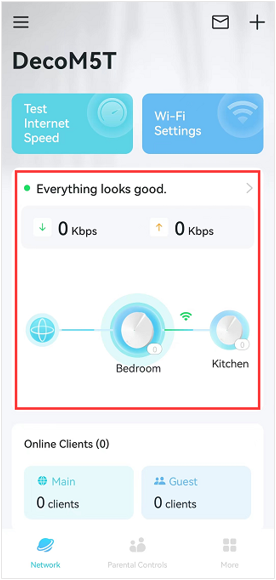
Step 1: Open the Network Map
Connect your phone to the Deco Wi-Fi network. Then open the Deco app, click on the network map.
Step 2: Tap Change Network Owner
Click on the icon at the top right corner, then tap Change Network Owner.

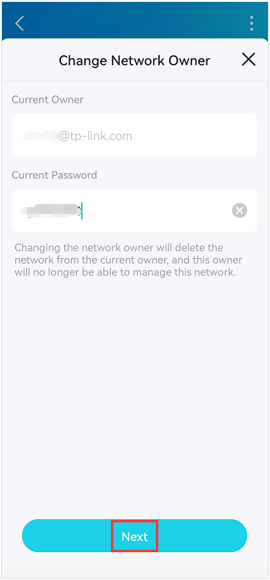
Step 3: Enter the Current Owner Password
Enter the password for the current owner account, then tap Next.
Note: It’s the password that you use to log in to the Deco app with the current owner’s account.
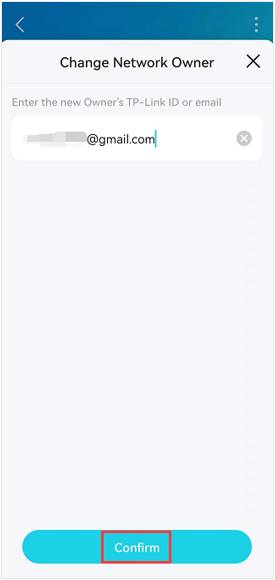
Step 4: Enter the New Owner's TP-Link ID or Email
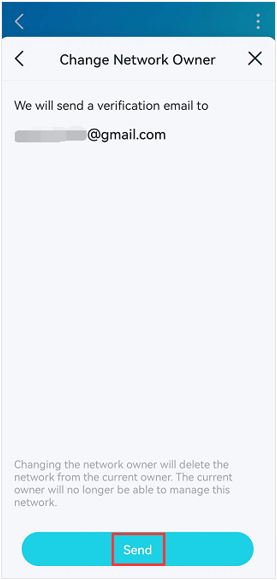
Enter the new Owner’s TP-Link ID or email, then tap Confirm > tap Send. The Deco app will send a verification email to the new owner’s email.
Note: The new owner must have an existing TP-Link ID created in the Deco app before proceeding.
Step 5: Confirm the Network Has Been Deleted and Log Out
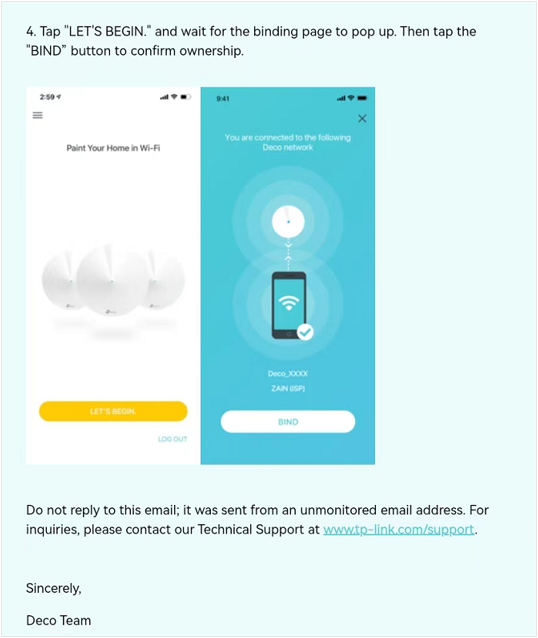
Then you will see a notice on the Deco app that “This Deco network has been deleted”, which means the Deco is not bound to the old owner account. If you press OK, you will see the “Let’s Begin” page, and please tap LOG OUT to log out of the current account.

Step 6: Check the New Owner's Email and Bind the Network
The new owner will receive an email from TP-LINK<no-reply@email.tp-link.com> with detailed steps to bind the Deco network to the new owner's account. Just follow the steps, and you will be able to log in and manage the Deco system with your new owner account.
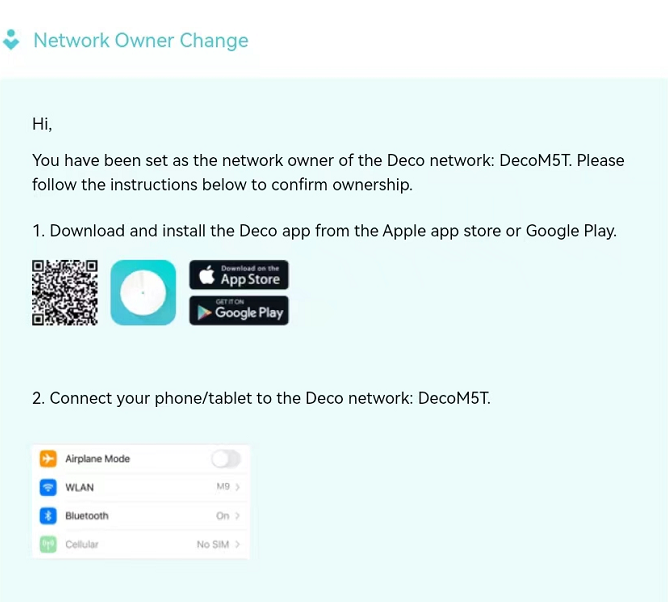
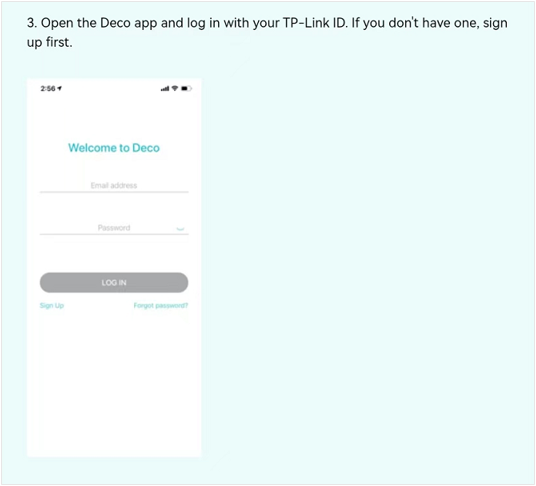
Here is the e-mail content:
¿Es útil esta pregunta frecuente?
Sus comentarios nos ayudan a mejorar este sitio.

_Overview_normal_20211225093343a.png)
