How to Configure the Wireless Router Mode on TL-WR802N/TL-WR810N
The configuration guide of TL-WR802N and TL-WR810N are similar, here takes TL-WR802N as demonstration.
Note: The default mode of TL-WR802N is wireless router mode. In wireless router mode, computers cannot configure the TL-WR802N through the Ethernet cable.
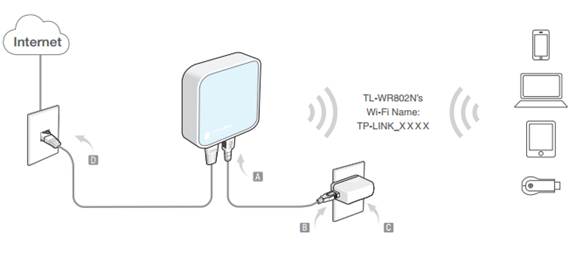
Step 1
Connect the router according to steps A to D in the below diagram.
Step 2
Wait until the router boots up, about 30 seconds, then use the default Wi-Fi Name and Password printed on the Wi-Fi Info Card to connect to the router.
Check the Internet connection on your laptop or smartphone, and please note that:
- If you can access Internet without any restriction, no other configuration is required.
- If you're redirected to a splash page authentication, please complete it to access the Internet.
- If you want to customize your own wireless network, continue with the steps below
Wi-Fi Info Card:


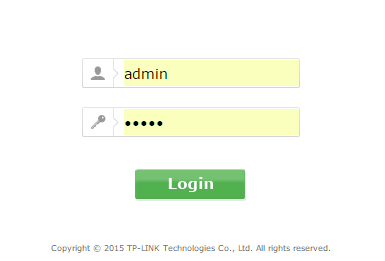
Step 3
Launch a web browser and type http://tplinkwifi.net or http://192.168.0.1 into the address bar. Enter admin (in lowercase) for both username and password.

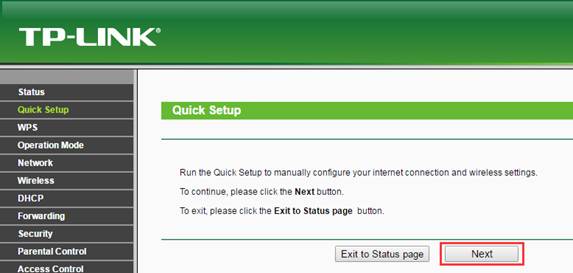
Step 4
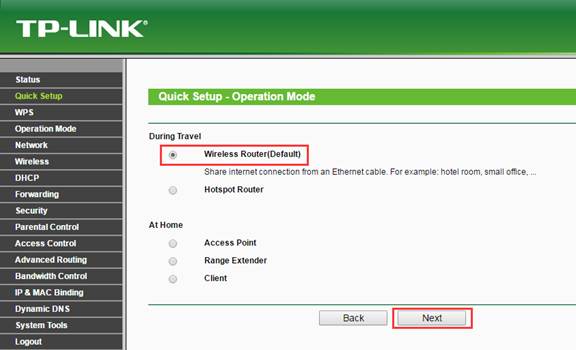
Click Quick Setup on the left panel, and click Next to start configuring the router. Select Wireless Router mode and click Next.
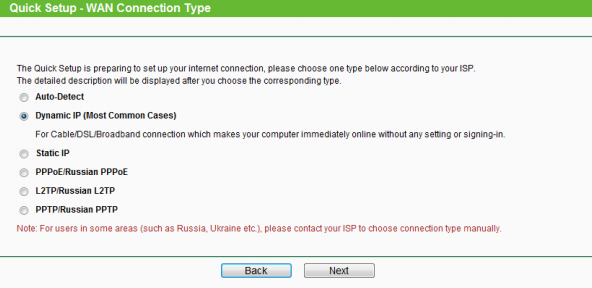
Step 5
Select the WAN Connection Type of your Internet Service Provider and follow the screen instructions to configure the parameters. When using the router in a hotel room or a small office, please select Dynamic IP.
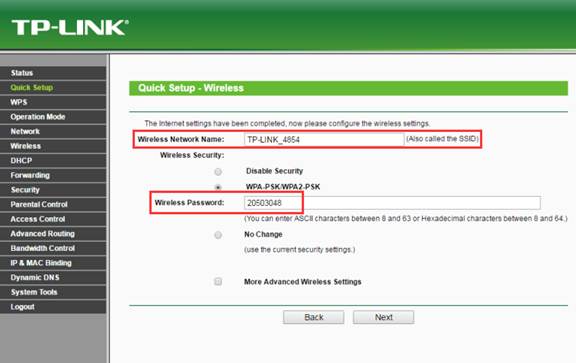
Step 6
On the Wireless screen, either keep the default Wireless Network Name and Wireless Password or customize them, then click Next.
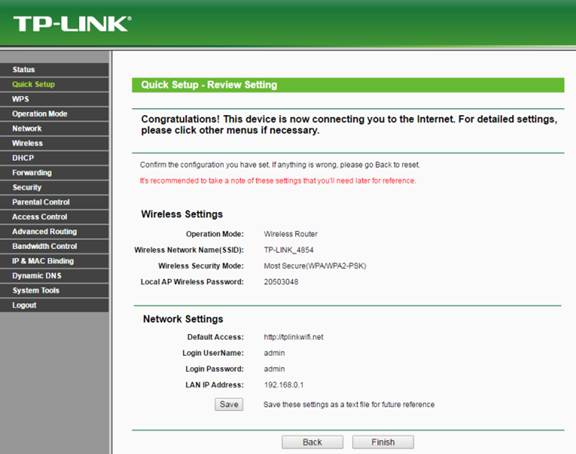
Step 7
Click Finish to complete the configuration.


In this way your devices will be able to access to Internet via the wireless connection. If it doesn't work, please feel free to contact us (support-contact.html ).
Get to know more details of each function and configuration please go to Download Center to download the manual of your product.
¿Es útil esta pregunta frecuente?
Sus comentarios nos ayudan a mejorar este sitio.
3.0-L-D-2000px_normal_1584496922931o.png)