How to connect your HS300 KP303 to the home network via Kasa app?
This article aims to introduce how to setup the Kasa smart power strip (HS300/KP303) so that you can control it via the Kasa APP locally and remotely. Here takes HS300 as demonstration.
Before we begin:
· Please download Kasa Smart app from App Store or Google Play and install it on your smart phone.
· Connect your smart phone to your home Wi-Fi network (2.4 GHz only).
· Plug HS300 into a power socket.
Steps to configure the HS300 via Kasa APP.
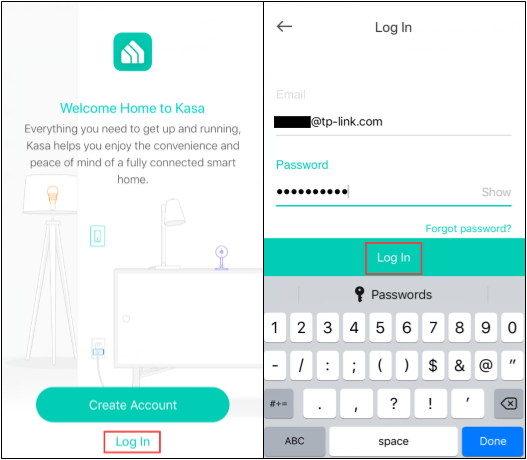
1. Open the Kasa APP and login to your cloud account.
a. If you don’t have an account, please sign up with one refer to How to create a TP-Link Cloud Account on Kasa?
b. Login the Kasa APP with your cloud account.
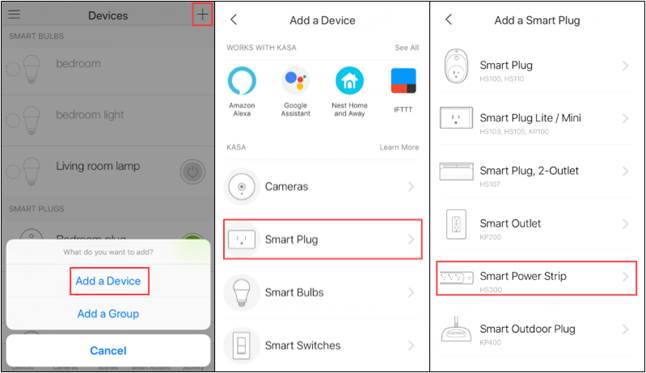
2. Add HS300 on Kasa APP. Tap “+” and “Add a Device”, then click on “Smart plug” and choose Smart Power Strip.
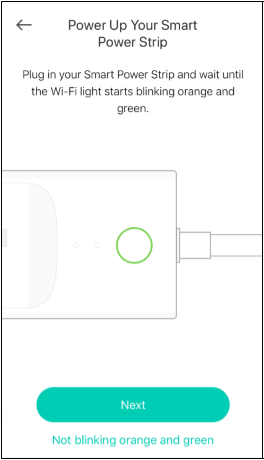
3. Follow the instruction on the Kasa APP to power on the HS300, wait for the Wi-Fi light blinking orange and green.
If the light do not blinking orange and green, please reset the HS300 as per User Guide/Quick Installation Guide.
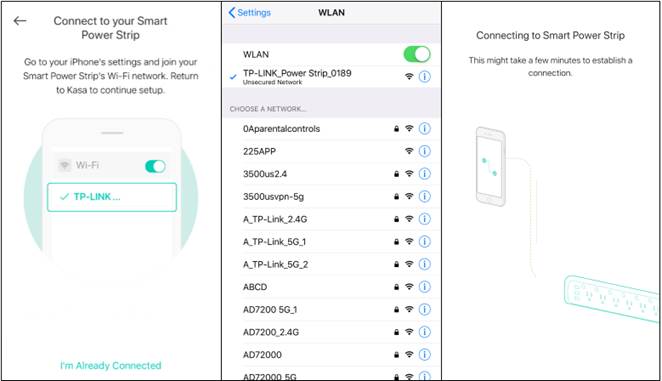
4. Connect your phone to the HS300’s Wi-Fi. There is a difference between Android and iOS phone in this step.
For Android: Kasa will look for the Wi-Fi automatically, and it will take about a minute.
If you have problem in this step, please go to Settings->Wi-Fi on your smart phone and connect to the Wi-Fi network of the HS300 manually (same as iOS).
For iOS: You need to connect to the Wi-Fi network of the HS300 manually, please go to Settings->Wi-Fi on your smart phone and connect to the HS300’s Wi-Fi network (TP-LINK_Power Strip_XXXX), and then go back to the Kasa APP to continue the setup process.
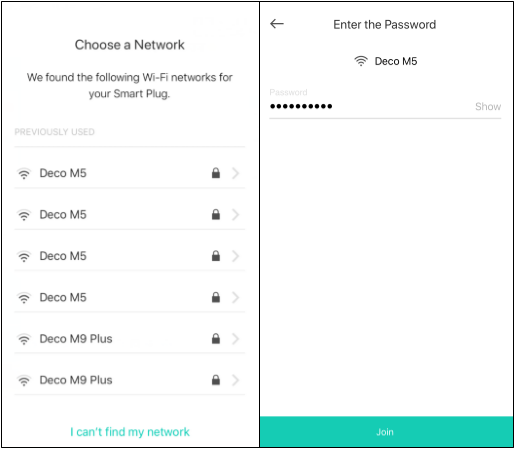
5. Connect HS300 to your home network. Here we choose “Deco M5” as our home wireless network.
If you cannot find your home network in the Wi-Fi list, please click on “Join Other Network” in the bottom of the Wi-Fi list, then enter your home network SSID and password manually. After this step, the HS300 will be connected to your home network.
6. Name your HS300.
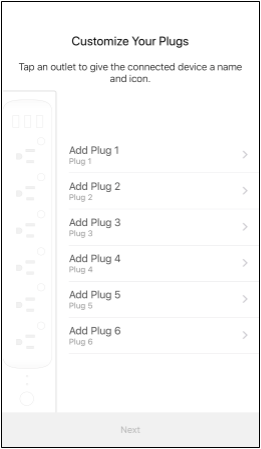
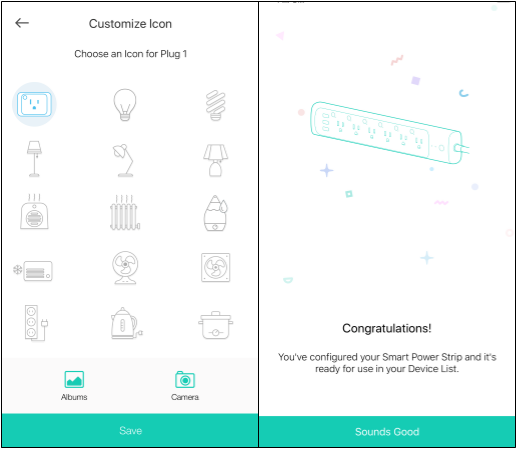
7. Customize an icon for this HS300. We can choose an icon from the list, or choose from the “Albums” of your smart phone or take a photo.
Then enjoy your HS300.
8. Go back to the Home Page of Kasa APP and you can find the new smart outlet.
Take the first plug as an example. You can tap one of the six outlets and turn to its Device Status page. On Device Status page, you can manage and control the outlet, and swipe left or right to quickly switch among the 6 outlets.
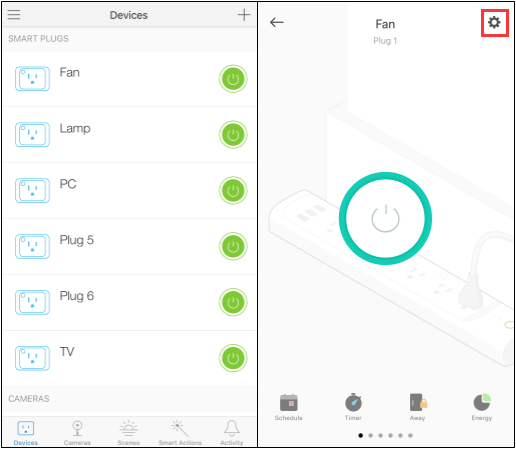
9. Tap  to enter the Device Settings page, click on “Name and Icon” to edit the name and icon of the outlet, click on “Device Info” to view the basic information of the HS300.
Note: If you encounter any problems during the above steps, you can press and hold one of the control buttons for 10 seconds to reset the power strip.
Finden Sie diese FAQ hilfreich?
Mit Ihrer Rückmeldung tragen Sie dazu bei, dass wir unsere Webpräsenz verbessern.
Von United States?
Erhalten Sie Produkte, Events und Leistungen speziell für Ihre Region