How to configure face analysis on VIGI NVR GUI and VIGI VMS Introduction
Contents
Introduction
Face Analysis uses AI algorithms to detect and capture faces appearing in the camera’s field of view, enabling quick target identification through the NVR’s AI Search function. This feature is suitable for scenarios where identifying individuals is essential, such as access control, attendance tracking, or security monitoring.
Requirements
For VIGI NVR GUI:
- VIGI camera that supports Face Analysis
- VIGI NVR that supports the AI Search function
For VIGI VMS:
- VIGI camera that supports Face Analysis
- VIGI NVR that supports the AI Search function
- VIGI Local VMS
- Ensure the IP camera is successfully added to the NVR and assigned to an active channel
Configuration – NVR GUI
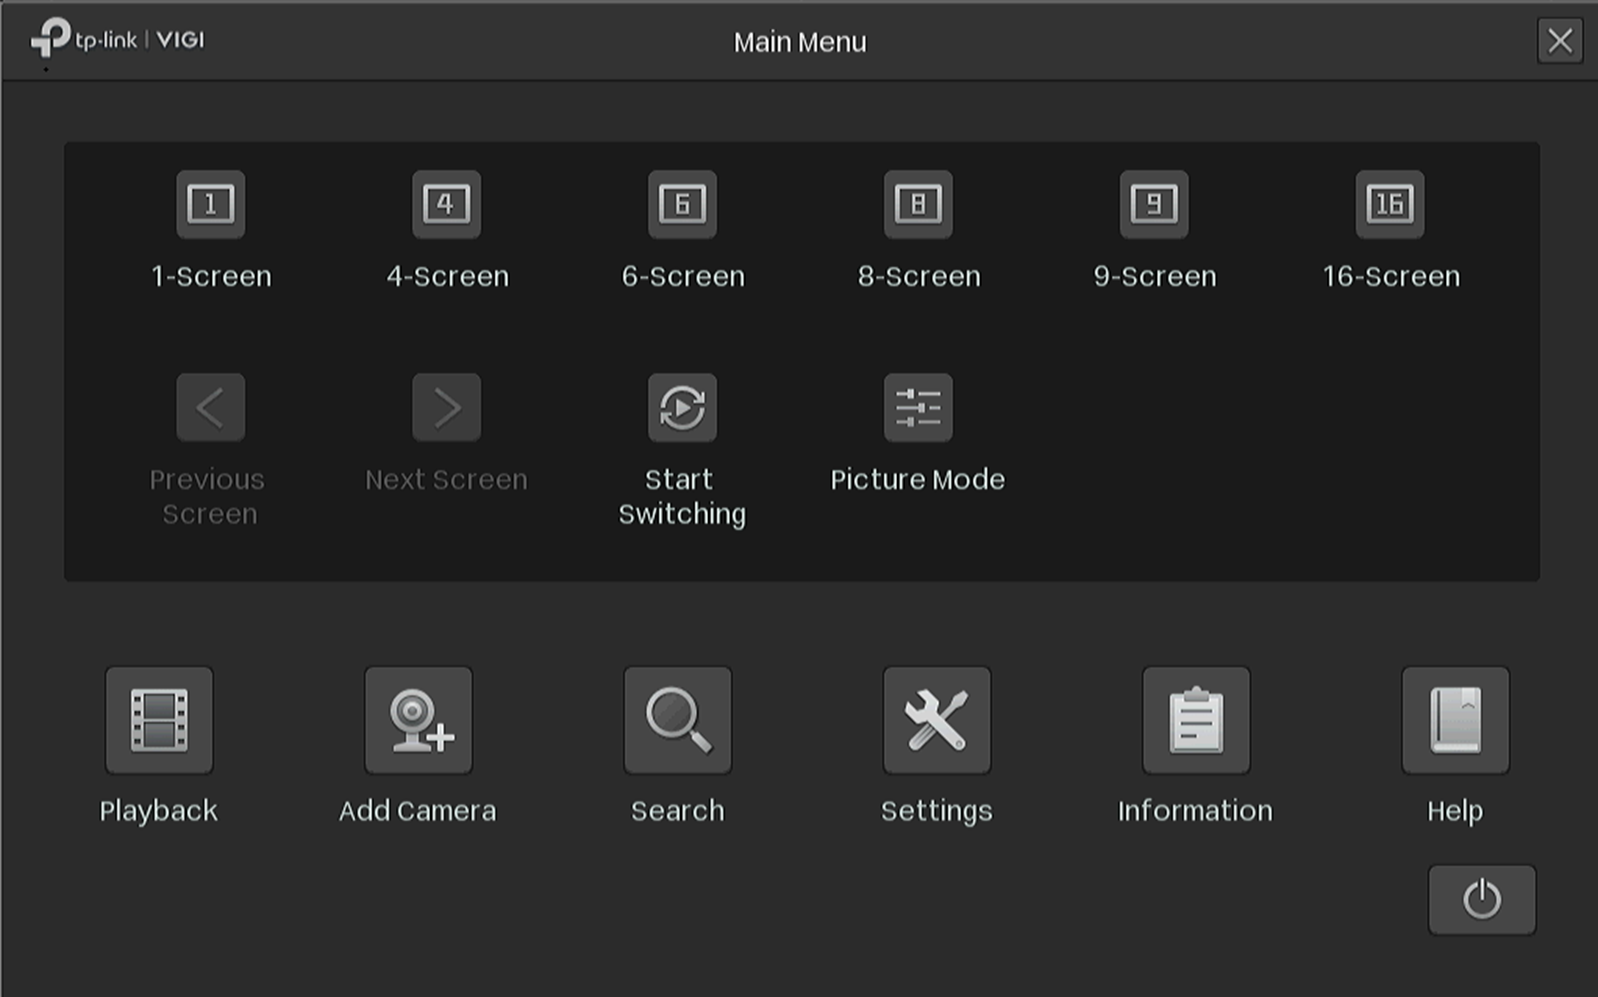
Step 1. Right-click on the screen, click Settings on the Main Menu.
Go to Settings > Event >VCA > Global Configuration. Scan the QR code and view the Privacy Policy. Then check the box to agree to the Privacy agreement and click Enable Smart Analysis On NVR.
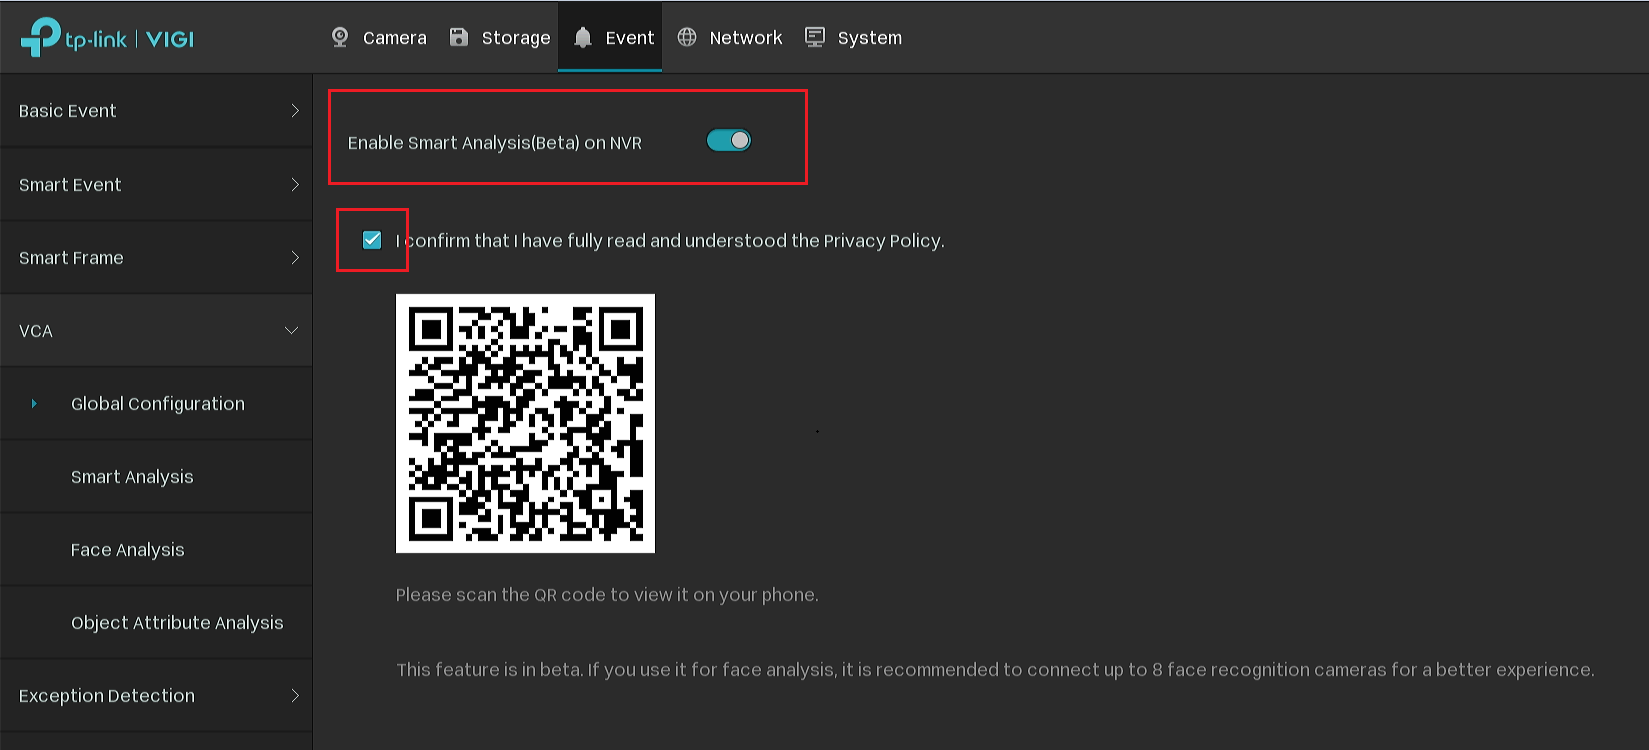
Note:
Currently, only one of the following camera functions can be selected, and the selection of multiple functions is not supported.
Smart Event: Basic smart events, such as line crossings, Intrusion Detection, etc., are supported by the camera by default
Face Analysis: Used to analyze the faces that appear on the screen
Object Attribute Analysis: Use to identify human and vehicle attributes.
Step 2. Adding cameras that support AI Search to NVR.
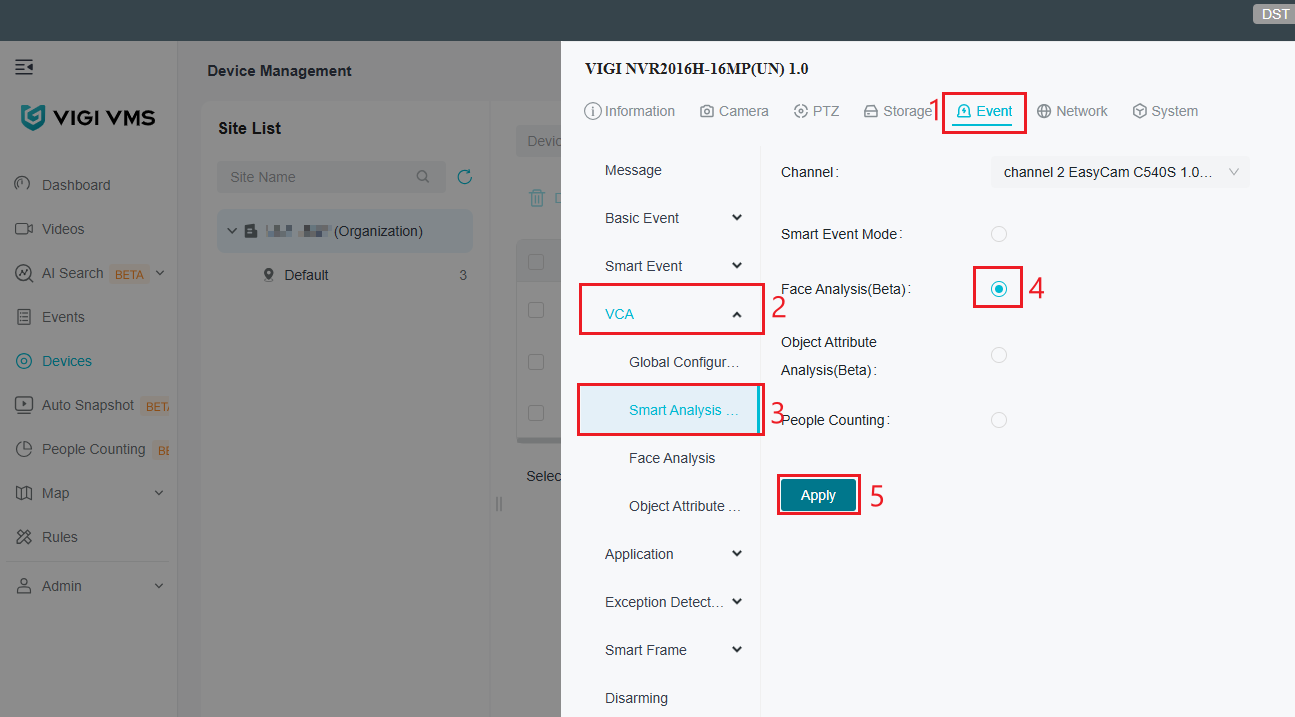
Step 3. Go to Settings> Event>VCA>Smart Analysis. Select the camera and enable the Face Analysis. Click Apply.

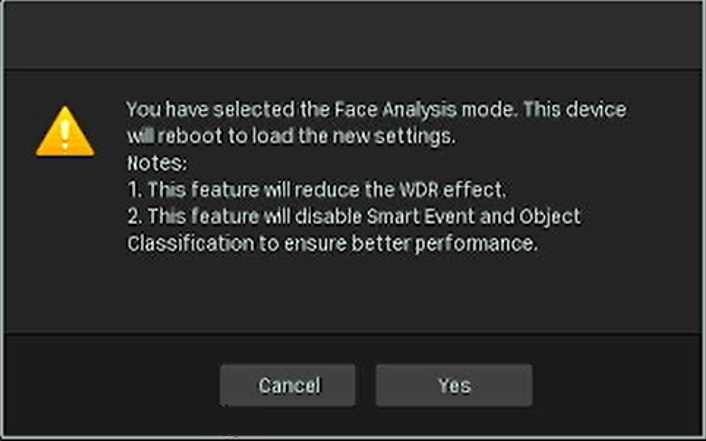
Step 4. There’ll be a small window that pops up. After clicking Yes, the camera will reboot automatically. Please wait for the camera to come back online.
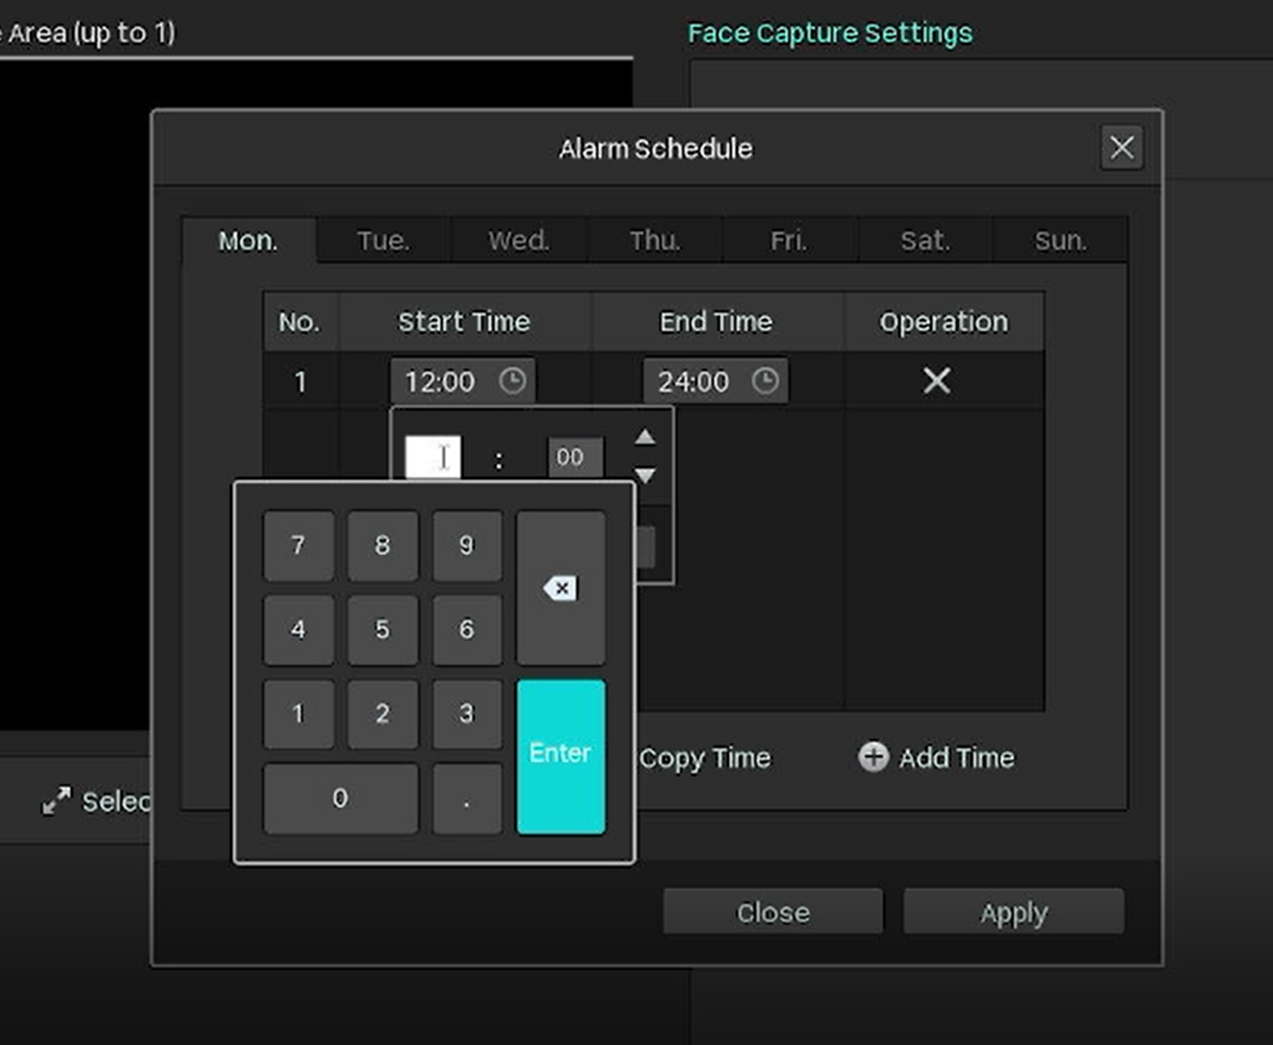
Step 5. After the camera restarts the connection, go to VCA > Face Analysis and enable Face Analysis. You can adjust the face capture area and Alarm Schedule on this page.
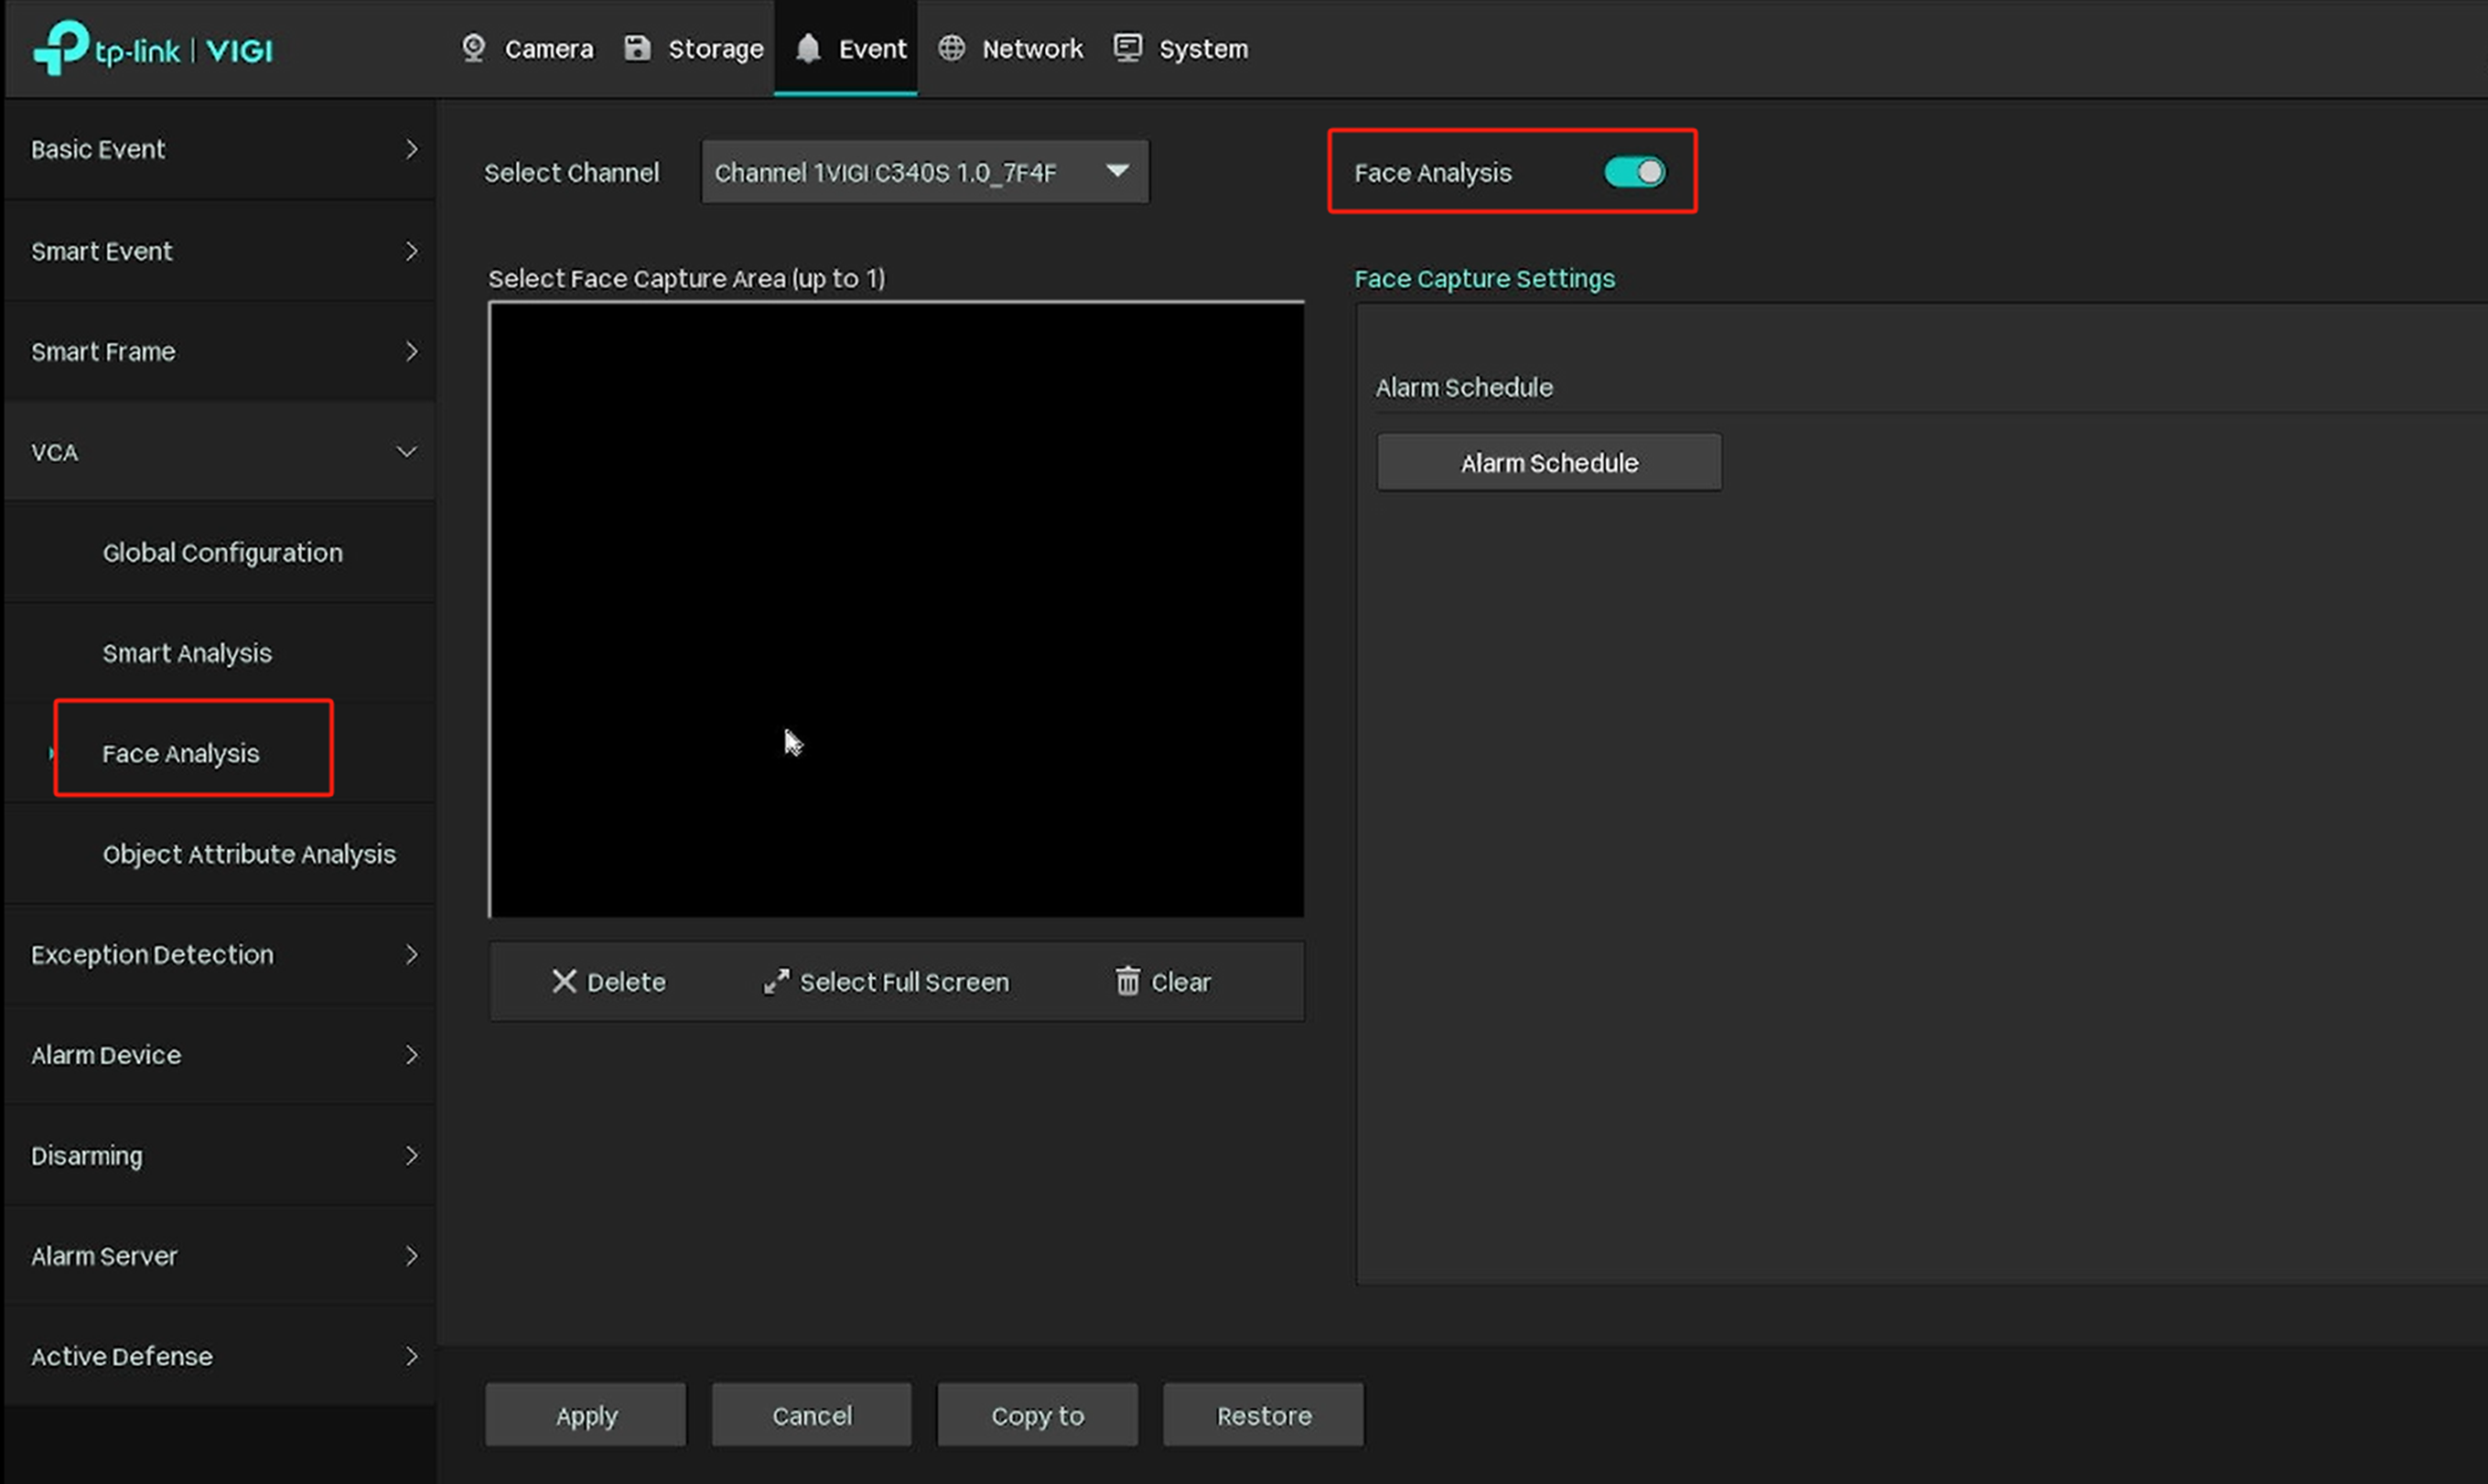
Step 6. After configuring Face Analysis settings, click Apply.
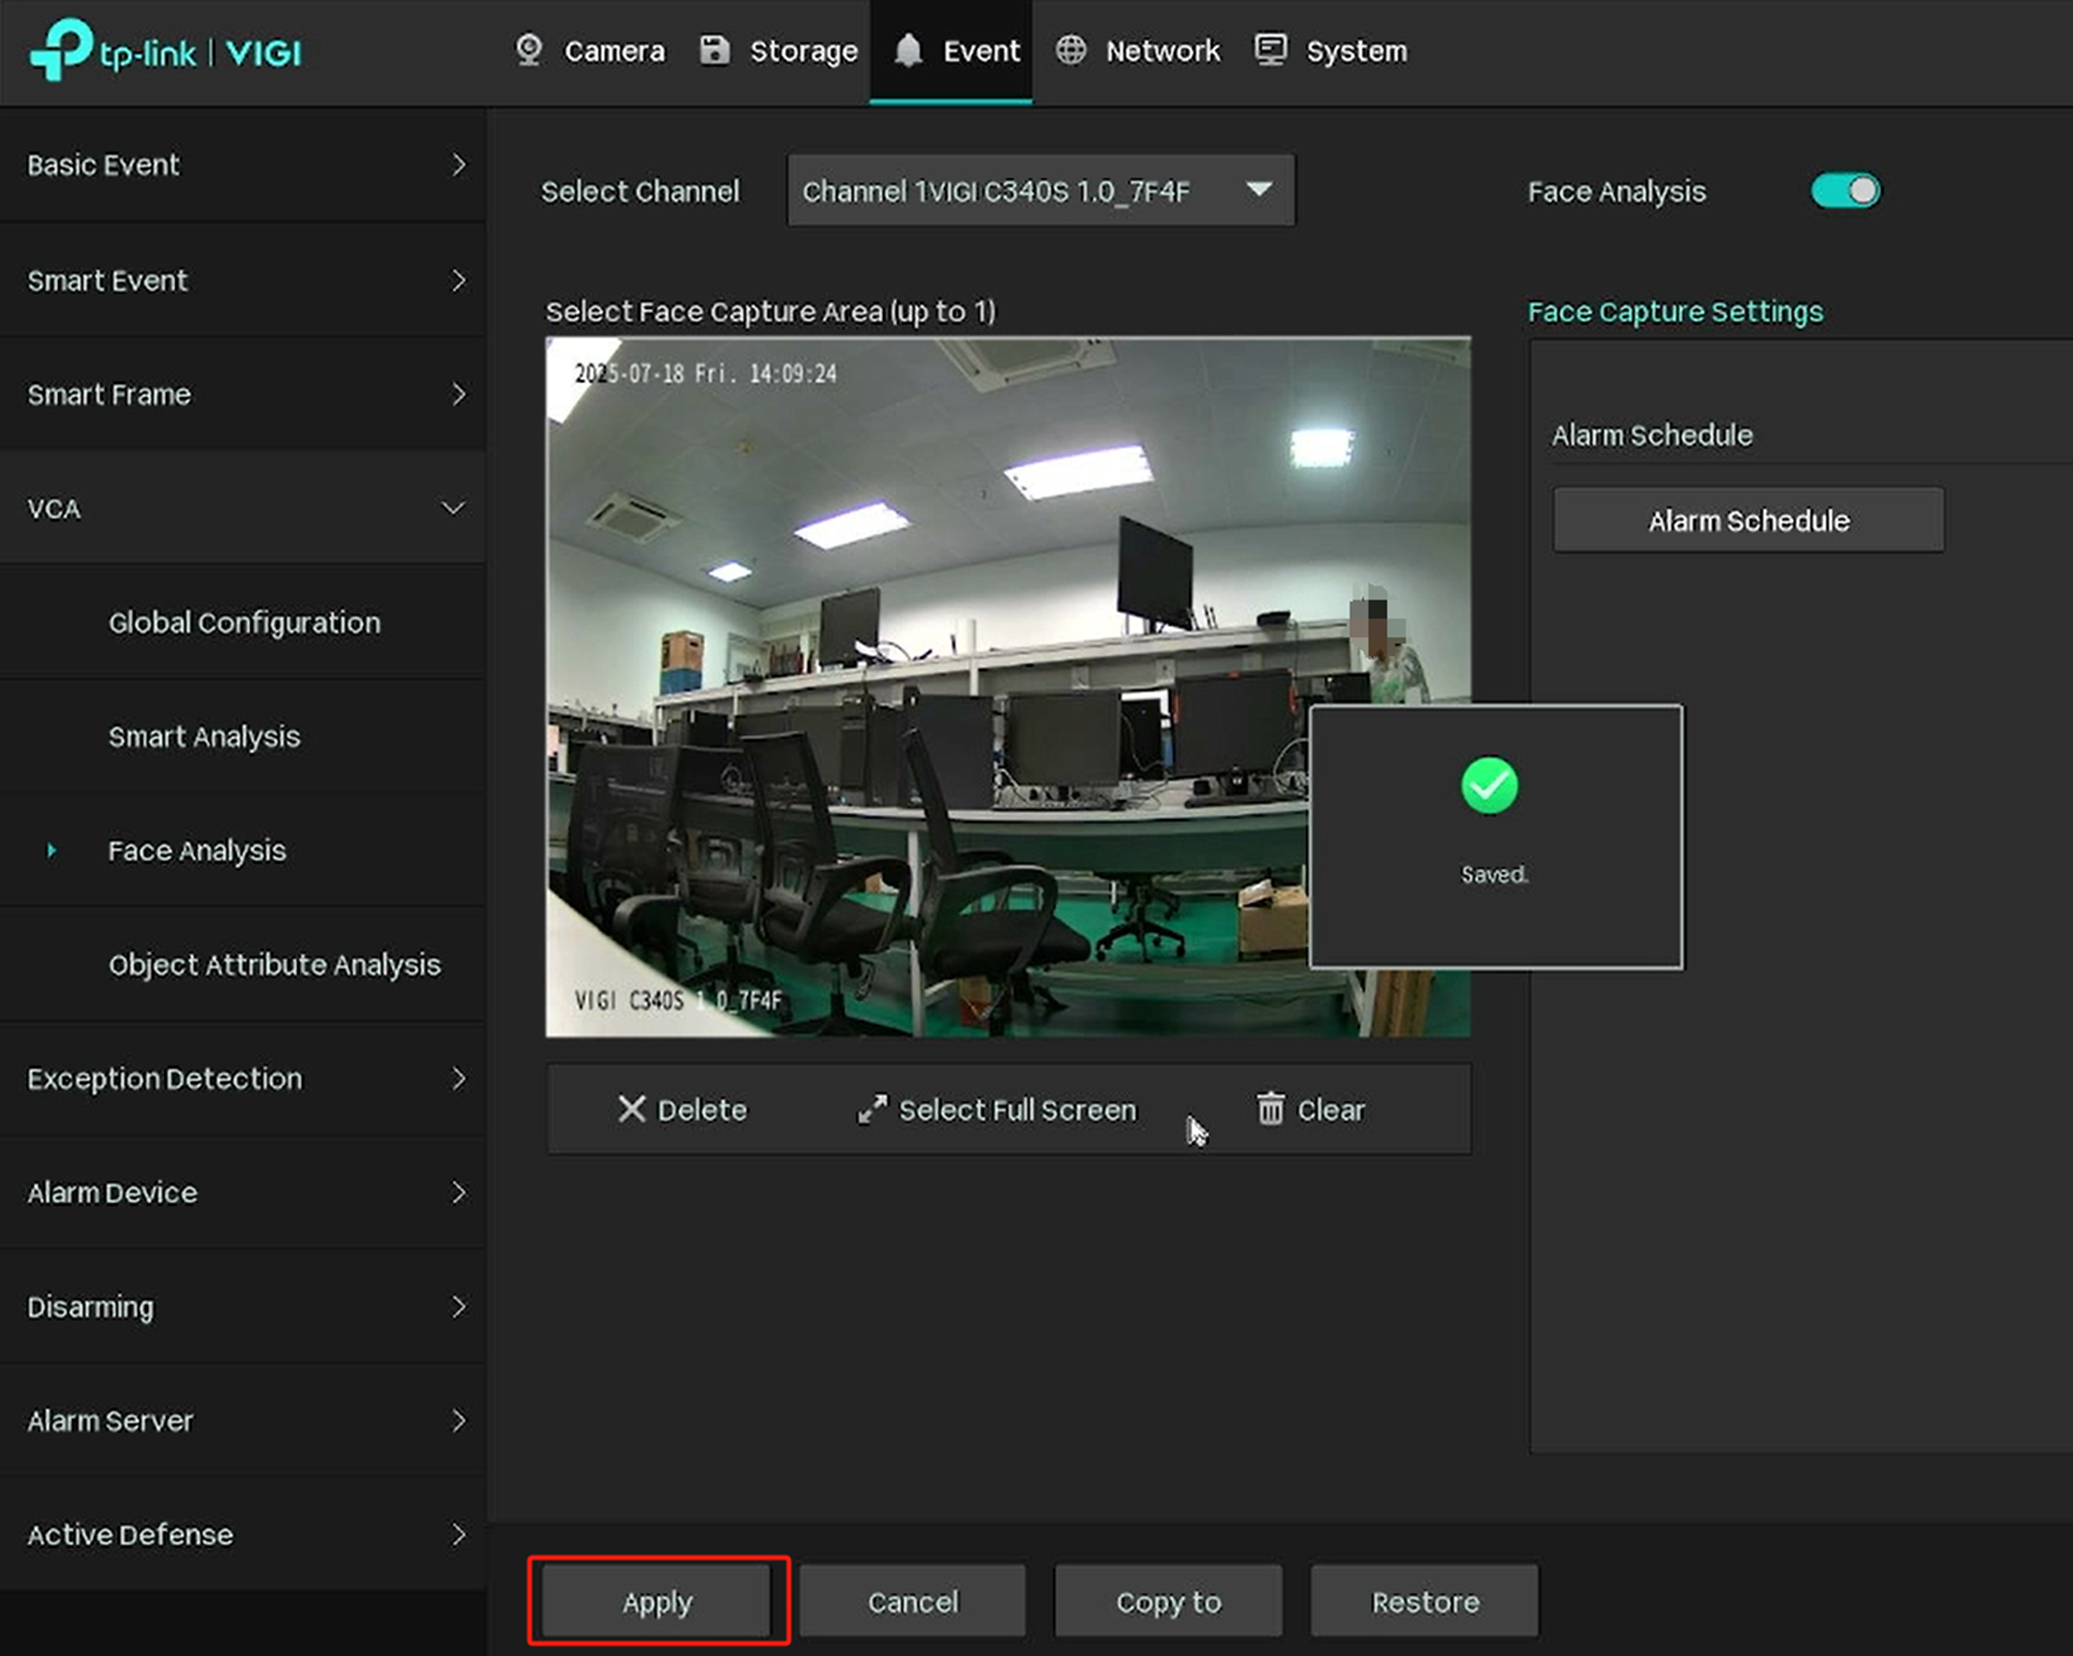
Note: After the configuration, please ensure a search target is visible on the screen, and that the installation height and angle meet the camera AI search shooting requirements. Once a certain amount of smart data is stored, it can be searched using the AI Search function on the GUI. If the detection target person is too far away from the camera, the face needs to be facing the camera.
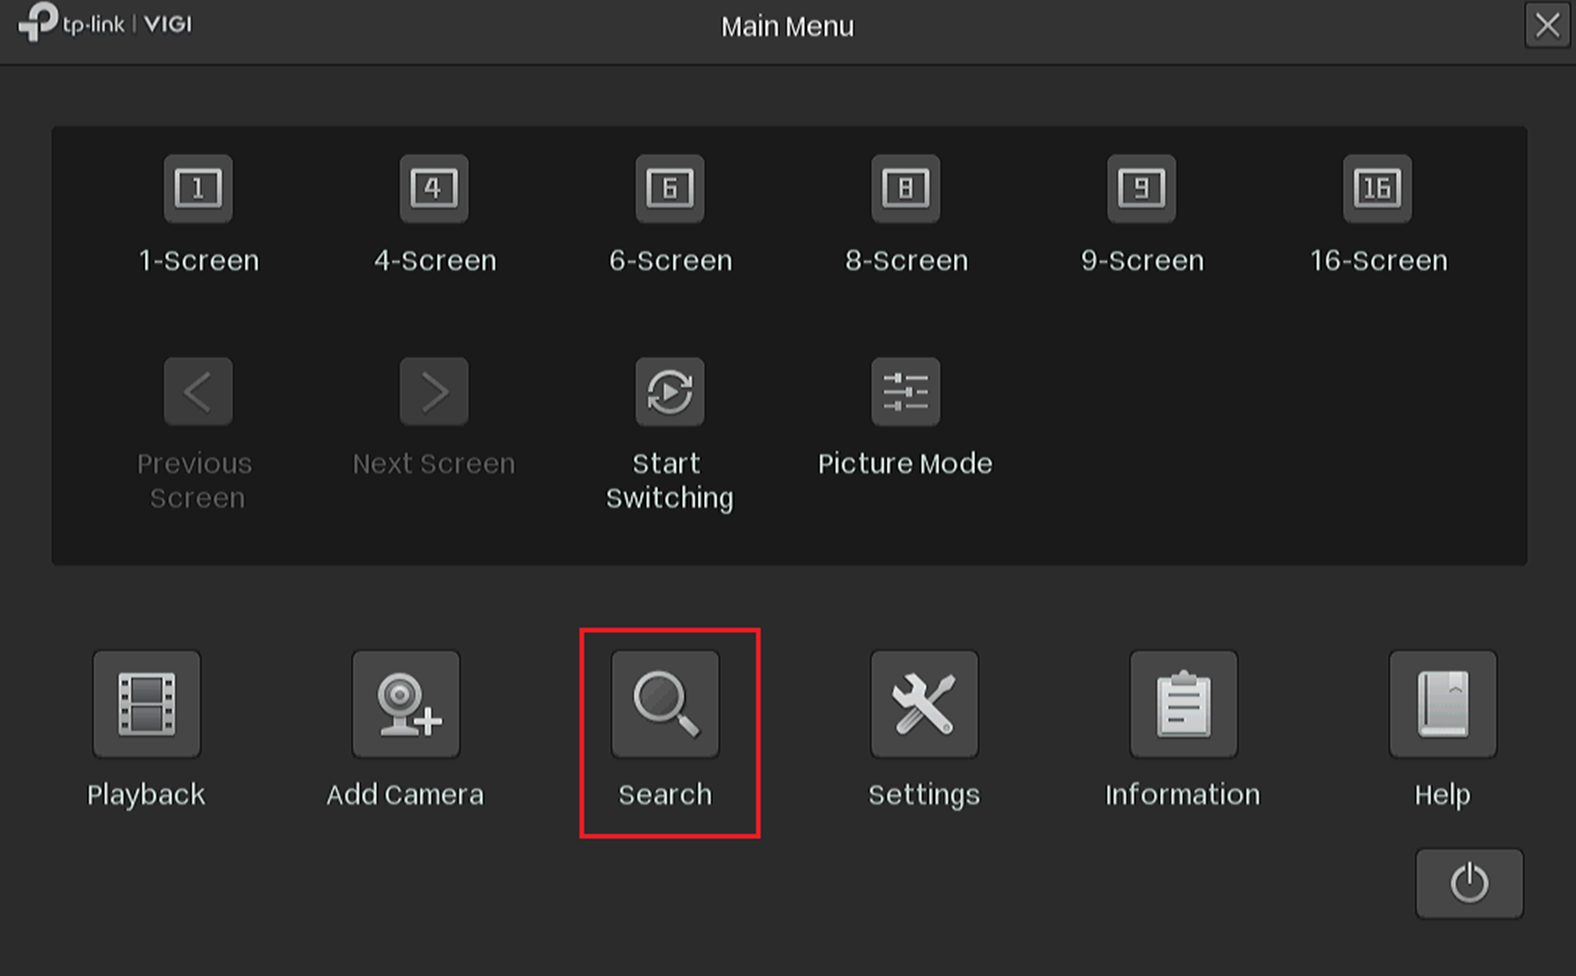
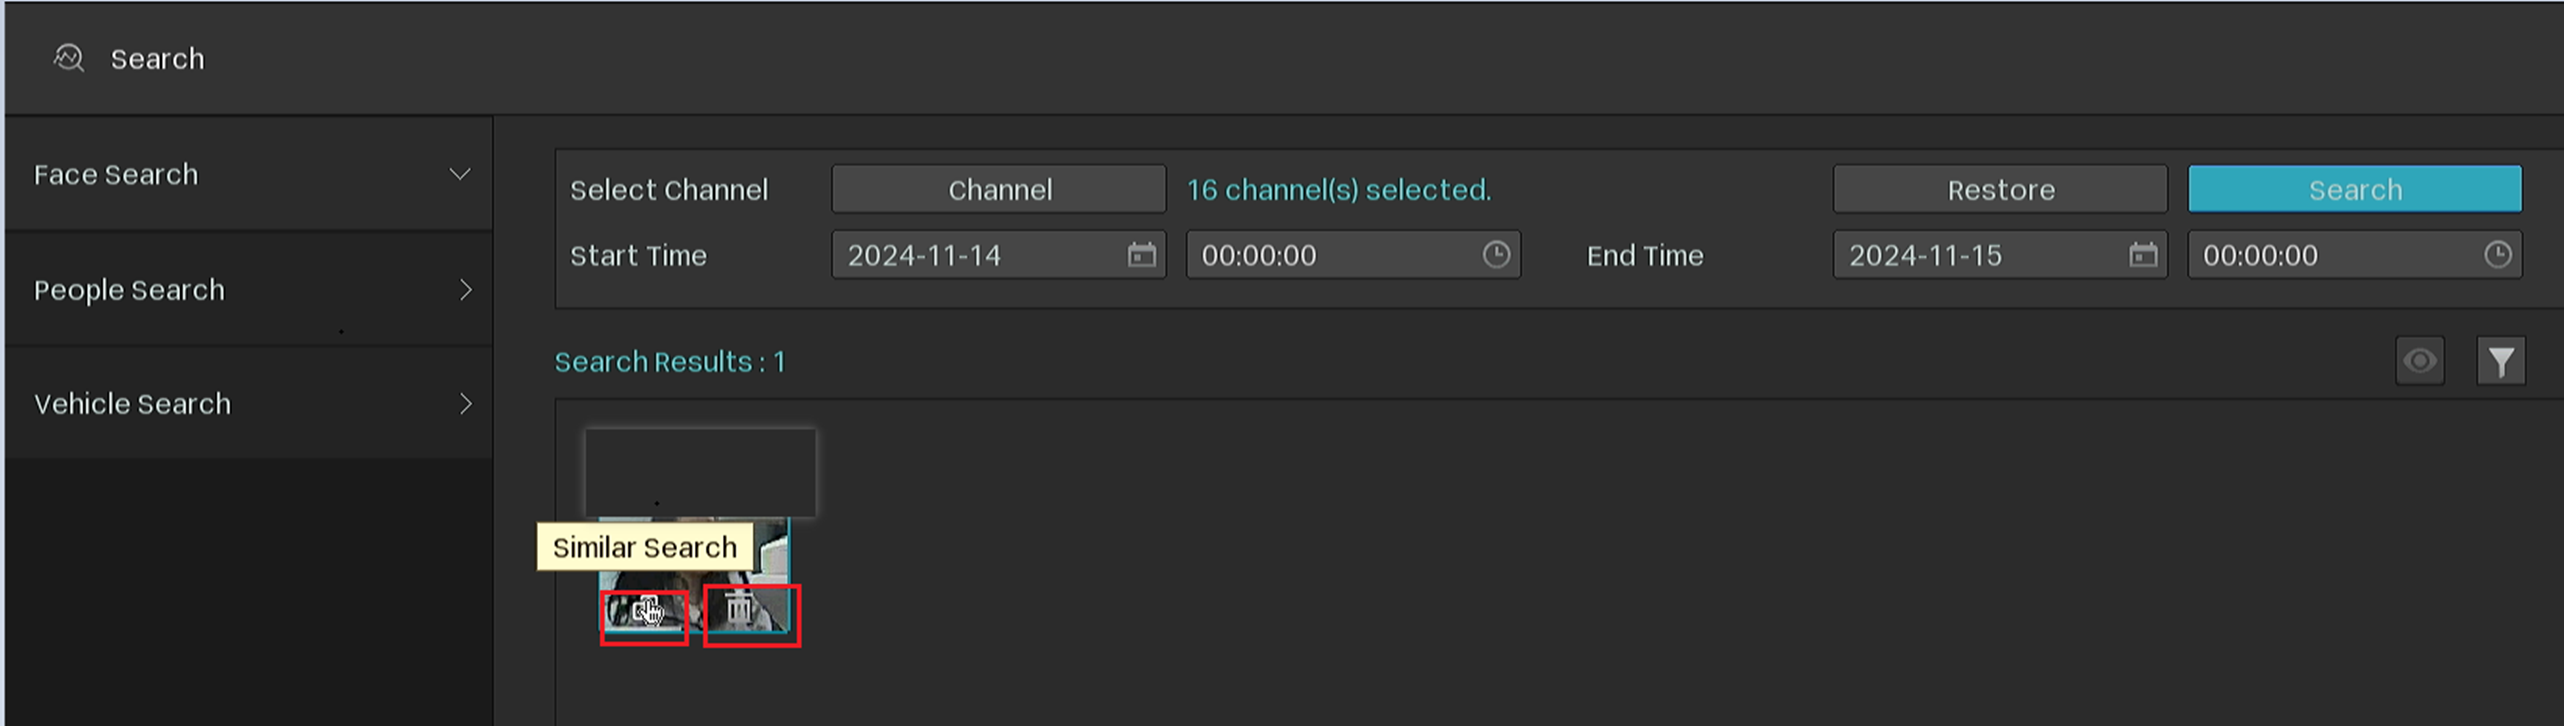
Step 7. Go back and right-click on the screen, click Settings on the Main Menu, and go to Search.
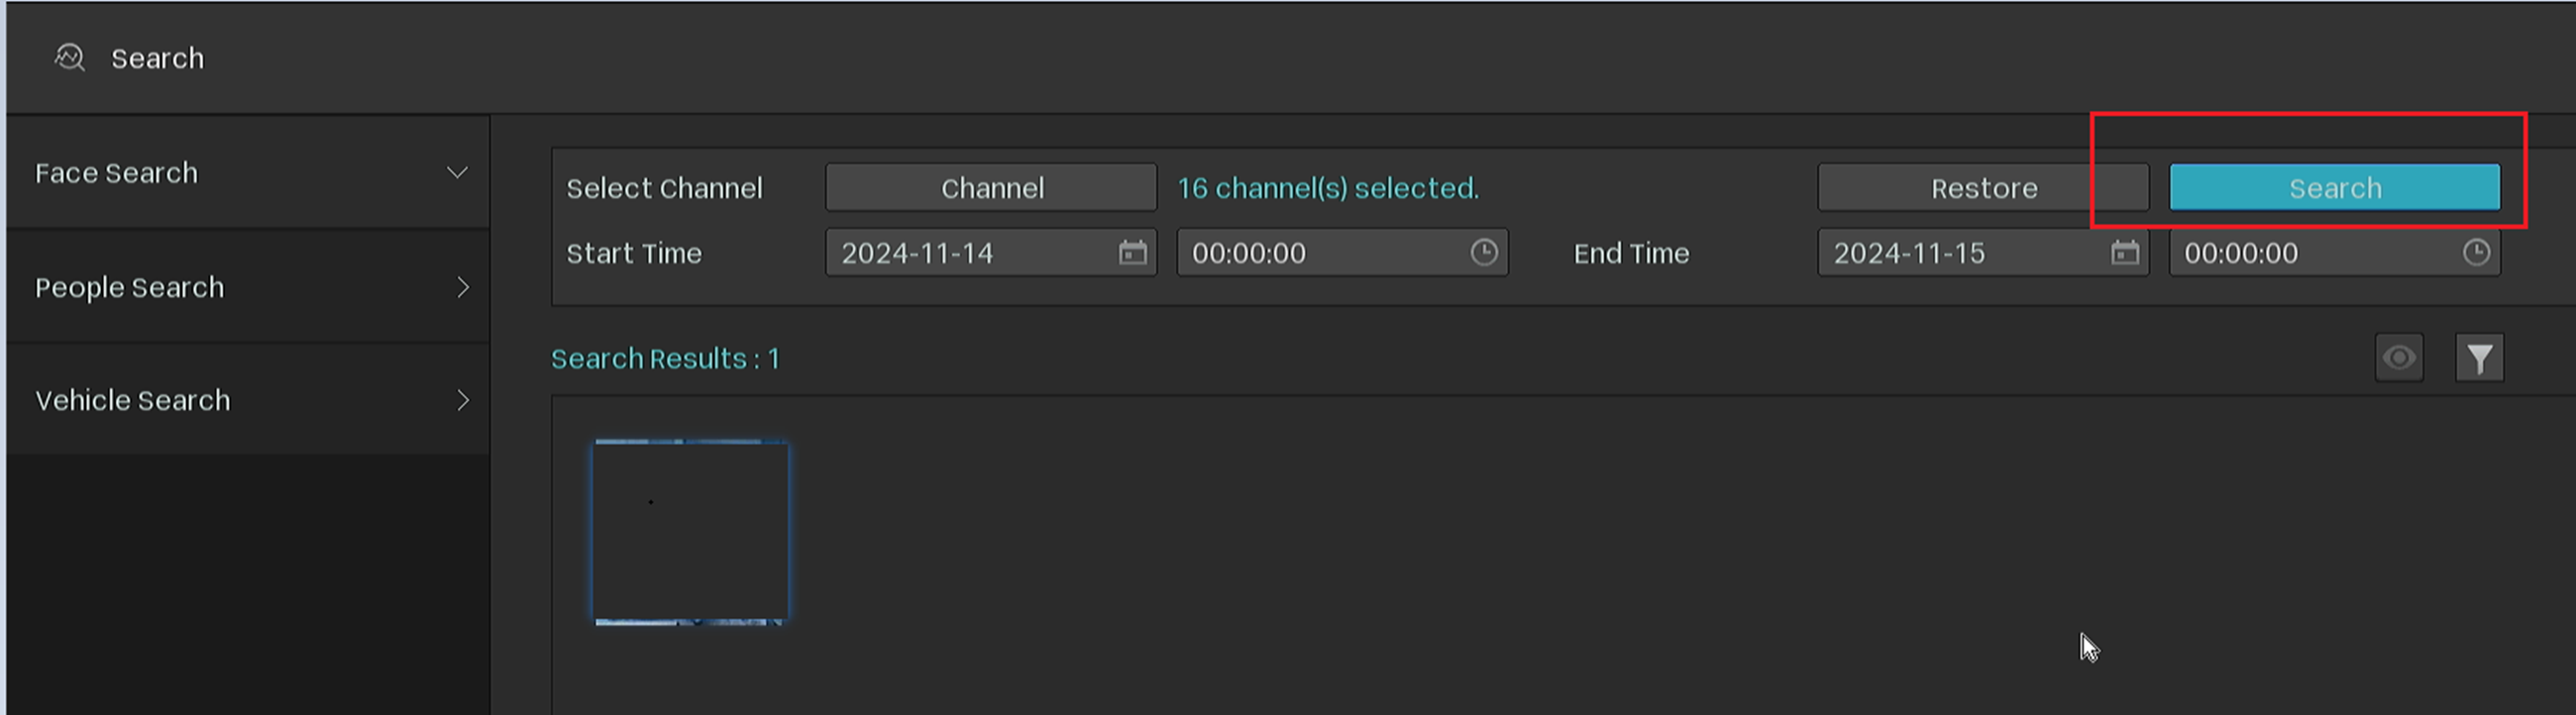
Step 8. Choose Face Search. You can configure the search channel and time range, and click Search to search for eligible captures.
Move the mouse over the bottom left corner of the thumbnail. This will allow you to search for similar pictures. Move the mouse over the bottom right corner of the preview picture. This will allow you to delete the face capture.
Configuration – VIGI VMS
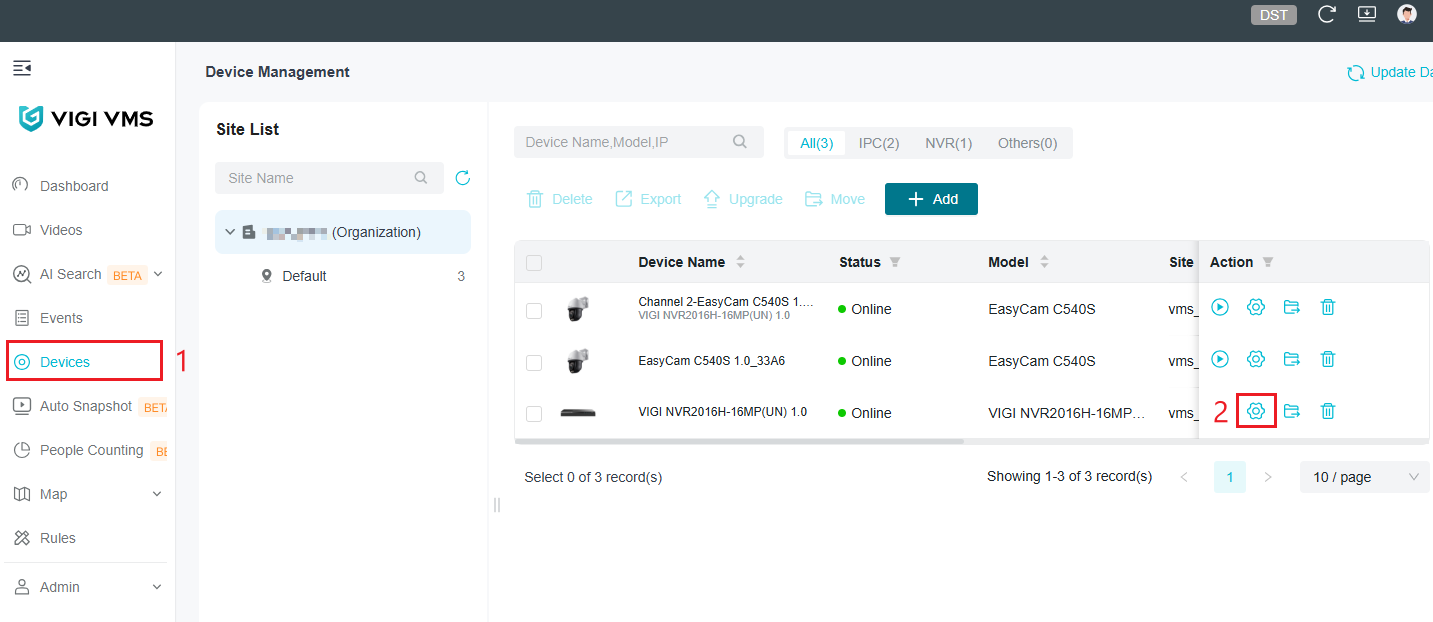
Step 1. Go to Devices > Locate the NVR device, then select the Edit button.

Step 2. Go to Event > VCA > Smart Analysis. Select Face Analysis and click Apply. A pop-up will appear. Please wait for the NVR to reboot with the new settings. IP Cameras may also reboot. This will also enable Smart Analytics on the IP Cameras.
Step 3. Go to Devices > Find the NVR device and select the Edit button once again.
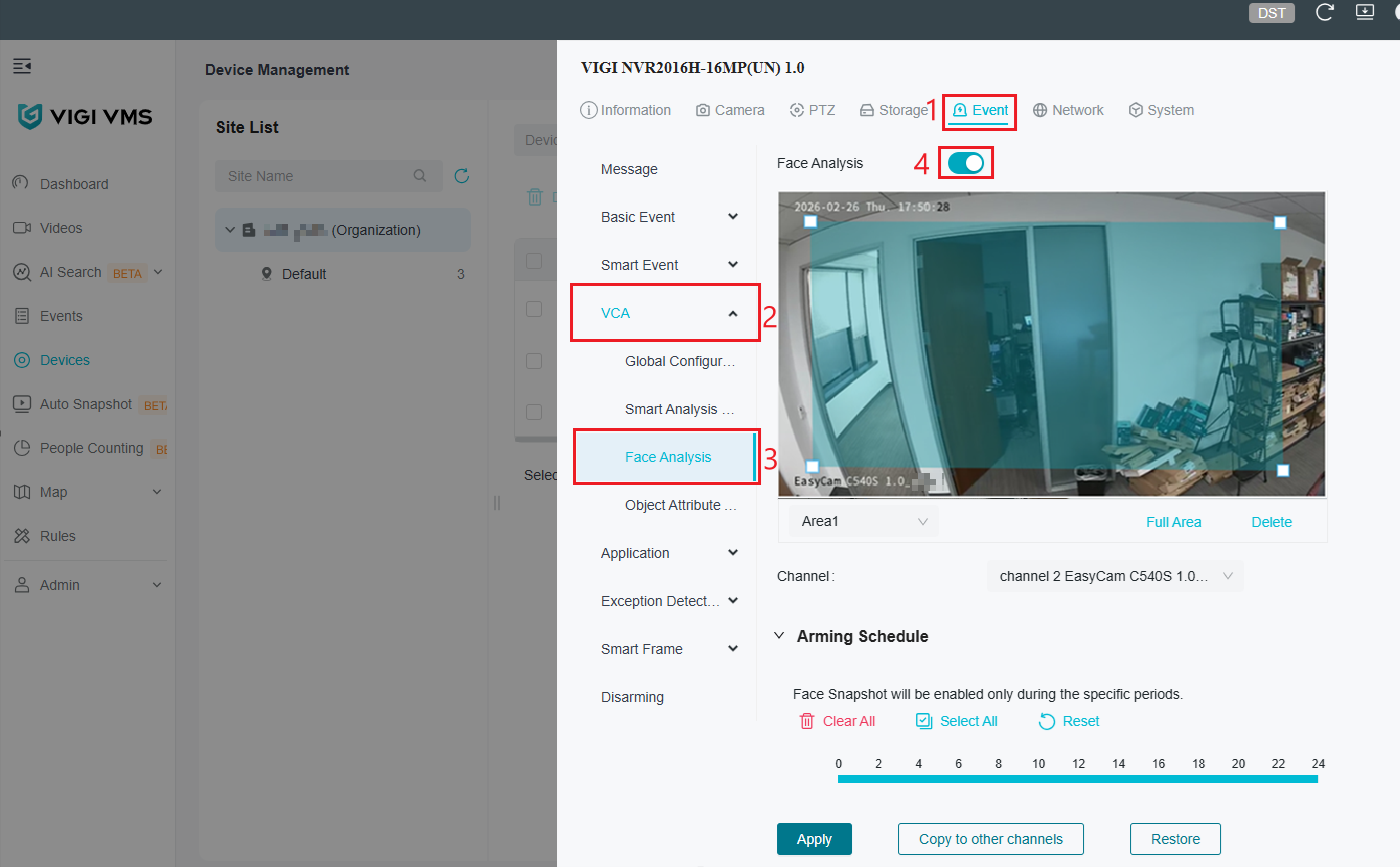
Step 4. Go to Event > VCA > Face Analysis. Face Analysis will now be active.
Configure the window.
Area Group: The Name of the Area which overlays the camera.
Full Area: Expand the Area to cover the full screen.
Delete: Delete the Area.
Channel: The channel which is currently being configured. Select another channel and camera to configure another channel.
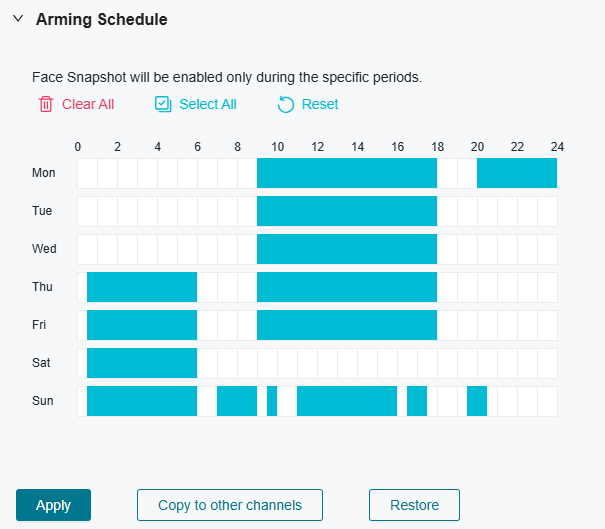
Step 5. To modify the Arming schedule select a day and adjust the hours to which Face Analysis will be active. This can also be done by clicking and dragging a time range.
Clear All: Remove the current Arming Schedule settings.
Select All: Populate all hours of all days with the Arming Schedule. This will turn the Face Analysis on 24/7.
Reset: Reset the Arming schedule back to the default configuration.
Note: A maximum of 6 time periods within 1 single day can be configured.
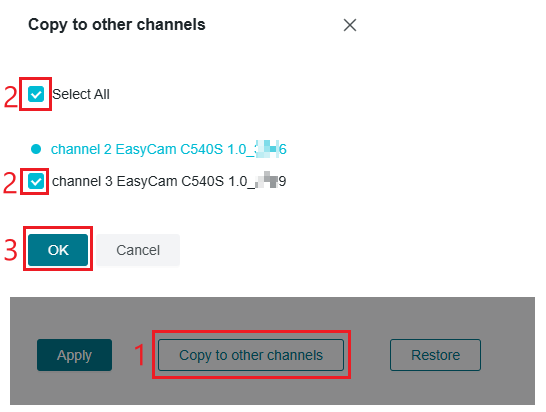
Step 6. As a bonus step, the configuration can be copied to another compatible VIGI camera. Select Copy to other channels. Click Select all to apply settings to all cameras or individually select cameras to apply the configuration to those individually. Click OK when complete.
Step 7. Once configuration is complete, select Apply. The settings will be saved.

Conclusion
You have now configured Face Analysis on your NVR. You can search and review face captures using the AI Search function.
Get to know more details of each function and configuration please go to Download Center to download the manual of your product.
QA
Q1. Which VIGI cameras support Face Analysis?
A1. Only VIGI cameras that support AI Search and Face Analysis can use this feature. Please verify the camera model specifications before configuration.
Q2. Why is the Face Analysis option grayed out or unavailable?
A2. Ensure the NVR and camera both support AI Search. Also, confirm Smart Analysis is enabled globally under VCA settings.
Q3. Can Face Analysis and Smart Events be enabled at the same time?
A3. No. Only one VCA function can be active per channel at a time. You must select either Smart Event, Face Analysis, or Object Attribute Analysis.
Q4. Why are no face results appearing in AI Search?
A4. Confirm Face Analysis is enabled, the arming schedule is active, and a sufficient amount of face data has been captured. The target must face the camera and be within appropriate detection distance.
Q5. Does enabling Face Analysis reboot the camera or NVR?
A5. Yes. Enabling Smart Analysis will trigger a reboot of the NVR and/or IP camera. Please wait for devices to come back online before continuing.
Q6. Can Face Analysis settings be copied to other cameras?
A6. Yes. In VIGI VMS, you can use the Copy to Other Channels option to apply the configuration to multiple compatible cameras.
Câu hỏi thường gặp này có hữu ích không?
Phản hồi của bạn giúp cải thiện trang web này.


