VIGI Security Manager User Guide

Recording and Storage

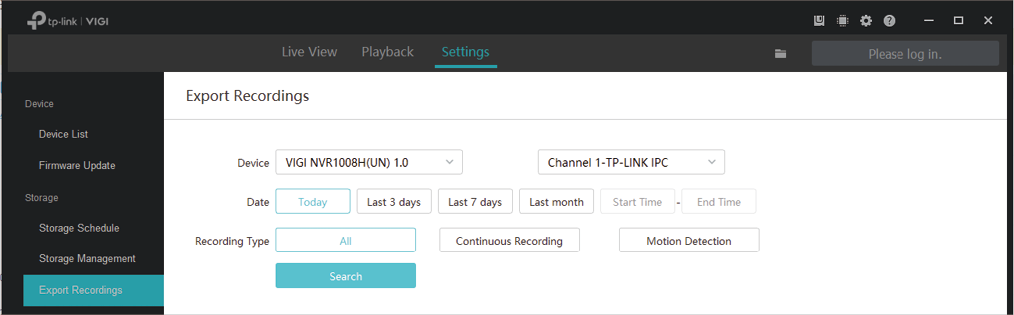
This chapter guides you on how to export recordings and configure recording and storage settings for your cameras. VIGI Security Manager allows you to set recording schedule templates and apply these templates to different cameras. You can also check and configure the storage settings for recordings and exported files. This chapter includes the following sections:

? Arrange Schedules for a Single Camera

? Storage Management

? Export Recordings

? File Settings

? Export Format

6. 1 Arrange Schedules for a Single Camera

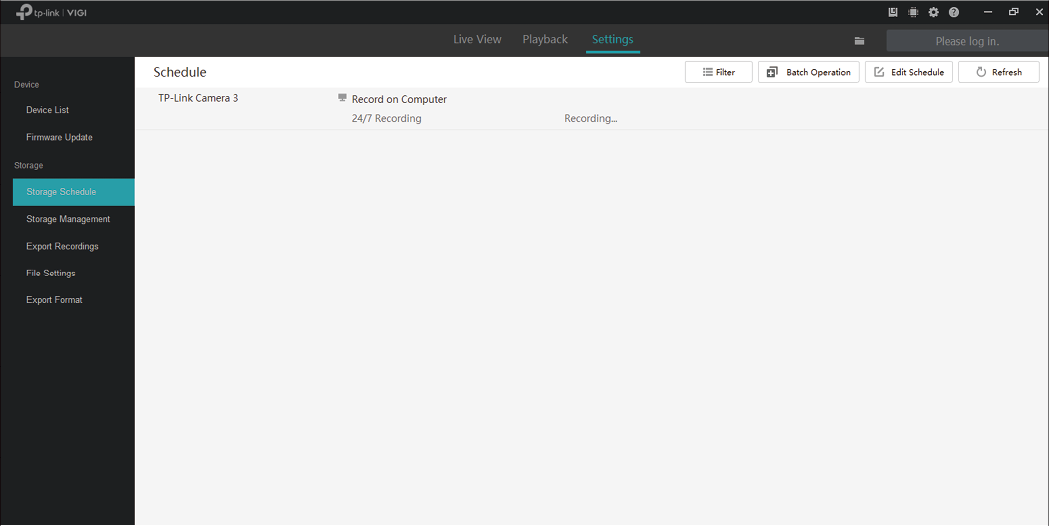
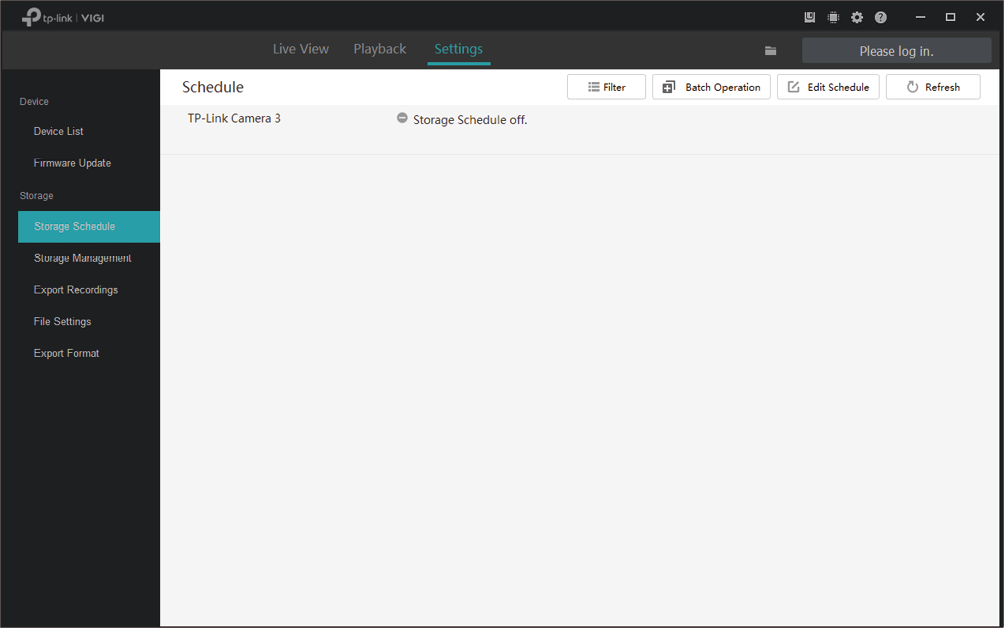
Storage schedule section provides convenience and flexibility for the daily monitoring of your devices. You can enable and customize the recording schedule and storage settings for a single camera. Go to Settings > Storage Schedule to modify these settings.

Note: If you have logged in to your TP-Link ID, you can not arrange schedules for cameras. To modify these settings, log out of your TP-Link ID and manage devices locally .

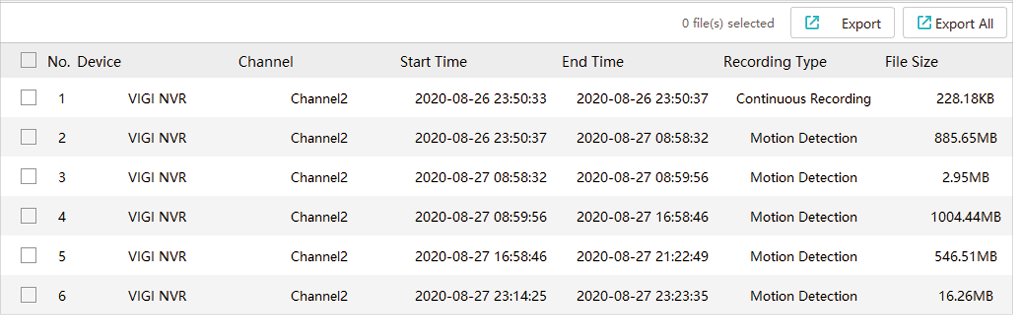
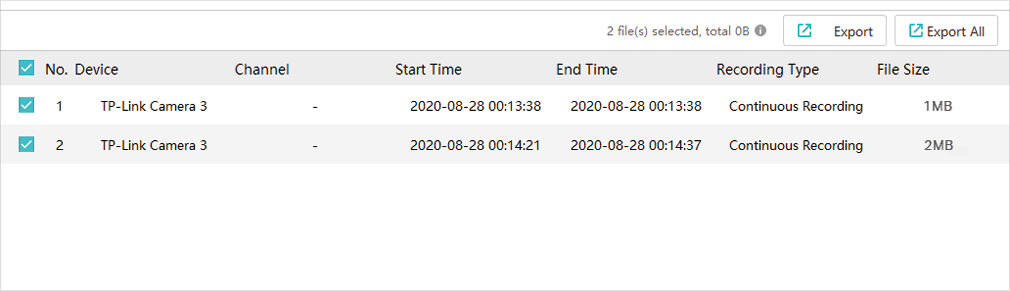
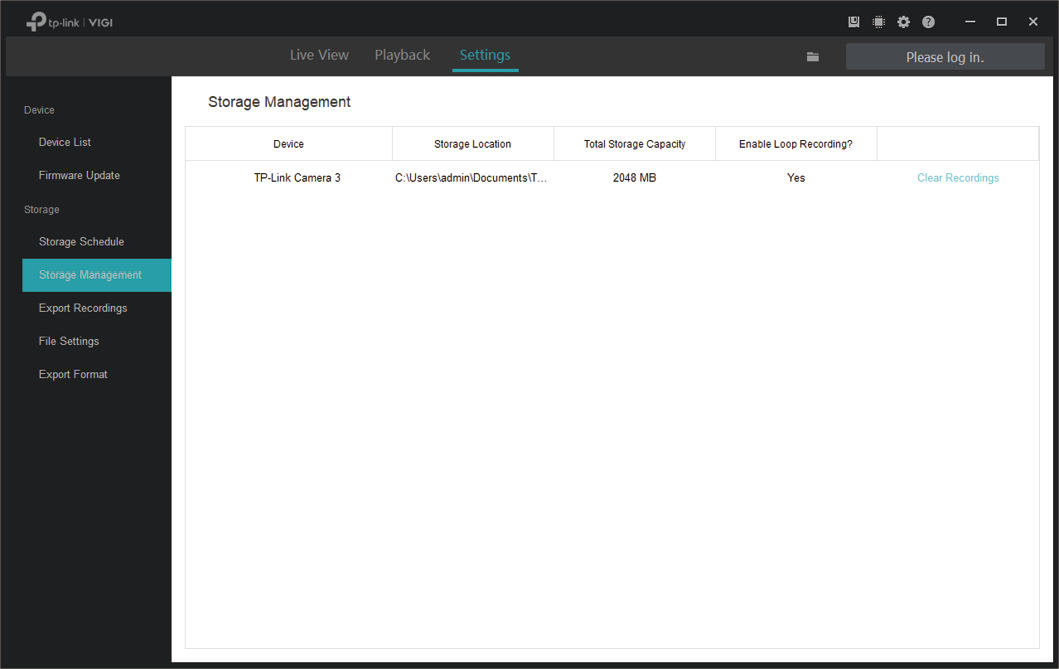
Record on Computer: Displays the cameras whose recordings are stored in the computer.

Record on SD Card: Displays the cameras whose recordings are stored in the SD card.

6. 1. 1 Customize Schedule Template

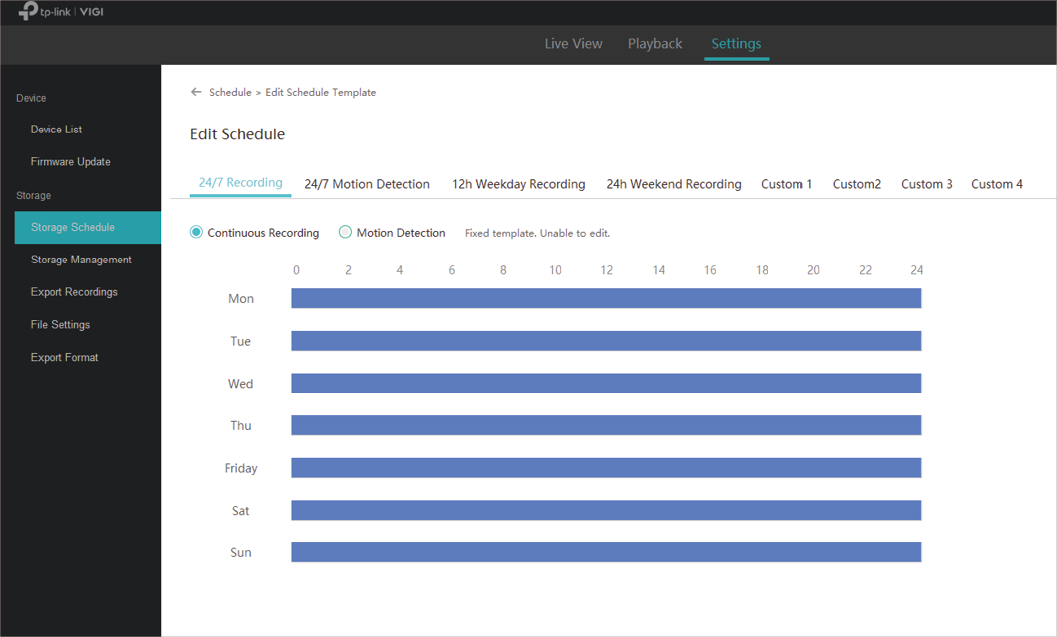
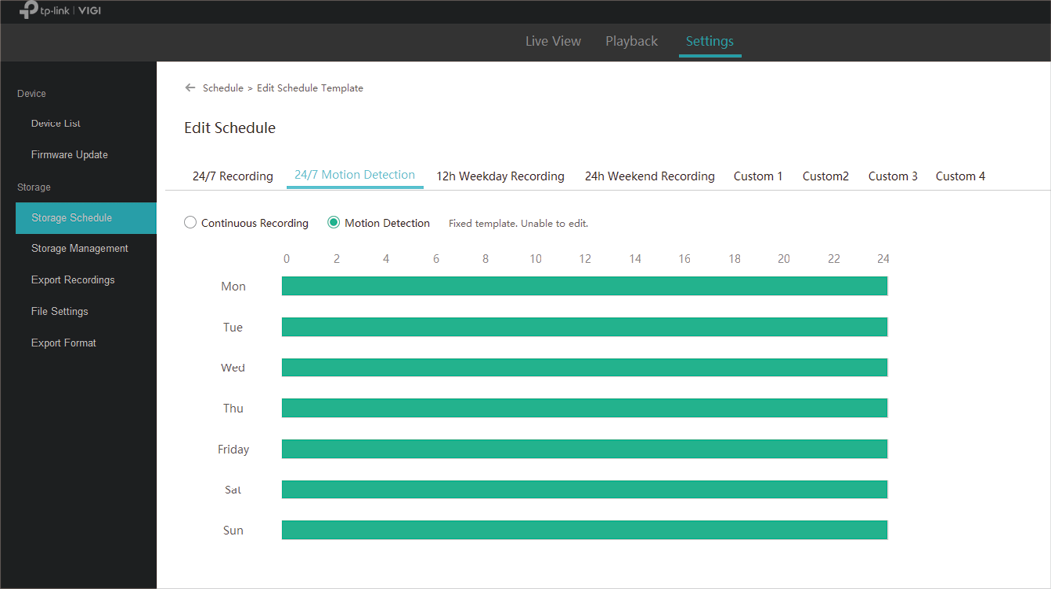
Recording schedules include 4 fixed templates and 4 custom templates. In Storage Schedule , click on the top right to enter Edit Schedule Template.

? 24/7 Recording

24/7 Recording allows your camera to record continuously all the time.

? 24/7 Motion Detection

24/7 Motion Detection allows your camera to record when motion detection is triggered.
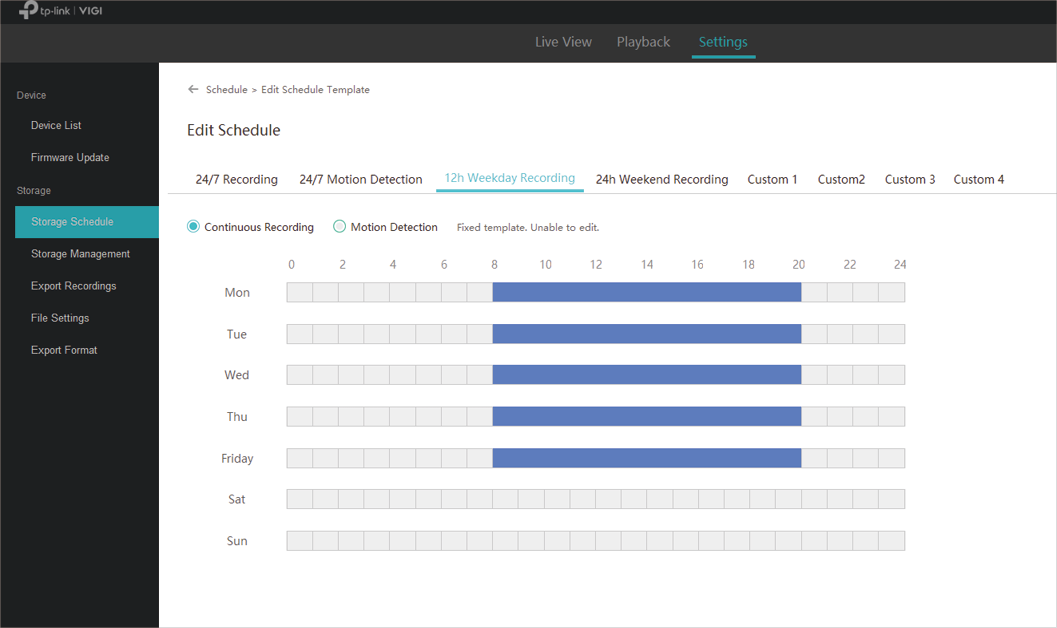
? 12h Weekday Recording

12h Weekday Recording allows your camera to record continuously from 8:00 to 20:00 on weekdays.

? 24h Weekend Recording

24h Weekend Recording allows your camera to record continuously all day on weekends.
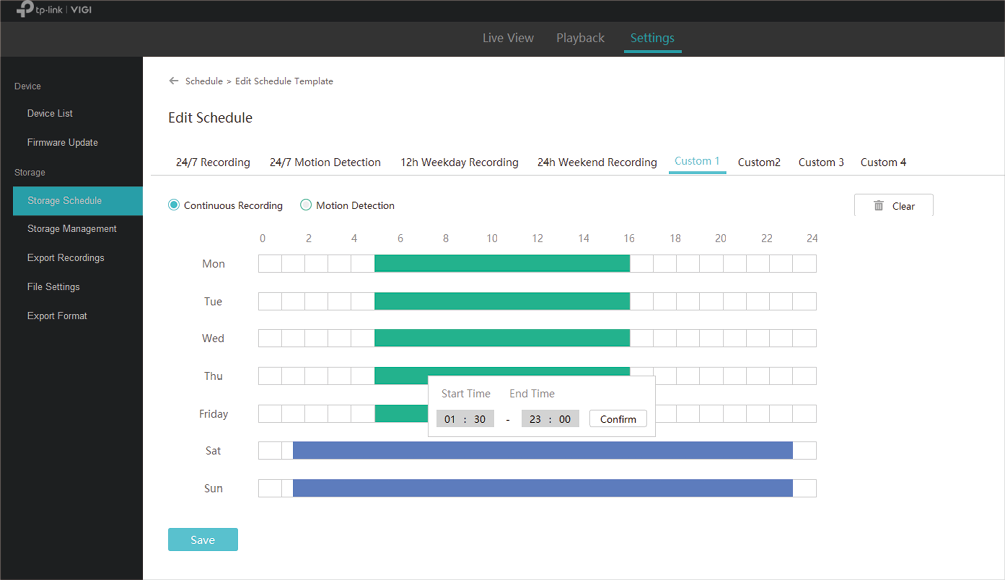
? Custom Schedule

You can customize the recording schedule according to your needs. For example, the camera will record based on a schedule of motion detection from 5:00-16:00 on weekdays; On weekends, the camera will record continuously from 1:30-23:00. Follow the steps below to finish the configuration.

1. Select a custom template (custom 1).

2. Click Motion Detection and drag the cursor on time bar to set 5:00 to 16:00 for continuous recording from Monday to Friday. The color of these rectangles will be changed to green.

3. Select Continuous Recording and drag the cursor to set 1:30 to 23:00 for motion detection recording on Saturday and Sunday. The color of these rectangles will be changed to blue. To enter the start and end time manually, click the time bar to select a rectangle first, then click the rectangle again.

4. Click Save .

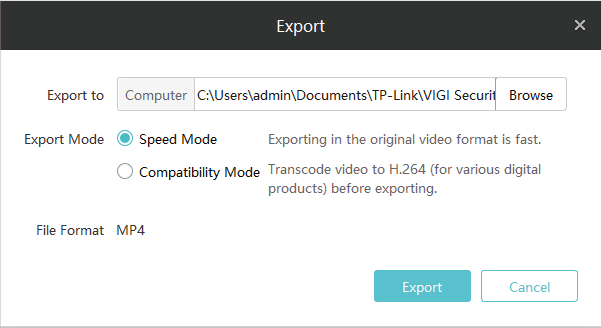
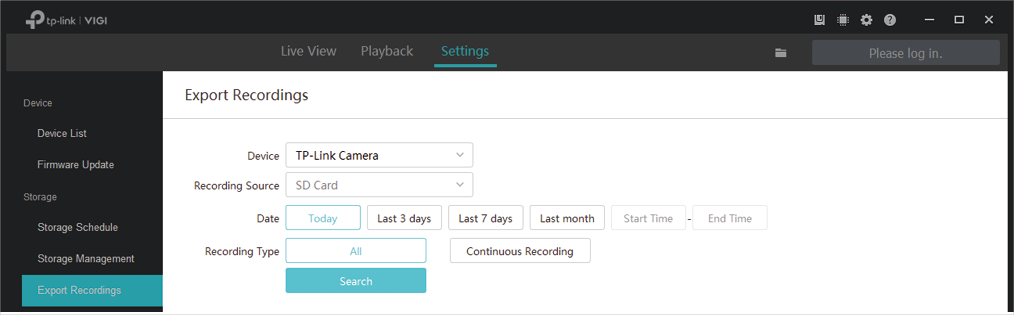
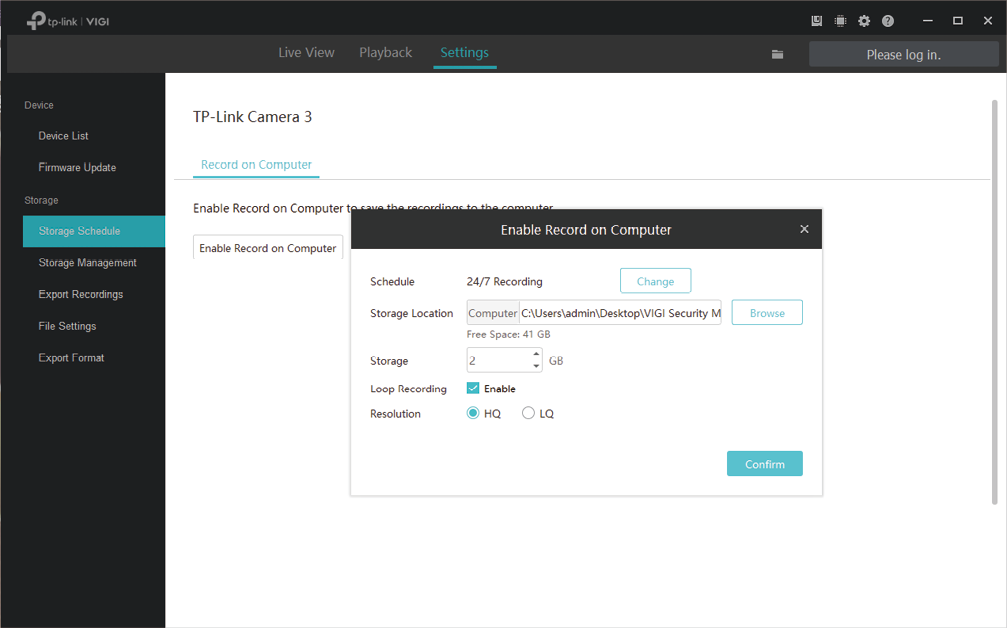
6. 1. 2 Configure Storage Settings

If you have not enabled recording function when adding the camera to VIGI Security Manager, follow the steps below to configure the storage settings. If you have already enabled this function, you can skip this section.

1. Click the camera you want from the list.

2. Click to configure storage settings.

3. Set the storage and recording settings.

Schedule

to customize the recording schedule of the camera on computer.

Storage Location

to select the storage location of files.

Storage

Enable Loop Recording

Resolution

4. Click Confirm .

6. 1. 3 Configure Recording Schedule and View Storage Settings

You can check storage settings and apply the schedule templates to the cameras directly added to VIGI Security Manager.

Note: The recording schedule of camera set on VIGI Security Manager will not be synchronized if you add this camera to your NVR later.

To apply the recording schedule to the camera, follow the steps below:

1. Go to Settings > Storage Schedule , and click the camera you want to configure.

2. Enable Record on Computer .

3. Click to select the schedule template according to your needs.
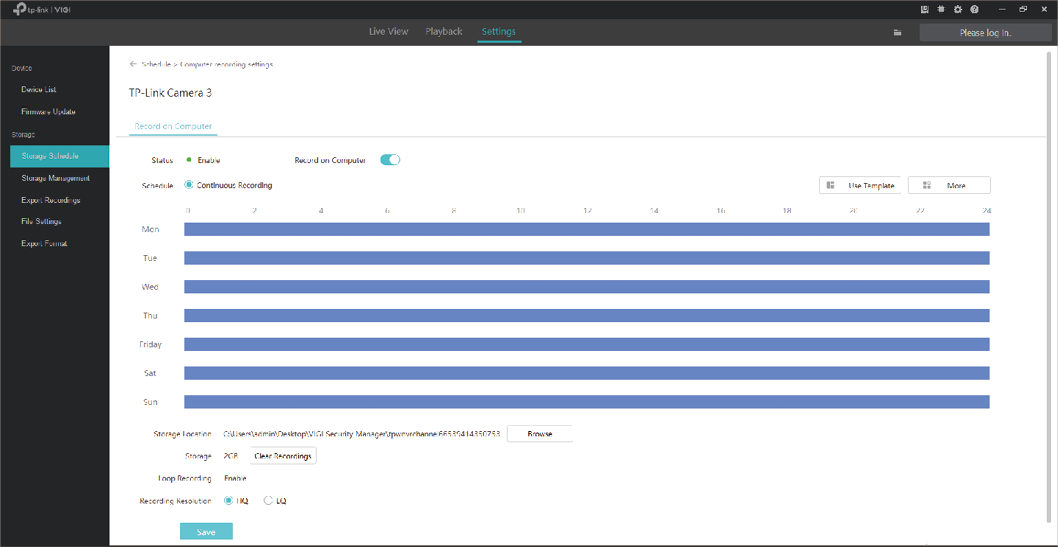
Note: Only the cameras supporting motion detection function can apply the schedule of motion detection.

4. Set the storage and recording settings.

Storage Location

Click Browse to check the storage location of files.

Storage

Click Clear Recordings to delete all the recordings stored on your computer.

Enable Loop Recording

Resolution

5. Click Save .

6. 2 Storage Management

To check the storage settings of your cameras directly added to VIGI Security Manager, go to Settings > Storage Management .

Note: If you have logged in to your TP-Link ID, you can not modify storage settings. To modify these settings, log out of your TP-Link ID and manage devices locally .

Device

Storage Location

Total Storage Capacity

Enable Loop Recording

Clear Recording

6. 3 Export Recordings

To export the recordings of the NVR and cameras according to your needs, go to Settings > Storage > Export Recordings and follow the steps below.

Note: If you have logged in to your TP-Link ID, you can not export recordings. To export recordings, log out of your TP-Link ID and manage devices locally .

? Export Recordings From NVR

1. Select the NVR you want and specify the channel from the drop-down list, select date and recording type, then click Search to filter files.

2. Select the recording files you want to export and click .

3. Click Browse to select the folder on your computer to store the exported files.

4. Select the export mode.

Speed Mode: The export process is faster than that of compatibility mode.

Compatibility Mode: The exported recordings will be transcoded to H.264 which is compatible with

various digital products.

5. Click Export and the files will be successfully exported.

? Export Recordings From Camera

1. Select the camera you want and the recording source from the drop-down list, select date and recording type, then click Search to filter files.

2. Select the recording files you want to export and click .

3. Click Browse to select the folder on your computer to store the exported files.

4. Select the export mode.

Speed Mode: The export process is faster than that of compatibility mode.

Compatibility Mode: Transcode the exported recordings to H.264 which is compatible with

various digital products.

5. Click Export , and the files will be successfully exported.

6. 4 File Settings

You can select the storage location for the screenshots, videos recorded in playback and video clips. Go to Settings > Storage > File Settings and click Browse to select the path. After you click Save , three folders, Picture , Video and Cloud , will be automatically created to store the corresponding files.

6. 5 Export Format

You can set the export mode in advance to simplify the export process.

Ask before each export

You should select the export mode every time before exporting files.

Using the following mode

Skip the pop-up window of export mode when exporting files. All the files will be exported using the selected mode.

Speed Mode: The export process is faster than that of compatibility mode.

Compatibility Mode: The exported recordings will be transcoded to H.264 which is compatible with various digital products.