VIGI Security Manager User Guide
Live View
In Live View, you can monitor the channels in real time and respond to abnormal conditions with quick operations, such as starting recording and zooming in the image. This chapter contains the following sections:
�? Configure the Screen Layout
4. 1 Configure the Screen Layout
4. 1. 1 Enable/Disable Live View
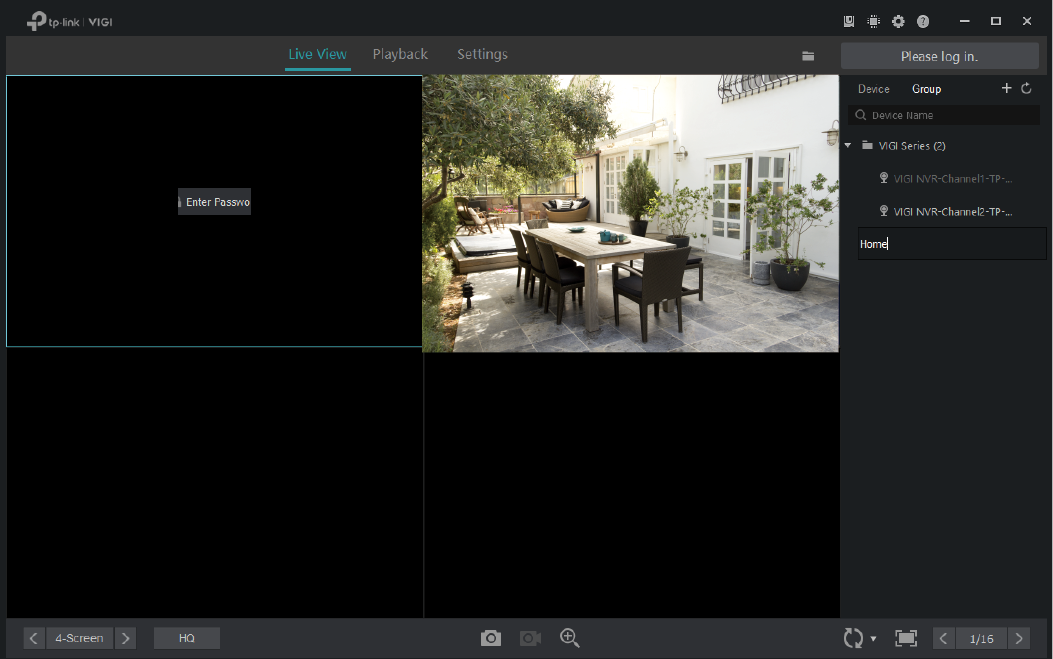
VIGI Security Manager displays the videos of each channel via several screens. Follow the steps below to flexibly enable or disable Live View function on channels to play the real-time video.
To enable Live View for a single channel, click a screen in Live View and click the channel on the right panel.
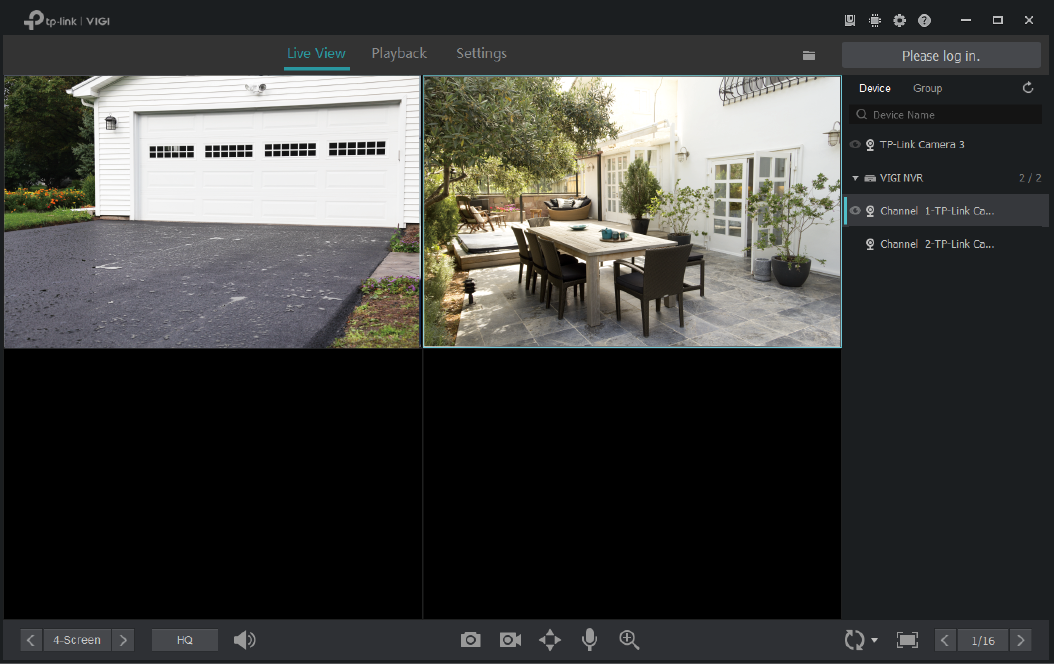
To disable Live View for a single channel, click a screen in Live View and click
 .
.
For the cameras managed by the NVR or added to a group, you can enable or disable Live View for channels in batches. To create groups, refer to 4. 3 Add and Manage Groups .
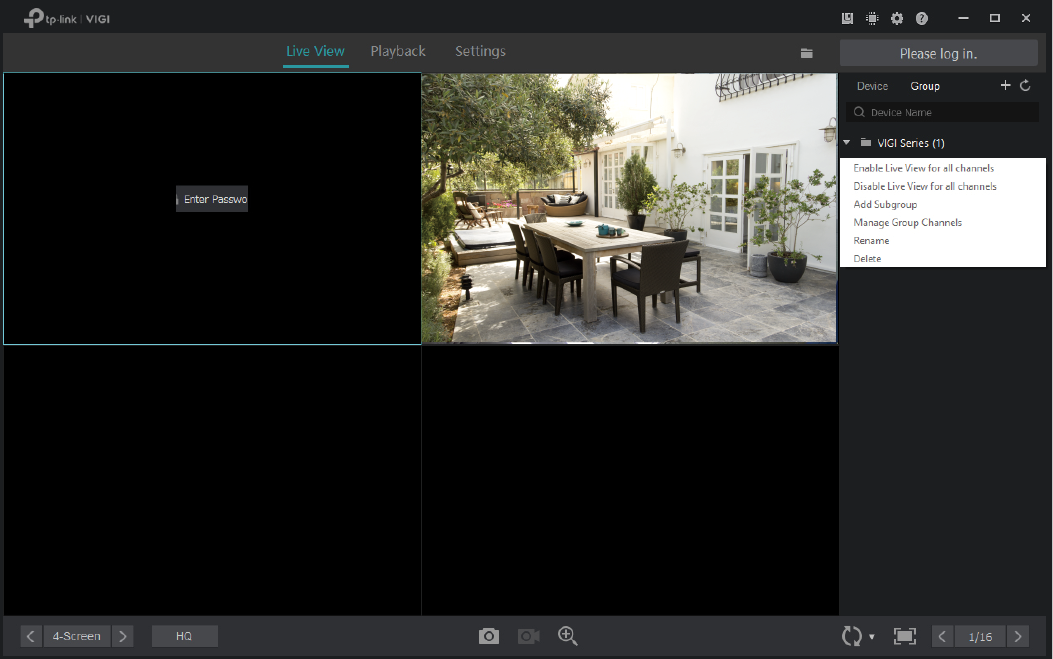
Right click an NVR or group on the right panel and click Enable Live View for All Channels . Then, Live View will be enabled on all channels that are managed by the NVR or added to the group.
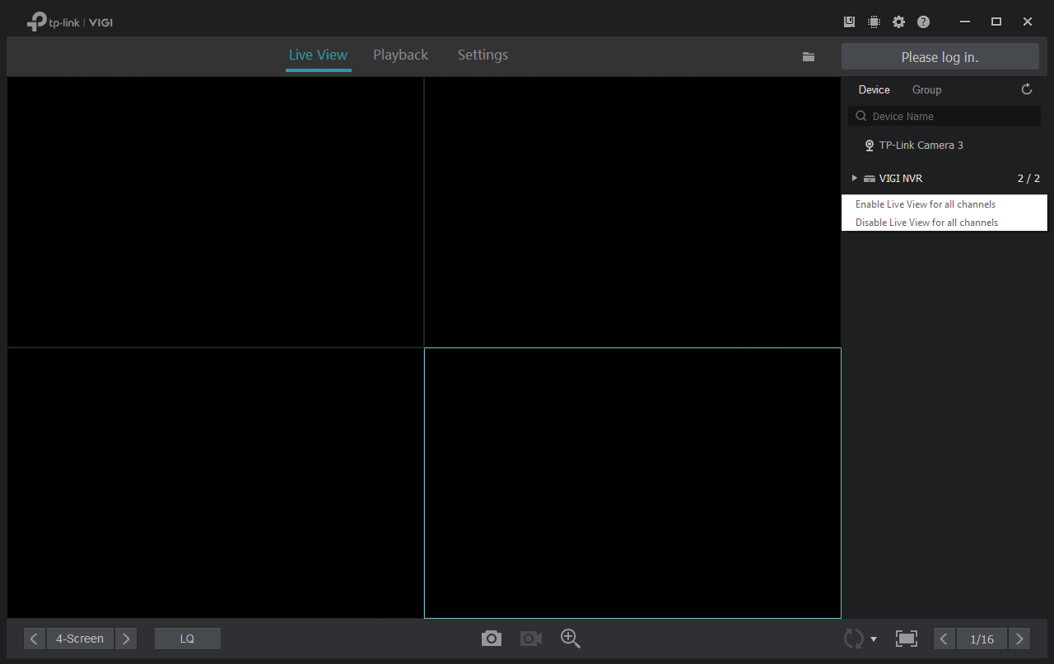
To disable Live View in batches, right click an NVR or group on the right panel and click Disable Live View for All Channels .
4. 1. 2 Rearrange the Layout
The manager supports ten layout modes, and each mode displays different numbers of screens. Click
 to select a layout mode and click
 to change the page.
For the layout mode with multiple screens, you can change the location of a channel by clicking and dragging it to another location. To view a channel in the full screen, double click it. Double click it again to go back to multi-screen layout mode.
4. 2 Configure Live View Settings
4. 2. 1 Configure Live View Settings via Toolbar
Click a screen in Live View and click the following icons to configure Live View settings, such as screenshot, digital zoom, and switching.
|
|
Click to switch between high quality (HQ) and low quality (LQ) for Live View. |
||||||||||||
|
|
|
|
Click to take a screenshot. To
show the screenshot in the folder,
click
|
||||||||||
|
|
To
show the recording in the folder,
click
|
||||||||||||
|
|
|
|
to talk. With this function, your can talk to people in the monitor area in real time. | ||||||||||
|
|
|
|
|
4. 2. 2 Configure Live View Settings for a Single Camera Right click a single camera on the right panel to configure the aspect ratio, delivery, stream and quality of its channel.
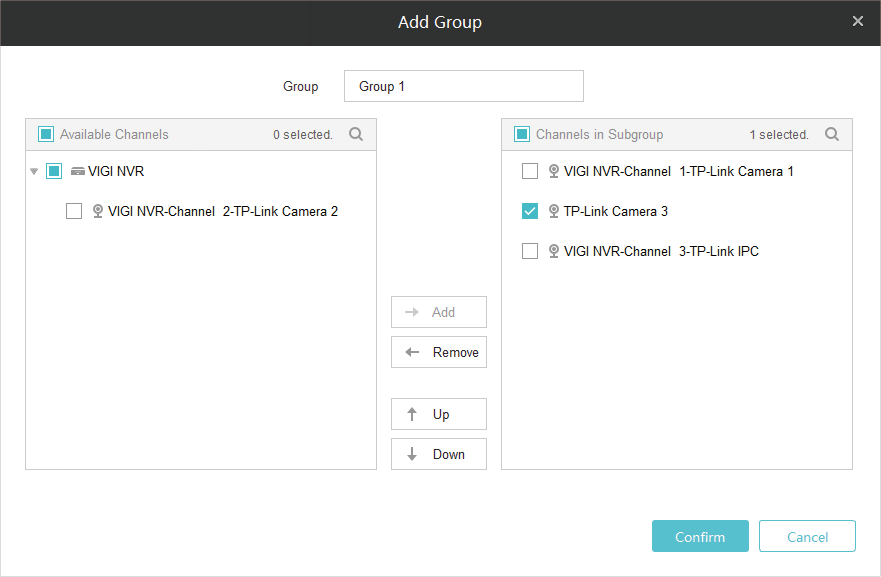
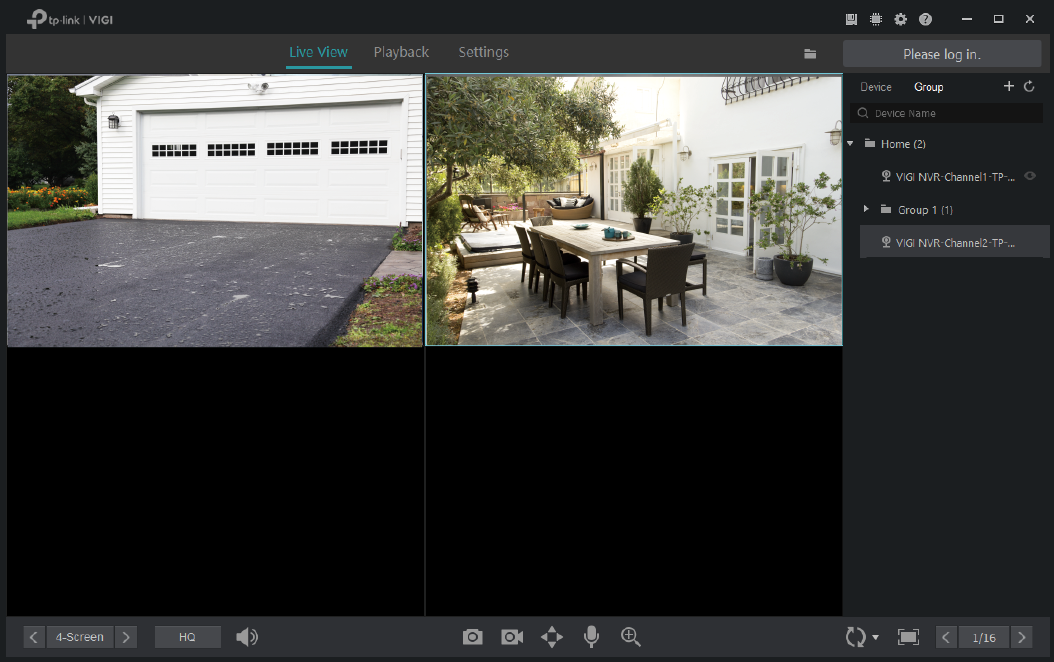
4. 3. 1 Add Groups Main groups and subgroups are used to classify the channels for easier management. You can enable or disable Live View for channels in the group simultaneously. Note : When enabling or disabling Live View based on groups, this operation is not applied to the subgroups. Follow the steps below to add groups.
To add a group, click
Group
and then click
To add a subgroup, click Group and right click a group on the right panel. Click Add Subgroup and enter the name. Then, you can drag the channel in the main group to the subgroup.
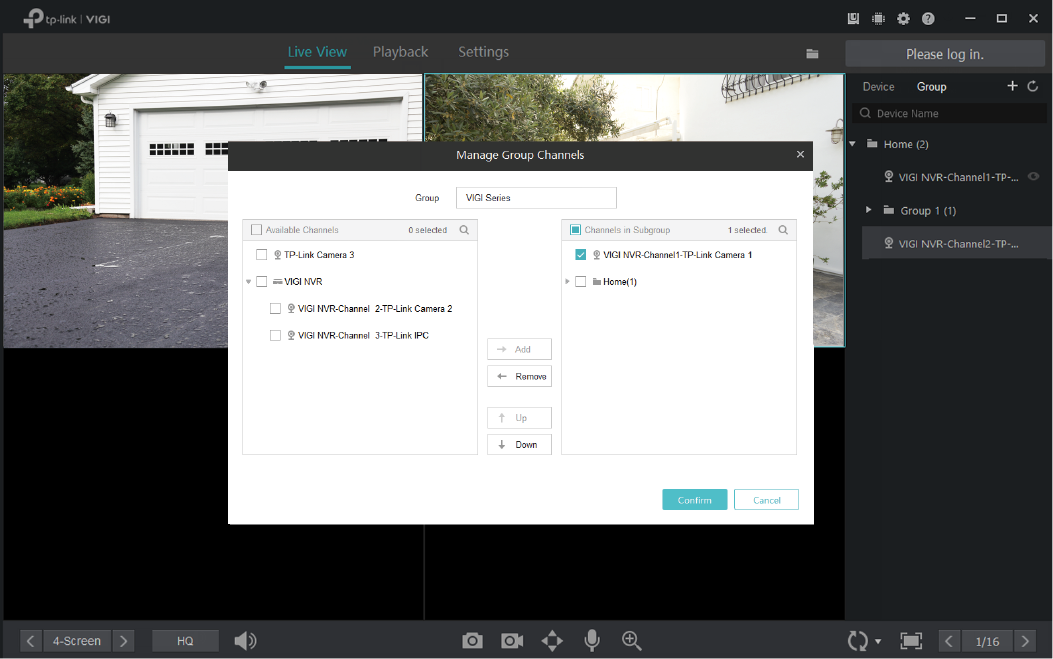
4. 3. 2 Manage Groups To move a single channel to other groups or change its order in the list, drag the channel and move it. To manage the channels, click Group and right click a group on the right panel. Click Manage Group Channels . Select the channels to add, remove or reorder them in the group. Click Confirm .
To rename a group, click Group and right click the group on the right panel. Click Rename and enter the name.
To delete a group, click Group and right click the group on the right panel. Click Delete .
Feedback
Thank you for your feedback. Sorry, something went wrong! |

 at the top right corner. To change the path where the screenshots are stored, refer to


 on the right panel. Enter the group name, select channels listed in Available Channels, and click