M7200 V3 User Guide
Chapter 7 Customize Your Network
This chapter guides you on how to configure network settings of your Mobile Wi-Fi.
It contains the following sections:
This Mobile Wi-Fi supports three modes of network connection: 4G Preferred, 4G Only and 3G Only. If your SIM card supports WCDMA, select 3G Only; if your SIM card supports FDD-LTE or TDD-LTE, select 4G Preferred or 4G Only as needed. In general, the 4G network is faster than the 3G one.
1.Visit http://tplinkmifi.net, and log in with the password you set for the Mobile Wi-Fi.
2.Go to Device > Advanced > Network Mode.
3.Select 4G Preferred, 4G Only or 3G Only as needed.
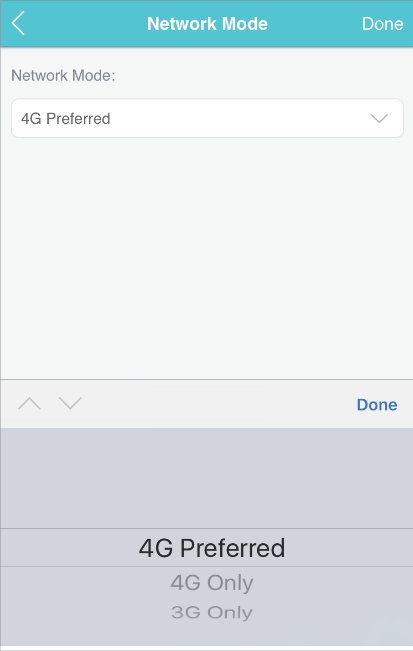
4.Tap Done.
2.1. Configure Dial-up Settings
If you are in a location beyond your mobile carrier’s service area, you may need to configure the dial-up settings to access the internet provided by a local mobile carrier.
1.Visit http://tplinkmifi.net, and log in with the password you set for the Mobile Wi-Fi.
2.Go to Dial-up.
3.Tap Create to build a dial-up profile.
4.Specify a name for the profile and fill in the parameters provided by your carrier.

5.Tap Done and then tap Yes in the pop-up to apply the new profile.
 Note:
Note:
1.Mobile Data is enabled by default. If disabled, internet access is prohibited.
2.Data Roaming is disabled by default. If enabled, data service is allowed when roaming.
3.You can click View profile details to check the current profile. If any parameter is wrong, you can click Create to build a new one.
2.2. Configure Network Search
The Mobile Wi-Fi provides two types of network connection: Auto and Manual.
•Auto: The Mobile Wi-Fi will automatically establish internet connection when it is started.
•Manual: When you have selected Manual, click Search and the Mobile Wi-Fi will scan for mobile networks. You can choose a network with better performance to connect to. The mobile carrier providing the network must be or have cooperation with your SIM card provider.
1.On your computer or tablet, visit http://tplinkmifi.net, and log in with the password you set for the Mobile Wi-Fi.
2.Go to Advanced > Dial-up > Network Settings.
3.Select Auto or Manual for Network Search as needed.

4.Click Save.
The Mobile Wi-Fi acts as a DHCP (Dynamic Host Configuration Protocol) server, dynamically assigning TCP/IP parameters to devices from the IP Address pool. You can change the settings of the DHCP server if necessary.
1.On your computer or tablet, visit http://tplinkmifi.net, and log in with the password you set for the Mobile Wi-Fi.
2.Go to Advanced > DHCP Server.
3.Enter a new IP address in the IP Address field and leave the Subnet Mask as default. And enter the starting and ending IP addresses in the Start and End IP Address fields respectively.
Note:
1.The start and end IP addresses should be on the same network segment as the IP address you have entered.
2.If you have changed the IP address of your Mobile Wi-Fi, you should use the new IP address or
http://tplinkmifi.net to log in to the web management page.
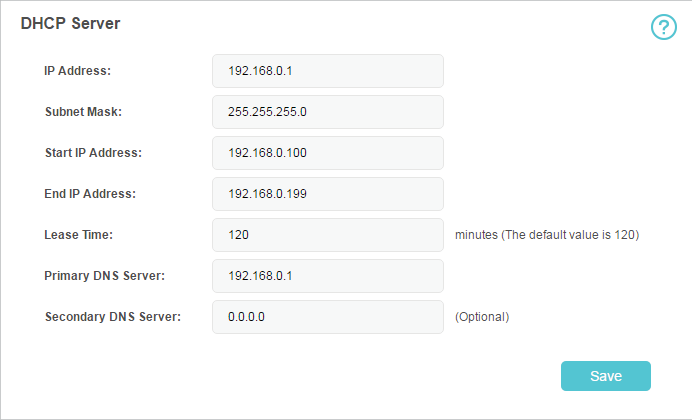
4.Enter the lease time in the Lease Time field. When the lease time expires, the Mobile Wi-Fi will reassign IP addresses.
5.Enter the primary DNS IP address which usually accords with the IP address.
6.Enter the secondary DNS IP address if provided by your carrier.
7.Click Save.