How to Upgrade the Firmware of VIGI Cameras
Contents
Configuration for VIGI Local VMS and Cloud VMS
Configuration for Local VIGI PC Client
Configuration for VIGI NVR GUI
Introduction
Keeping your VIGI camera firmware up to date provides access to the latest features, performance improvements, and issue fixes. This guide explains how to upgrade the firmware of a VIGI camera using the available management methods.
Requirements
- VIGI Camera
Configuration
This section describes how to upgrade the firmware of a VIGI camera using the VIGI App, VIGI VMS, VIGI Cloud VMS, VIGI PC Client, camera Local UI, or a VIGI NVR. Follow the method corresponding to your management platform.
Configuration for WebUI
Step 1. Log in to the VIGI IPC via its local IP address and navigate to Settings > System Settings > System Management > Upgrade Firmware > Browse.
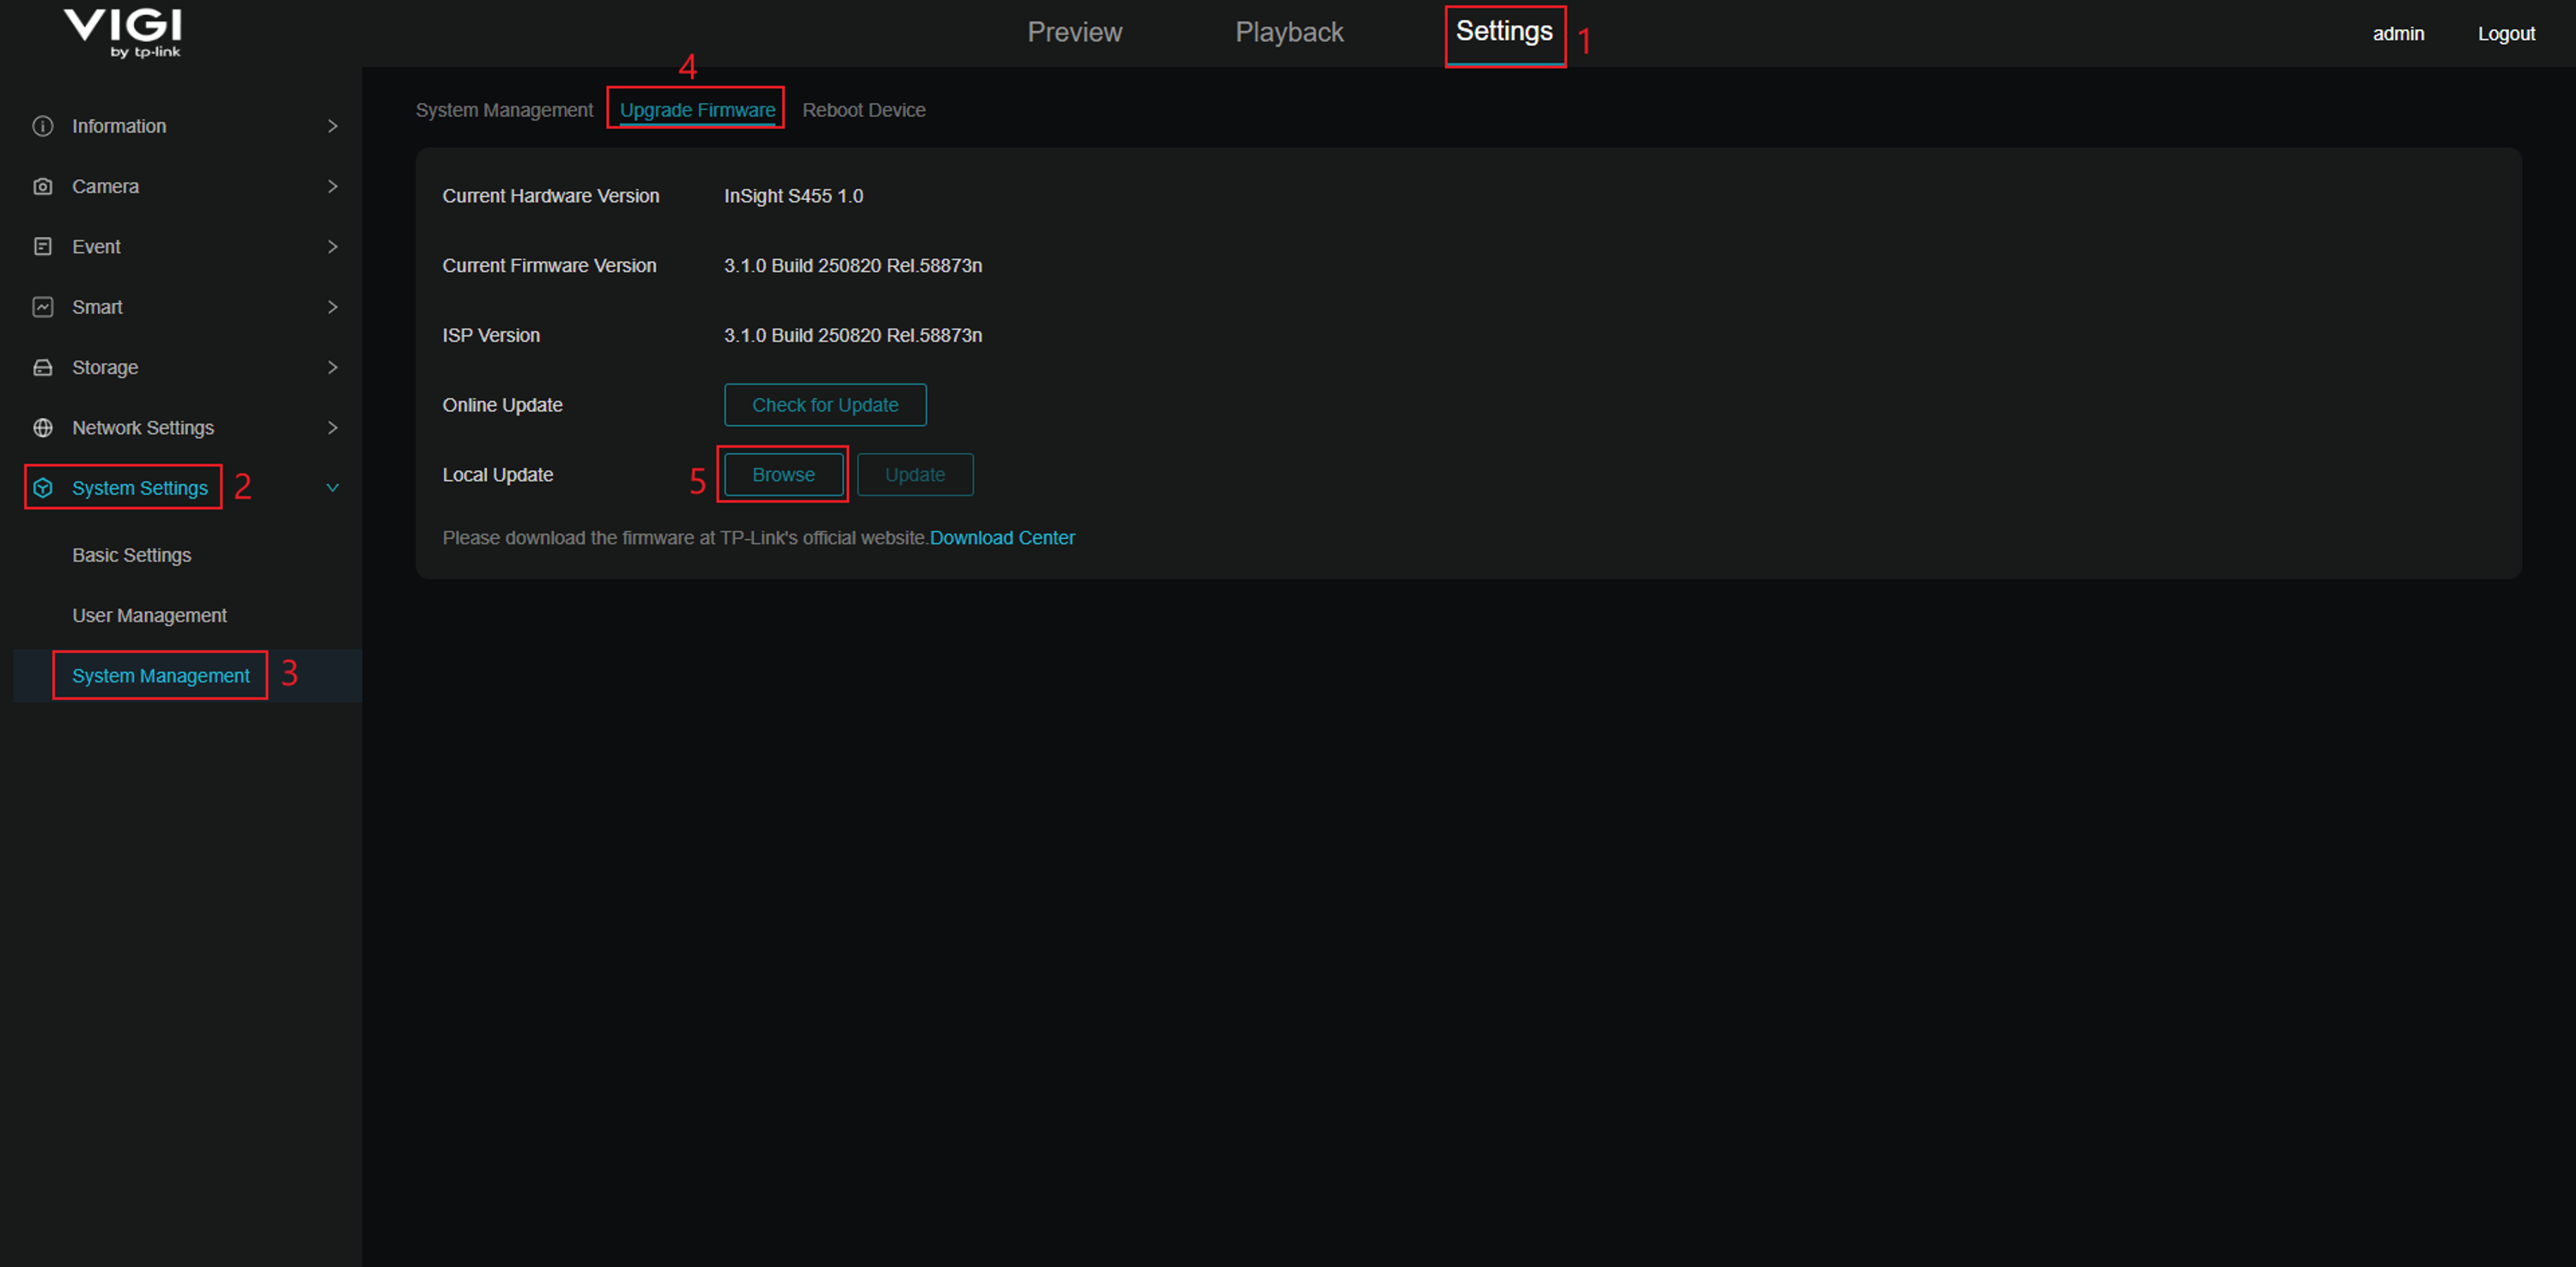
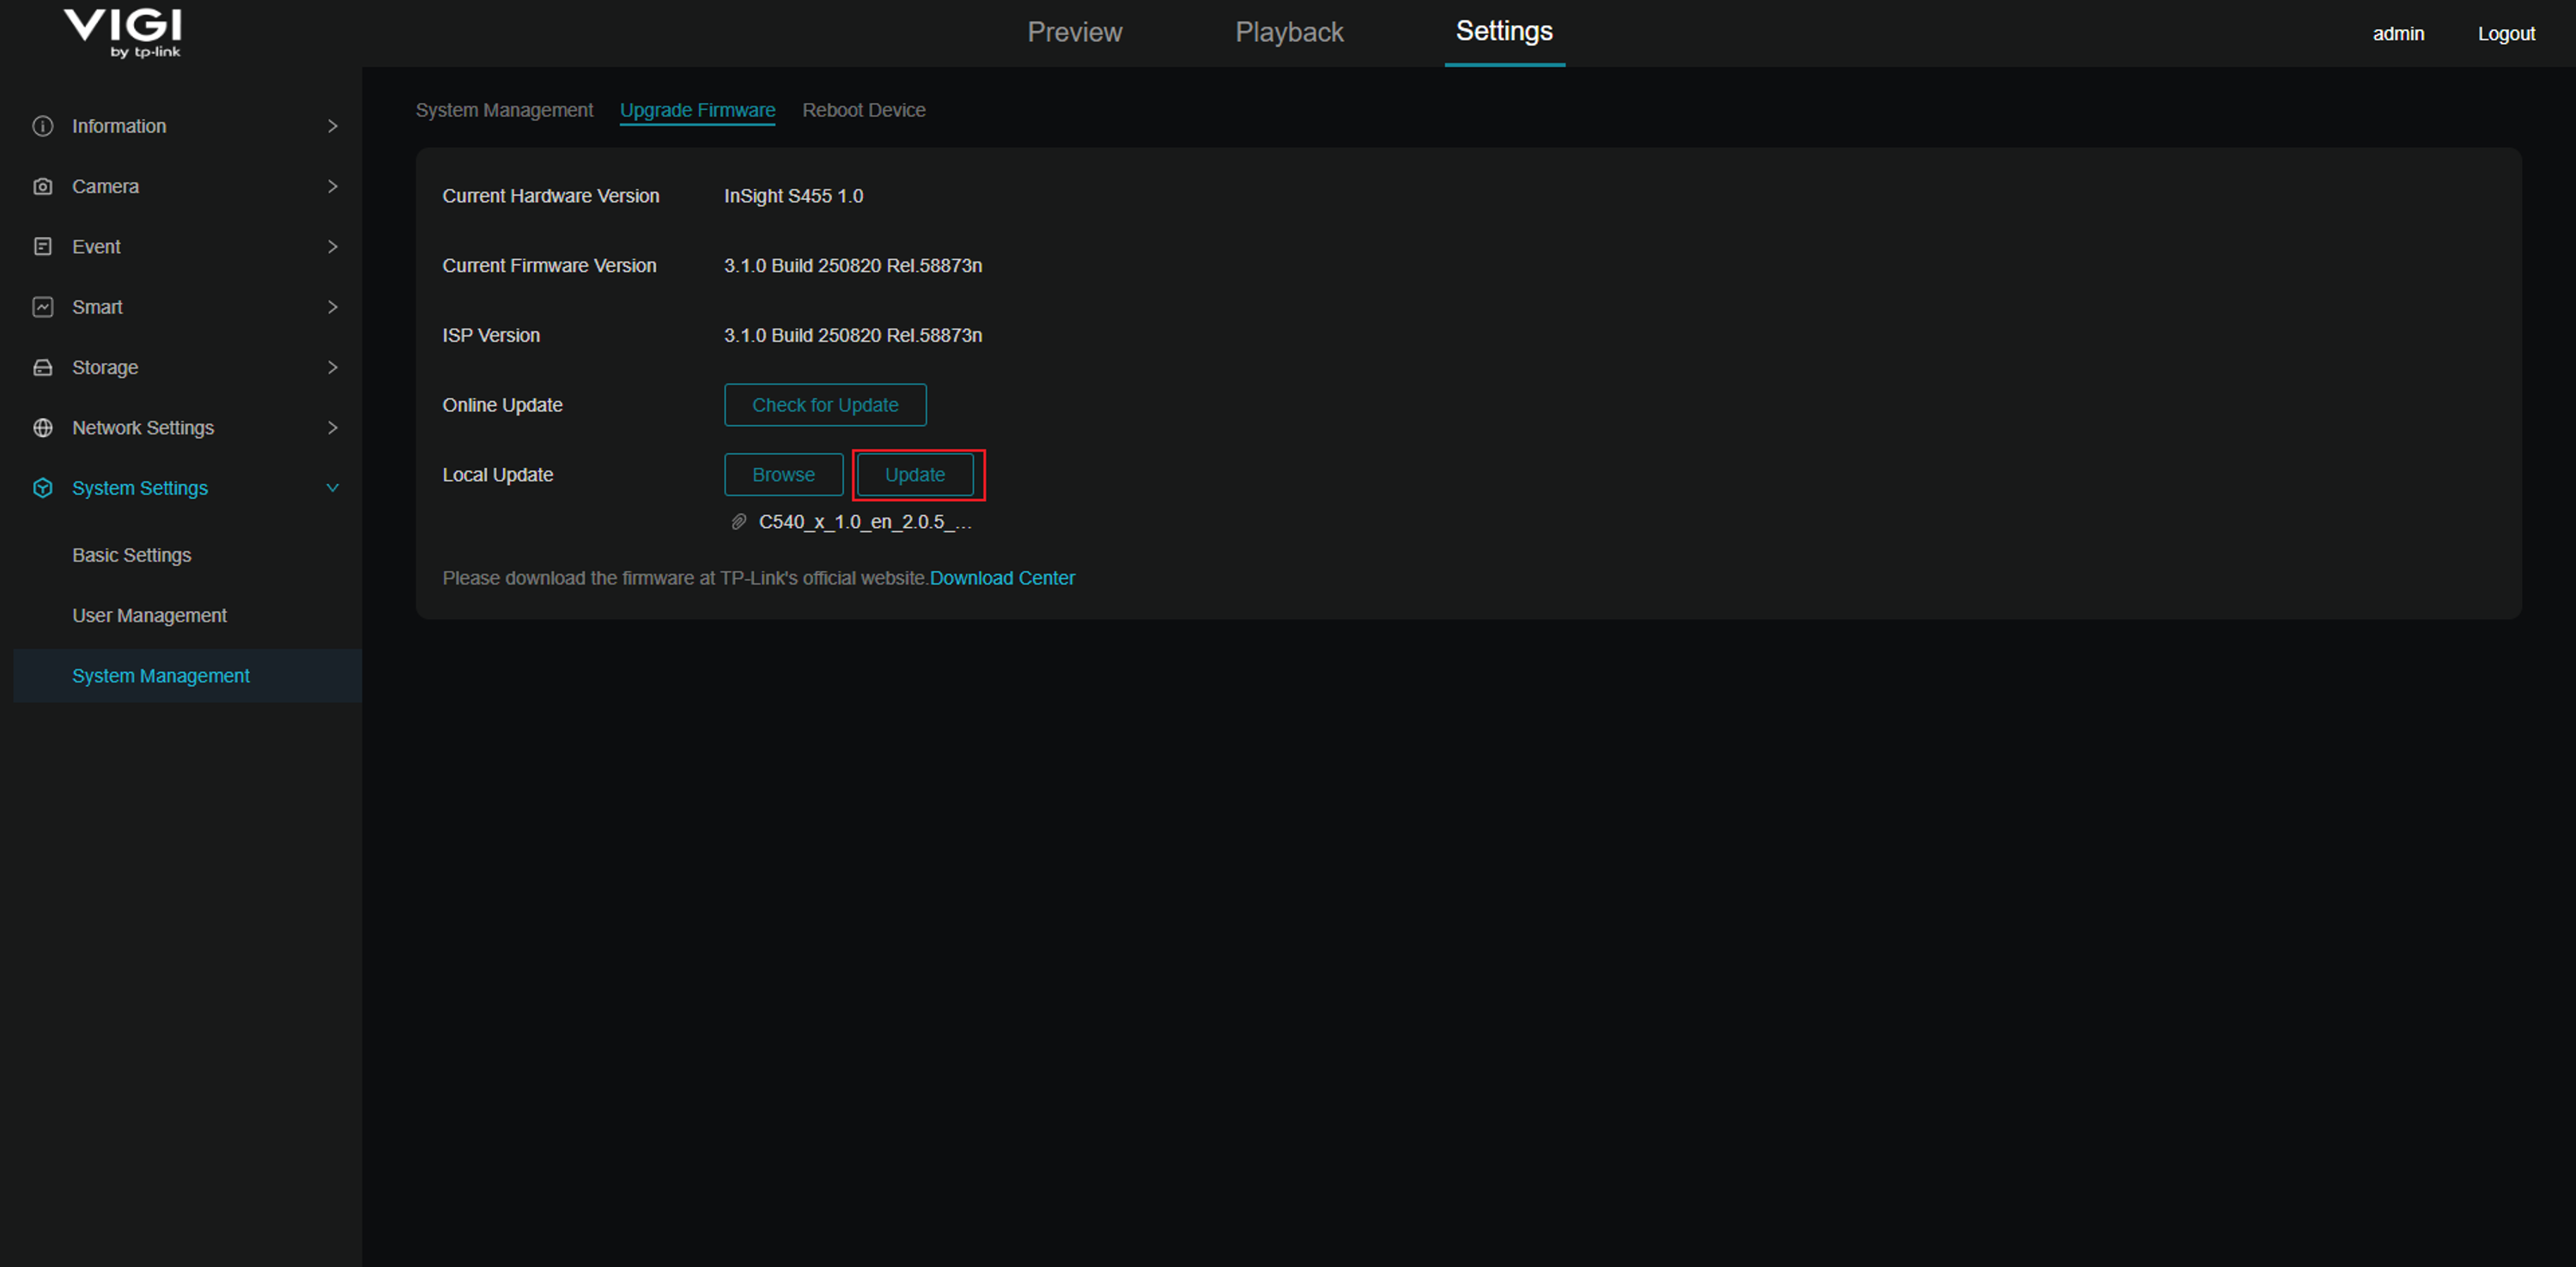
Step 2. Select the firmware file and click Update.
Online Update: Upgrade the firmware online directly. Click Check for Upgrade to check for available updates or to initiate the upgrade process.
Local Update: Upgrade the firmware locally with the downloaded .bin firmware file.
Note: To download the corresponding firmware based on your Vigi Camera’s model and hardware version from the TP-Link official website Download Center.
Configuration for VIGI Local VMS and Cloud VMS
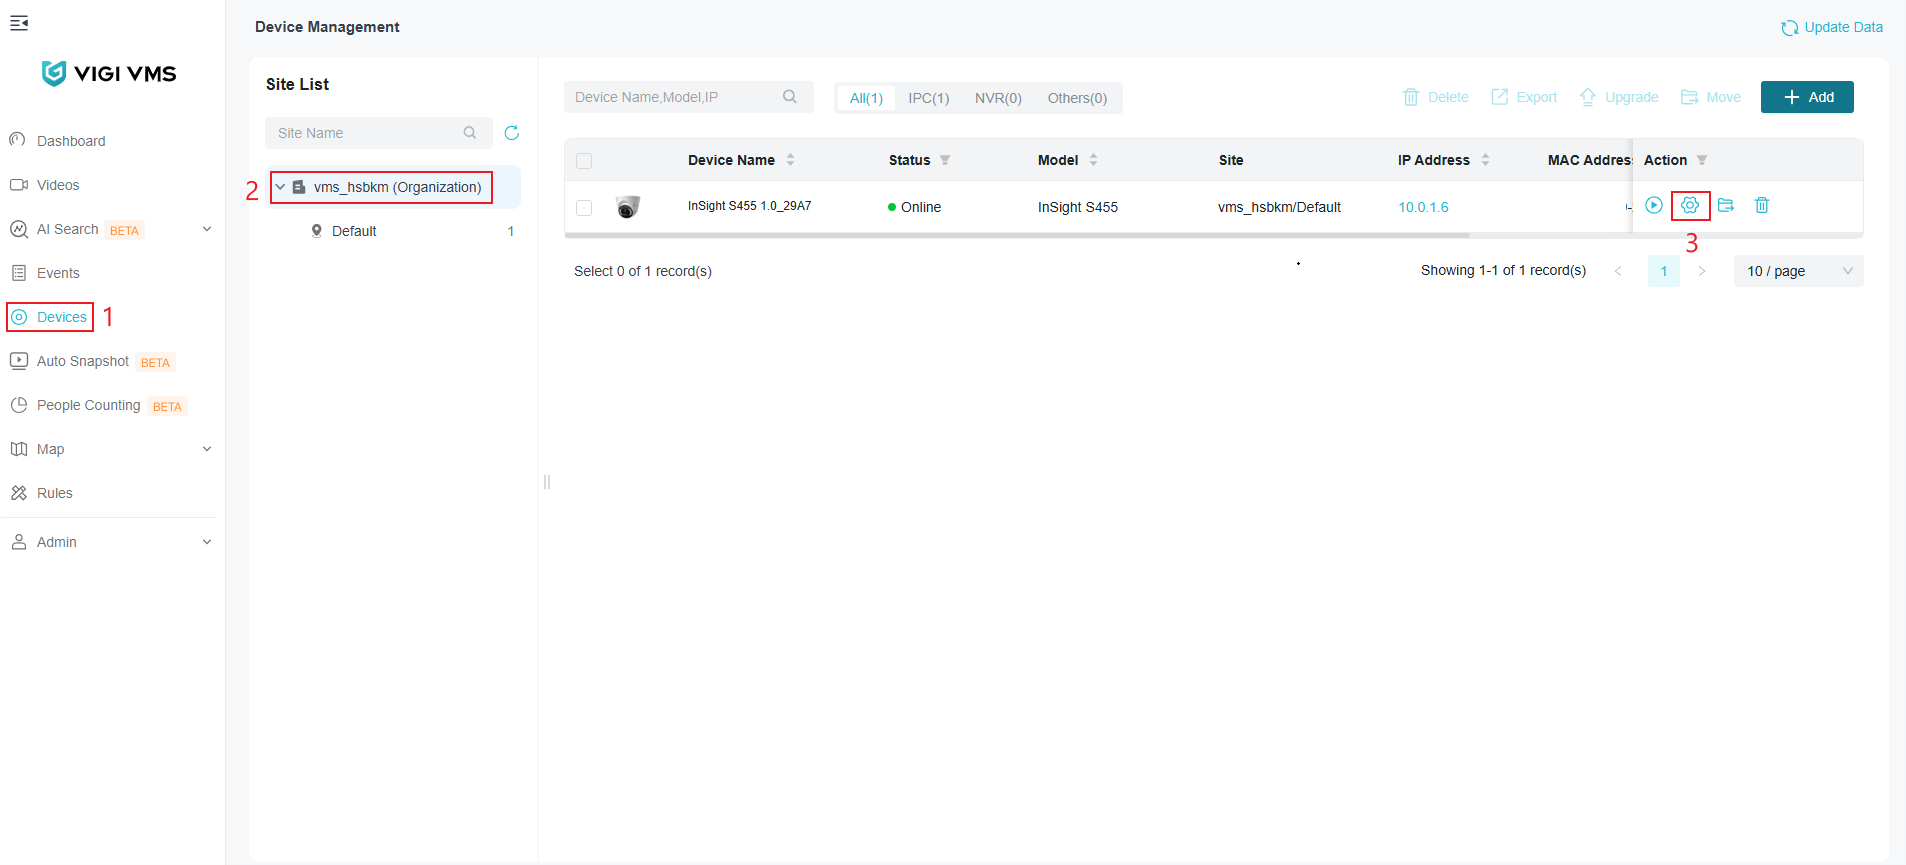
Step 1. Log in to the VIGI Local VMS or VMS Cloud and navigate to Devices > Organization > and click Edit.
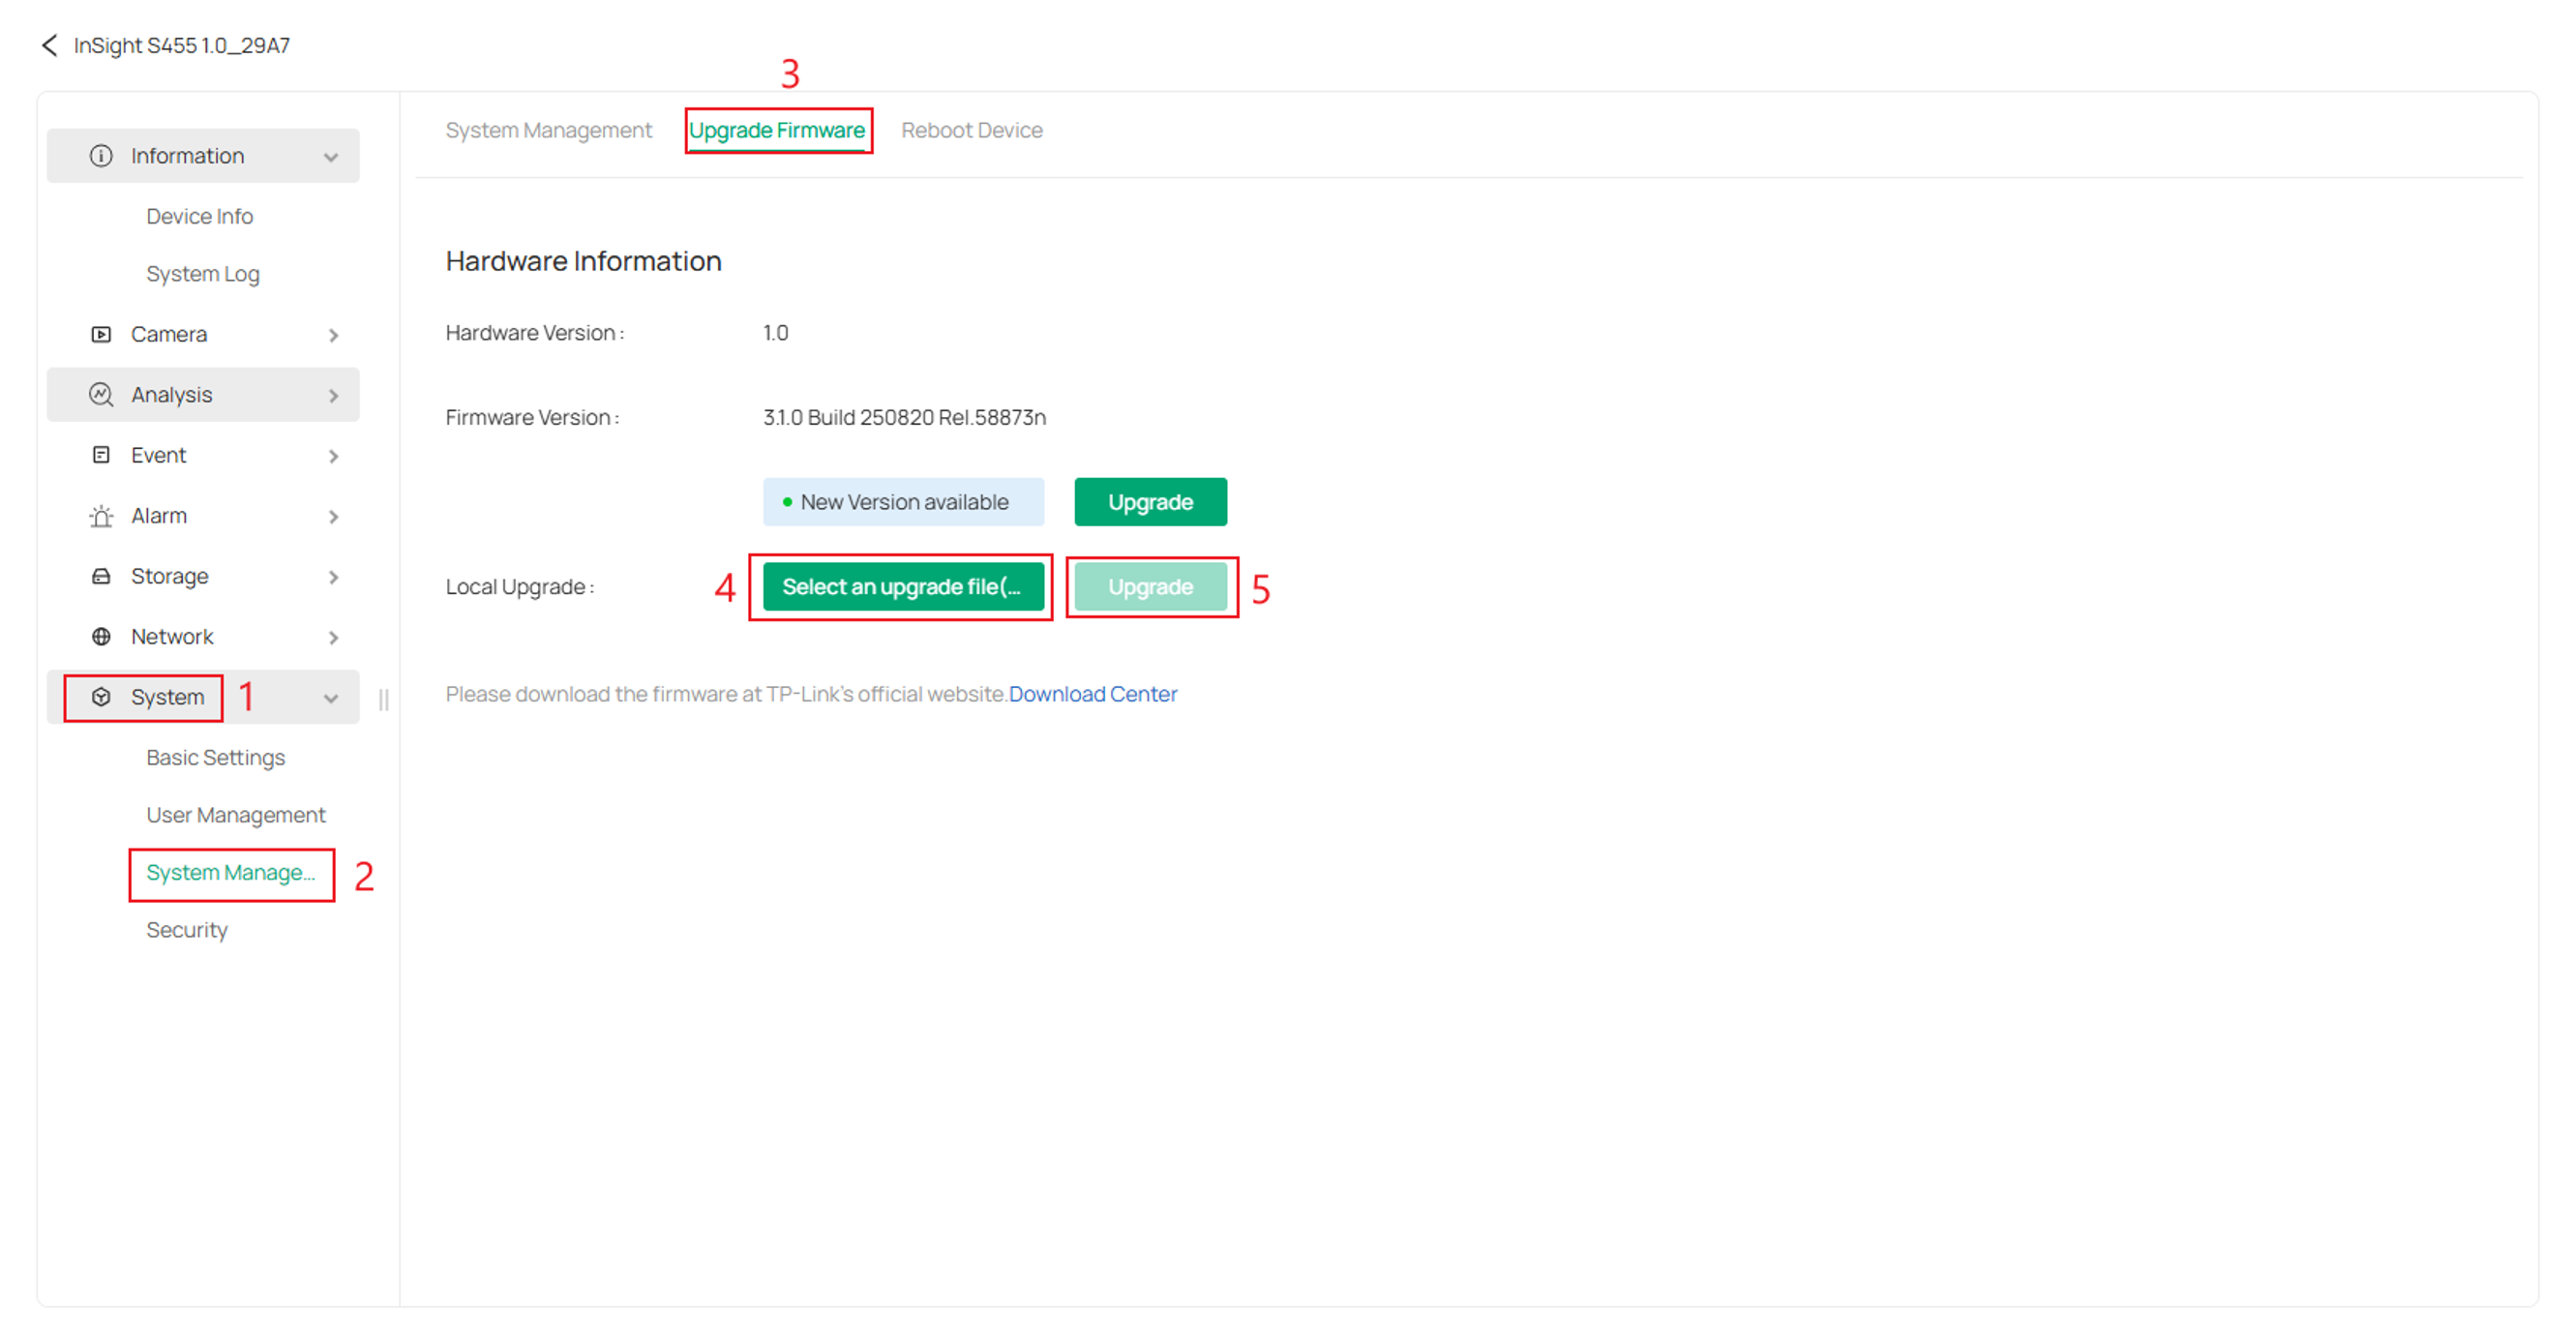
Step 2. Go to System > System Management > Upgrade Firmware > upload the firmware file > and click Upgrade.
Screenshot for Local VMS:
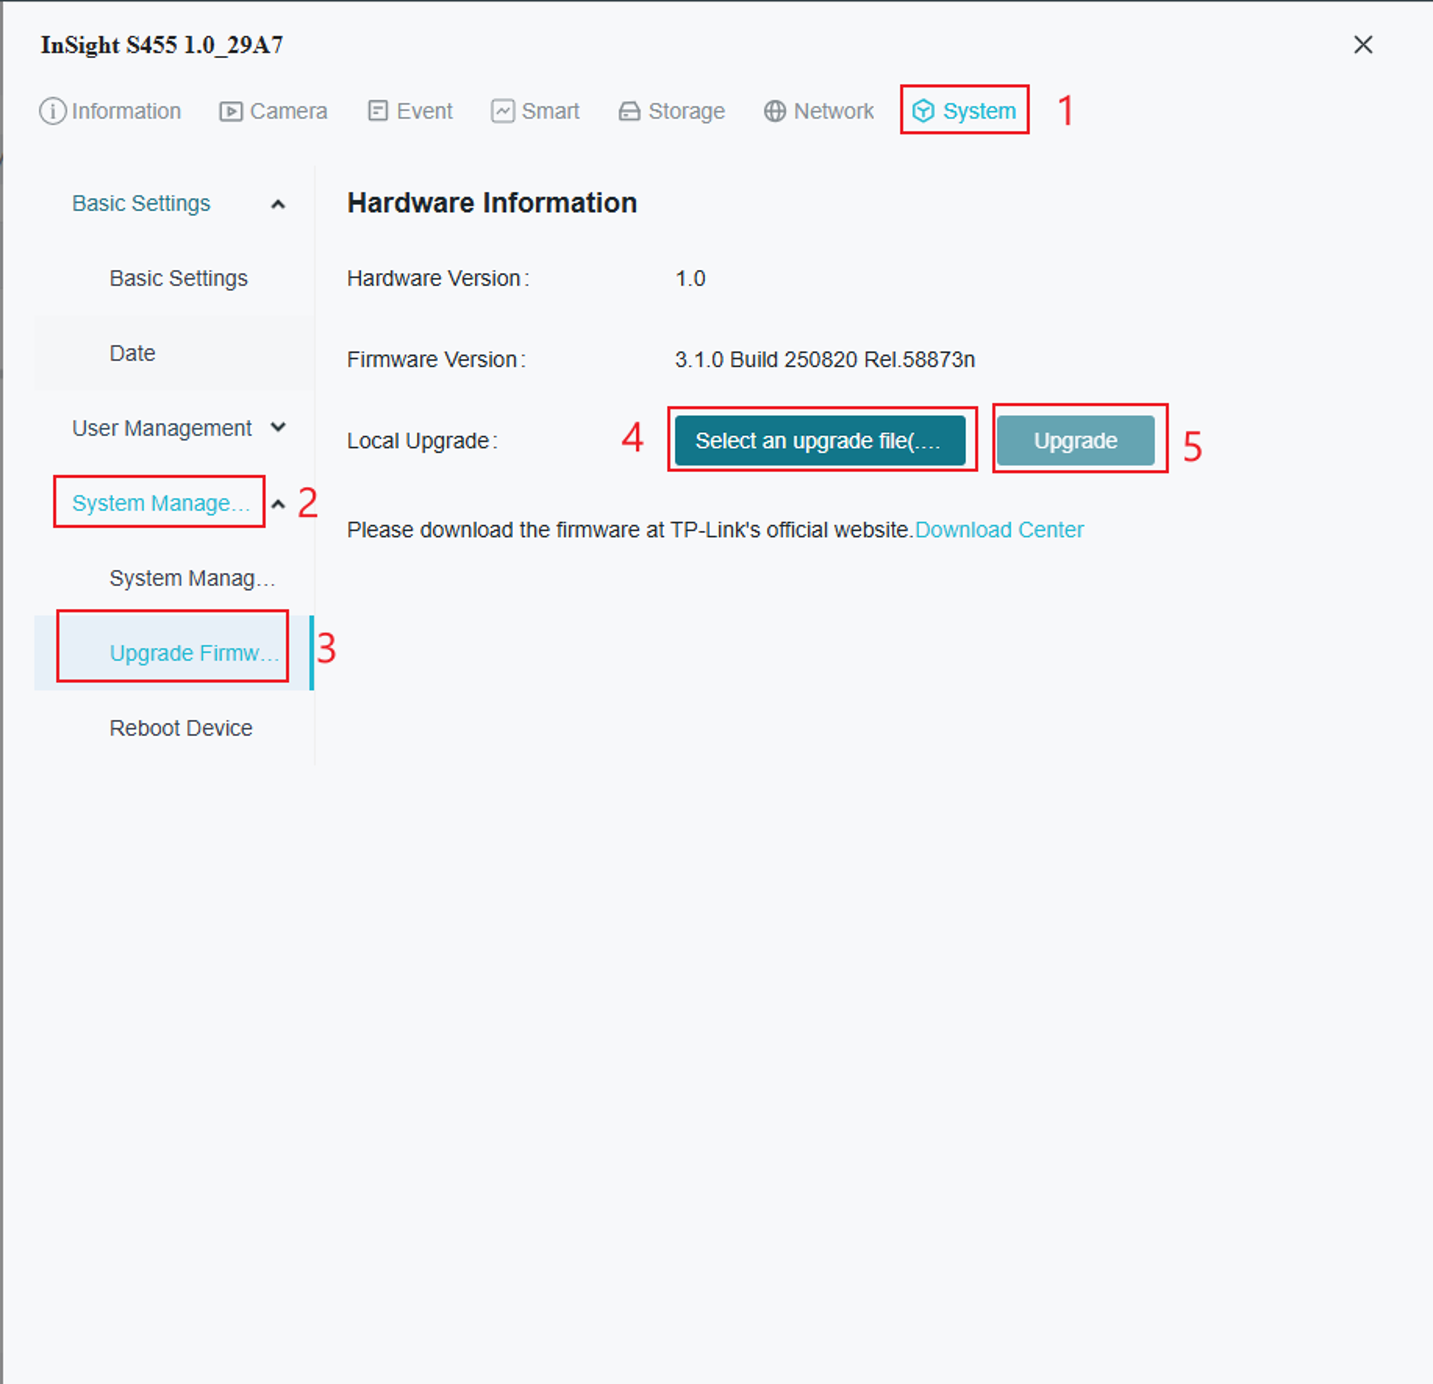
Screenshot for the Cloud VMS:
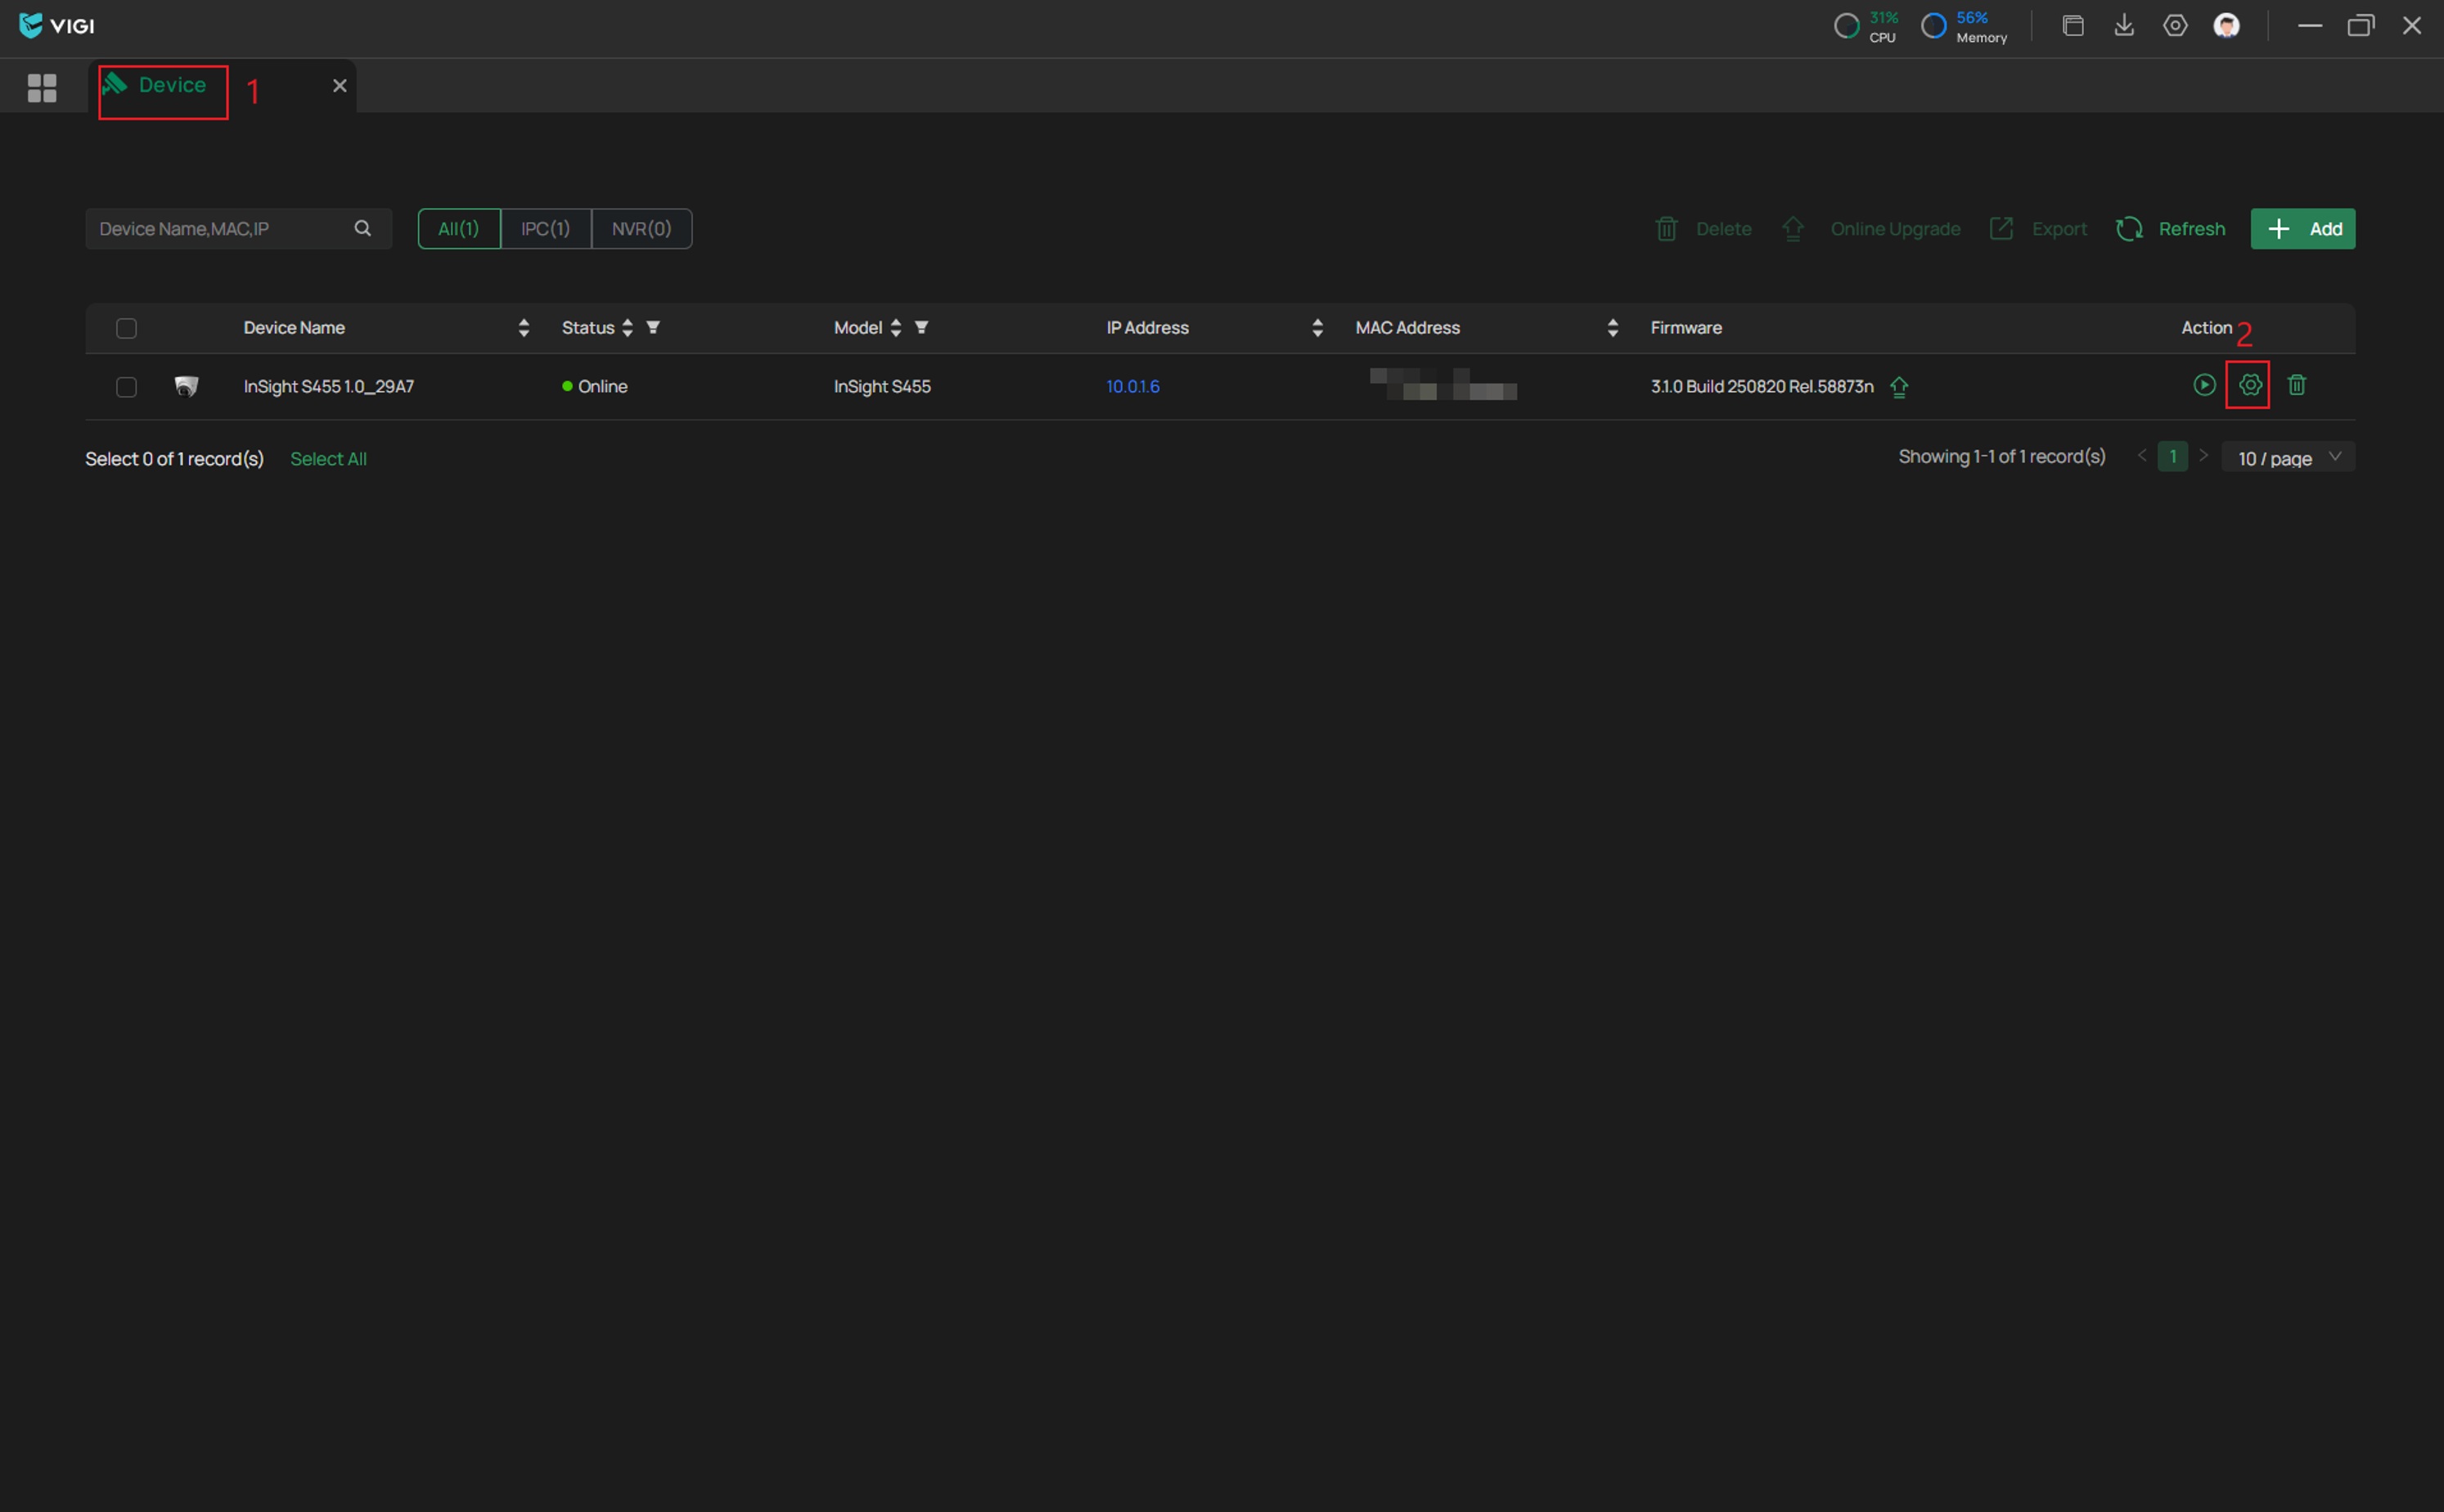
Configuration for Local VIGI PC Client
Step 1. After opening the Local VIGI PC Client navigate to Device and click Edit on the device you want to perform a firmware upgrade one.
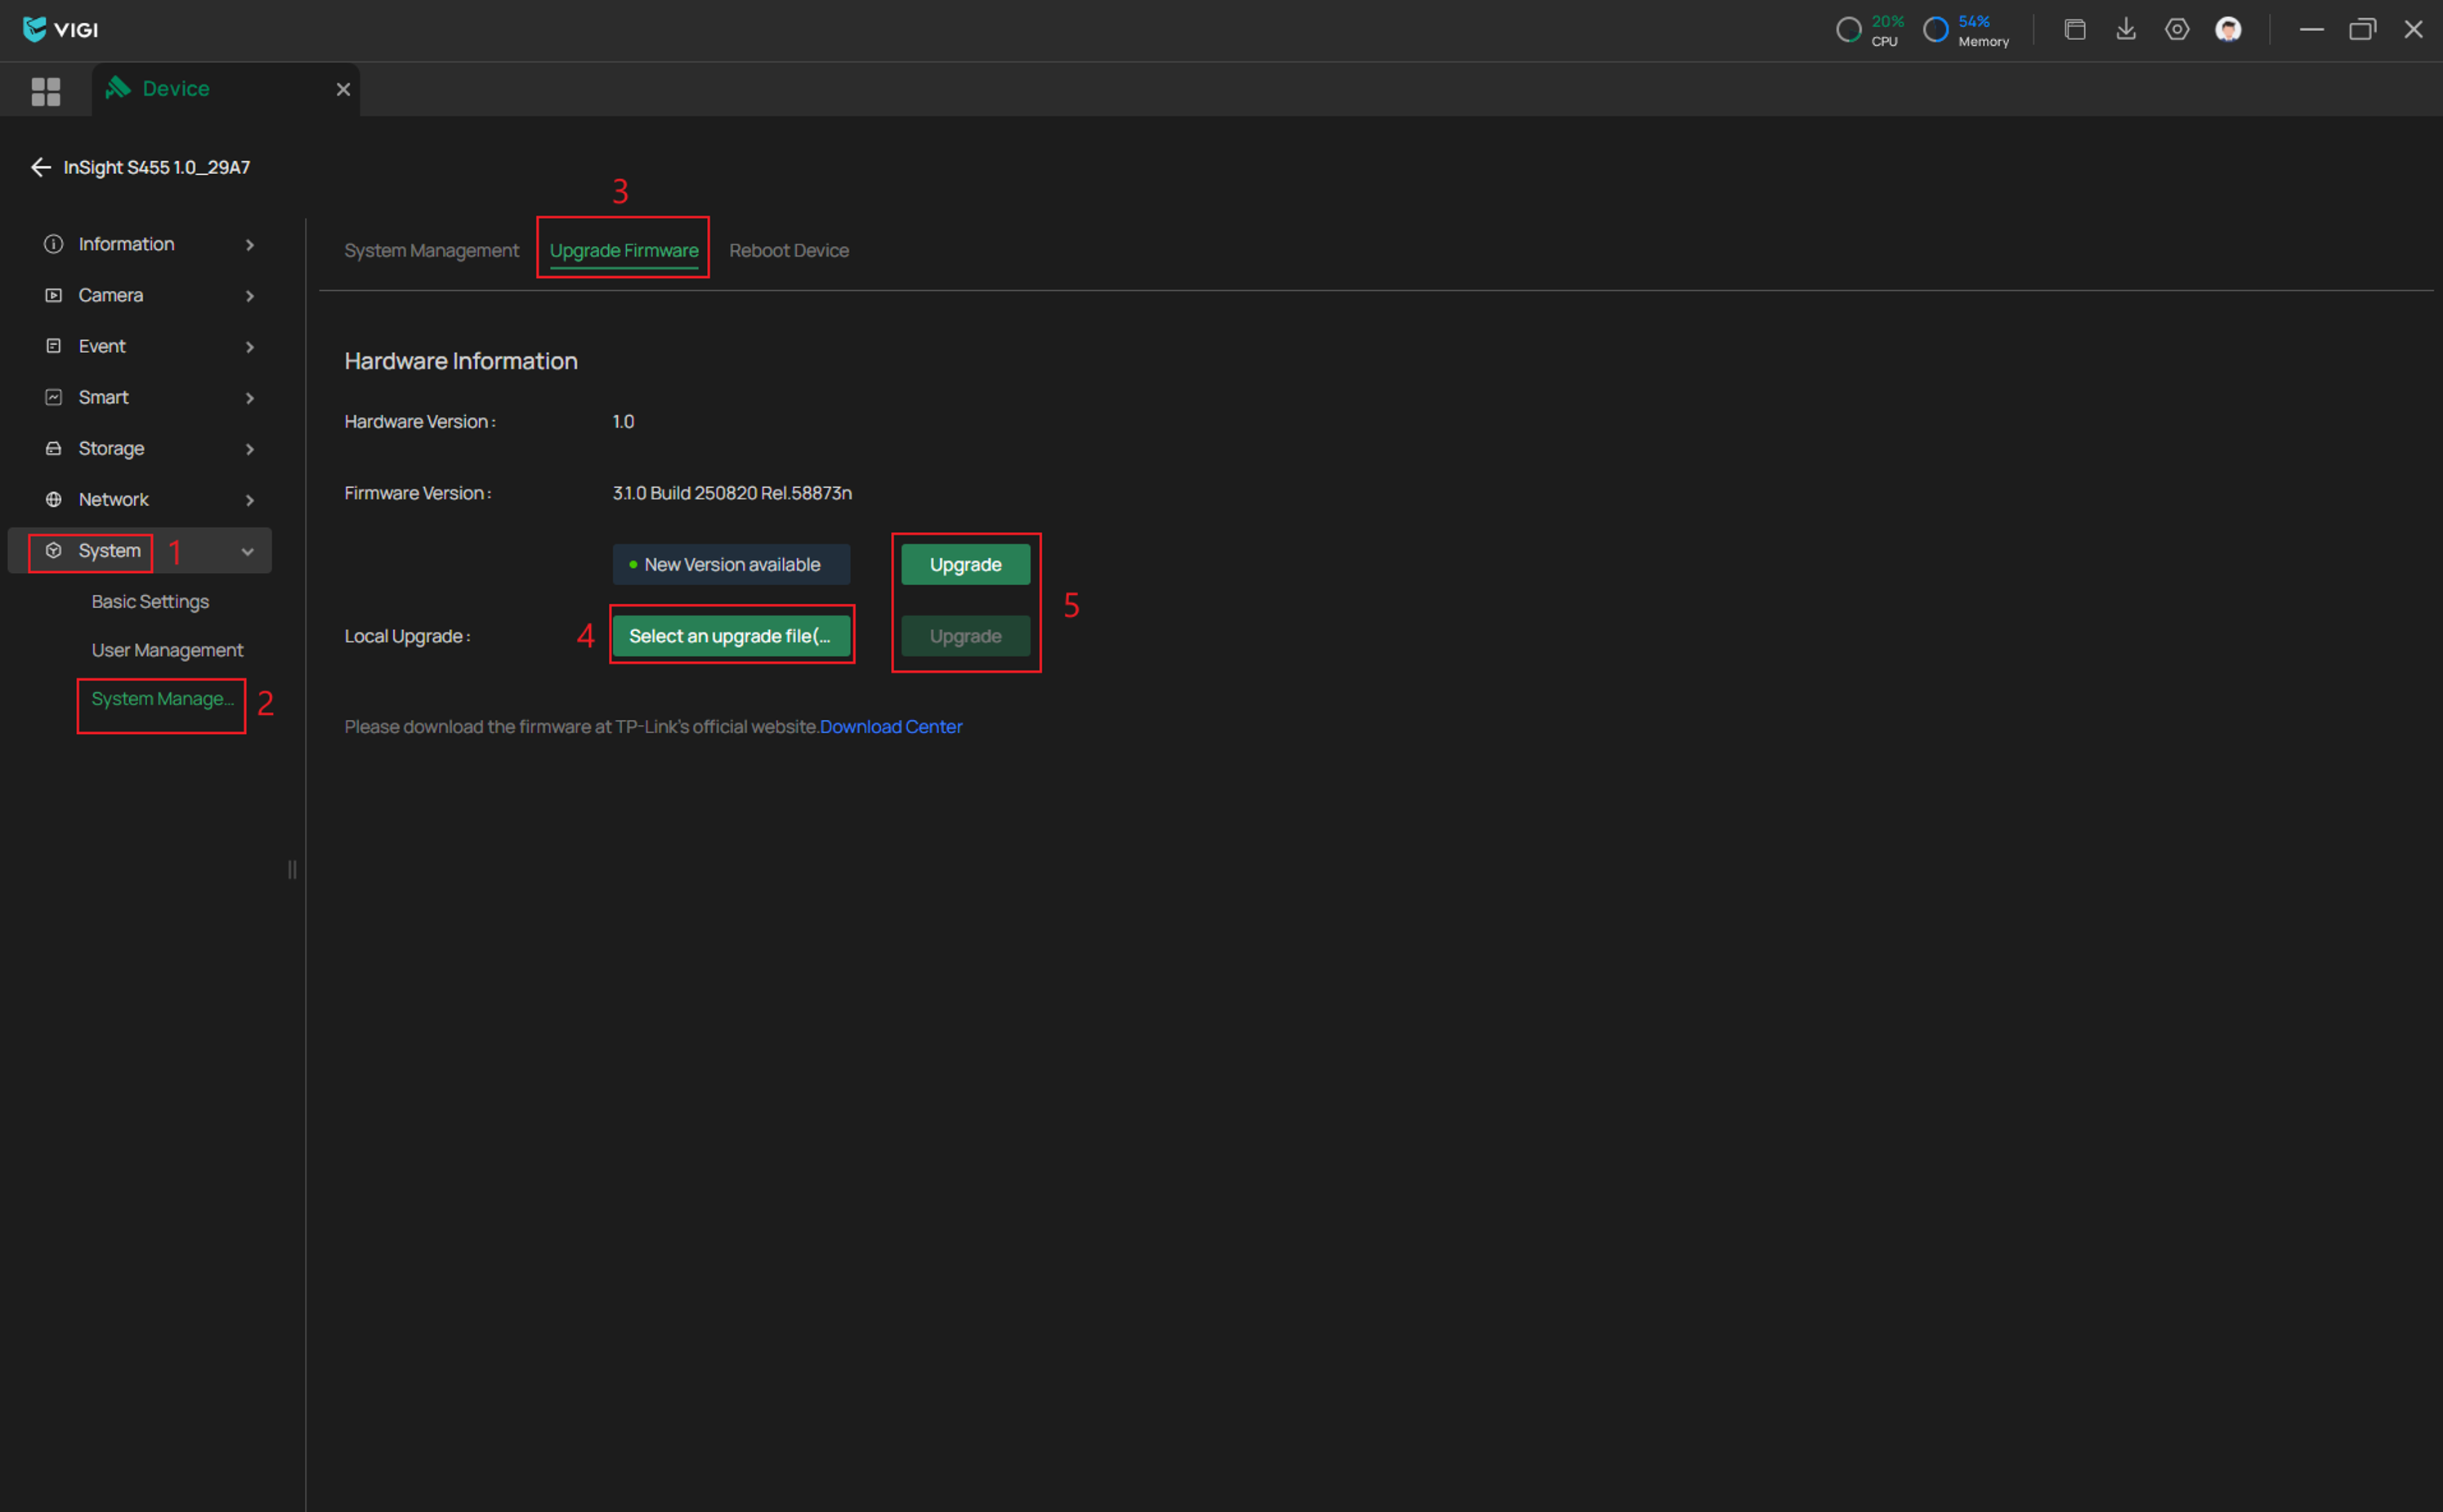
Step 2. Next go to System > System Management > Upgrade Firmware > click Select an Upgrade file if there isn’t one detected and select Upgrade.
Configuration for VIGI NVR GUI
Note: Before upgrading the firmware locally via the NVR GUI, please download the corresponding firmware based on your Omada Camera’s model and hardware version from the TP-Link official website Download Center.
After downloading, extract the firmware package to obtain the .bin file required for the upgrade. Copy the .bin file to a USB drive, then plug the USB drive into the Omada NVR's USB port to proceed with the upgrade.
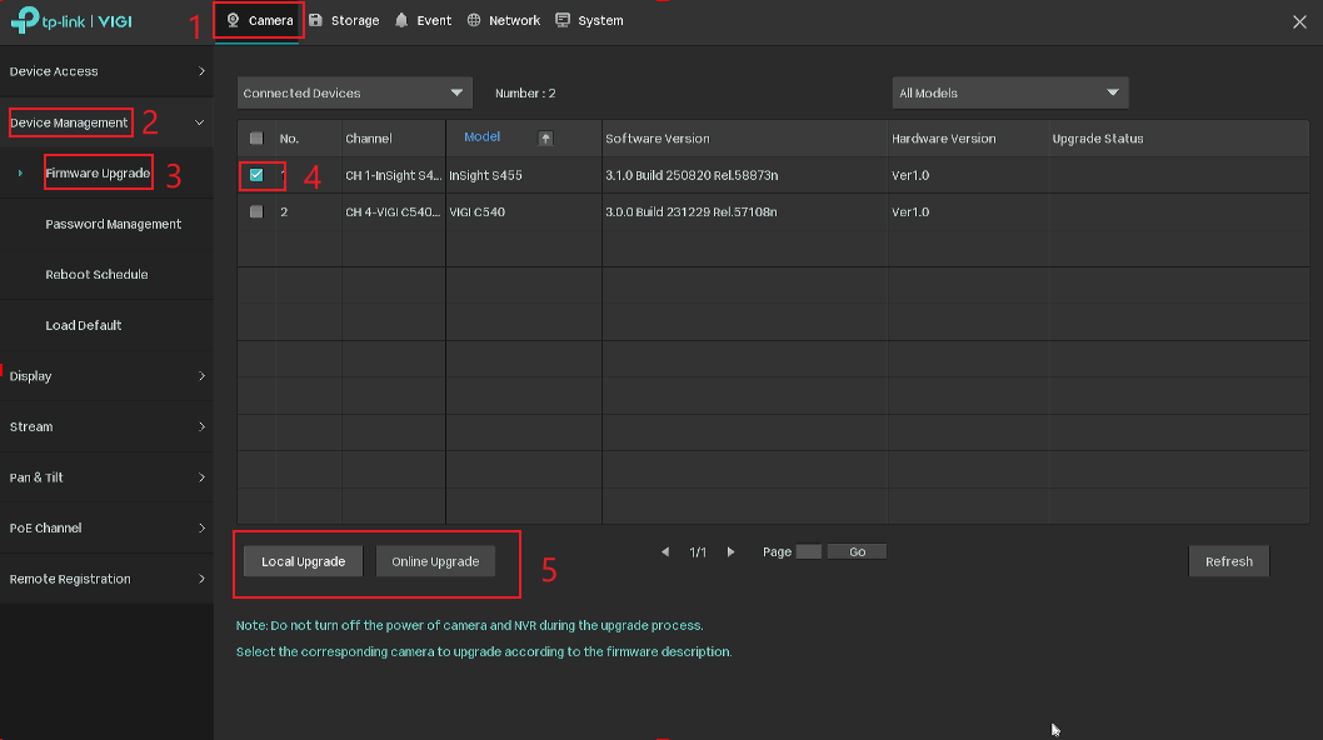
Step 1. Navigate to the NVR's Settings.
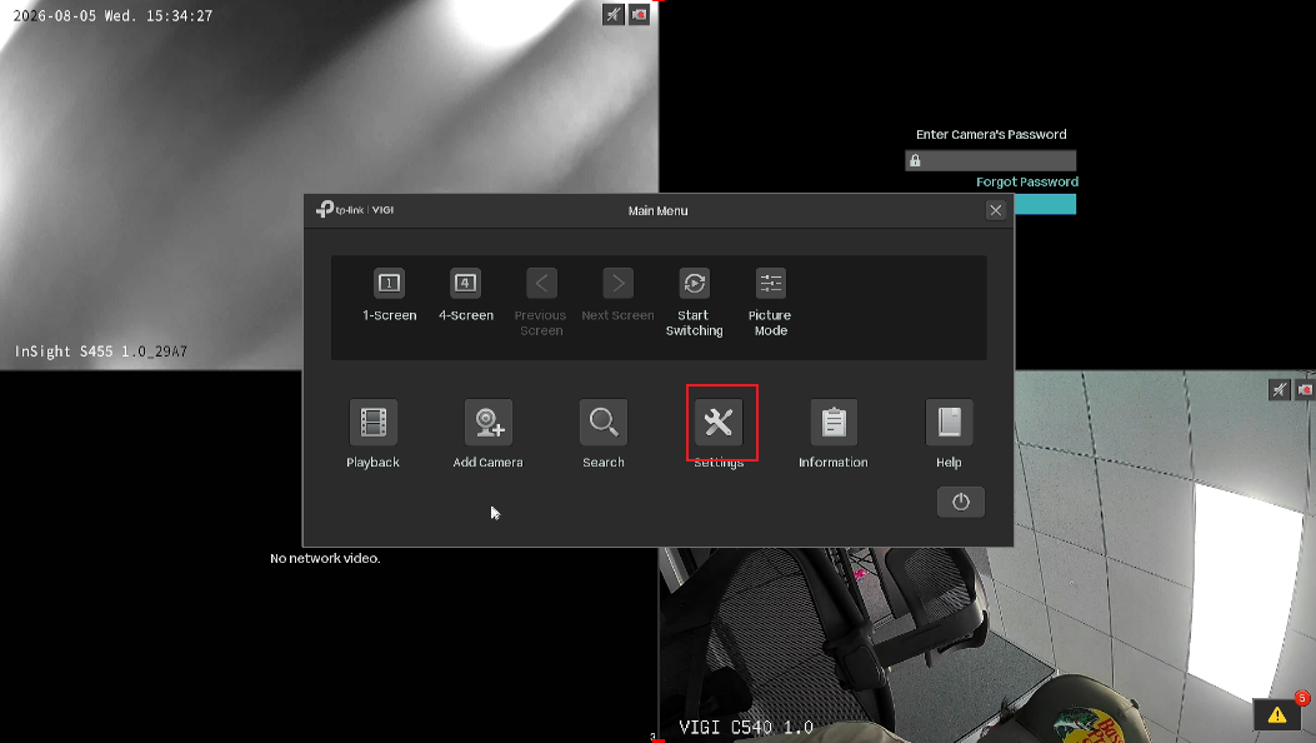
Step 2. Go to Camera > Device Management > Firmware Upgrade > select the IPC > and select your upgrade method
Configuration for VIGI App
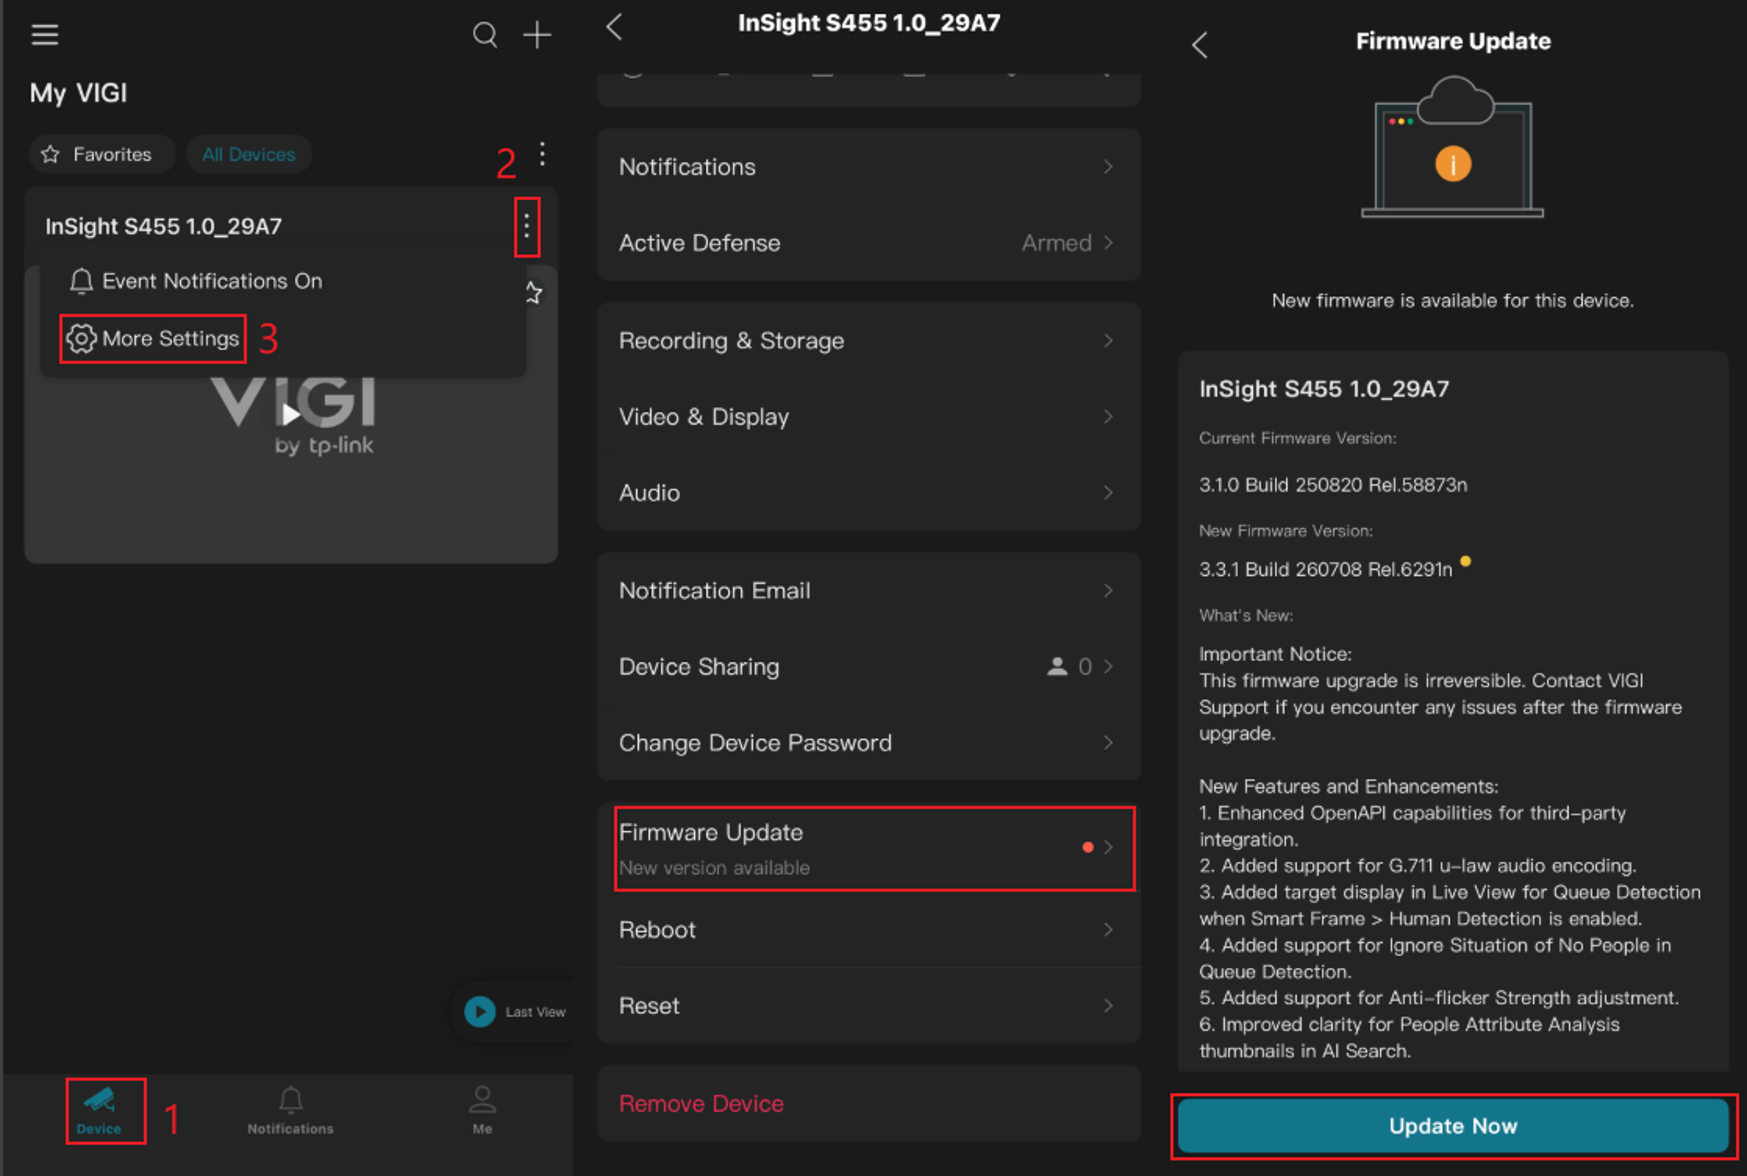
Step 1. Open the VIGI App and go to Device > Settings at the top right of the device > More Settings > Firmware Update > and click Update Now if there is an available firmware update.
Note: If a new firmware version is available, follow the on-screen prompts to start the upgrade.
If the Camera is already running the latest firmware, the app will display a message indicating that the firmware is up to date.
Conclusion
You have now successfully upgraded the firmware of your VIGI camera using the available management platform. Keep the camera powered and connected during the upgrade and verify that it returns online afterward.
To learn more about each function and configuration, please visit Support Home to download or check the manual for your product.
Looking For More
Is this faq useful?
Your feedback helps improve this site.



TP-Link Community
Still need help? Search for answers, ask questions, and get help from TP-Link experts and other users around the world.