How can I enable the 24/7 Capture on Battery Camera?
What is 24/7 Capture?
24/7 Capture refers to a mechanism that captures images at a certain frequency and triggers recording based on the differences between images. Once enabled, the Camera can continuously capture images at 1fps within a specific time interval for 7*24 hours. When an event is detected, it will switch back to normal frame rate recording.
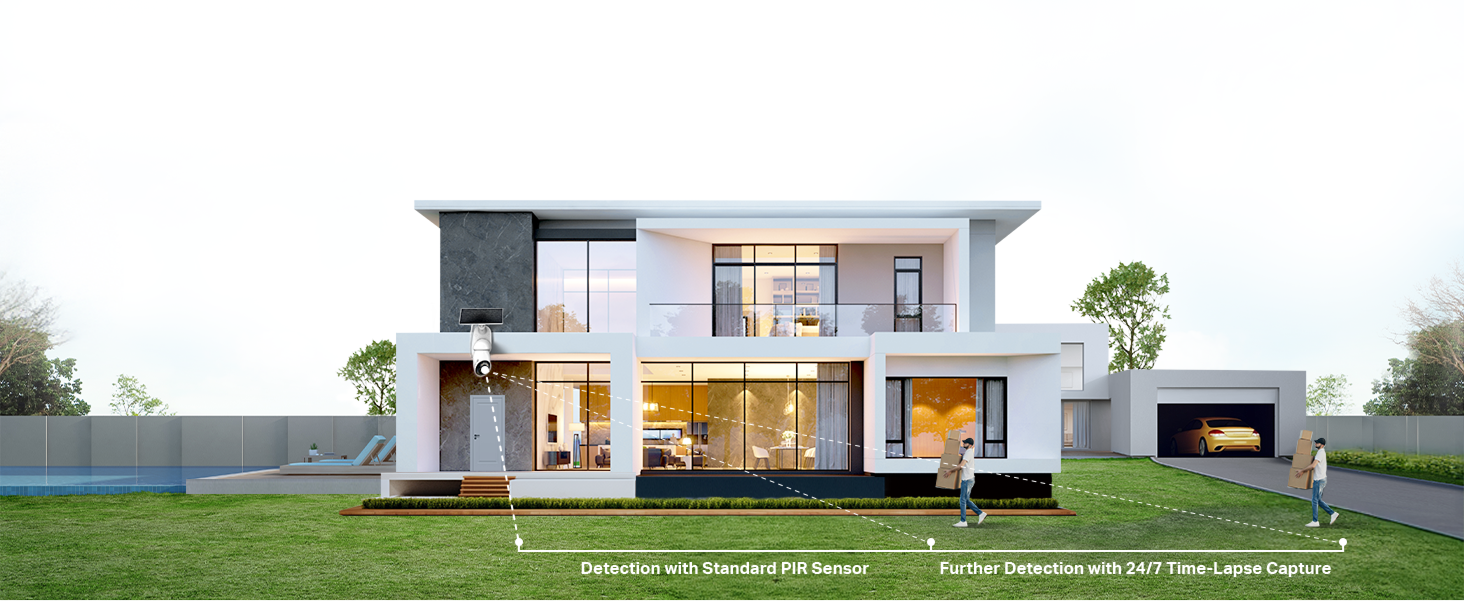
24/7 Capture can extend detection range for comprehensive coverage and achieve a result similar to continuous recording with lower power consumption. It ensures more critical footage is captured.
How can I enable the 24/7 Capture?
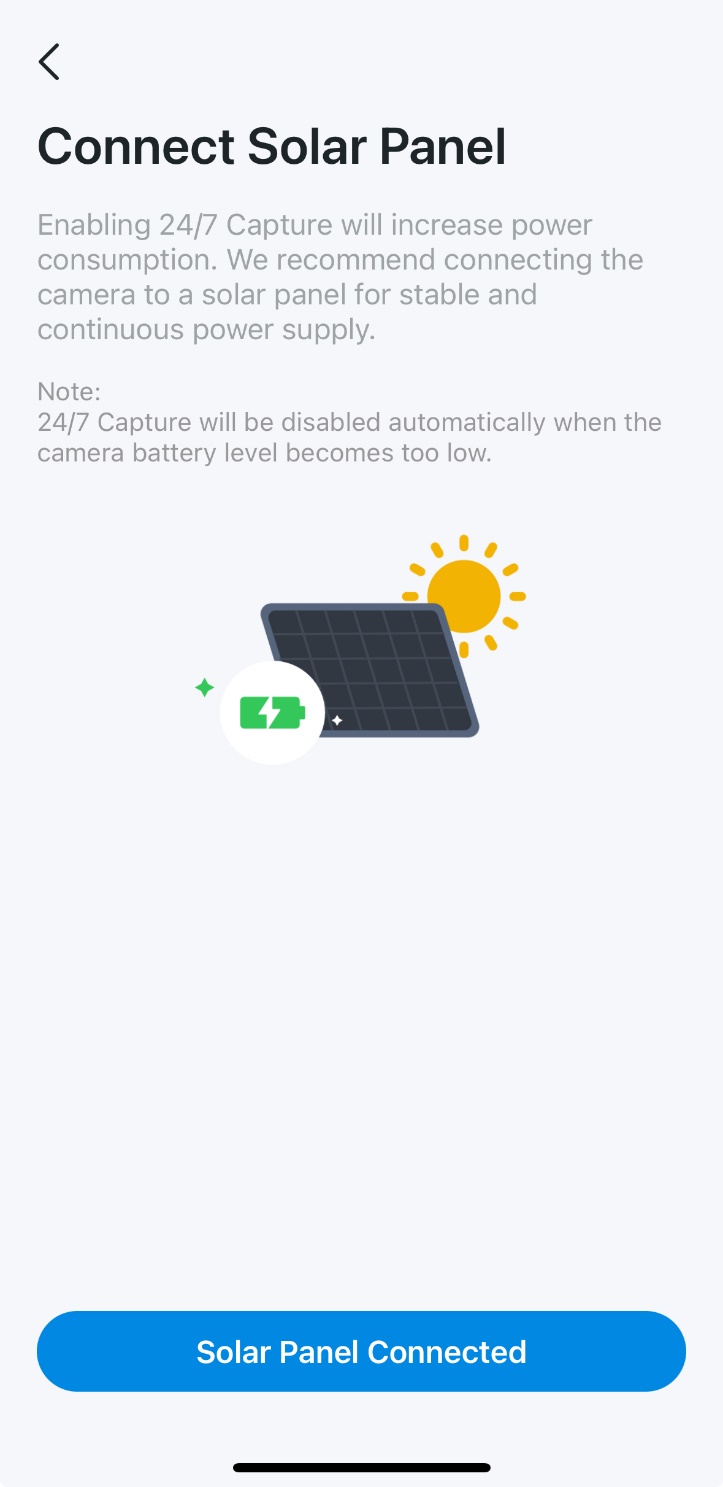
Note: After enabling 24/7 Capture, the device will consume power quickly and is recommended to be used with solar panels.
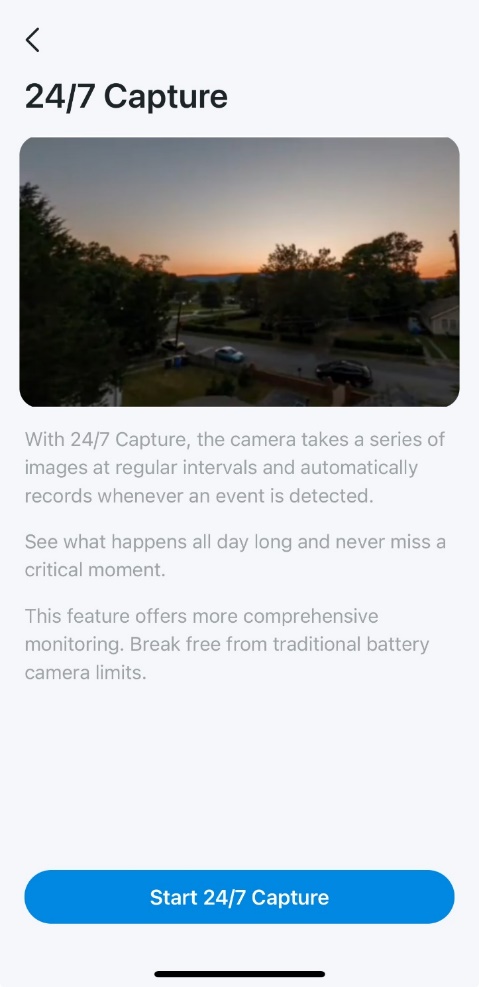
With 24/7 Capture, the camera takes a series of images at regular intervals and automatically records whenever an event is detected.
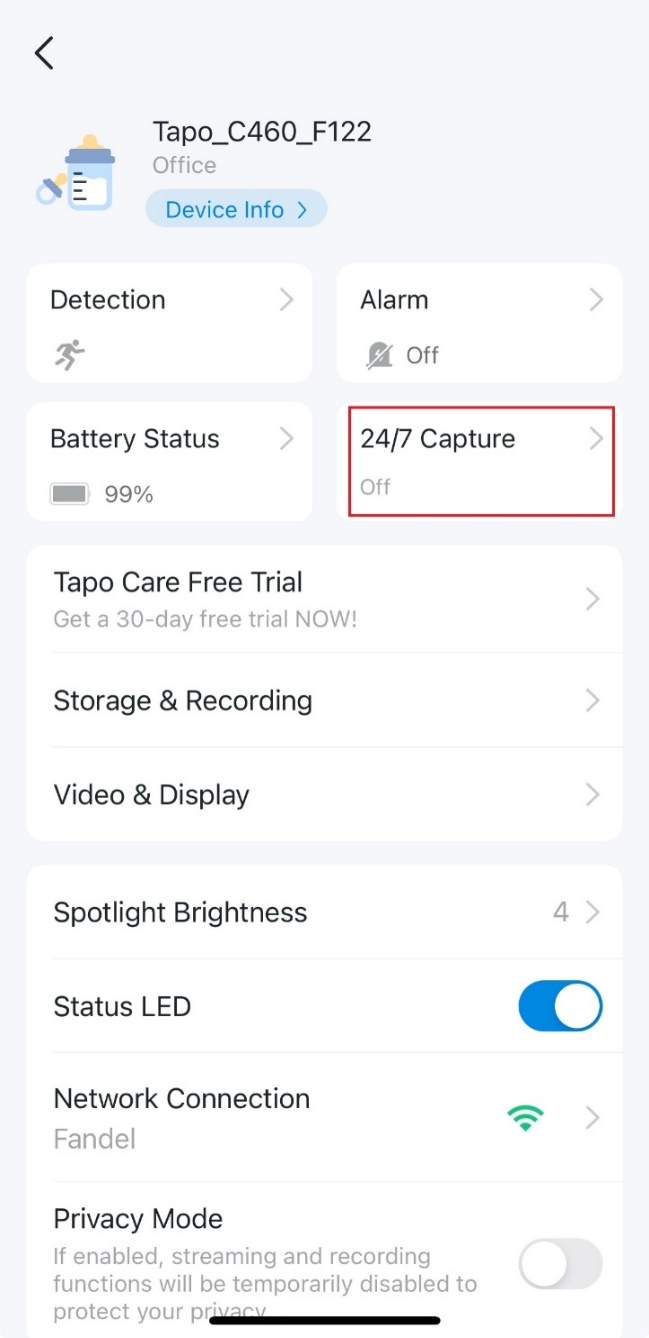
1. Go to the Device Settings page
2. Tap 24/7 Capture
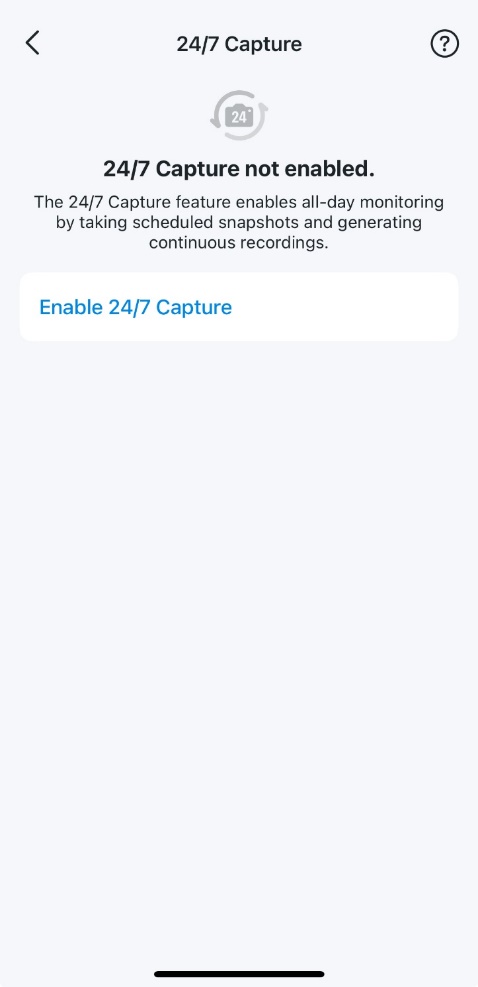
3. If this is your first time configuring 24/7 Capture, tap Start 24/7 Capture. Otherwise, tap Enable 24/7 Capture.
4. Tap Solar Panel Connected
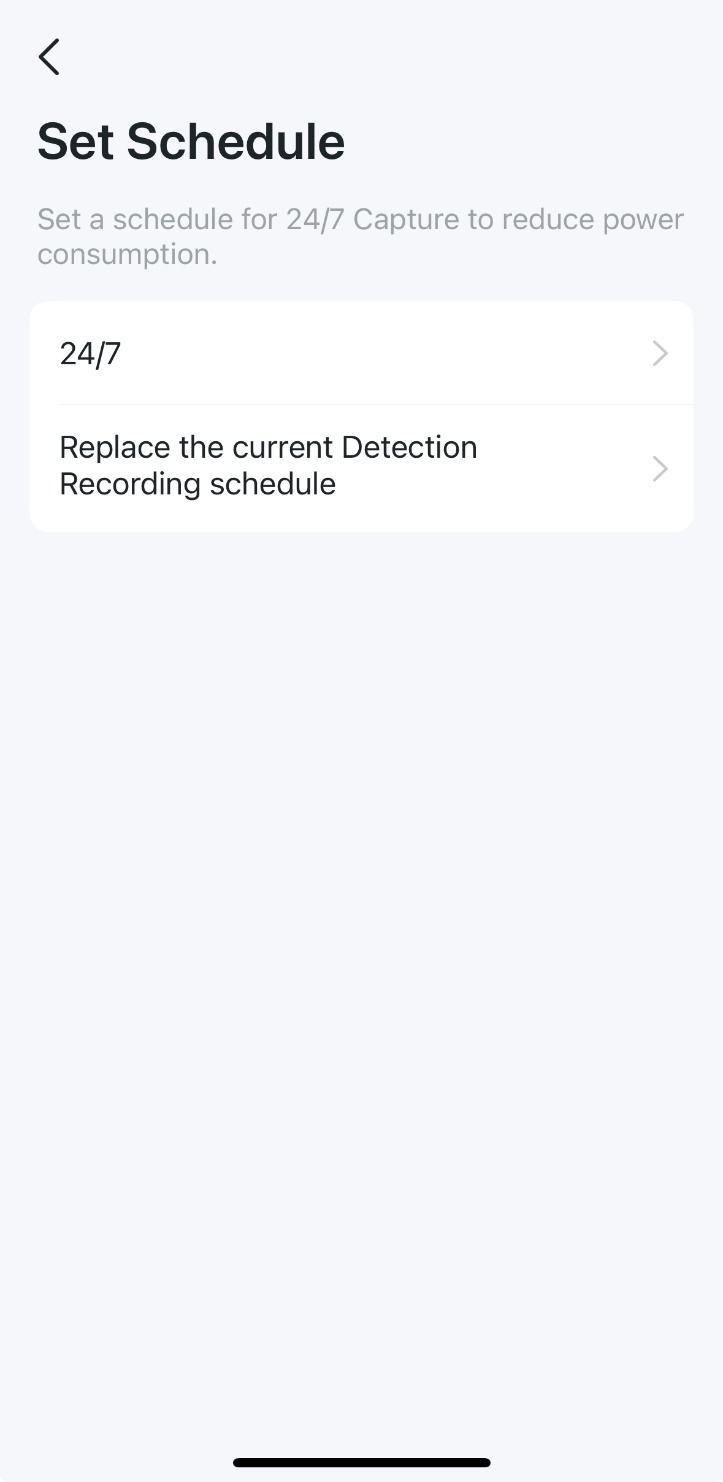
5. Tap 24/7 or tap Replace the current Detection Recording schedule to enter the 24/7 Capture page.
Choosing 24/7 sets the default Recording Schedule to 24/7 and the recording type to 24/7 Capture.
Choosing Replace the current Detection Recording schedule retains the previously set recording schedule and changes the recording type to 24/7 Capture.
For a specific photo illustration showing the difference, please refer to the QA Q: What’s the difference between 24/7 and Replace the current Detection Recording schedule? in this article.
6. Configure 24/7 Capture. (Optional)
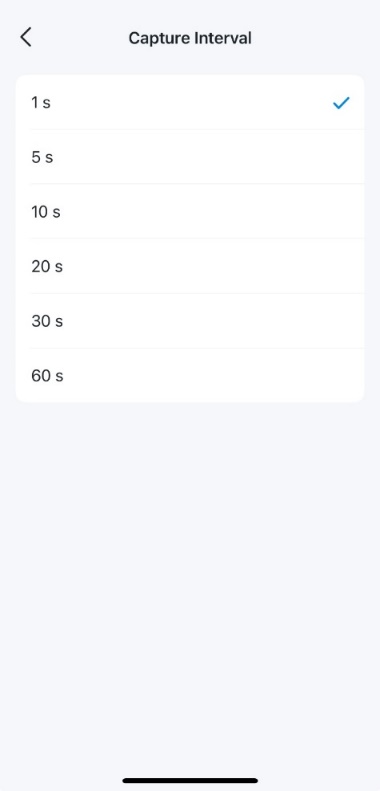
1) Tap Capture Interval to configure Capture Interval, which indicates how often the device captures footage.
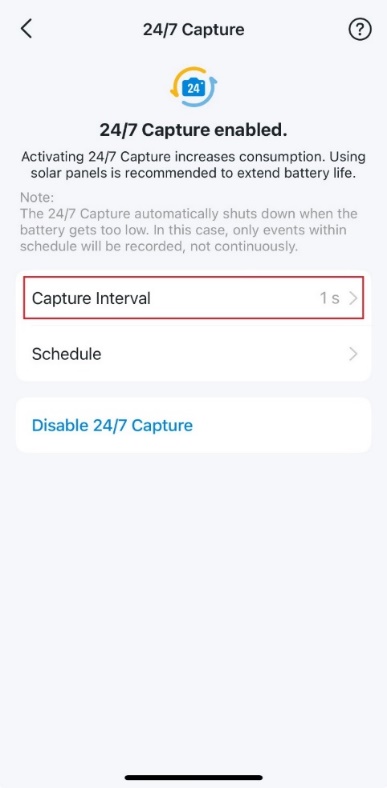
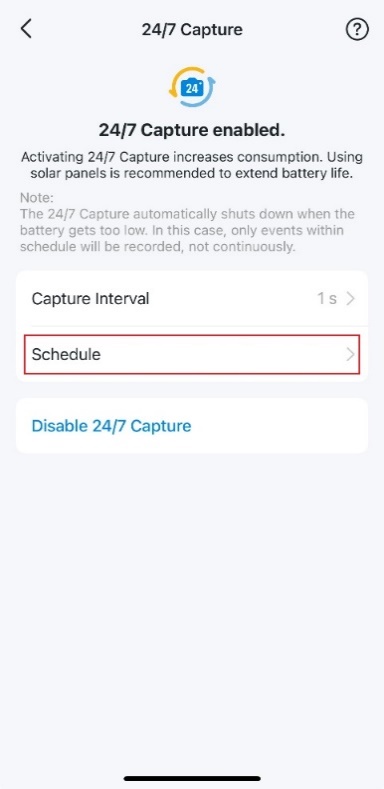
2) Tap Schedule to go to the Recording Schedule page. Tap Edit to configure the Capture and Detection Recording time periods.
QA
Q1: What is the difference between 24/7 Capture, PIR Detection and Continuous Recording?
A1: For details, please refer to the following table:
|
Feature |
24/7 Capture |
PIR Detection |
Continuous Recording |
|
Trigger Mechanism |
Image difference detection |
Infrared motion detection |
Always recording |
|
Power Consumption |
Moderate (much higher than PIR, but lower than continuous) |
Low |
High |
|
Storage Usage |
Lower than continuous recording |
Lower than 24/7 Capture |
Highest |
|
Detection Range |
Longer (up to 15m for human, 30m+ for vehicles) |
Shorter (up to 9m) |
Not applicable (no detection) |
|
Use Case |
Ideal for energy-efficient monitoring with good coverage |
Best for low power consumption |
Best for full-time recording, but high power usage |
Q2: What are the effects after enabling 24/7 Capture?
A2: After enabling 24/7 Capture, the detection range will be extended, and events outside the original PIR detection range may also be detected. At this time, it is recommended to set the detection area or adjust the installation position to avoid unnecessary detection alerts.
Additionally, since enabling 24/7 Capture increases the number of wake-ups and keeps the original PIR wake-up detection active, the installation guidelines to prevent frequent wake-ups from draining the battery still apply. For example, avoid pointing the camera directly at a busy street or swaying trees.
Q3: Can 24/7 Capture be used without an SD card or Hub storage?
A3: No. Requires SD card for full functionality. Only video that triggers detection is saved to Tapo Care, and playback of 24/7 Capture viewed by Tapo Care has the same effect as Detection Recording. Pictures from regular captures are not stored in Tapo Care.
24/7 Capture is not fully compatible with Hub storage yet. Please ensure to select Camera Storage as the local storage location, then try to enable 24/7 Capture again.
Please expect 24/7 Capture to be fully adapted to the Hub in Dec.2025.
Q4: How do the interval settings of 24/7 Capture affect battery life?
A4: Check the table below for estimated battery performance:
|
Frame interval (S) |
Battery life on a full charge(without a Solar Panel) |
Solar charging time to support one day of use |
|
1 |
8 Days |
105 minutes |
|
5 |
25 Days |
<45 minutes |
|
10 |
37 Days |
<45 minutes |
|
20 |
42 Days |
<45 minutes |
|
30 |
51 Days |
<45 minutes |
|
60 |
55 Days |
<45 minutes |
Note:
- Battery life and solar charging time are based on Tapo laboratory tests, assuming 23 daytime events and 12 nighttime events per day, each triggering a 13-second video recording with the device in standby mode the rest of the time.
- Solar charging time is measured under standard test conditions (1000W/㎡, 25℃, AM1.5). Actual performance may vary depending on device settings, usage patterns, router specifications, and environmental conditions.
Q5: What is the storage space usage of 24/7 Capture on the SD card?
A5: When no detection event is triggered, with a 10-second capture interval, 24/7 Capture recording consumes about 173MB per day. If the interval is set to 1 second, it will consume about 1730MB per day.
The following table shows the approximate number of days the storage can hold 24/7 Capture recordings:
|
Capture Interval |
16GB |
32GB |
64GB |
128GB |
256GB |
512GB |
|
1 second |
~9 days |
~18 days |
~36 days |
~73 days |
~147 days |
~294 days |
|
10 seconds |
~91 days |
~184 days |
~368 days |
~736 days |
~1472 days |
~2944 days |
Q6: What’s the difference between 24/7 and Replace the current Detection Recording schedule?
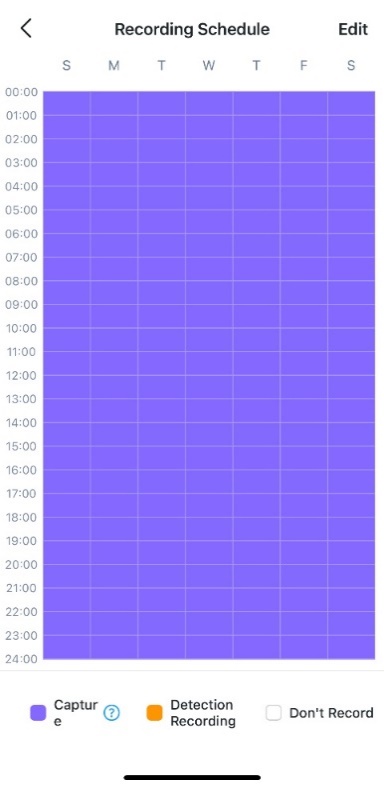
A6: Choosing 24/7 sets the default Recording Schedule to 24/7 and the recording type to 24/7 Capture.
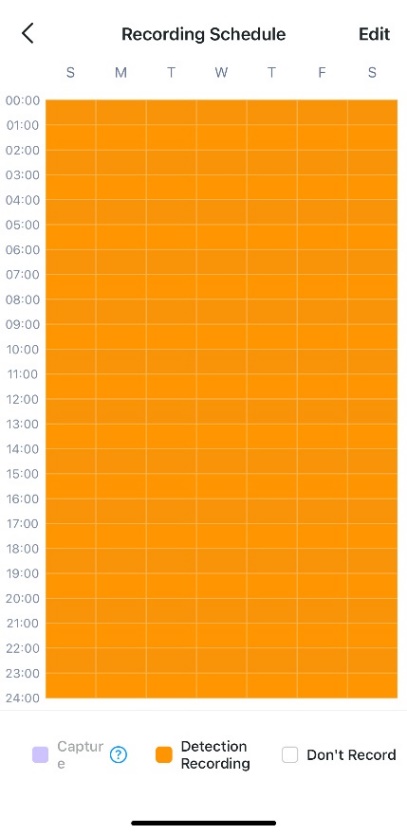
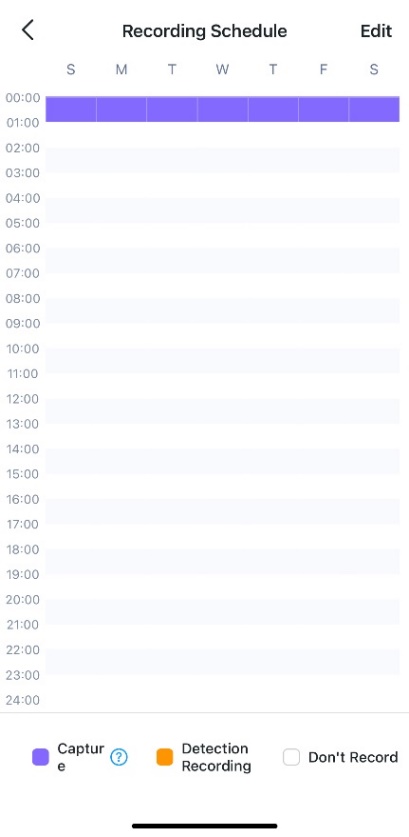
Choosing Replace the current Detection Recording schedule retains the previously set recording schedule and changes the recording type to 24/7 Capture.
No matter which quick configuration method is chosen, after that, whether the user manually turns off or the device automatically turns off the 24/7 Capture function, the recording schedule remains unchanged, and the recording type is set back to Detection Recording.
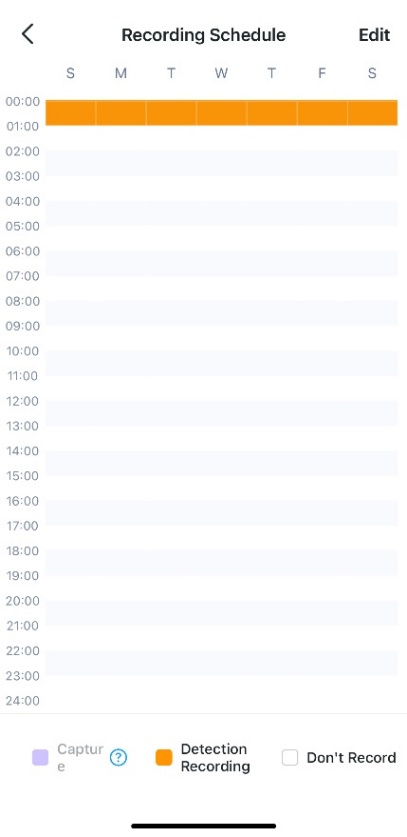
24/7:
 >
> >
>
The above three images show the process of quickly configuring the Recording Schedule by selecting 24/7, from the previous configuration to enabling 24/7 Capture and then disabling 24/7 Capture.
Replace the current Detection Recording schedule:
 >
> >
>
The above three images show the process of quickly configuring the Recording Schedule by selecting Replace the current Detection Recording schedule, from the previous configuration to enabling 24/7 Capture and then disabling 24/7 Capture.
Is this faq useful?
Your feedback helps improve this site.

TP-Link Community
Still need help? Search for answers, ask questions, and get help from TP-Link experts and other users around the world.