How to configure the TP-Link Travel Router in Range Extender mode
Introduction
The TP-Link Travel Router supports multiple operating modes to accommodate diverse connectivity needs, including Wireless Router/Access Point/Range Extender/Client/Hotspot mode. This article provides step-by-step instructions for configuring them in range extender mode effectively.
The range extender mode repeats the signal from an existing wireless network, which is suitable to extend wireless coverage, reaching devices that were previously too far from your primary router to maintain a stable wireless connection.
If it doesn’t match your network environment, identify which operation mode is suitable for you first.
Configuration
Note: This guide uses TL-WR902AC and TL-WR3602BE as reference models to show the installation steps. The actual interface and function options shown in this FAQ may vary slightly from those of your product model. For more details, please refer to your router's User Guide.
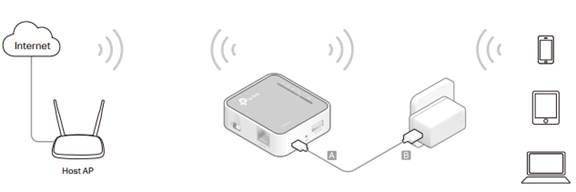
Step 1. Switch the operating mode to AP/Rng Ext/Client and plug the travel router into an electrical outlet near your host router (host AP).
Note: There is no physical switch button on the TL-WR802N and TL-WR810N to control the operating mode; you can select the mode after accessing the web management.
Step 2. Connect one computer to the router wirelessly or via an Ethernet cable. The Wi-Fi network name and password are on the router’s label.
Step 3. Open a browser to visit tplinkwifi.net to log in to the web management page with the username and password you set for the router. The default is admin (all lowercase) for both the username and the password.
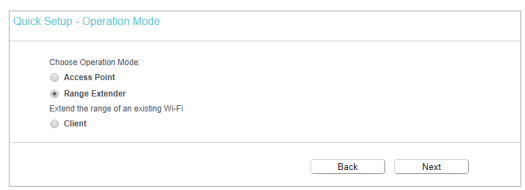
Step 4. Click Next to start the Quick Setup.
Step 5. Select Range Extender (Repeater) as the router's operation mode.
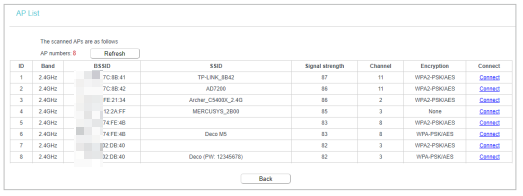
Step 6. Click Connect to connect to the host network in the AP List page.
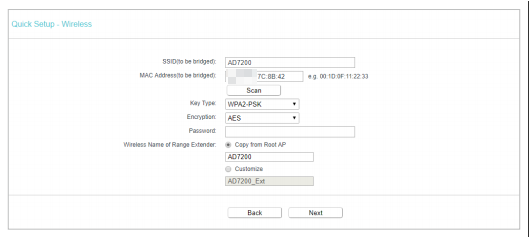
Step 7. Enter the host network password, then either copy the Wireless Name from the host network or customize it.
Step 8. Select the LAN IP type for the router, or leave the default Smart IP for most cases, then click Next.
Step 9. Click Finish to apply the settings. Once finished, you can relocate the router about halfway between your host network and the Wi-Fi dead zone.
Step 1. Power on the travel router near your host router (main AP), and wait until the LED turns into solid red before moving on.
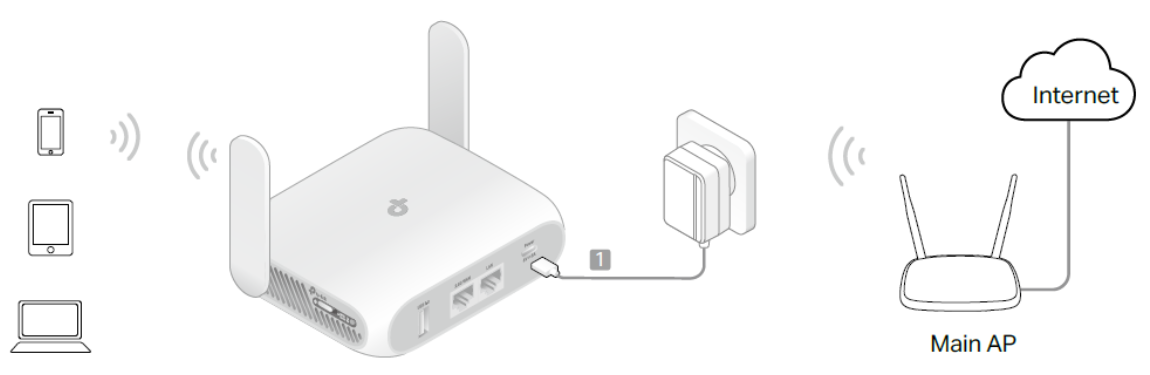
Step 2. Connect one computer to the travel router wirelessly or via a wired connection.
- Wirelessly: Connect your device to the router’s Wi-Fi. The default wireless network name (SSID) and wireless password are printed on both the Wi-Fi info card and the label at the bottom of the router.
- Wired: Turn off the Wi-Fi on your computer and connect to the LAN port of the router with an Ethernet cable.
Step 3. Open a browser to visit tplinkwifi.net or 192.168.0.1, and then create a local password to sign in to the web management page. If you have already configured this device, it will ask you to enter the local password. Once sign in, go to Step 6.
Note: If you do not remember the local password, get a pin to press the reset hole for 6 seconds to perform a hard reset.
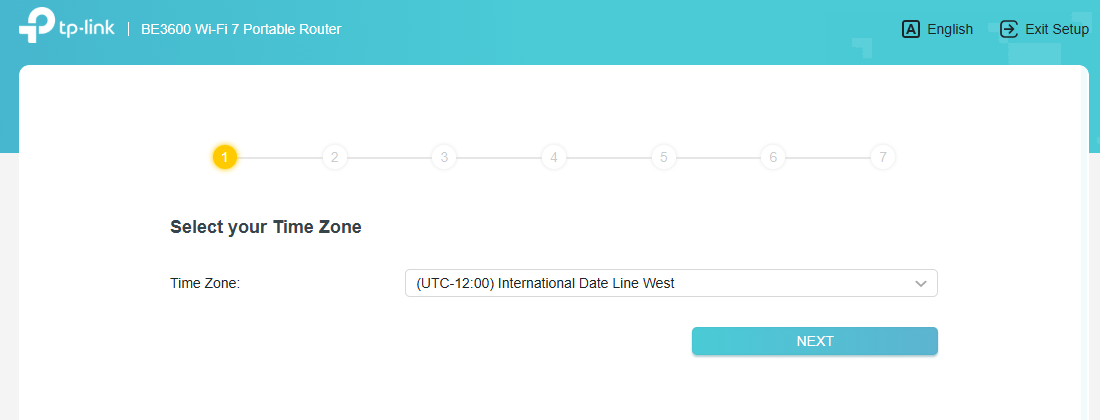
Step 4. Select your time zone, and click NEXT.
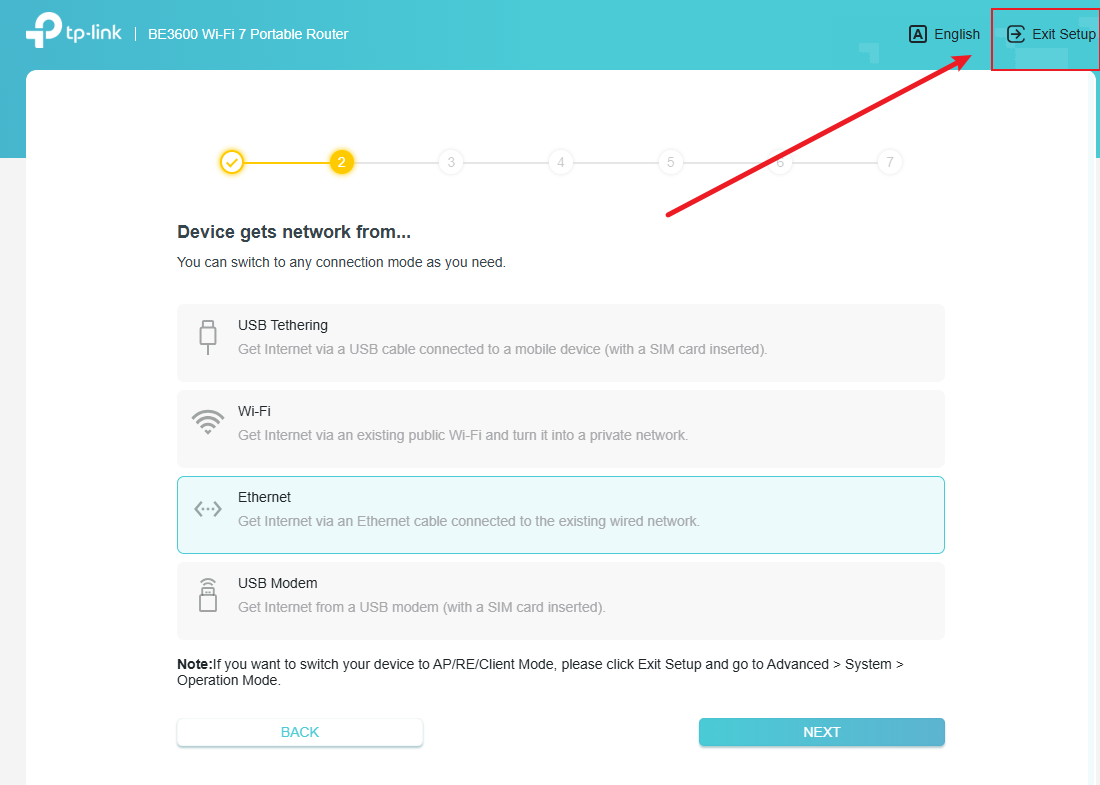
Step 5. On the next page, select Exit Setup, then click EXIT in the pop-up dialog to terminate the current configuration.
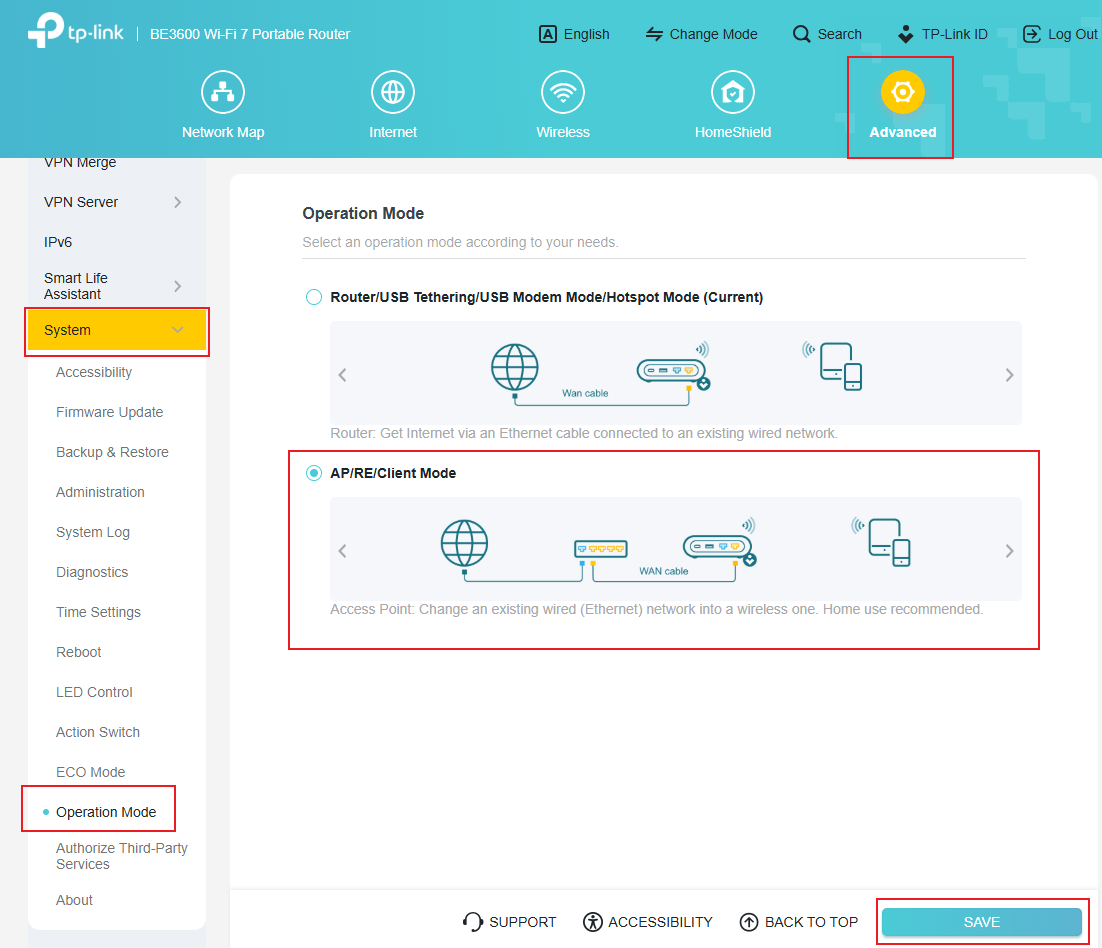
Step 6. Navigate to Advanced > System > Operation Mode, select AP/RE/Client Mode, and apply changes with SAVE.
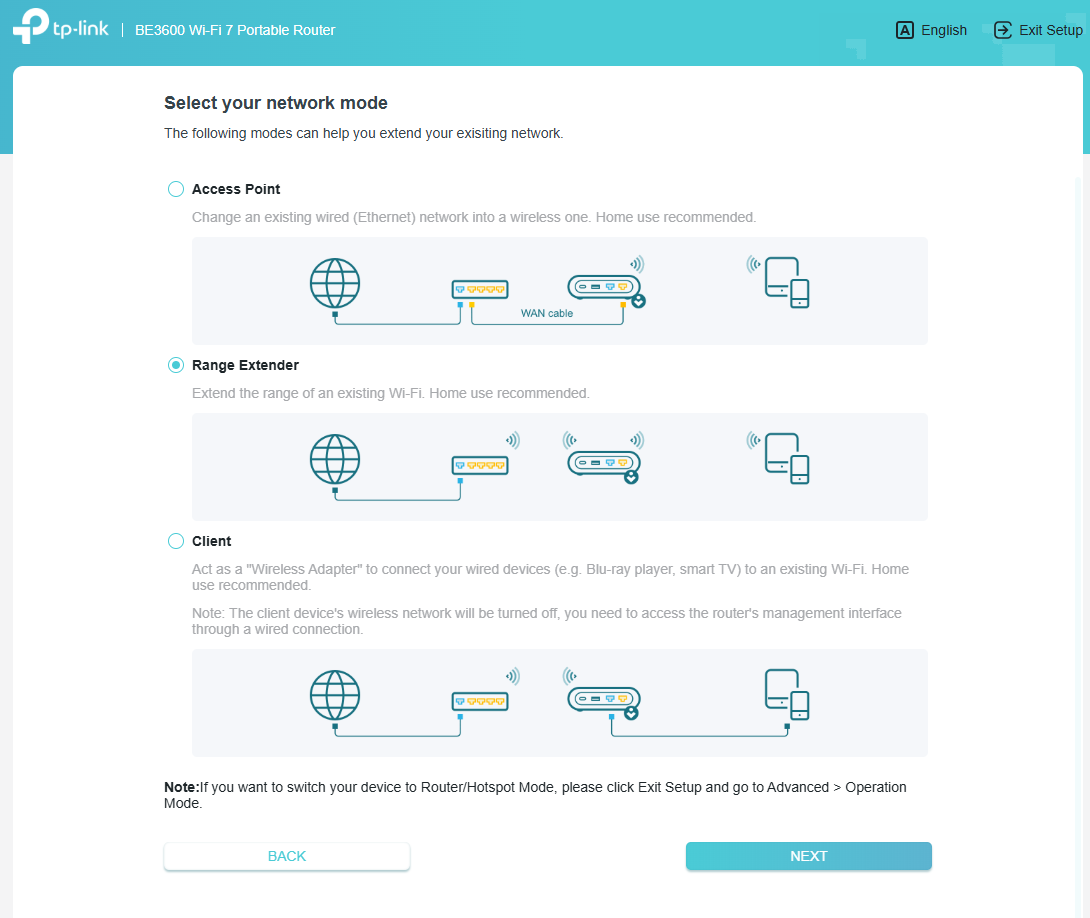
Note: When switching from Access Point Mode or Client Mode to Range Extender, navigate to Advanced > Network > Network Mode, select Range Extender as the active configuration, then confirm the changes by clicking SAVE. (Configuration requires a system reboot to activate new parameters.) Then go to Step 8.
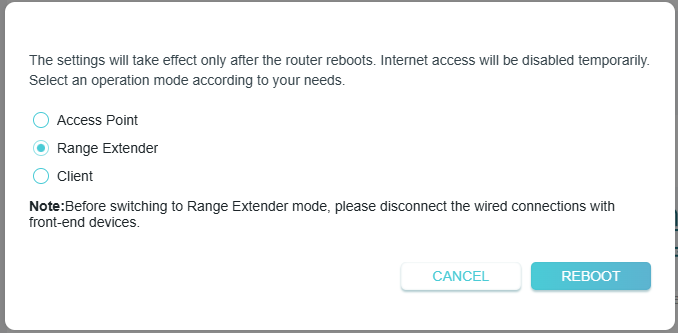
Step 7. In the next confirmation window, revalidate the Range Extender mode selection, then execute REBOOT and await successful configuration deployment.
Step 8. Access the web management page via tplinkwifi.net and authenticate using the local password.
Step 9. Set your time zone, configure the Range Extender to use the network mode, and click NEXT to proceed.
Step 10. Follow the on-screen instructions to select the 2.4 GHz and 5 GHz wireless network signals of the main AP, and then enter the correct Wi-Fi passwords.
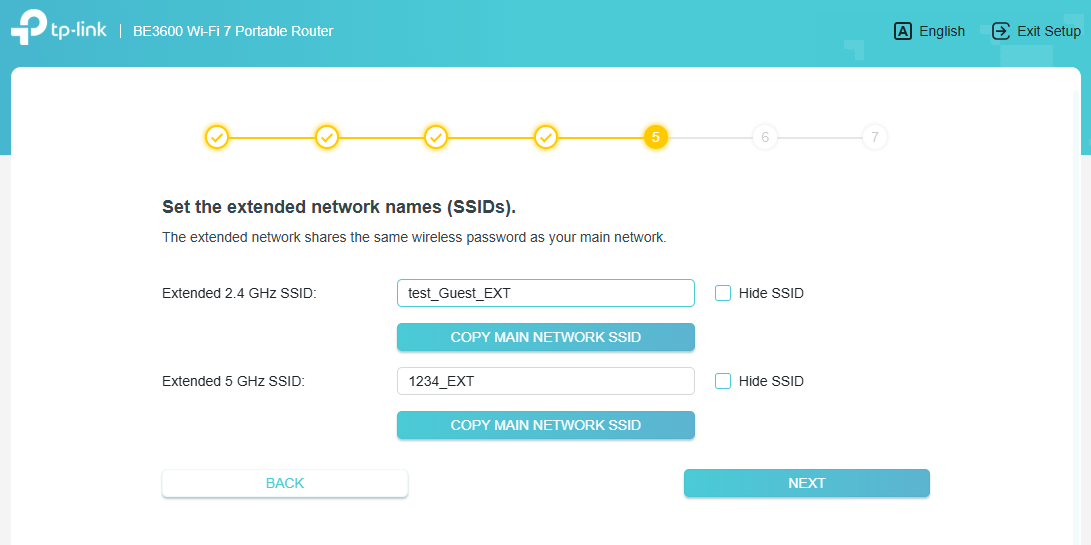
Step 11. Define the custom SSIDs for the extended networks (password automatically synchronizes with the main AP).
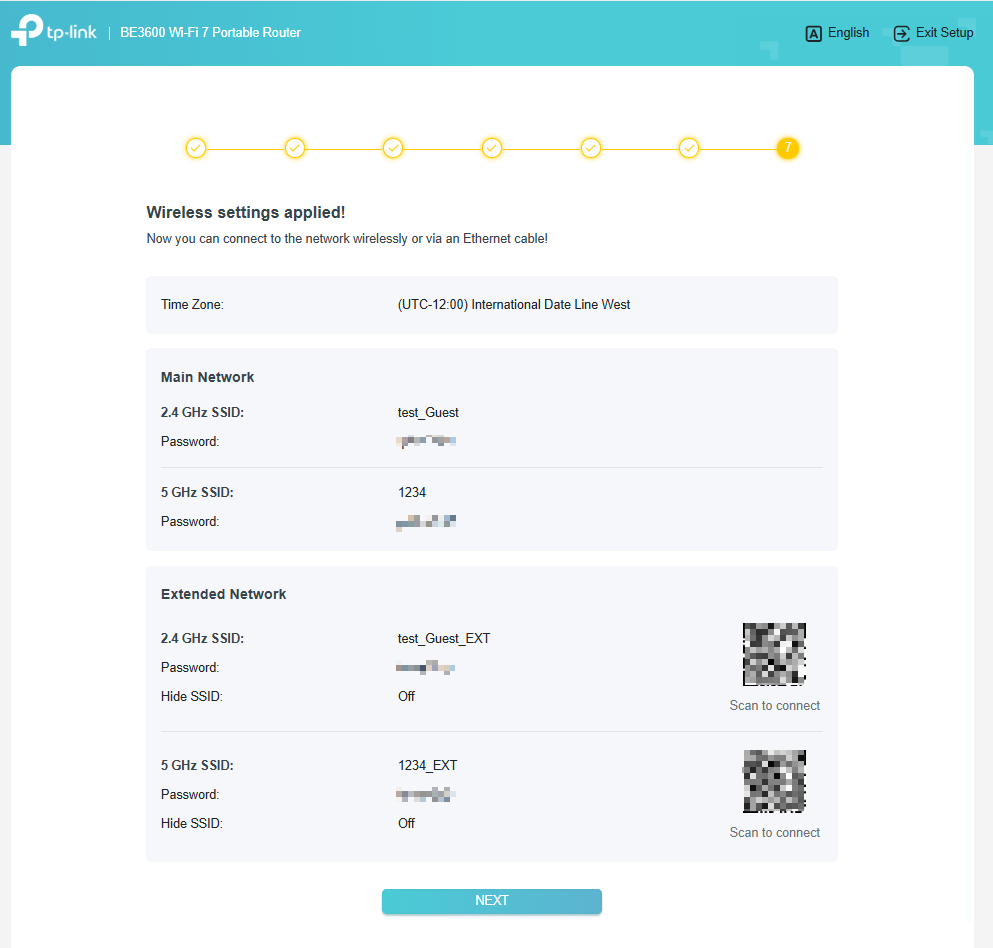
Step 12. Review firmware update preferences, confirm with NEXT, and then wait for it to apply the settings. Once finished, you can relocate the router about halfway between your host network and the Wi-Fi dead zone.
To get to know more details of each function and configuration, please go to the Download Center to download the manual for your product.
Is this faq useful?
Your feedback helps improve this site.

-3.0-package_normal_1584497266805j.png)
TP-Link Community
Still need help? Search for answers, ask questions, and get help from TP-Link experts and other users around the world.