How to configure the Wireless MAC address filter onTP-Link Wi-Fi Router
Wireless MAC Filtering is used to allow or deny specific wireless client devices access to your network based on their MAC addresses.
For example, you want wireless clients A (MAC address XX-XX-XX-B0-00-0B) and B (MAC address XX-XX-XX-00-07-5F) to access the router, but other wireless clients cannot.
You can follow the instructions below to configure the Wireless MAC address filter to achieve it:
Step 1. Log in to the Router Management Page
Open the web browser and type http://tplinkwifi.net or the LAN IP address 192.168.0.1 in the address bar. Press Enter. The username and password are both “admin”. You can see How to Log In to your TP-Link Router to know more details.
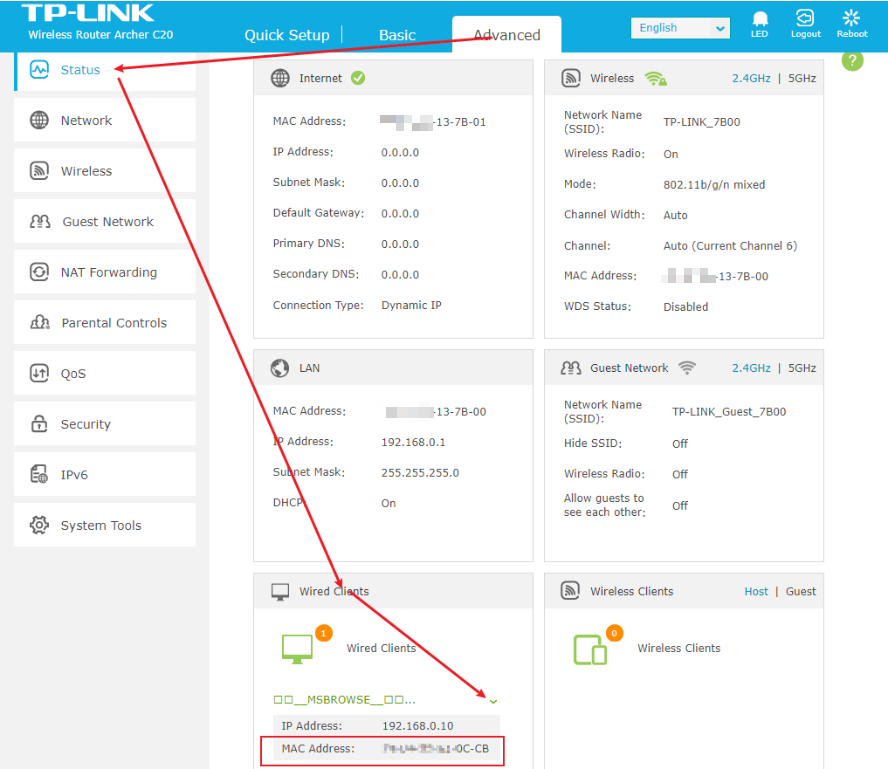
Step 2. Find Your Client MAC Address
You can find your client's MAC address on the device itself, or find it on the router’s management page if the client connects to the router.
On the Router’s management page, go to the Advanced > Status> Wired Clients/ Wireless Clients, and you can see your client's MAC address. Please make sure that “Private MAC Address” is not enabled on your device; otherwise, your device's MAC address will change randomly.
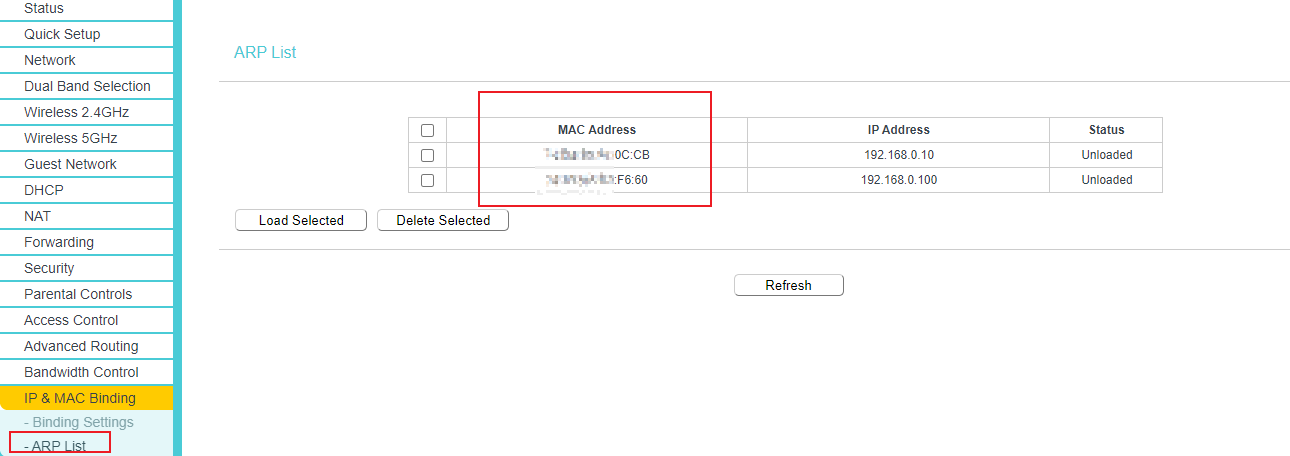
For some other model, go to IP & MAC Binding > ARP List page, where you can find the MAC address of all the devices that are connected to the router.
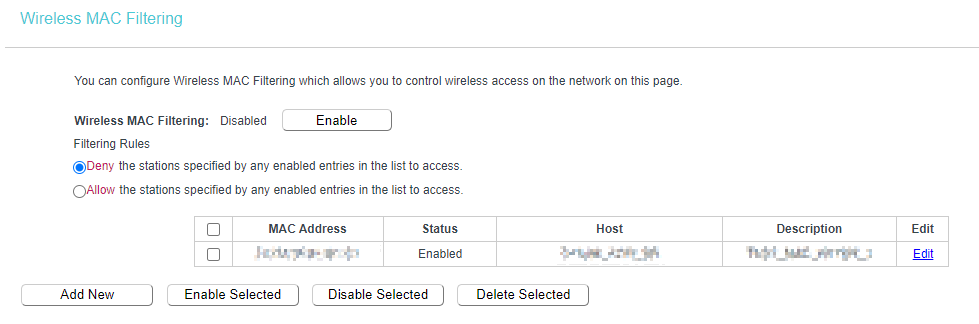
Step 3. Enable the Wireless MAC Filtering
Go to Wireless 2.4GHZ or Wireless 5GHZ > Wireless MAC Filtering page, click the Add New button.

1) Enter your client’s MAC address XX-XX-XX-XX-XX-XX in the MAC Address field.
2) Enter wireless client A/B in the Description field.
3) Leave the status as Enabled.
4) Click Save and click Back.
Step 4. Choose Filtering Rules
At last, about the Filtering Rules, please choose Allow/Deny and enable the Wireless MAC Filtering function.
Get to know more details of each function and configuration. Please go to the Download Center to download the manual for your product.
Looking For More
Is this faq useful?
Your feedback helps improve this site.
3.0-A_normal_1584497085776k.png)
TP-Link Community
Still need help? Search for answers, ask questions, and get help from TP-Link experts and other users around the world.