How to set up and use the FTP Server Function on TP-Link cable modem routers(Blue UI)

TC-W7960( V1 ) , Archer CR700( V1 )
Recent updates may have expanded access to feature(s) discussed in this FAQ. Visit your product's support page, select the correct hardware version for your device, and check either the Datasheet or the firmware section for the latest improvements added to your product. Please note that product availability varies by region, and certain models may not be available in your region.
Note: Archer CR700 is used for demonstration in this article.
Step 1
Plug a USB storage device into the USB port, and make sure the USB light lit up on the router.
Check the USB LED explanation below.
Step 2.
Please refer to How to log into the web-based management interface of Archer CR700?
Step 3
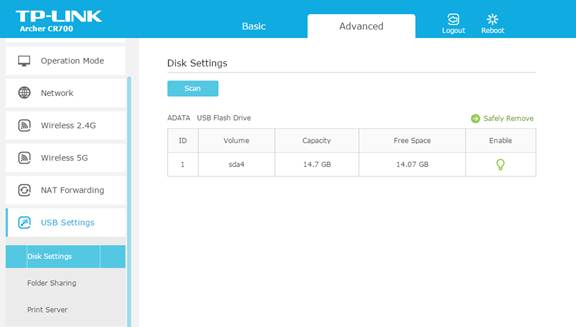
Click Advanced on the top, then click USB Settings -> Disk Settings on the left side menu. Check whether the USB device is identified by the modem router. If there is no device listed on this page, please click Scan. And you can also try unplug the USB device and plug it back in.
Step 4.
Check the options FTP and FTP (via Internet) to enable FTP server function.
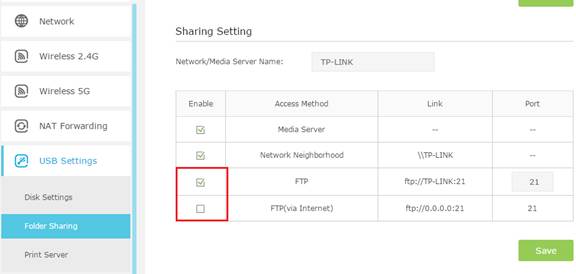
On the Folder Settings part below, the Network/Media Server Name can be changed to something else.
Switch on Enable Authentication. This takes effect when Share All is on.
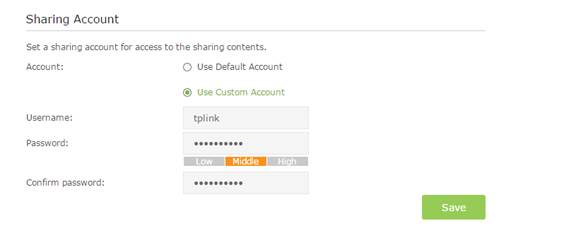
Go to Sharing Account on the top. If you choose Use New Account, you will have a separate login account for the USB device. If check on Use Default Account, it would be admin/admin. Click on Save.
Step5.
It is set to share all the files by default. If you want to customize the shared content, switch off Share All, and click on Add to choose your specific folder.
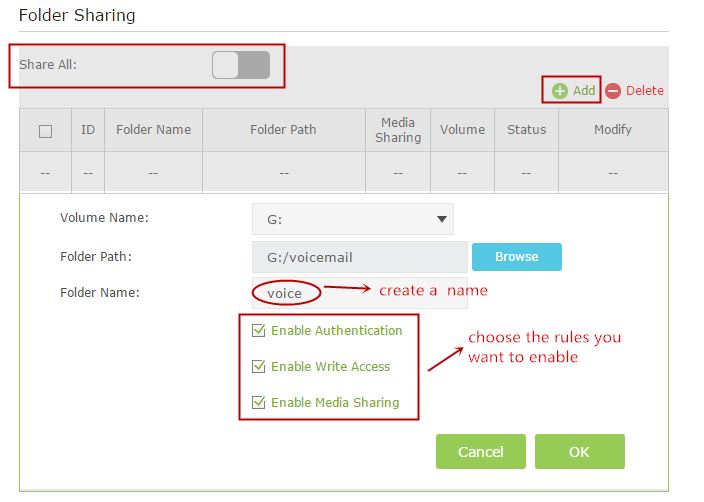
Below are explanations for the options:
Volume Name - From the pull-down list, select which volume to save the file under.
Folder Path- Path to the folder is determined by where the file is saved.
Folder Name - Name of the shared folder, customized by users.
Enable Authentication - Select the check box to require users to log in with a username and password.
Enable Write Access - Select the check box to allow users to make changes to the folder content.
Enable Media Sharing - Enable media server function
Step 6
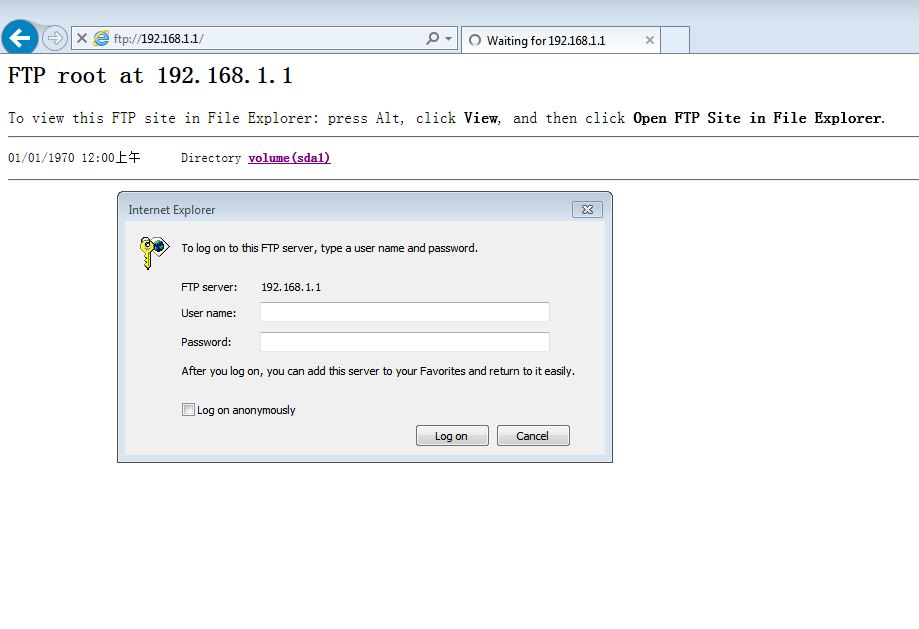
Now the FTP server can be accessed by local network. Please open the web browser and type in address ftp: //LAN IP, press enter. Then type in your account to access to the FTP server. Here the LAN IP address of the router is 192.168.1.1.
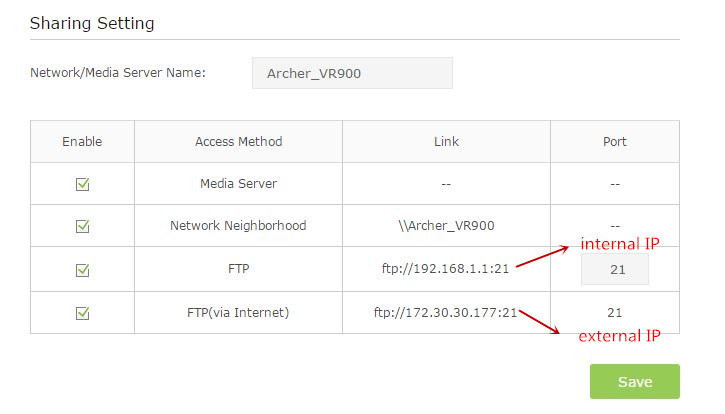
You can also access the FTP server from external network. Please type in address ftp: //WAN IP to access to it.
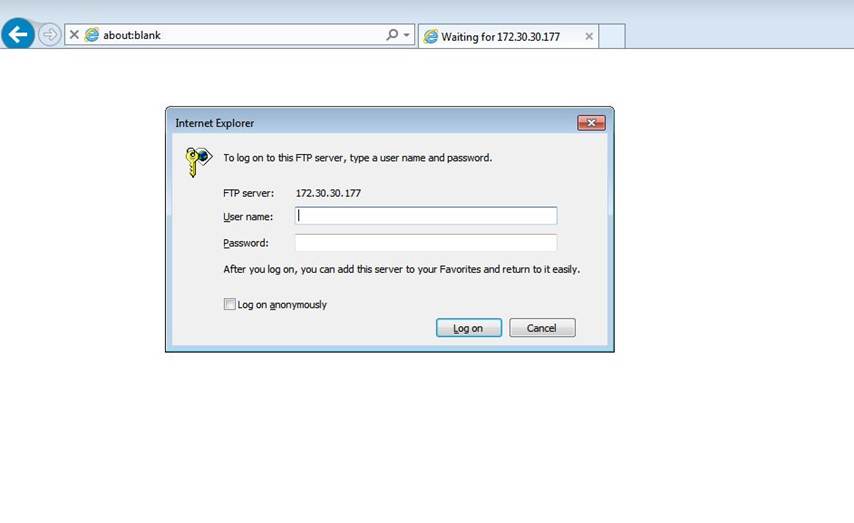
Get to know more details of each function and configuration please go to Download Center to download the manual of your product.
Is this faq useful?
Your feedback helps improve this site.
What’s your concern with this article?
- Dissatisfied with product
- Too Complicated
- Confusing Title
- Does not apply to me
- Too Vague
- Other
Thank you
We appreciate your feedback.
Click here to contact TP-Link technical support.
Recommend Products
This website uses cookies to improve website navigation, analyze online activities and have the best possible user experience on our website. You can object to the use of cookies at any time. You can find more information in our privacy policy . Don’t show again
Your Privacy Choices
This website uses cookies to improve website navigation, analyze online activities and have the best possible user experience on our website. You can object to the use of cookies at any time. You can find more information in our privacy policy . Don’t show again
Deze cookies zijn noodzakelijk voor de werking van de website en kunnen niet worden uitgeschakeld.
TP-Link
accepted_local_switcher, tp_privacy_banner, tp_privacy_base, tp_privacy_marketing, tp_top-banner, tp_popup-bottom, tp_popup-center, tp_popup-right-middle, tp_popup-right-bottom, tp_productCategoryType
Youtube
id, VISITOR_INFO1_LIVE, LOGIN_INFO, SIDCC, SAPISID, APISID, SSID, SID, YSC, __Secure-1PSID, __Secure-1PAPISID, __Secure-1PSIDCC, __Secure-3PSID, __Secure-3PAPISID, __Secure-3PSIDCC, 1P_JAR, AEC, NID, OTZ
Cookies voor analyse geven ons de mogelijkheid uw activiteiten op onze website te volgen en zo de functionaliteit van de website aan te passen en te verbeteren.
Marketing cookies kunnen op onze website worden geplaatst door externe adverteerders waar wij mee samenwerken om een profiel te creëren met uw interesses en u zo van relevante advertenties te kunnen voorzien op andere websites.
Google Analytics & Google Tag Manager
_gid, _ga_<container-id>, _ga, _gat_gtag_<container-id>
Google Ads & DoubleClick
test_cookie, _gcl_au
Meta Pixel
_fbp
Crazy Egg
cebsp_, _ce.s, _ce.clock_data, _ce.clock_event, cebs
lidc, AnalyticsSyncHistory, UserMatchHistory, bcookie, li_sugr, ln_or