How to configure Alarm Server
Contents
Introduction
The Alarm Server feature is designed to receive event messages proactively reported by VIGI Cameras and VIGI NVRs when alarm events are triggered.
The information included in the report will be gradually enriched as the device-side software version is updated, including event type, event timestamp, device details, and an optional event snapshot image.
This feature enables seamless alarm linkage and business processing between VIGI devices and third-party systems.
In addition to describing how to configure the Alarm Server function on VIGI devices, this article also provides troubleshooting guidelines for potential issues, such as server connection failures, abnormal device data reporting, and server-side parsing errors.
Requirements
- VIGI Camera/NVR
- Alarm Server
- Laptop
Configuration
Since the message format and parsing process used during the interaction between VIGI Cameras and VIGI NVRs are identical, this article uses a VIGI Camera as the example for demonstration purposes.
Step 1. Build the topology according to the topology diagram below.
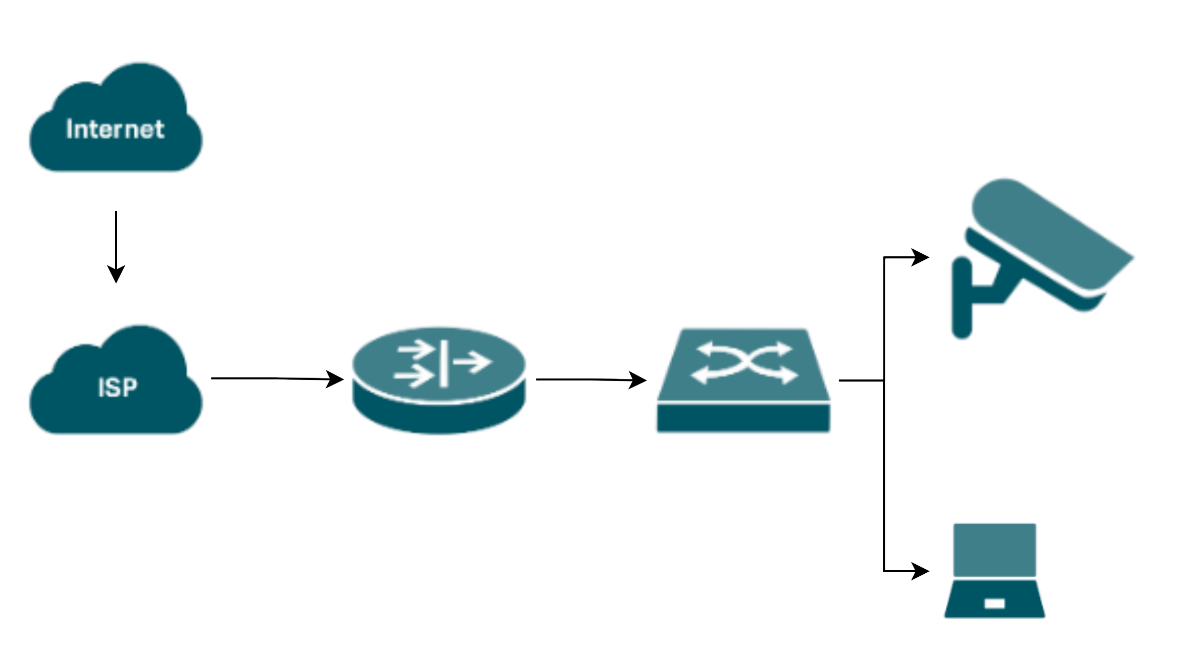
Note: The topology shown in this article is for reference purposes only. Actual deployment scenarios are more diverse.
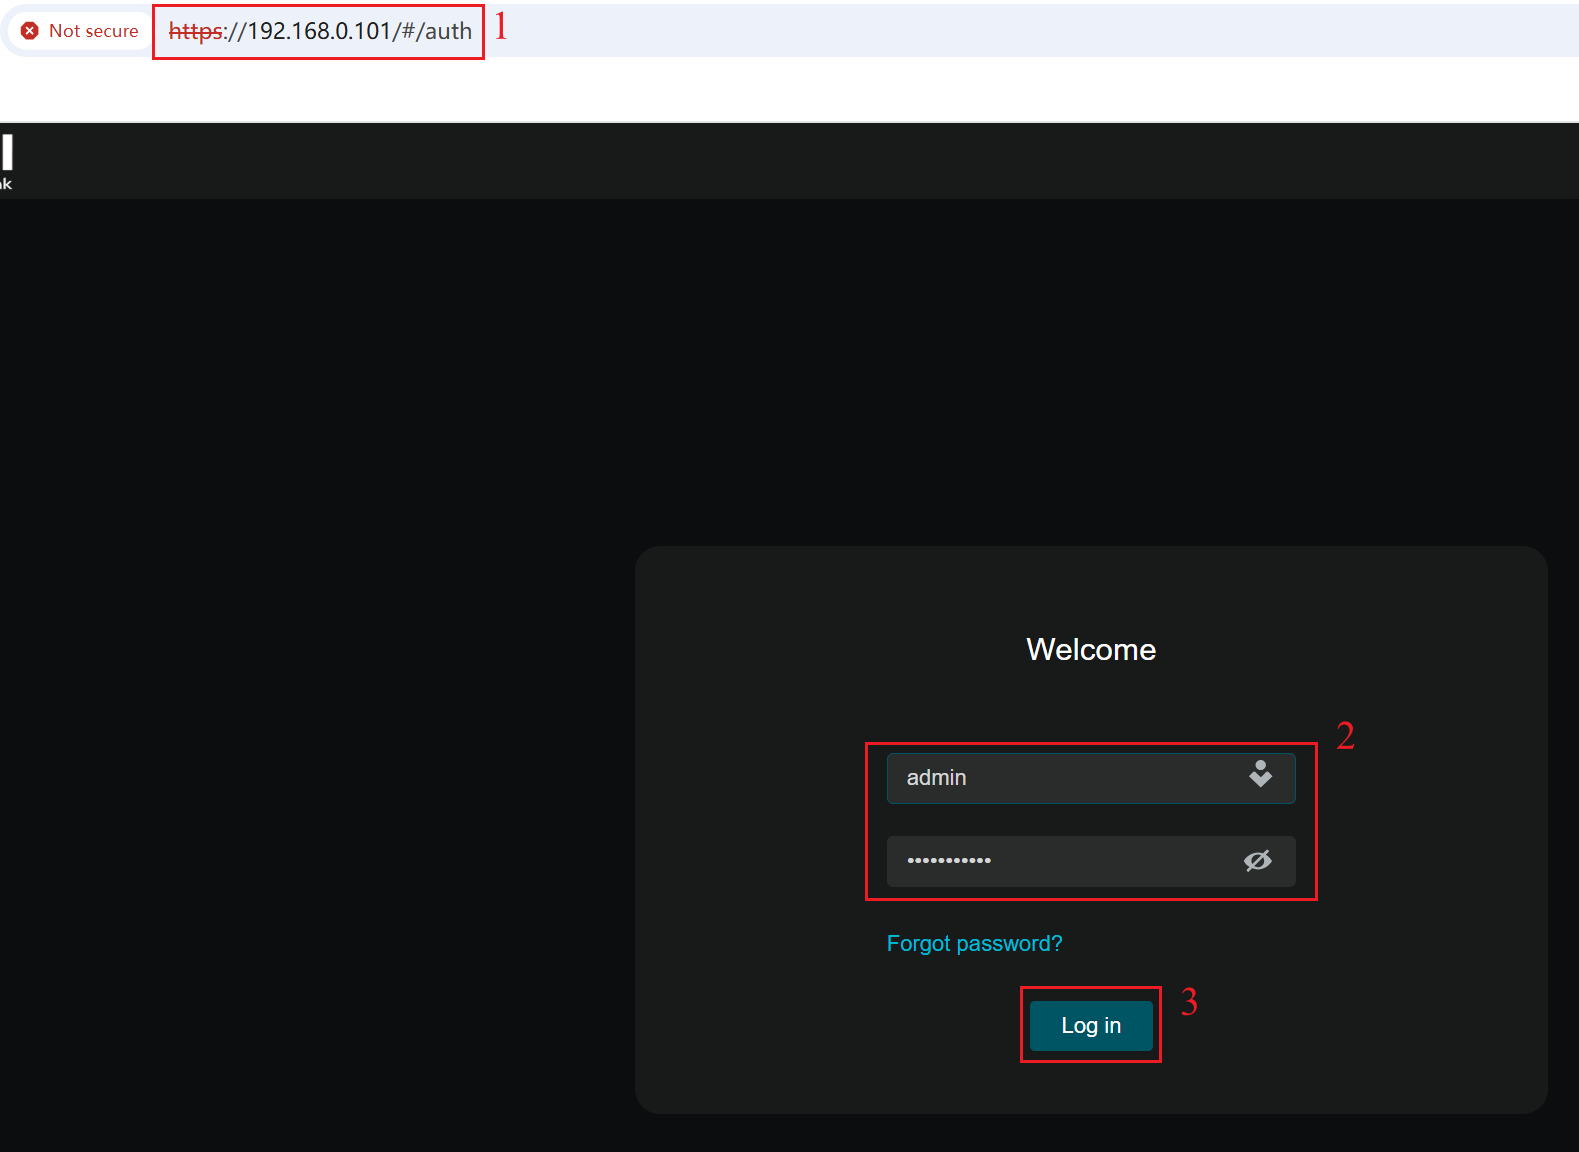
Step 2. Log in VIGI Camera’s web interface with its’ IP address. Enter the Username and Password, click Log in.
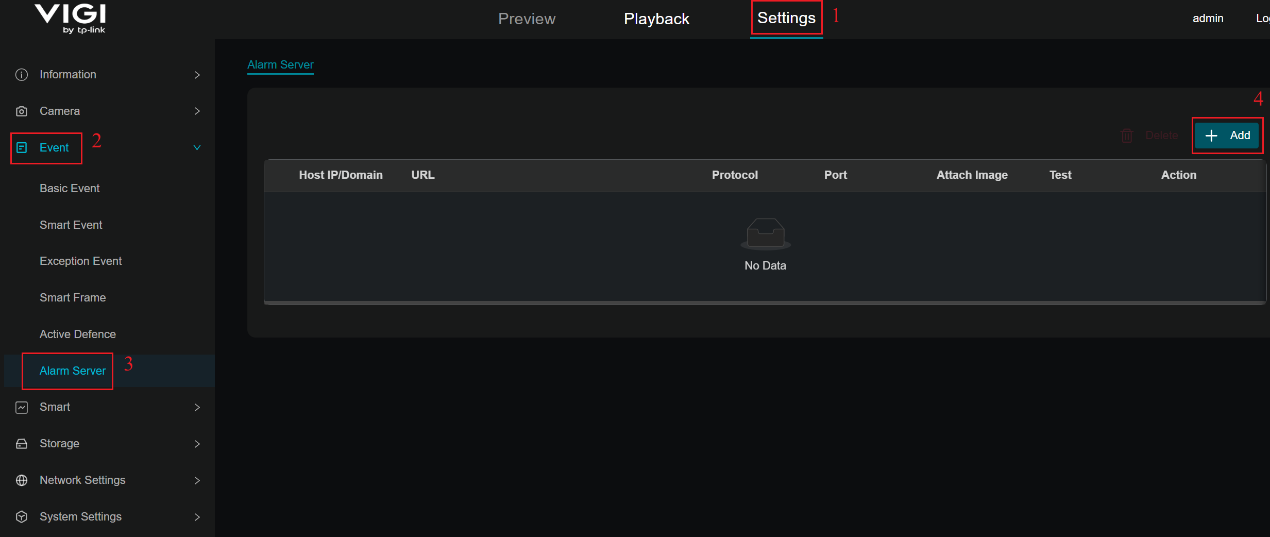
Step 3. Navigate to Settings > Event > Alarm Server, click “+Add” button.
Step 4. In the pop-up window, enter the information related to the third-party server. In this article, https://webhook.site/#!/ is used as the reference server.
Step 5. Enter the third-party server’s Host IP or Domain and URL, select the appropriate protocol (HTTP or HTTPS), and specify the corresponding port number (port 80 for HTTP and port 443 for HTTPS.). In this article, the HTTP protocol and port 80 are used for the configuration demonstration. You can also choose whether to include an attached image in the reported event message. Finally, click Save to apply and store the configuration.
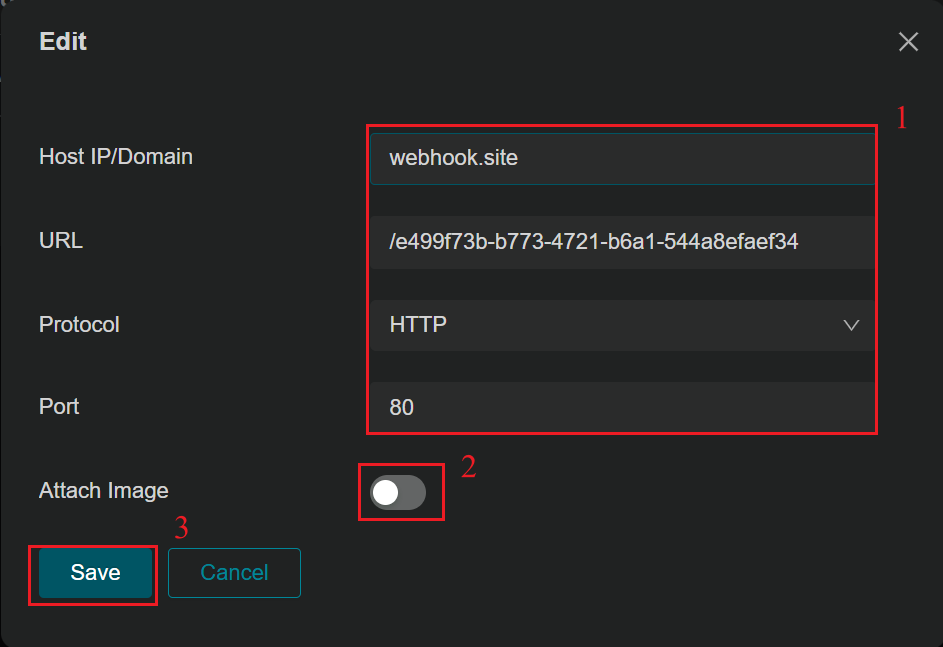
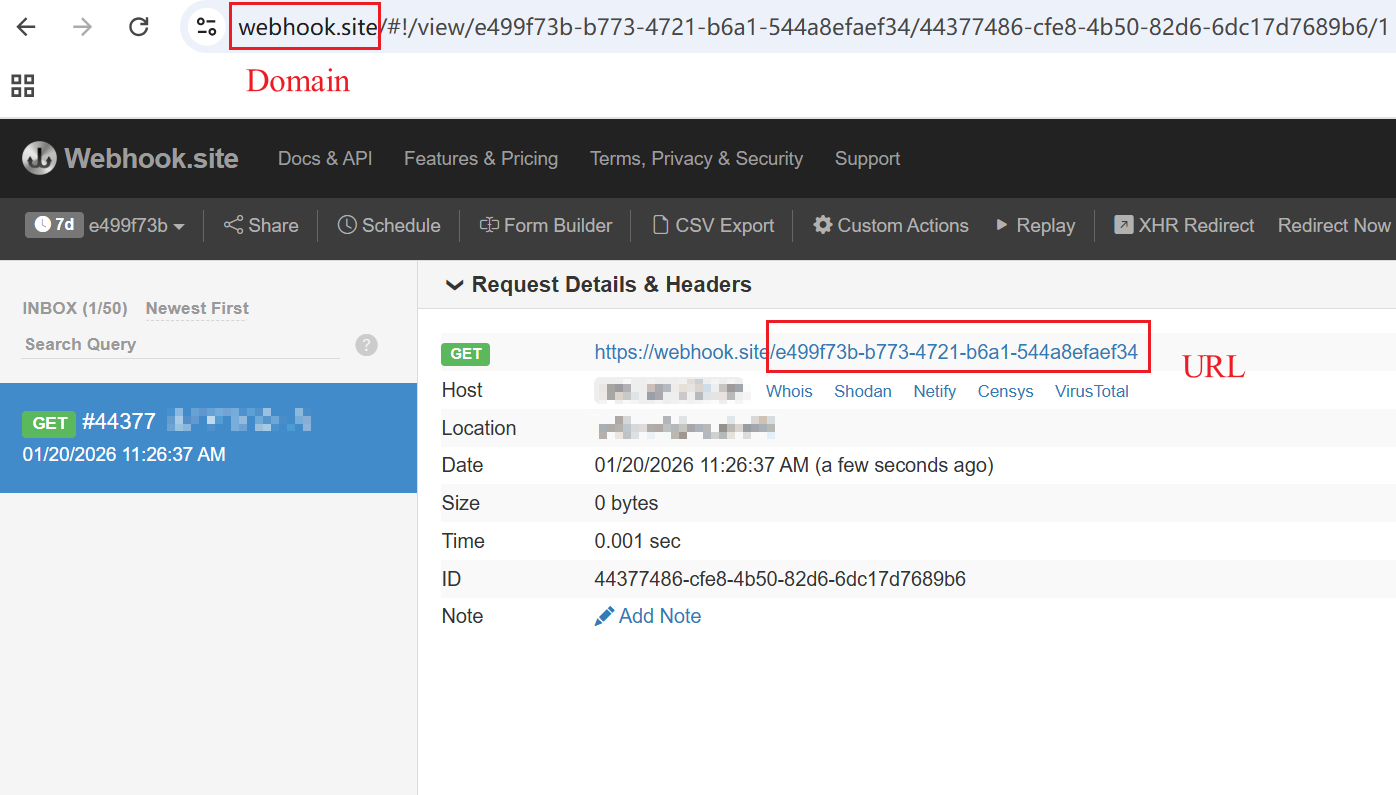
Note: In the configuration parameters, Host IP/Domain refers to the IP address or domain name of the server, which in this article is webhook.site.
The URL corresponds to the URL path used in the HTTP messages exchanged between the device and the server. In this document, the server’s default URL (/e499f73b-b773-4721-b6a1-544a8efaef34) is used:
Step 6. You can click the “Test” button to check the connection status between the device and the server.

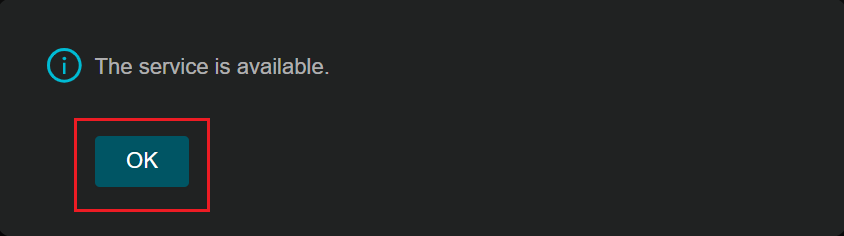
Step 7. When a pop-up message displays “The service is available”, it indicates that the connection status is normal and the function is operating properly. Click OK to proceed.
Step 8. Navigate to Settings > Event > Smart Event > Human Detection, enable human detection function.
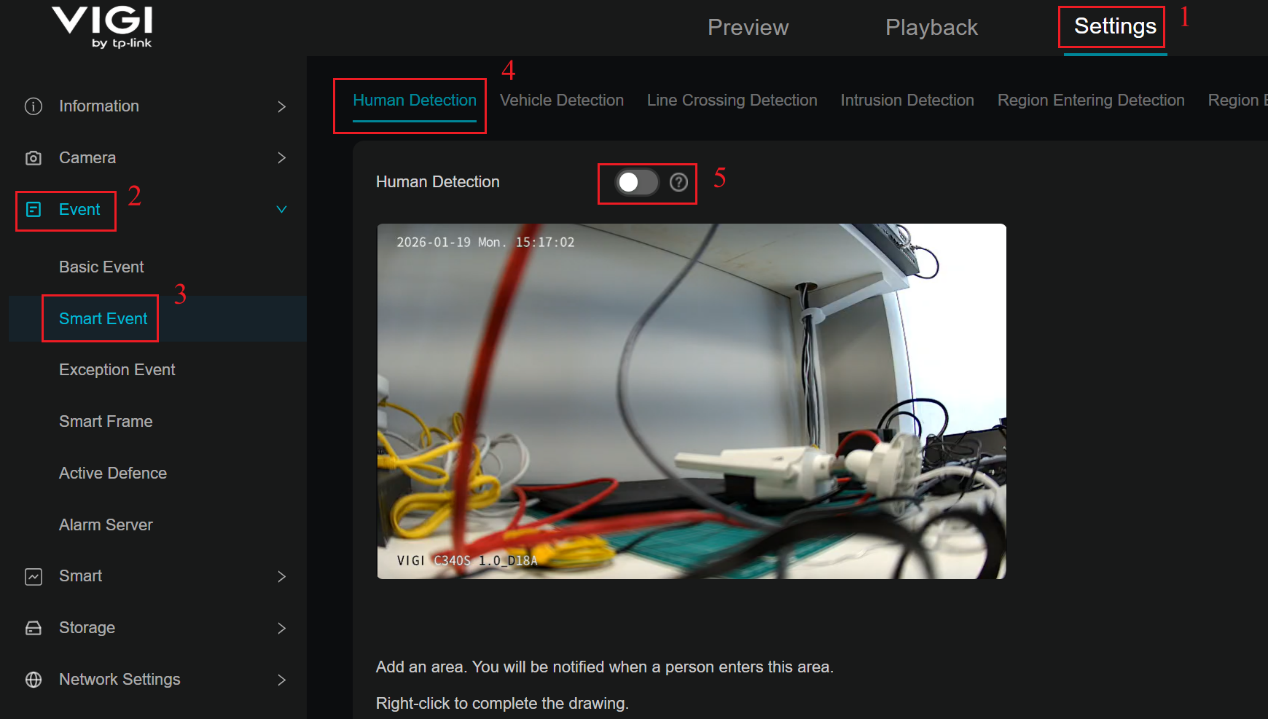
Note: This article uses Human Detection as an example for demonstration purposes. Other event detection functions will also take effect in the same manner.
Step 9. In processing mode, please select the “Send to Alarm Server”. Finally, click Apply.

Verification
Step 1. Configure port mirroring on the switch to mirror the port connected to the VIGI camera to the port connected to the laptop. Start packet capture on the laptop’s network interface using Wireshark and then trigger the Human Detection event.
Step 2. Verify the information reported by the VIGI Camera.
Scenario 1. Without attached image
Step 1. Use “http” command to filter the captured packets. Then check the HTTP POST Request and HTTP Response.

Step 2. Check the HTTP POST Request Headers
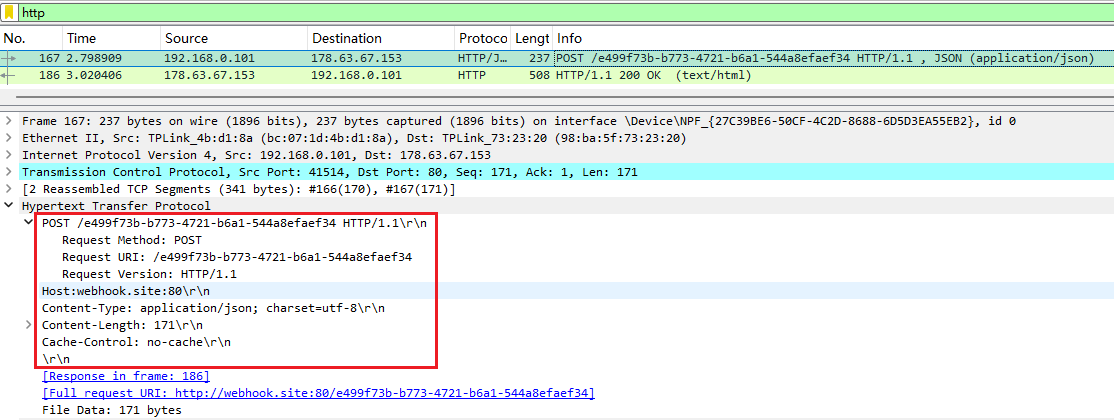
Note: The first line contains the POST method, the request target URI, and HTTP version 1.1. The URI corresponds to the URL string configured previously in the Alarm Server settings.
From the second line up to the blank line, each line represents a key–value pair that describes the request metadata. These include Host, Content-Type, Content-Length, and Cache-Control.
When the Content-Type is set to application/json, it indicates that only the event message is pushed (without attached image), and the request body is a JSON-formatted string.
Each line ends with \r\n. A blank line consisting only of \r\n indicates the end of the request headers and the beginning of the request body.
Step 3. Check the HTTP POST Request Body
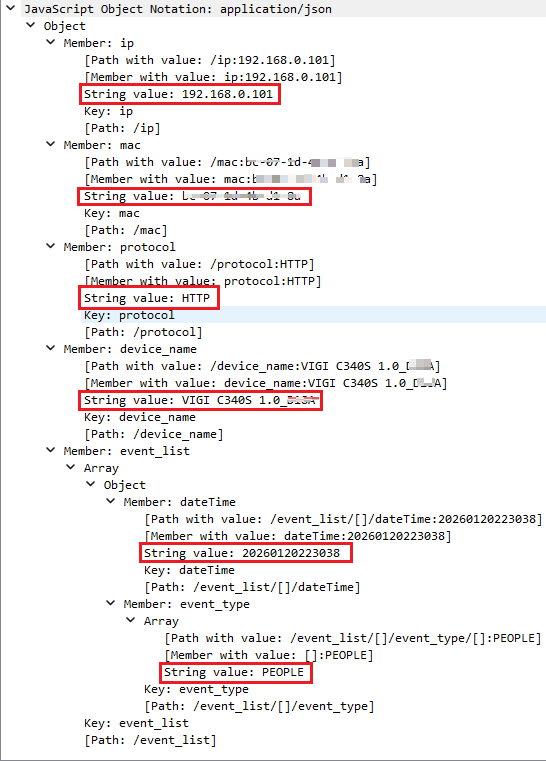
Note: In the JSON payload, ip represents the IP address of the IPC that reports the event message, and MAC represents the MAC address of the reporting IPC. The protocol field indicates whether the communication uses the HTTP or HTTPS protocol. The device_name field specifies the name of the IPC reporting the event.
Within event_list, each entry represents an event included in the report, indicating the event occurrence time and the corresponding event name.
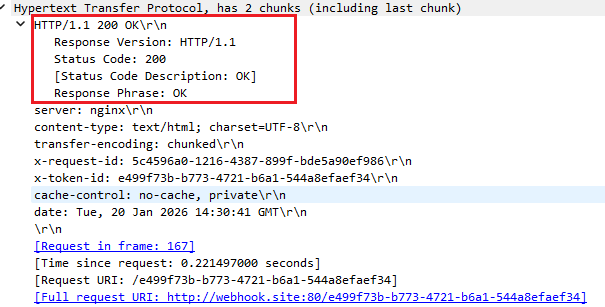
Step 4. Check the HTTP Response. A returned 200 OK status code indicates that the webhook.site server has successfully received and processed the request.
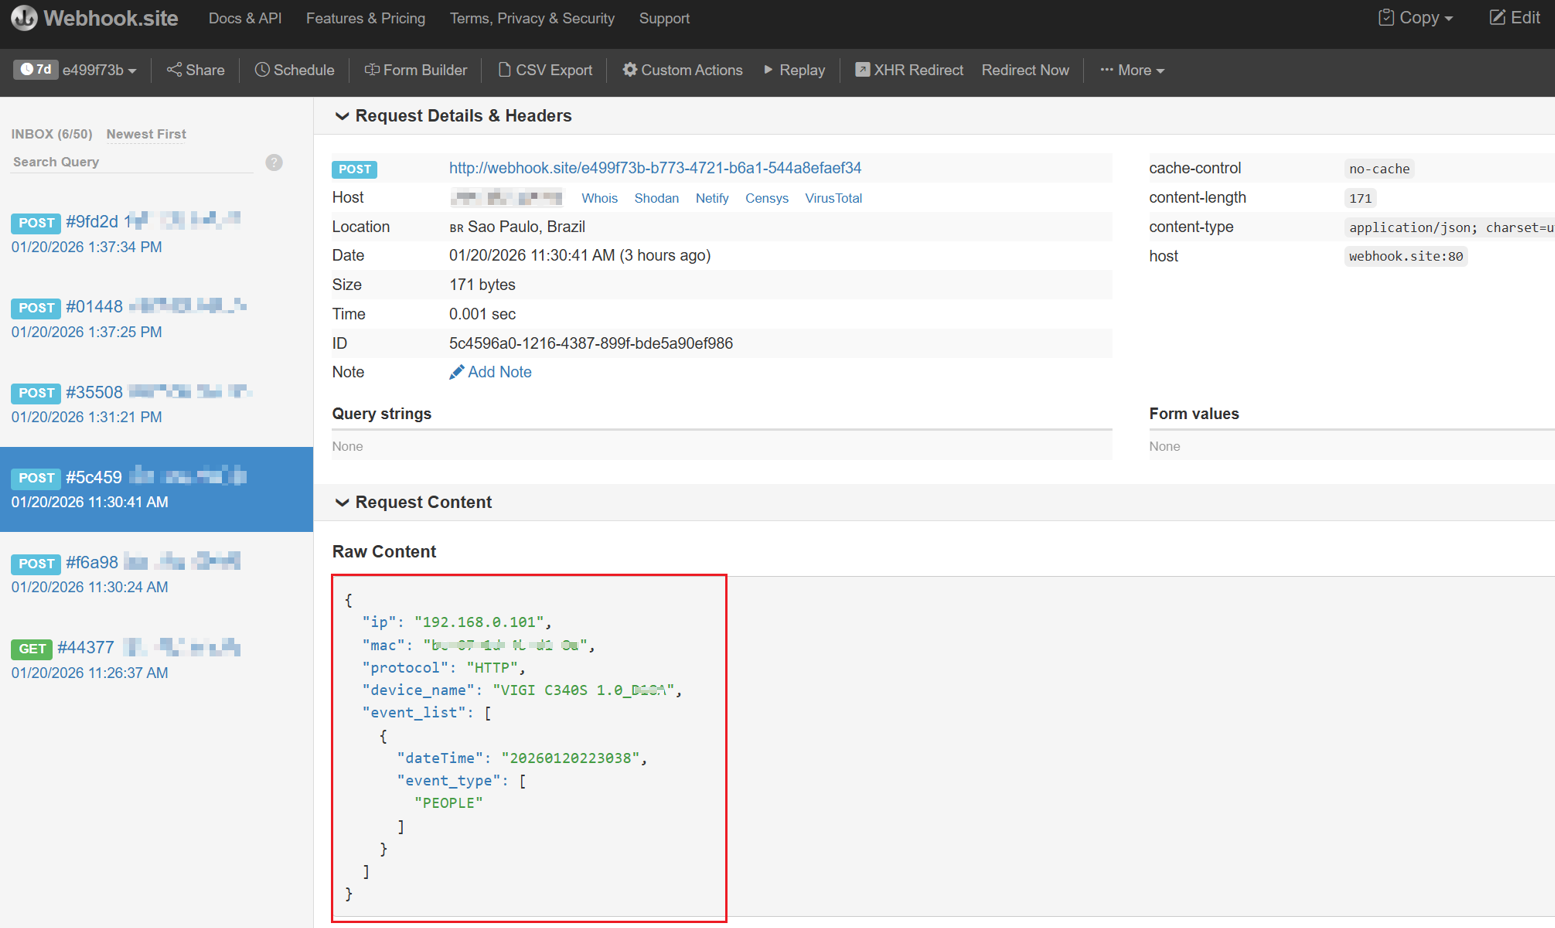
Step 5. Compare the data reported in the HTTP POST Request Body with the data received and parsed by the webhook.site server to verify whether they are consistent.
Scenario 2. With attached image
Step 1. Before starting packet capture, click the Edit button in the upper-right corner of the webhook.site server page, and modify the Content-Type for messages with attached images to multipart/form-data; boundary=ReportEventBoundary.

Note: multipart/form-data indicates mixed data containing both a JSON string and image data. boundary=ReportEventBoundary specifies the boundary used to separate different parts of the data payload.
Step 2. Use “http” command to filter the captured packets. Then check the HTTP POST Request Headers and Body.
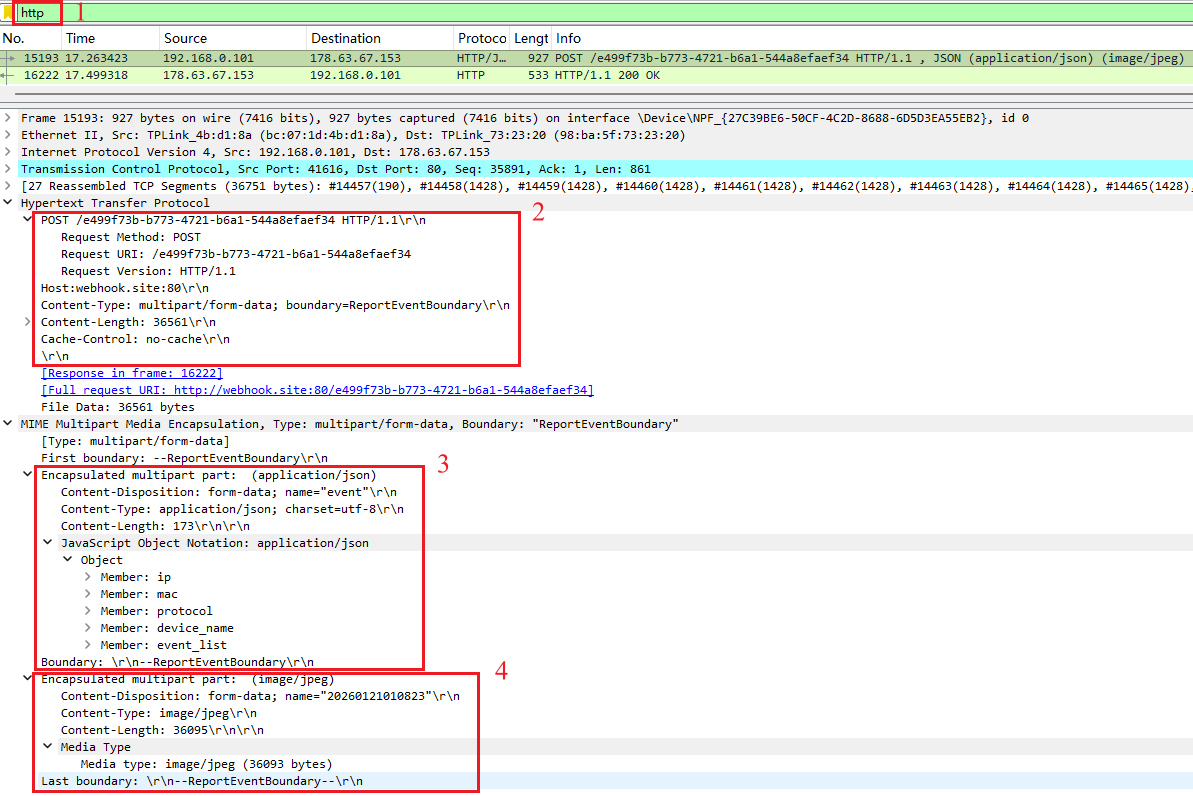
Note: The request body starts after a blank line (\r\n). Since the Content-Type is multipart/form-data, the body is divided into multiple parts, each separated by the boundary --ReportEventBoundary. The request body ends with --ReportEventBoundary--.
The first part contains the JSON event data, and the second part contains the JPEG image data. The name field indicates the timestamp of the image, image/jpeg specifies that this part contains JPEG image data, and Content-Length indicates the size of the image data.
JPEG DATA represents the binary JPEG image content.
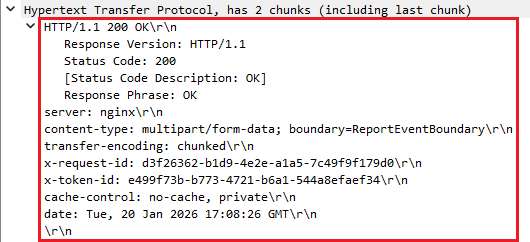
Step 3. Check the HTTP Response. A returned 200 OK status code indicates that the webhook.site server has successfully received and processed the request.
Step 4. Compare the data reported in the HTTP POST Request Body with the data received and parsed by the webhook.site server to verify whether they are consistent.
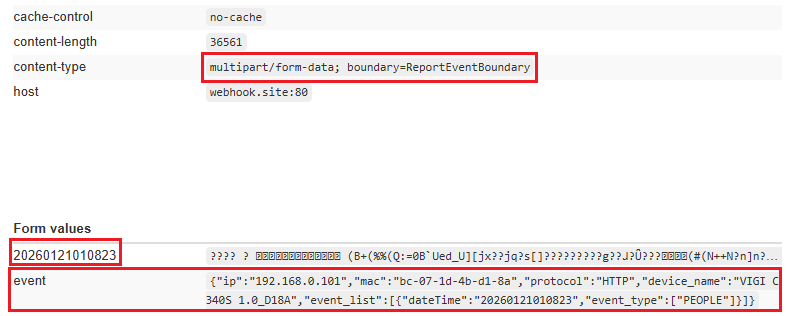
Note: webhook.site server itself does not parse or decode the uploaded image content. It only receives and displays the HTTP request data. Therefore, only the event information and the corresponding image timestamp are visible.
Conclusion
You have successfully configured the Alarm Server feature, and upon triggering an event, the event message and snapshot image are successfully reported.
Get to know more details of each function and configuration please go to Download Center to download the manual of your product.
QA
Q1: If the Alarm Server has been configured successfully but no alarm data is received by the server when an event is triggered, what should I do:
A1: Please perform the following checks:
Step 1. Perform a preliminary configuration check. Review the device logs to confirm that the event has indeed been detected and triggered, and that Send to Alarm Server is enabled in the settings. At the same time, verify all Alarm Server configuration parameters on the device, with particular attention to whether the configured port is actively listened to by the server and whether the URL matches the server’s listening endpoint exactly.
Step 2. Configure port mirroring and capture packets from the device side, then check the following items sequentially:
- TCP Connection: Verify whether the TCP three-way handshake between the device and the server is successfully established.
- HTTP POST Request: Confirm that the POST request is initiated successfully and that the request header format is correct. Pay particular attention to the Content-Type field. When only event information is reported, the Content-Type should be application/json. When a snapshot image is included, the Content-Type should be multipart/form-data, and the mixed data (JSON string and image data) must be separated using boundary=ReportEventBoundary.
- HTTP Response: Check the HTTP response status code returned in the packet to confirm whether the server responds to the HTTP request correctly.
Questa faq è utile?
Your feedback helps improve this site.