How to Configure Active Defense Function on VIGI Cameras
Contents
Configuring Active Defense in IPC Web UI
Configuring Active Defense in VIGI App
Objective
This article provides configurations of Active Defense via web UI and APP, as well as showing special configurations such as sound type and volume for audible alarms.
Requirements
- VIGI IPC
- VIGI Web UI
- VIGI App
Introduction
Active Defense is a monitoring feature that uses deep learning algorithms or external alarm devices to trigger flashing lights and loud sounds in real time, deterring intruders. It also supports user-created custom voice audio.
Configuration
Configuring Active Defense in IPC Web UI
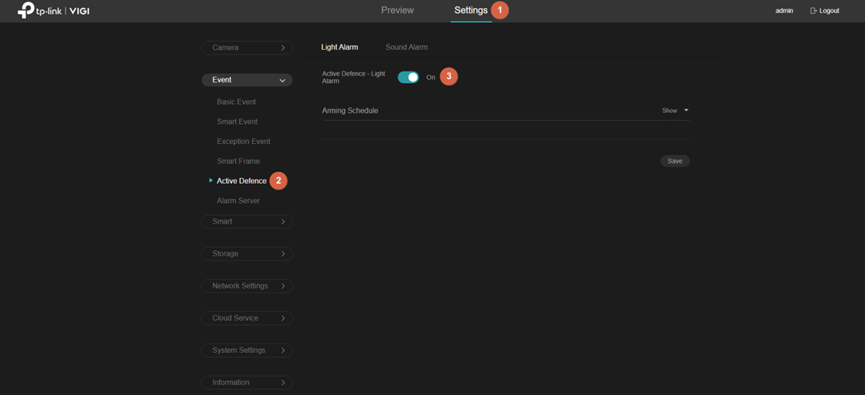
Log in to the IPC’s management web interface, and go to Settings > Event > Active Defense. Choose Light Alarm or Sound Alarm, then enable the button.
If the button is green  , which represents light/sound alarm is enabled.
If the button is grey  , which represents light/sound alarm is disabled.
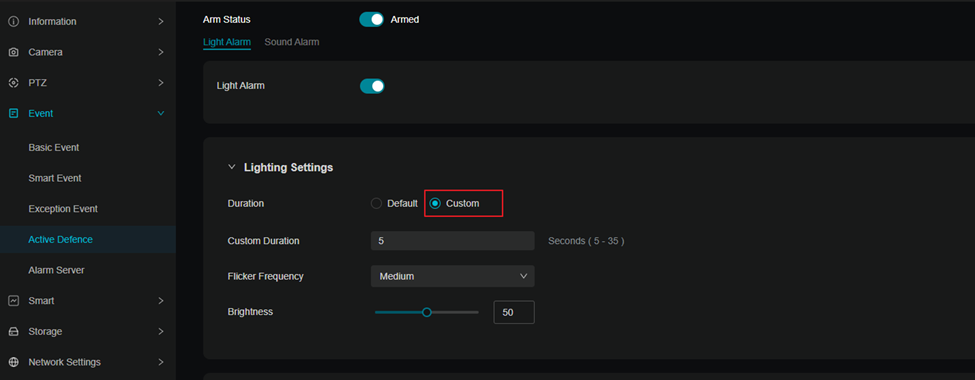
Light Alarm
Step1. Customizable light alarm. Find the “Custom” button in the light alarm.
Configure more attributes of the light alarm.
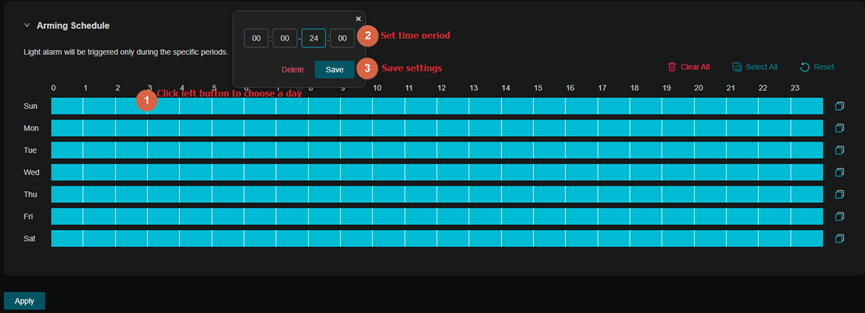
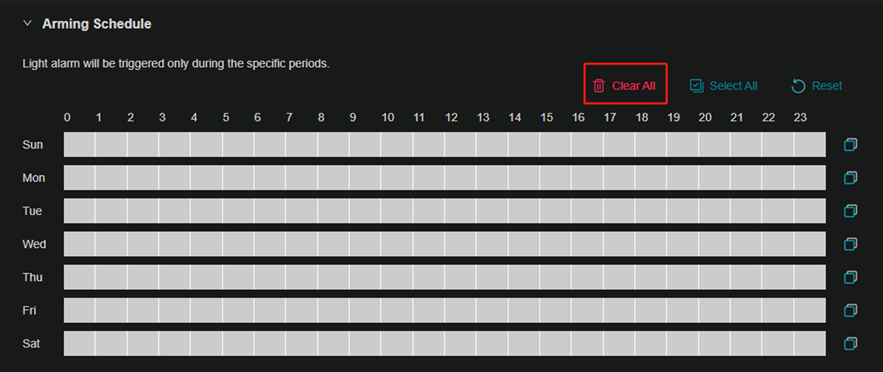
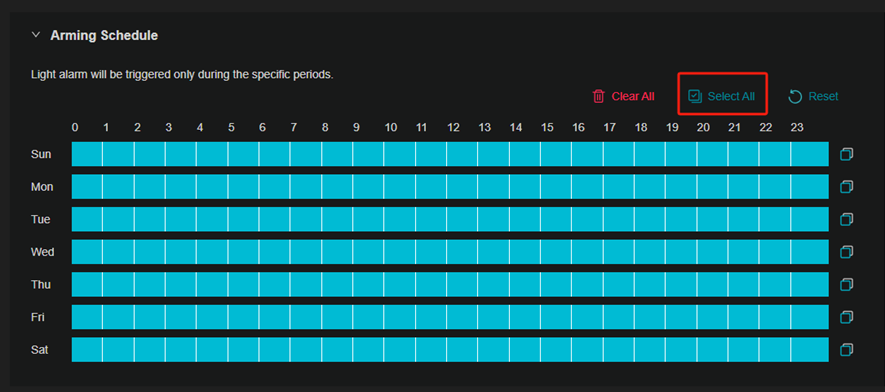
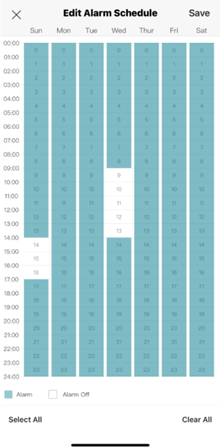
Step 2. Set the aiming schedule. There are two ways to set the aiming schedule:
(1) Draw the time period you wish to record continuously directly on the timeline, by dragging the timeline with the mouse.
(2) Left-click the timeline and go to the edit page for more precise settings. You can customize the time point.
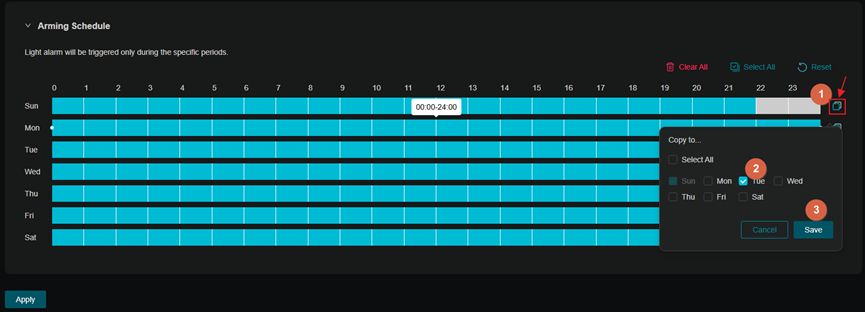
Step 3. After setting up a single day, you can use the schedule copy function to copy the arming times to other days.
The timeline is fully selected by default. You can clear the timeline by Clear All, select the entire timeline with Select All, or return the timeline to its default state with Reset.
Sound Alarm
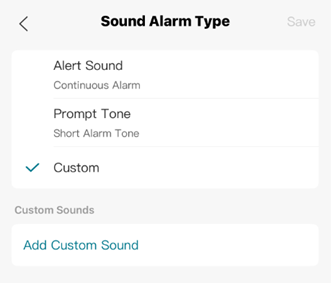
Step 1. In Sound Alarm, you can choose Sound Type and modify the volume.
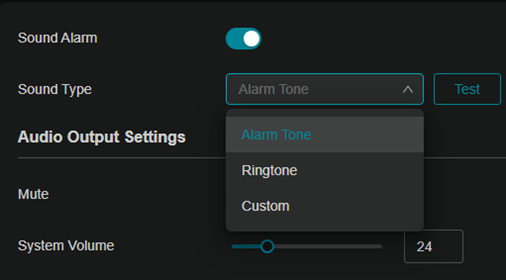
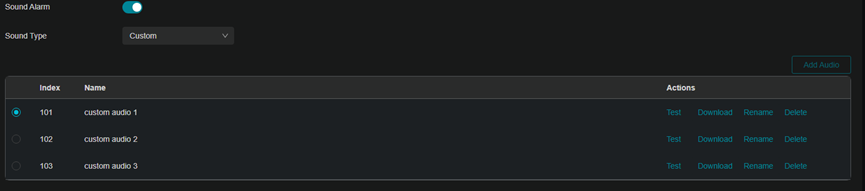
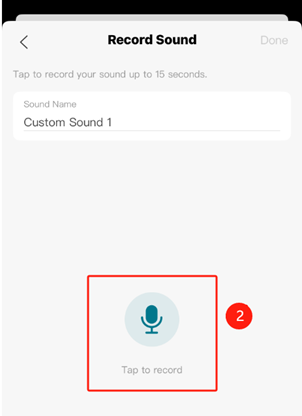
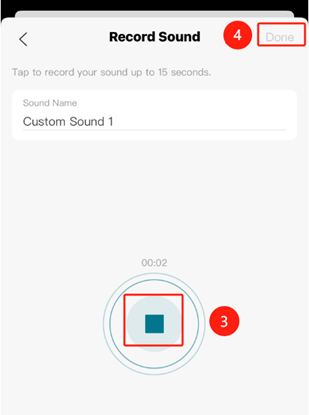
Sound Alarm also support selecting customized voice types and uploading customized audio files. Choose Sound Type > Custom and upload the audio.
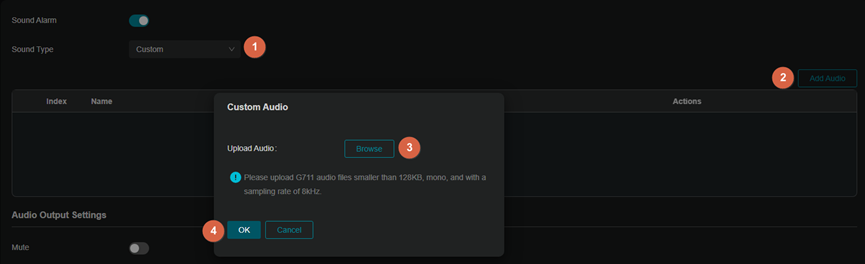
Step 2. After uploading audio file, you can select, audition, download, rename and delete the audio.
Note: The maximum number of custom audio files you can upload is 3. Please use the following audio format:
G711: mono audio, file size ≤ 128KB, sampling rate = 8kHz.
WAV: mono audio, duration ≤ 15 seconds, file size ≤ 256KB, sampling rate = 8kHz.
MP3: mono audio, duration ≤ 15 seconds, file size ≤ 128KB, encoding rate (bit rate) ≤ 64kbps.
Step 3. You can also customize the Sound Alarm Times. Find the Alarm Times in the sound alarm and select Custom mode. Set the alarm times according to your needs.
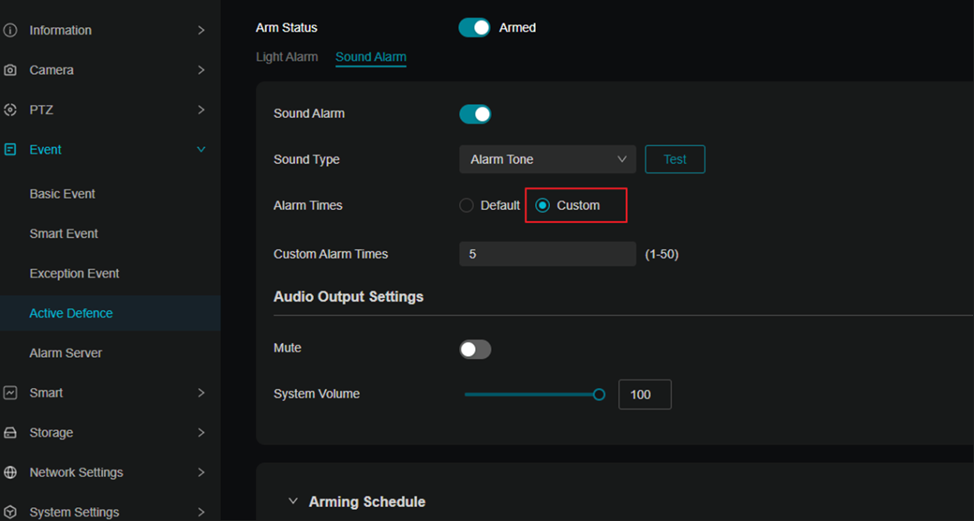
Step 4. Set the aiming schedule. The steps for setting timeline is consistent with the light alarm.

Configuring Active Defense in VIGI App
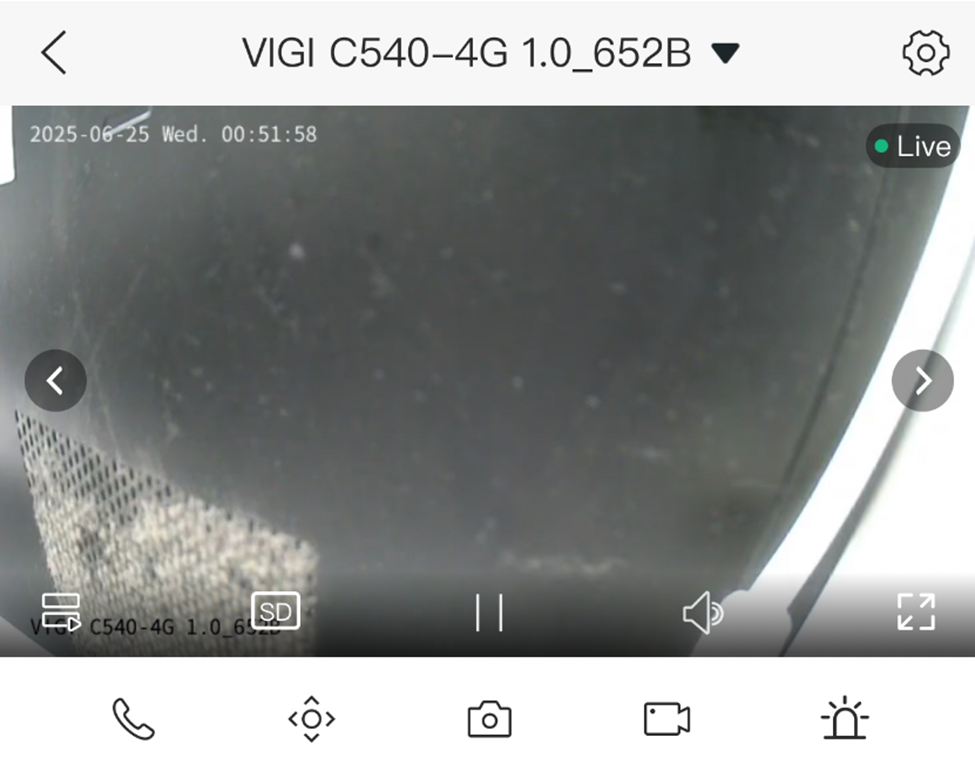
Step 1. Tap on your camera and go to the Live View page. Then, tap on  icon.
icon.
Step 2. Tap on Active Defense and enable the Arming Status.
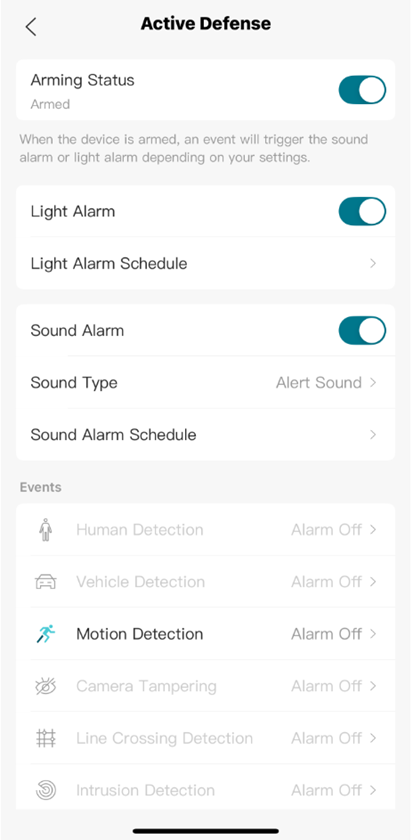
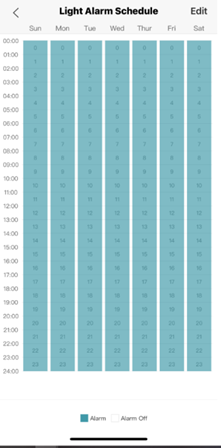
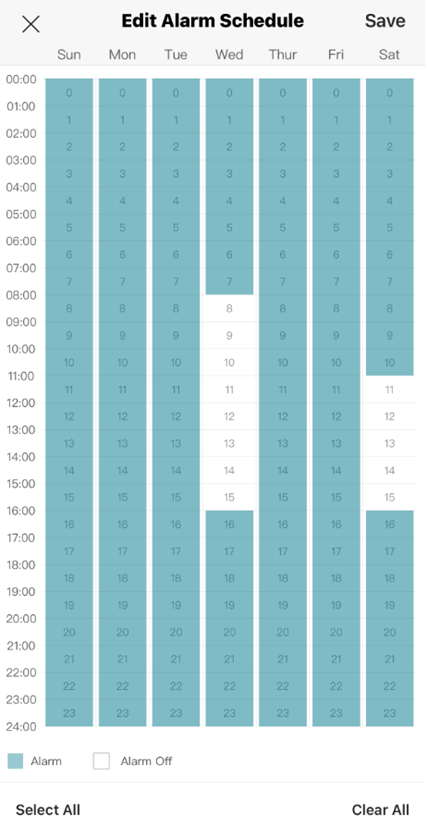
Step 3. Enable Light Alarm and go to Light Alarm Schedule. Set the alarm schedule. The timeline is fully selected by default.
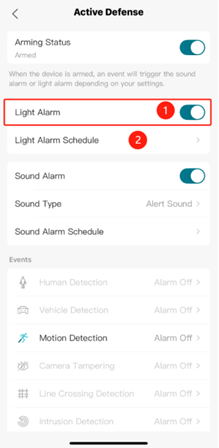
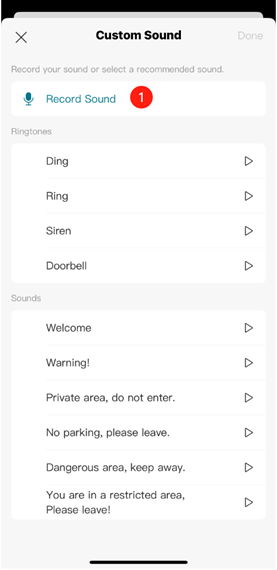
Step 4. Go back to Active Defense. Enable Sound Alarm and Go to Sound Type, choose the alert method as you want.
In Custom, you can customize the audio or record your own audio.
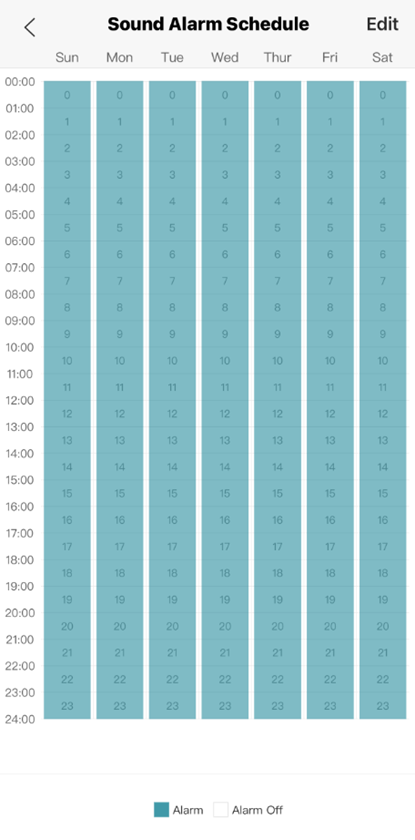
Step 3. Go to Sound Alarm Schedule and set the alarm schedule. The timeline is fully selected by default.
Conclusion
You can now better configure Active Defense on VIGI camera via Web UI and VIGI App.
Get to know more details of each function and configuration please go to Download Center to download the manual of your product.
Is this faq useful?
Your feedback helps improve this site.


TP-Link Community
Still need help? Search for answers, ask questions, and get help from TP-Link experts and other users around the world.