How to Use Motion Detection Function of My VIGI Camera using the Web UI
Contents
Configuration for Enabling Motion Detection
Configuration for Notifications
Configuration for Smart Detection
Configuration for Active Alarm
Configuration for Detection Zones
Configuration for Arming Schedule
Introduction
This article provides a guide on how to utilize the motion detection function of your VIGI camera using the Web User Interface (Web UI).
Objective
You will be guided on motion detection and other functions related to motion detection using the VIGI Camera Web Interface.
Requirements
- PC: Make sure the computer and VIGI camera are on the same network or that the PC can reach the IP Camera’s IP address.
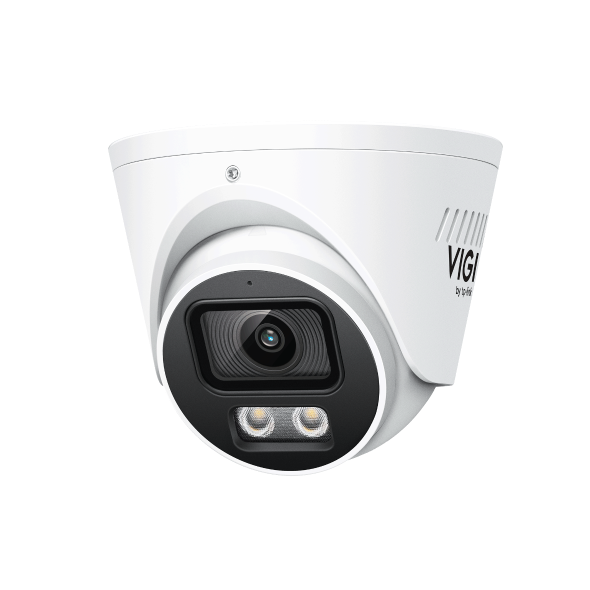
- VIGI camera (Certain functions may vary depending on the specific camera model. In this example, VIGI InSight S385 was used).
Configuration
The configuration includes activating motion detection, enabling "Human" or “Vehicle” for object classification, setting up notifications and alarms, defining custom activity zones, and adjusting the motion sensitivity (Low, Medium, or High).
Configuration for Enabling Motion Detection
Step 1: Login locally to your Camera.
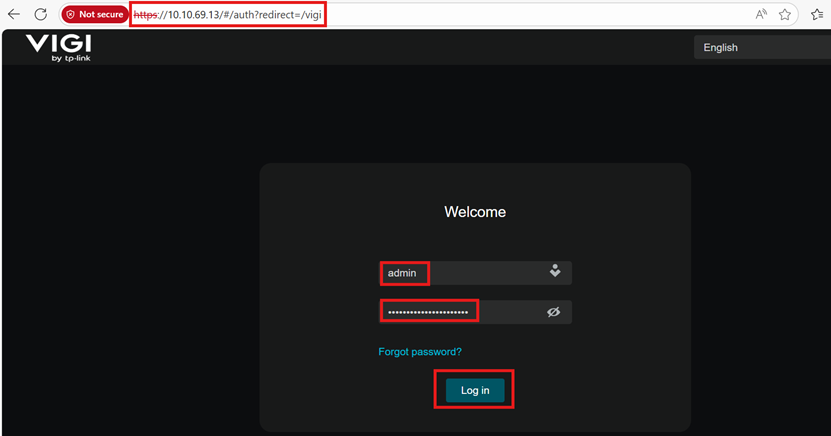
To access the camera's web interface, use its IP address. Ensure your computer and the VIGI camera are on the same network, or that the PC can otherwise reach the camera's IP address.
The "Not private/Not secure" warning you see in your browser is because the local management certificate is self-signed. Most browsers don't trust these certificates as they are not issued by a recognized Certificate Authority (CA). These authoritative certificates are primarily used to verify the authenticity of a remote server.
However, even if our self-signed Certificate is not trusted, the connection between your browser and the devices' Local Management is secure.
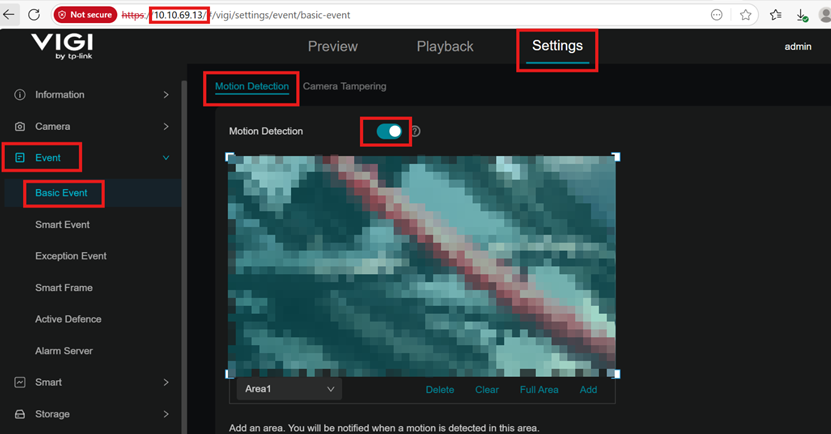
Step 2: Go to Settings > Event > Basic Event > Motion Detection . Click on the toggle button to enable Motion Detection.
Configuration for Notifications
Step 1: Login locally to your Camera.
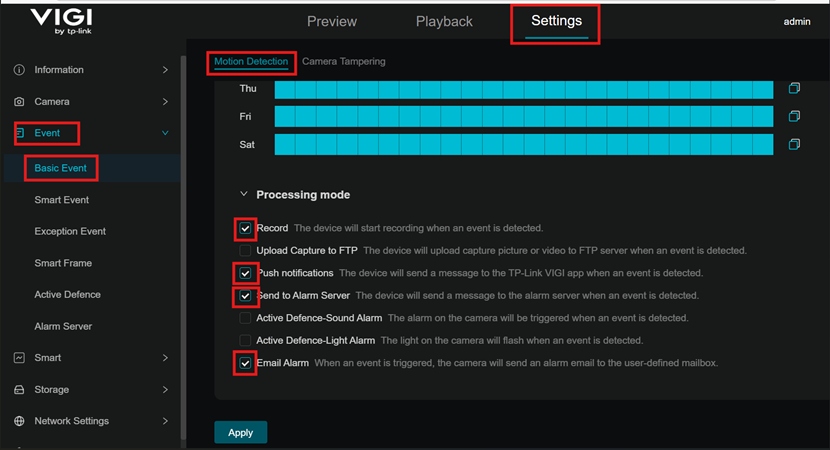
Step 2: Go to Settings > Event > Basic Event > Motion Detection and scroll down to the bottom of the page to choose the notifications you want to enable.
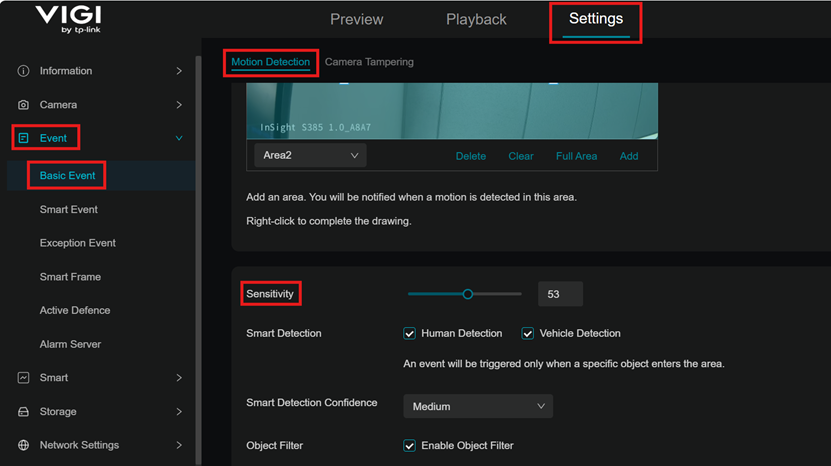
Configuration for Smart Detection
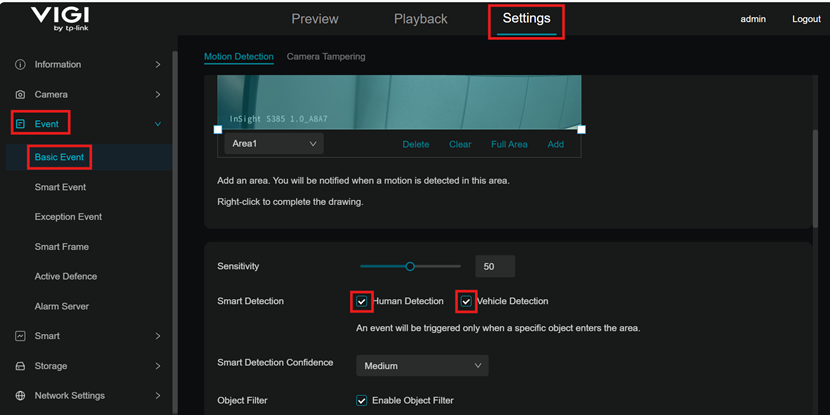
When enabled, an event will be triggered only when the selected target is detected moving in this area.
Step 1: Login locally to your Camera.
Step 2: Go to Settings > Event > Basic Event > Motion Detection and scroll down to Smart Detection. Click the Checkbox to enable Human and/or Vehicle detection triggers.
Configuration for Active Alarm
Step 1: Login locally to your Camera.
Step 2: Go to Settings > Event > Basic Event > Motion Detection and scroll down to Processing Mode. Choose Active Defence-Light Alarm and/or Active Defence-Sound Alarm.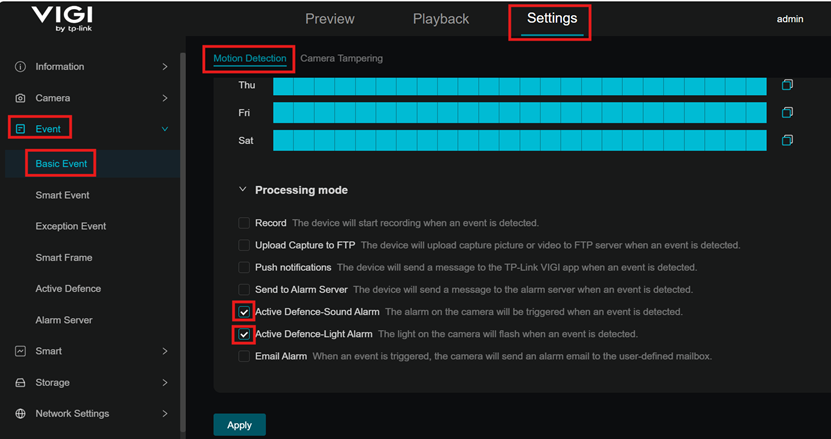
- When the Active Defence-Sound Alarm is enabled, the camera will emit a powerful sound upon detecting a human or vehicle, based on the options you've selected in the Smart Detection settings.
- When the Active Defence-Light Alarm is enabled, the camera will flash a powerful light upon detecting a human or vehicle, based on the options selected in the Smart Detection settings.
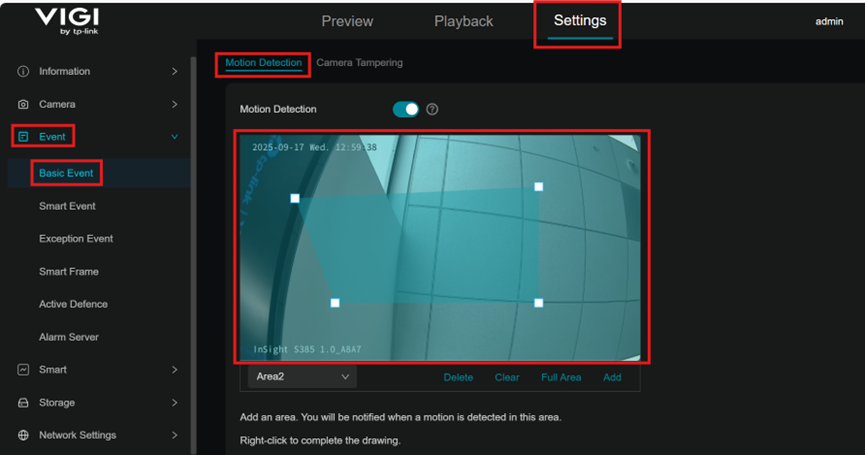
Configuration for Detection Zones
You can use this function to restrict motion detection to custom zones. The camera will not detect motion outside of these designated areas. Entire view is covered by default.
Step 1: Login locally to your Camera.
Step 2: Go to Settings > Event > Basic Event > Motion Detection. Add an area. You will be notified when a motion is detected in this area.
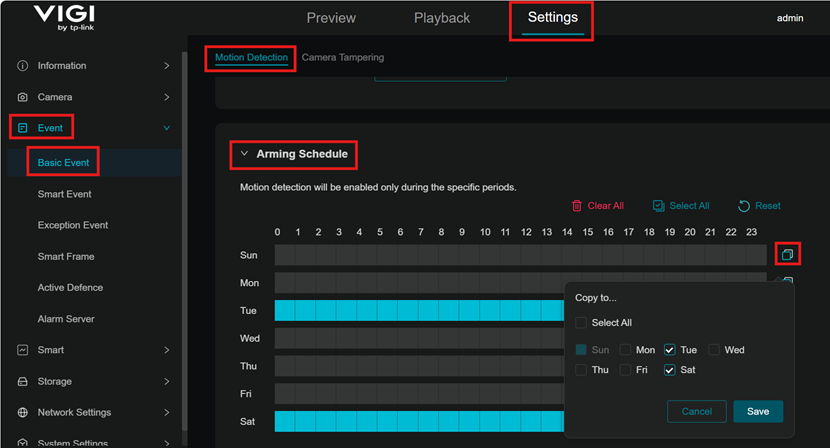
Configuration for Arming Schedule
Step 1: Login locally to your Camera.
Step 2: Go to Settings > Event > Basic Event > Motion Detection. Under Arming Schedule you may choose the days or intervals when the motion detection is enabled.Click and drag on a row to select intervals.
Configuration for Sensitivity
Step 1: Login locally to your Camera.
Step 2: Go to Settings > Event > Basic Event > Motion Detection. Scroll down to Sensitivity. Slide to adjust Sensitivity (Low/Medium/High) as needed. Increased sensitivity results in more recordings and notifications.
Conclusion
This article covers the configuration process that allows you to fully customize your VIGI camera's motion detection settings, including how it detects motion, the types of objects it recognizes, and how it notifies you of events. This ensures the camera operates according to your specific security needs and preferences.
Get to know more details of each function and configuration please go to Download Center to download the manual of your product.
FAQ
Q1: What is required for the playback feature of motion detection to work?
A storage device, such as a Security Manager, NVR, or a microSD card, is required for the playback feature.
Q2: What are some of the key features that can be configured for motion detection? Key features include setting up notifications, object classification (e.g., human, vehicle), defining detection zones, and adjusting sensitivity.
Finden Sie diese FAQ hilfreich?
Mit Ihrer Rückmeldung tragen Sie dazu bei, dass wir unsere Webpräsenz verbessern.


Von United States?
Erhalten Sie Produkte, Events und Leistungen speziell für Ihre Region