How to Set Up IoT Network on TP-Link Wireless Router
User’s Application Scenario
This router can create a dedicated wireless network for you to manage your IoT devices together, such as smart lights and cameras, enhancing their connection stability.
How can I do that?
Method 1: Via the Web Management page (for all models)
1. Visit http://tplinkwifi.net, and log in with your TP-Link ID or the password you set for the router.
2. Go to Advanced > Wireless > IoT Network.
3. Create an IoT network as needed.
1) Tick the Enable checkbox for the 2.4GHz or 5 GHz wireless network. For the 5 GHz network, make sure your IoT devices can connect to a 5 GHz network.
2) Customize the SSID. Don‘t select Hide SSID unless you want your IoT devices to manually input the SSID for network access.
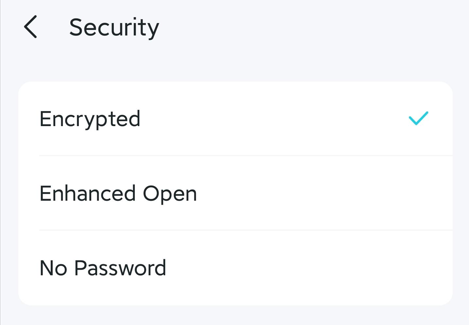
3) Select the Security type and customize your own password. If No security is selected, no password is needed to access the IoT network.

4) Click SAVE. Now you can connect your IoT devices to the dedicated IoT network.
5) You can also click Share Network to share the SSID and password with others.

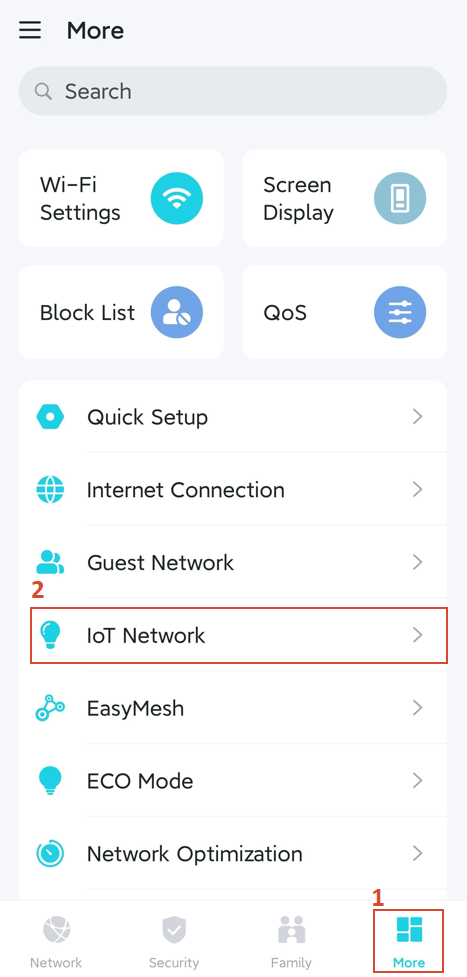
Method 2: Via the Tether App (for Tether-compatible models)
1. Open the Tether app, tap your router to log in.
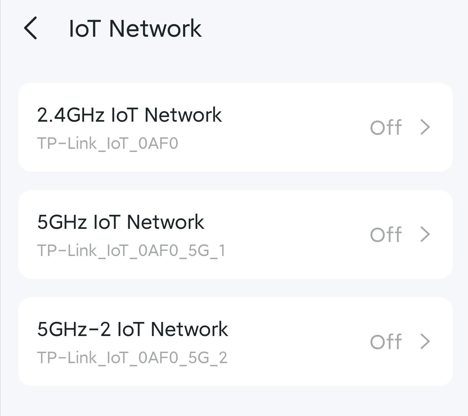
2. Go to More > IoT Network, and click any one of these IoT Networks to enable it. Here we’ll take the 2.4G IoT Network for an example
Note: Not all models support 5GHz-2 IoT Network.
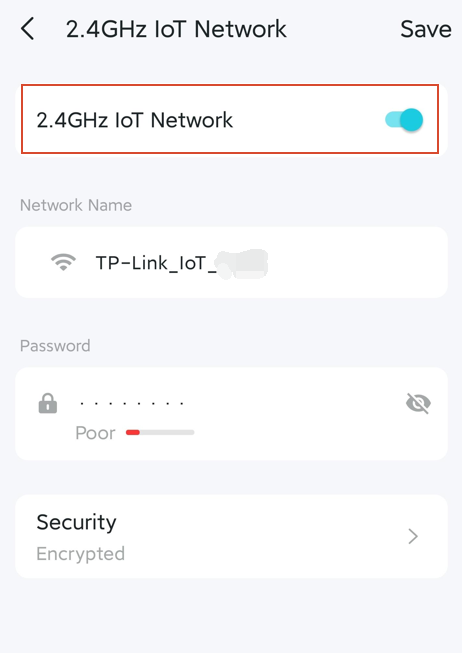
3. Toggle on the 2.4GHz IoT Network, then you can set the Wi-Fi name, password, and Security type as you like.
Looking For More
Is this faq useful?
Your feedback helps improve this site.


TP-Link Community
Still need help? Search for answers, ask questions, and get help from TP-Link experts and other users around the world.