WireGuard VPN Setup: Server and Client Configuration on Your TP-Link Router
WireGuard VPN is a modern protocol based on the User Datagram Protocol (UDP) that uses current encryption algorithms to deliver secure, fast remote access. This guide covers how to set up your TP-Link router as a WireGuard VPN Server, so remote devices can access your home network, and how to configure the WireGuard VPN client to route your router's traffic through an external VPN.
Key Takeaways
- WireGuard VPN is a modern VPN protocol based on the User Datagram Protocol (UDP) that uses current encryption algorithms to provide secure, fast remote access.
- Setting up the TP-Link router as a WireGuard VPN Server allows remote devices to access your home network. Selecting "Internet and Home Network" as the Client Access type also routes remote Internet traffic through the VPN.
- Each WireGuard VPN account can only be used by one client device at a time. It is not possible for two devices to connect to the VPN server simultaneously using the same account.
- To connect a mobile device to the WireGuard VPN server, download the WireGuard app from Google Play or the Apple App Store and scan the QR code generated by the router.
- When using the router as a WireGuard VPN Client, the same configuration file cannot be used on multiple VPN clients simultaneously. Importing a file to both a mobile phone and a router means only one can be connected to the VPN server at a time.
- If the server's private and public keys are renewed, any connected clients must be reconfigured before they can reconnect to the VPN server.
Set Up WireGuard VPN Server on Your TP-Link Router
The WireGuard VPN Server feature allows remote devices to connect securely to your home network. The steps below use the Archer AX55 as the example model.
Step 1: Enable WireGuard VPN Server
- Visit http://tplinkwifi.net and log in with your TP-Link ID or the password you set for the router.
- Go to Advanced > VPN Server > WireGuard and tick the Enable box for WireGuard.
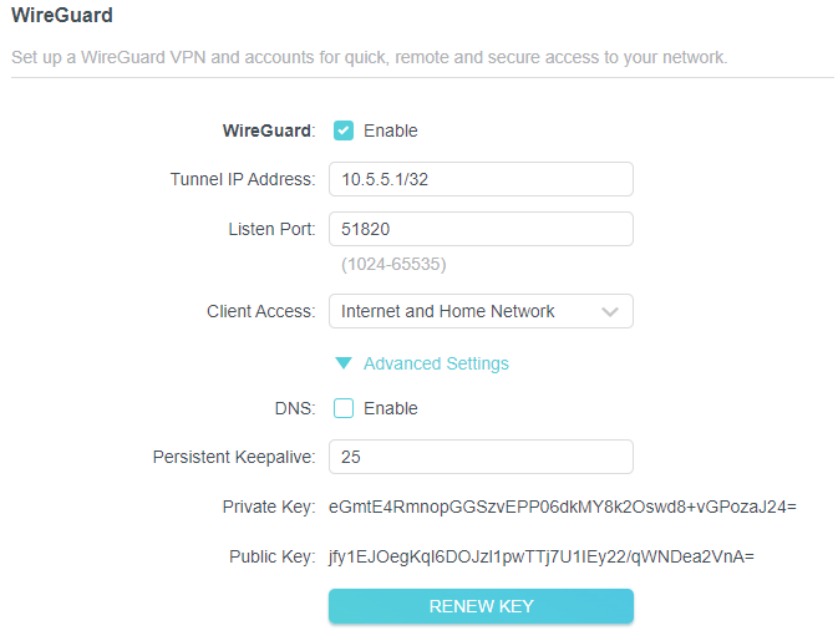
- View the default WireGuard VPN settings, as shown above. The parameters are automatically filled in. Do NOT change them unless necessary.
- Select your Client Access type. Select Home Network Only if you only want the remote device to access your home network. Select Internet and Home Network if you also want the remote device to access the Internet through the VPN Server.
- (Optional) Click Advanced Settings to display more settings. If DNS is turned on, the router will become the DNS server of the VPN client that establishes a connection with it. Change the Persistent Keepalive time (25 seconds by default) to send out heartbeat regularly. You can also click RENEW KEY to update the private key and public key.
Step 2: Create WireGuard VPN Accounts for Remote Clients
- Locate the Account List section. Click Add to create an account.
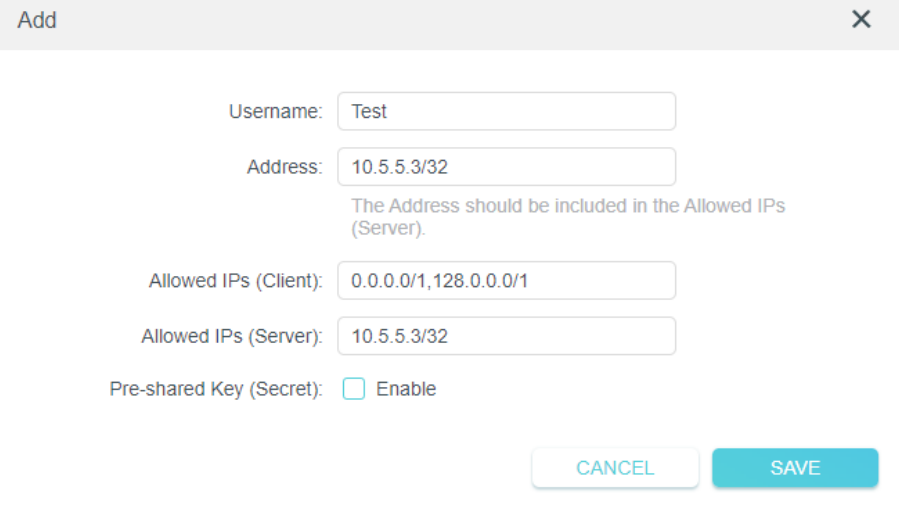
- Specify a name for this account.
- Enter the address of the virtual interface assigned to this account. Do NOT change it unless necessary.
- Traffic sent from the WireGuard VPN client to the allowed IPs (client) will be transmitted through the tunnel. By default, all network traffic from clients will be transmitted through the tunnel. Do NOT change it unless necessary.
- Traffic sent from the WireGuard VPN server to the allowed IPs (server) will be transmitted through the tunnel. Do NOT change it unless necessary.
- Enable or disable the Pre-shared key.
- Click SAVE.
Note: One account can only be used by one WireGuard VPN client at the same time to connect to the WireGuard VPN server.
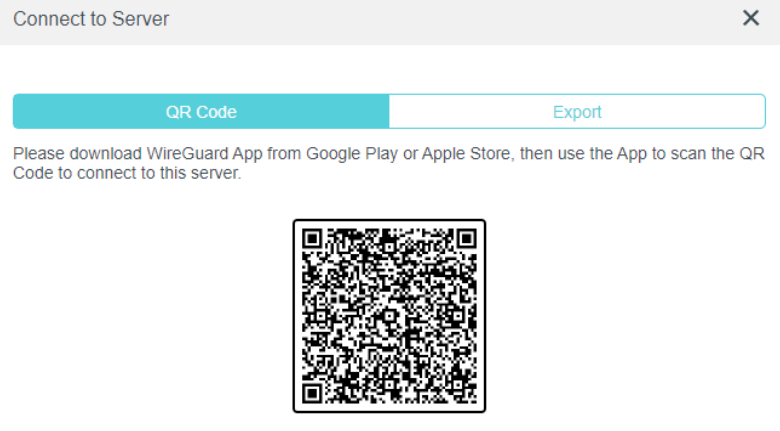
- Connect to the WireGuard server. On the Account List, click in the Modify column of the corresponding account.
- Mobile phones: Download the WireGuard app from Google Play or the Apple App Store, then use the app to scan the QR code to connect to this server. For step-by-step instructions, see How to Set Up WireGuard VPN Client on Android Phone and iPhone.
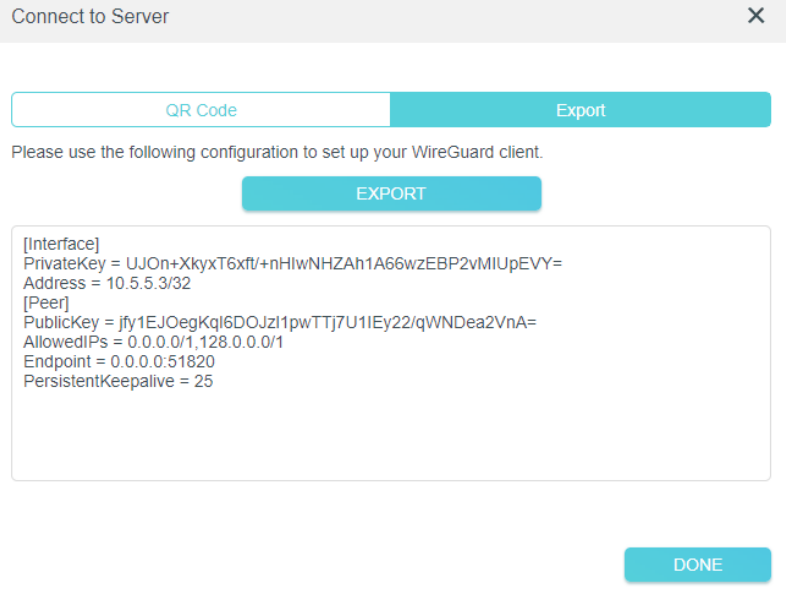
- Other devices (for example, a TP-Link WireGuard VPN client): Click EXPORT to save the WireGuard VPN configuration file. The remote device will use this file to access your router.
- On the account list, you can click the button to modify the VPN server settings, connect to the server, or delete the account.
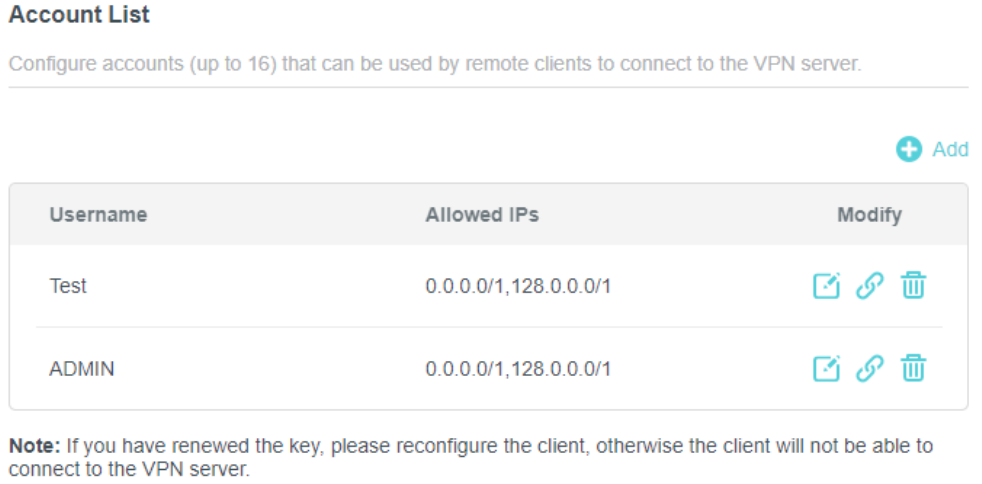
Note: If you have renewed the key, please reconfigure the client, otherwise the client will not be able to connect to the VPN server.
If your TP-Link router is connected to a main router, you may also need to configure port forwarding. See How to Set Up Port Forwarding on the Main Router When VPN Server Is Set on the TP-Link Router or Deco for guidance.
Configure WireGuard VPN Client on Your TP-Link Router
When your TP-Link router is set up as a WireGuard VPN client, all network traffic from designated devices is routed through an external VPN server. The steps below use the Archer AX55 as the example model. If you need to set up the WireGuard VPN client on a mobile device instead, see How to Set Up VPN Client on Computer and Phone.
- Download your VPN configuration file — Download the configuration file from your VPN provider.
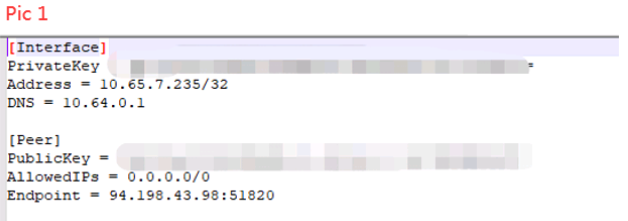
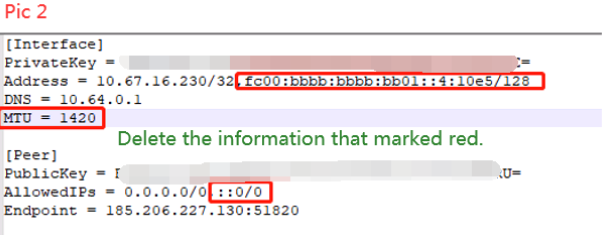
- Check and edit your WireGuard VPN client configuration file — The router supports a specific set of WireGuard configuration file parameters (shown in Pic 1 below). If your configuration file includes unsupported parameters such as IPv6 addresses or MTU values (shown in Pic 2 below), edit the file and delete those parameters before saving.
- Log in to your router — Visit http://tplinkwifi.net and log in with your TP-Link ID or the password you set for the router. Go to Advanced > VPN Client.
- Enable VPN Client — Enable VPN Client and click SAVE.
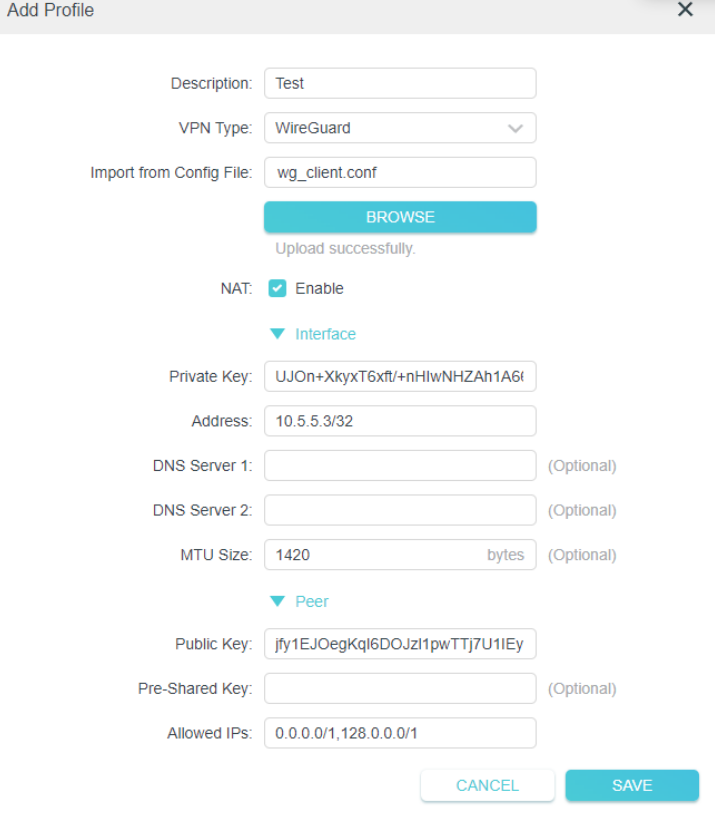
- Import your WireGuard VPN client configuration file — Click the Add button in the upper-right of the Server List. Specify a description for the VPN and choose WireGuard as the VPN Type. Click BROWSE to import the configuration file provided by your VPN provider, then click SAVE.
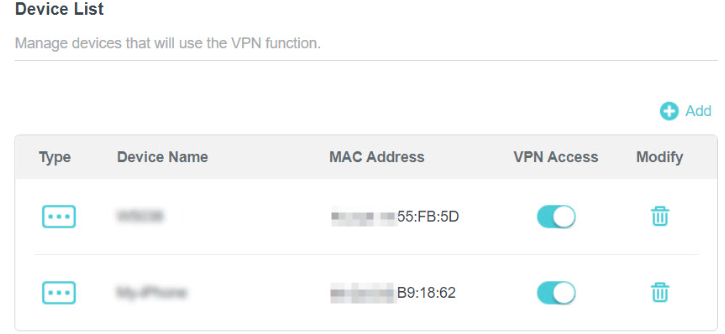
- Enable WireGuard VPN access for your devices — Check and enable the WireGuard entry in the Server List, then add and enable VPN Access for the devices that will use the VPN function.

Note: It's NOT suggested to use the same configuration file on multiple VPN Clients simultaneously. You could import the configuration file into your mobile phones as well as the router, but you are not allowed to connect to the VPN server simultaneously based on WireGuard protocols.
If you have trouble accessing certain devices after connecting, see Why Can't I Access or Discover Certain Devices Over VPN?
¿Es útil esta pregunta frecuente?
Sus comentarios nos ayudan a mejorar este sitio.


