Archer C58HP V1 User Guide
- About This Guide
- Chapter 1 Get to Know About Your Router
- Chapter 2 Connect to the Internet
- Chapter 3 Log In to Your Router
- Chapter 4 Guest Network
- Chapter 5 Parental Controls
- Chapter 6 QoS
- Chapter 7 Network Security
- Chapter 8 NAT Forwarding
- Chapter 9 VPN Server
- Chapter 10 Customize Your Network Settings
- Chapter 11 Manage the Router
- FAQ
- Authentication
Chapter 11 Manage the Router
This chapter will show you the configuration for managing and maintaining your router. Some features are only supported by a certain mode.
It contains the following sections:
•Test the Network Connectivity
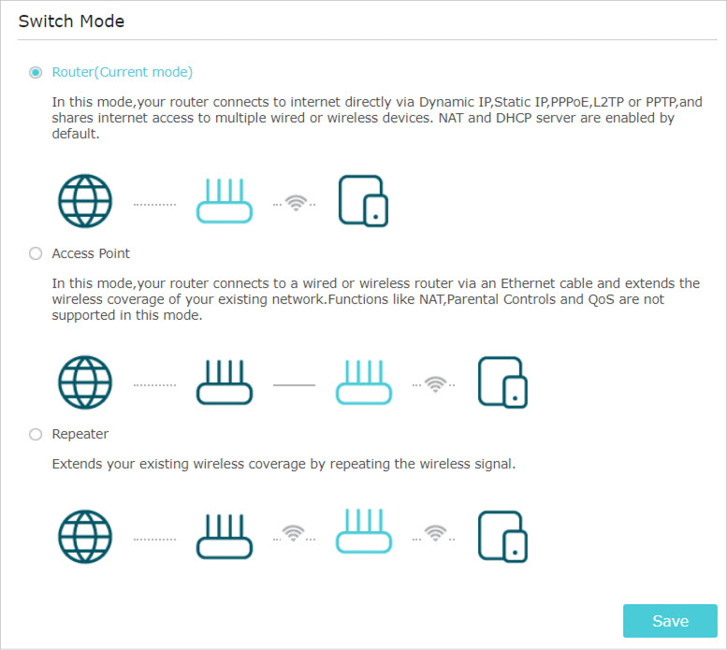
The router supports three operation modes: router, access point and repeater. Select one mode as needed.
1.Visit http://tplinkwifi.net, and log in with the password you set for the router.
2.Go to Advanced > Operation Mode.
3.Select the mode as needed and click Save. The router will reboot to apply the settings.
System time is the time displayed while the router is running. The system time you configure here will be used for other time-based functions like Parental Controls.
1.Visit http://tplinkwifi.net, and log in with the password you set for the router.
2.Go to System Tools > Time Settings.
•To get time from the internet:
1.Select your local Time Zone from the drop-down list.
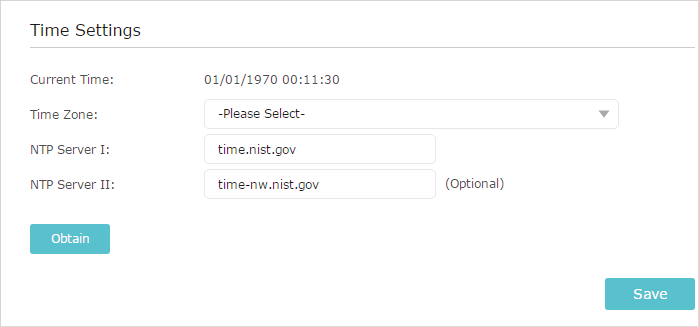
2.In the NTP Server I field, enter the IP address or domain name of your desired NTP Server.
3.(Optional) In the NTP Server II field, enter the IP address or domain name of the second NTP Server.
4.Click Obtain to get the current Internet time and click Save.
•To set up Daylight Saving Time:
1.Select Enable Daylight Saving Time.
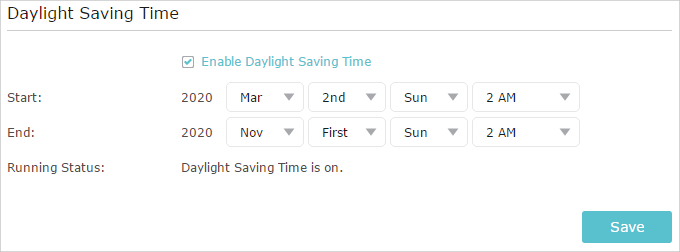
2.Select the correct Start date and time when daylight saving time starts at your local time zone.
3.Select the correct End date and time when daylight saving time ends at your local time zone.
4.Click Save.
The router‘s LEDs indicate the router’s activities and status. You can turn on or off the LEDs from the web management page.
1.Visit http://tplinkwifi.net, and log in with the password you set for the router.
2.Go to System Tools > LED Control.
3.Tick the Night Mode checkbox.
4.Specify a time period in the LED Off Time as needed, and the LEDs will be off during this period.
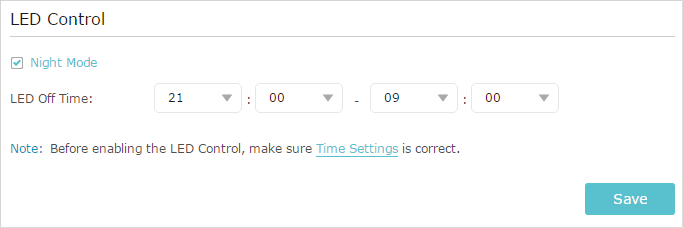
5.Click Save.
4. Test the Network Connectivity
Diagnostics is used to test the connectivity between the router and the host or other network devices.
1.Visit http://tplinkwifi.net, and log in with the password you set for the router.
2.Go to Advanced > System Tools > Diagnostics.
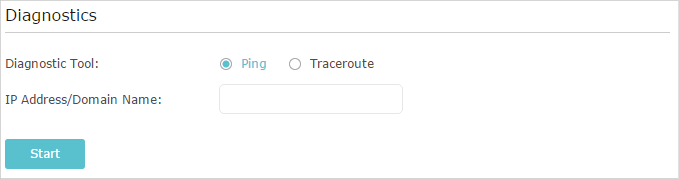
3.Enter the information with the help of page tips:
1 )Choose Ping or Traceroute as the diagnostic tool to test the connectivity;
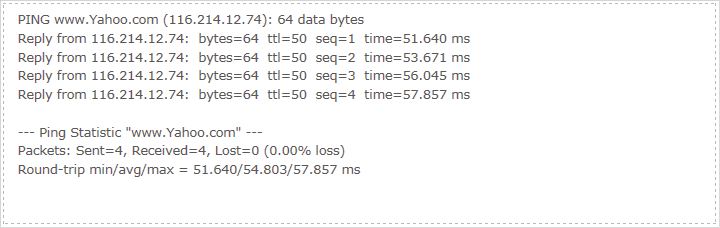
•Ping is used to test the connectivity between the router and the tested host, and measure the round-trip time.
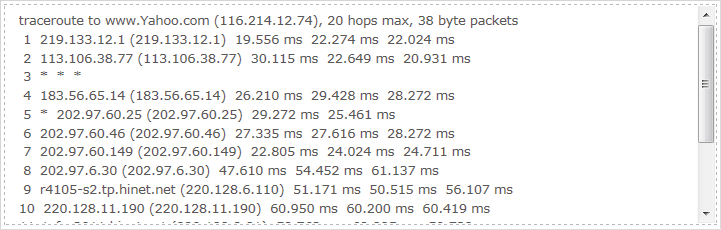
•Traceroute is used to display the route (path) your router has passed to reach the tested host, and measure transit delays of packets across an Internet Protocol network.
2 )Enter the IP Address or Domain Name of the tested host.
4.Click Start to begin the diagnostics.
 Tips: Click Advanced, you can modify the ping count, ping packet size or the Traceroute Max TTL. It’s recommended to keep the default value.
The figure below indicates the proper connection between the router and the Yahoo server (www.Yahoo.com) tested through Ping.
The figure below indicates the proper connection between the router and the Yahoo server (www.Yahoo.com) tested through Traceroute.
TP-Link aims at providing better network experience for users.
We will inform you through the web management page if there’s any update firmware available for your router. Also, the latest firmware will be released at the TP-Link official website www.tp-link.com, and you can download it from the Support page for free.
 Note:
Note:
•Make sure you remove all attached USB devices from the router before the firmware upgrade to prevent data loss.
•Backup your router configuration before firmware upgrade.
•Do NOT turn off the router during the firmware upgrade.
1.Download the latest firmware file for the router from www.tp-link.com.
2.Visit http://tplinkwifi.net, and log in with the password you set for the router.
3.Go to System Tools > Firmware Upgrade.
4.Click Browse to locate the downloaded new firmware file, and click Upgrade.
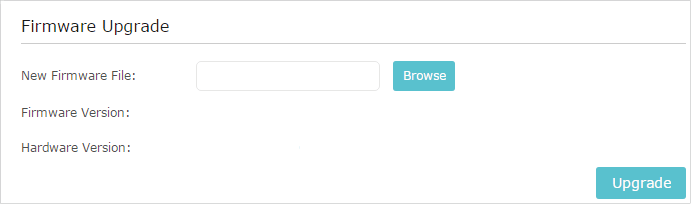
5.Wait a few minutes for the upgrade and reboot to complete.
6. Backup and Restore Configuration Settings
The configuration settings are stored as a configuration file in the router. You can backup the configuration file to your computer for future use and restore the router to a previous settings from the backup file when needed. Moreover, if necessary you can erase the current settings and reset the router to the default factory settings.
1.Visit http://tplinkwifi.net, and log in with your the password you set for the router.
2.Go to System Tools > Backup & Restore.
•To backup configuration settings:
Click Backup to save a copy of the current settings to your local computer. A ‘.bin’ file of the current settings will be stored to your computer.

•To restore configuration settings:
1.Click Browse to locate the backup configuration file stored on your computer, and click Restore.
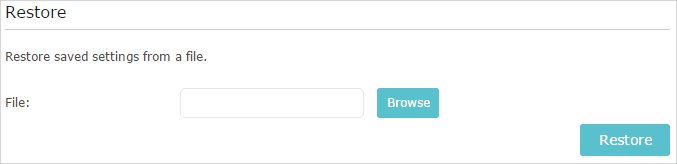
2.Wait a few minutes for the restoring and rebooting.
Note: During the restoring process, do not turn off or reset the router.
•To reset the router to factory default settings:
1.Click Factory Restore to reset the router.

2.Wait a few minutes for the resetting and rebooting.
Note:
•During the resetting process, do not turn off or reset the router.
•We strongly recommend you backup the current configuration settings before resetting the router.
Auto Reboot allows you to specify a time when the router will reboot automatically.
1.Visit http://tplinkwifi.net, and log in with the password you set for the router.
2.Go to System Tools > Auto Reboot.
3.Enable Auto Reboot.
4.Select Every Day or Selected Day. If Selected Day is selected, then specify the days when you want to the router to reboot.
5.Specify the time at which your router will reboot.
6.Click Save.

The account management feature allows you to change your login password of the web management page.
1.Visit http://tplinkwifi.net, and log in with the password you set for the router.
2.Go to System Tools > Administration and focus on the Account Management section.
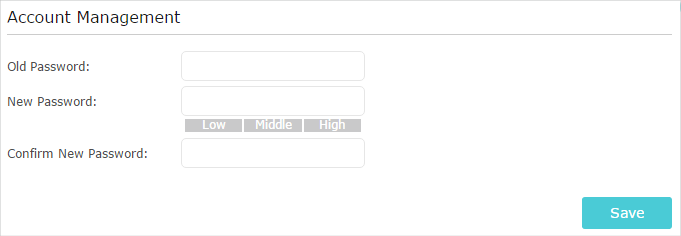
3.Enter the old password, then a new password twice (both case-sensitive). Click Save.
4.Use the new password for future logins.
This feature allows you to recover the login password you set for you router in case you forget it.
1.Visit http://tplinkwifi.net, and log in with the password you set for the router.
2.Go to System Tools > Administration and focus on the Password Recovery section.
3.Tick the Enable Password Recovery checkbox.
4.Specify a mailbox (From) for sending the recovery letter and enter its SMTP Server address. Specify a mailbox (To) for receiving the recovery letter. If the mailbox (From) to send the recovery letter requires encryption, select Enable Authentication and enter its username and password.
 Tips:
Tips:
•SMTP server is available for users in most webmail systems. For example, the SMTP server address of Gmail is smtp.gmail.com. You can refer to their Help page to learn the SMTP server address.
•Generally, Enable Authentication should be selected if the login of the mailbox requires username and password.
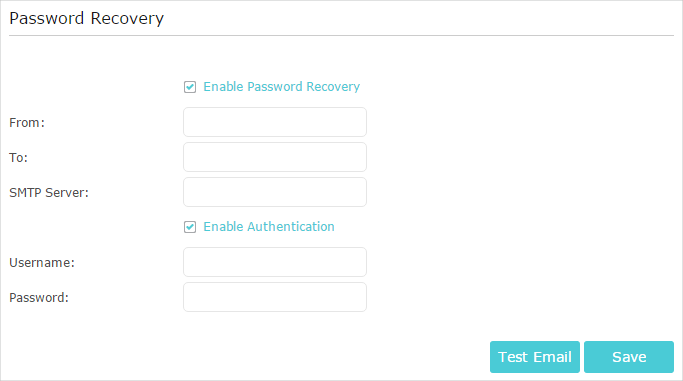
5.Click Save.
You can click Test Email to test whether the configuration is successful.
To recover the login password, please visit http://tplinkwifi.net, click Forgot Password? on the login page and follow the instructions to set a new password.
This feature allows you to limit the number of client devices on your LAN from accessing the router by using the MAC address-based authentication.
1.Visit http://tplinkwifi.net, and log in with the password you set for the router.
2.Go to Advanced > System Tools > Administration and complete the settings In Local Management section as needed.
•Allow all LAN connected devices to manage the router:
Toggle on Access for All LAN Connected Devices.

•Allow specific devices to manage the router:
1.Toggle off Access for All LAN Connected Devices.
2.Click Add.
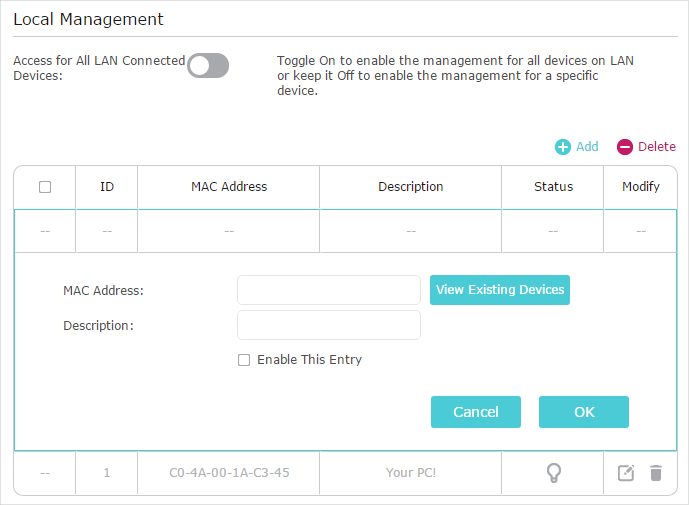
3.Click View Existing Devices and select the device to manage the router from the Existing Devices list, or enter the MAC address of the device manually.
4.Specify a Description for this entry.
5.Tick the Enable This Entry checkbox.
6.Click OK.
This feature allows you to control remote devices’ authority to manage the router.
1.Visit http://tplinkwifi.net, and log in with the password you set for the router.
2.Go to Advanced > System Tools > Administration and complete the settings in Remote Management section as needed.
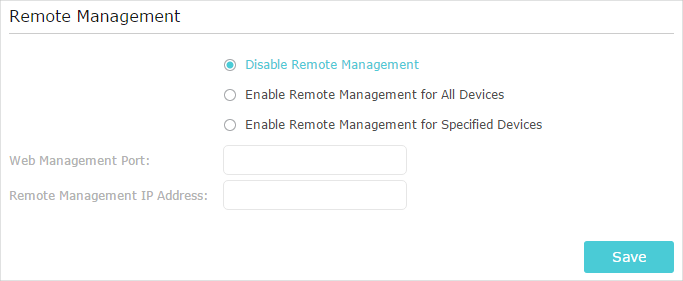
•Forbid all devices to manage the router remotely:
Select Disable Remote Management and click Save.
•Allow all devices to manage the router remotely:
1.Select Enable Remote Management for All Devices.
2.Enter Web Management Port (1024-65535 or 80).
3.Click Save.
Devices on the internet can log in to http://Router’s WAN IP address:port number (such as http://113.116.60.229:1024) to manage the router.
Tips:
•You can find the WAN IP address of the router on Basic > Network Maps > Internet.
•The router’s WAN IP is usually a dynamic IP. Please refer to Set Up a Dynamic DNS Service Account if you want to log in to the router through a domain name.
•Allow specific devices to manage the router remotely:
1.Select Enable Remote Management for Specified Devices.
2.Enter Web Management Port (1024-65535 or 80).
3.In Remote Management IP address, enter the IP address of the remote device to manage the router.
4.Click Save.
Devices using this WAN IP can manage the router by logging in to http://Router’s WAN IP:port number (such as http://113.116.60.229:1024).
Tips: The router’s WAN IP is usually a dynamic IP. Please refer to Set Up a Dynamic DNS Service Account if you want to log in to the router through a domain name.
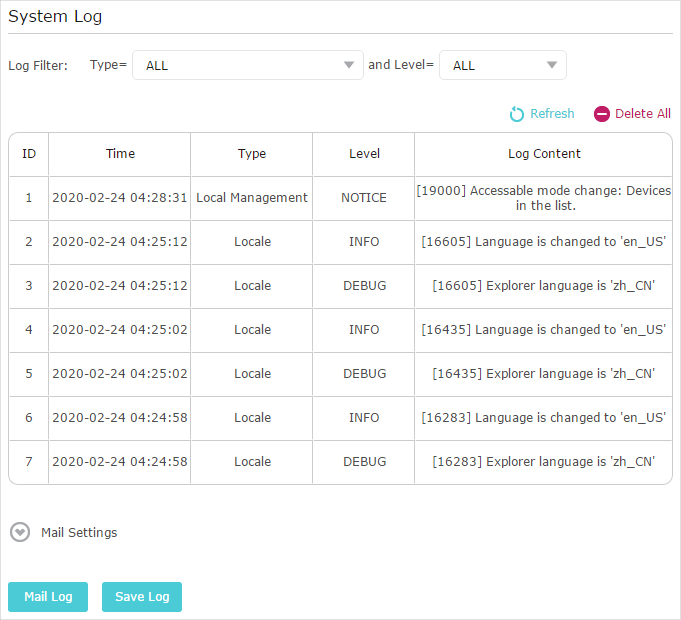
When the router does not work normally, you can save the system log and send it to the technical support for troubleshooting.
•To save the system log locally:
1.Visit http://tplinkwifi.net, and log in the password you set for the router.
2.Go to System Tools > System Log.
3.Choose the type and level of the system logs as needed.
4.Click Save Log to save the system logs to a local disk.
•To send the system log to a mailbox at a fixed time:
For example, I want to check my router’s working status at a fixed time every day, however, it’s too troublesome to log in to the web management page every time I want to go checking. It would be great if the system logs could be sent to my mailbox at 8 a.m. every day.
1.Visit http://tplinkwifi.net, and log in with the password you set for the router.
2.Go to System Tools > System Log.
3.Click Mail Settings.
4.Enter the information required:
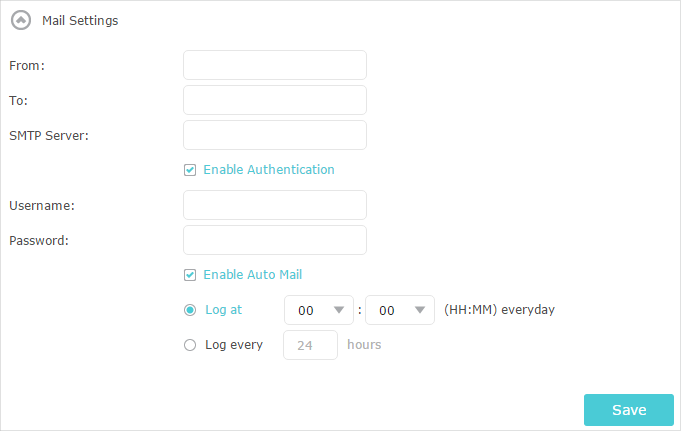
1 )From: Enter the email address used for sending the system log.
2 )To: Enter the recipient’s email address, which can be the same as or different from the sender’s email address.
3 )SMTP Server: Enter the SMTP server address.
Tips: SMTP server is available for users in most webmail systems. For example, the SMTP server address of Hotmail is smtp-mail.outlook.com. You can refer to their Help page to learn the SMTP server address.
4 )Select Enable Authentication.
Tips: Generally, Enable Authentication should be selected if the login of the mailbox requires username and password.
5 )Username: Enter the email address used for sending the system log.
6 )Password: Enter the password to login the sender’s email address.
7 )Select Enable Auto Mail.
 Tips: The router will send the system log to the designated email address if this option is enabled.
8 )Set a fixed time. The recipient will receive the system log sent at this time every day.
5.Click Save.
13. Monitor the Internet Traffic Statistics
The Traffic Statistics page displays the network traffic of the LAN, WAN and WLAN sent and received packets, allowing you to monitor the volume of internet traffic statistics.
1.Visit http://tplinkwifi.net, and log in with the password you set for the router.
2.Go to Advanced > System Tools > Traffic Statistics.
3.Toggle on Traffic Statistics, and then you can monitor the traffic statistics in Traffic Statistics List section.
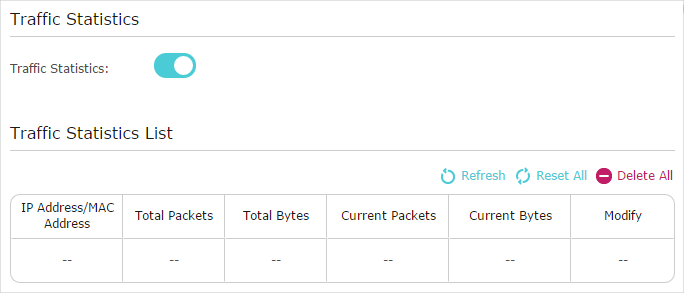
Click Refresh to update the statistic information on the page.
Click Reset All to reset all statistic values in the list to zero.
Click Delete All to delete all statistic information in the list.
Click  to reset the statistic information of the specific device.
Click  to delete the specific device item in the list.