Archer AX73 V1 User Guide
- About This Guide
- Chapter 1 Get to Know About Your Router
- Chapter 2 Connect the Hardware
- Chapter 3 Log In to Your Router
- Chapter 4 Set Up Internet Connection
- Chapter 5 TP-Link Cloud Service
- Chapter 6 Wireless Settings
- Chapter 7 Guest Network
- Chapter 8 USB Settings
- Chapter 9 HomeShield
- Chapter 10 OneMesh with Seamless Roaming
- Chapter 11 Network Security
- Chapter 12 NAT Forwarding
- Chapter 13 VPN Server
- Chapter 14 Customize Your Network Settings
- Chapter 15 Manage the Router
- FAQ
- Authentication
Chapter 6 Wireless Settings
This chapter guides you on how to configure the wireless settings.
It contains the following sections:
•Specify Wireless Settings
•Schedule Your Wireless Function
1. Specify Wireless Settings
The router’s wireless network name (SSID) and password, and security option are preset in the factory. The preset SSID and password can be found on the label of the router. You can customize the wireless settings according to your needs.
1.Visit http://tplinkwifi.net, and log in with your TP-Link ID or the password you set for the router.
2.Go to Wireless or Advanced > Wireless > Wireless Settings.
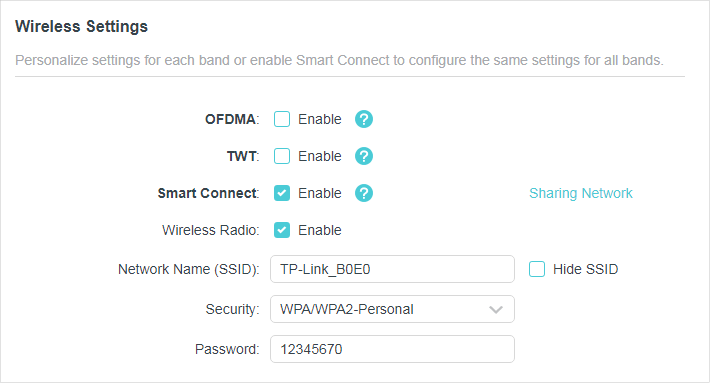
•To enable or disable OFDMA:
OFDMA enables multiple users to transmit data simultaneously, and thus greatly improves speed and efficiency. Noted that only when your clients also support OFDMA, can you fully enjoy the benefits. It is disabled by default.
1.Go to Advanced > Wireless > Wireless Settings.
2.Enable OFDMA.
•To enable or disable TWT:
TWT (Target Wake Time) allows 802.11ax routers and clients to negotiate their periods to transmit and receive data packets. Clients only wake up at TWT sessions and remain in sleep mode for the rest of the time, which significantly extend their battery life. It is disabled by default.
1.Go to Advanced > Wireless > Wireless Settings.
2.Enable TWT.
•To use the Smart Connect function:
The Smart Connect function lets you enjoy a more high-speed network by assigning your devices to best wireless bands based on actual conditions to balance network demands.
1.Go to Advanced > Wireless > Wireless Settings.
2.Enable Smart Connect.

3.Keep the default values or set a new SSID and password, and click SAVE. This SSID and password will be applied for the 2.4GHz and 5GHz wireless networks. If you want to configure the wireless settings separately for each band, untick the checkbox to disable this feature.
•To enable or disable the wireless function:
1.Go to Wireless or Advanced > Wireless > Wireless Settings.
2.The wireless function is enabled by default. If you want to disable the wireless function of the router, just untick the Enable checkbox of each wireless network. In this case, all the wireless settings will be invalid.
•To change the wireless network name (SSID) and wireless password:
1.Go to Wireless or Advanced > Wireless > Wireless Settings.
2.Create a new SSID in Network Name (SSID) and customize the password for the network in Password. The value is case-sensitive.
 Note: If you change the wireless settings with a wireless device, you will be disconnected when the settings are effective. Please write down the new SSID and password for future use.
•To hide SSID:
1.Go to Wireless or Advanced > Wireless > Wireless Settings.
2.Select Hide SSID, and your SSID won’t display when you scan for local wireless networks on your wireless device and you need to manually join the network.
•To change the security option:
1.Go to Advanced > Wireless > Wireless Settings.
2.Select an option from the Security drop-down list: None, WPA/WPA2-Personal, WPA2/WPA3-Personal, WPA/WPA2-Enterprise. We recommend you don’t change the default settings unless necessary.
In addition
•Transmit Power - Select either High, Middle or Low to specify the data transmit power. The default and recommended setting is High.
•Channel Width - Select a channel width (bandwidth) for the wireless network.
•Channel - Select an operating channel for the wireless network. It is recommended to leave the channel to Auto, if you are not experiencing the intermittent wireless connection issue.
•Mode - Select a transmission mode according to your wireless client devices. It is recommended to just leave it as default.
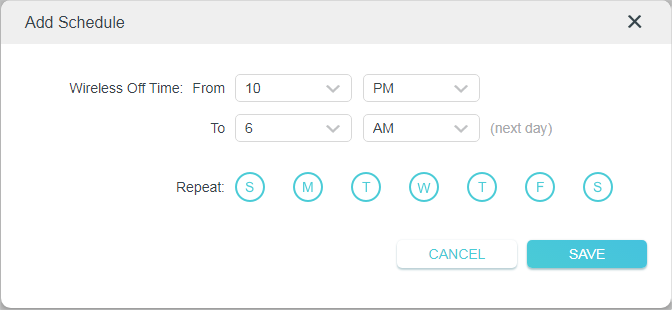
2. Schedule Your Wireless Function
The wireless network can be automatically off at a specific time when you do not need the wireless connection.
1.Visit http://tplinkwifi.net, and log in with your TP-Link ID or the password you set for the router.
2.Go to Advanced > Wireless > Wireless Schedule.
3.Enable the Wireless Schedule feature.

4.Click Add to specify a wireless off period during which you need the wireless off automatically, and click Save.
Note:
•The Effective Time Schedule is based on the time of the router. You can go to Advanced > System > Time & Language to modify the time.
•The wireless network will be automatically turned on after the time period you set.
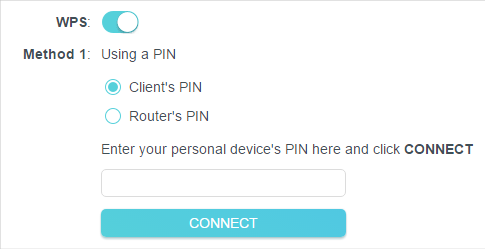
3. Use WPS for Wireless Connection
Wi-Fi Protected Setup (WPS) provides an easier approach to set up a security-protected Wi-Fi connection.
1.Visit http://tplinkwifi.net, and log in with your TP-Link ID or the password you set for the router.
2.Make sure the Wi-Fi of your router is on and go to Advanced > Wireless > WPS.
3.1. Connect via the Client’s PIN
Enter the PIN of your device and click Connect. Then your device will get connected to the router.
3.2. Connect via the Router’s PIN
Select Router’s PIN in Method 1 to enable Router’s PIN. You can use the default PIN or generate a new one.
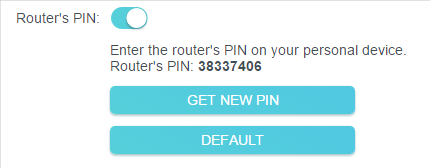
Note:
PIN (Personal Identification Number) is an eight-character identification number preset to each router. WPS supported devices can connect to your router with the PIN. The default PIN is printed on the label of the router.
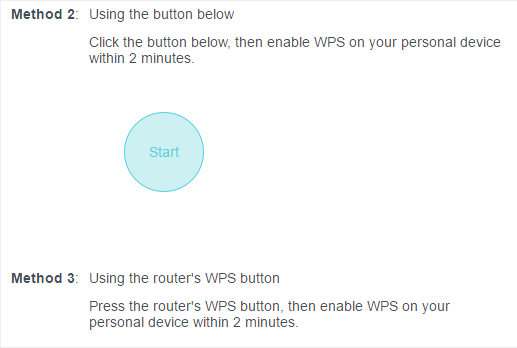
3.3. Push the WPS Button
Click Start on the screen or directly press the router’s WPS button. Within two minutes, enable WPS on your personal device. Success will appear on the screen and the WPS LED of the router should change from flashing to solid on, indicating successful WPS connection.
Check advanced wireless settings for your device.
1.Visit http://tplinkwifi.net, and log in with your TP-Link ID or the password you set for the router.
2.Go to Advanced > Wireless > Additional Settings.
3.Configure advanced wireless settings.
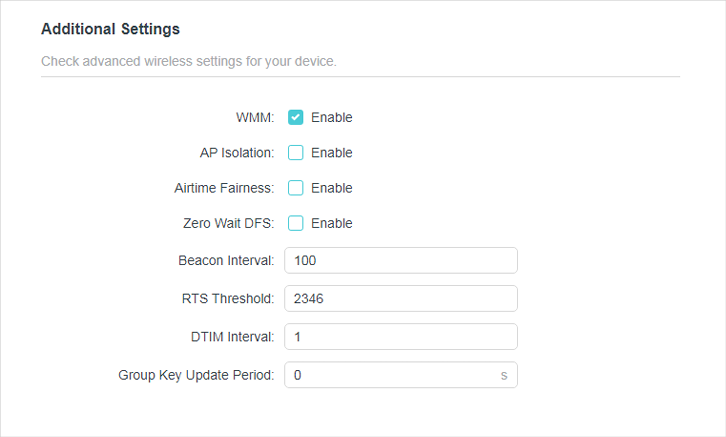
•WMM - WMM function can guarantee the packets with high-priority messages being transmitted preferentially.
•AP Isolation - This function isolates all connected wireless stations so that wireless stations cannot access each other through WLAN.
•Airtime Fairness - This function can improve the overall network performance by sacrificing a little bit of network time on your slow devices.
•Zero Wait DFS - Zero Wait DFS (Dynamic Frequency Selection) allows the router to immediately reselect a new channel once the radar signal is detected on a channel allocated to radar devices to ensure lag-free network experience.
•Beacon Interval - Enter a value between 40 and 1000 in milliseconds to determine the duration between beacon packets that are broadcasted by the router to synchronize the wireless network. The default value is 100 milliseconds.
•RTS Threshold- Enter a value between 1 and 2346 to determine the packet size of data transmission through the router. By default, the RTS (Request to Send) Threshold size is 2346. If the packet size is greater than the preset threshold, the router will send RTS frames to a particular receiving station and negotiate the sending of a data frame.
•DTIM Interval - The value determines the interval of DTIM (Delivery Traffic Indication Message). Enter a value between 1 and 15 intervals. The default value is 1, which indicates the DTIM Interval is the same as Beacon Interval.
•Group Key Update Period - Enter a number of seconds (minimum 30) to control the time interval for the encryption key automatic renewal. The default value is 0, meaning no key renewal.