Archer AX73 V1 User Guide
- About This Guide
- Chapter 1 Get to Know About Your Router
- Chapter 2 Connect the Hardware
- Chapter 3 Log In to Your Router
- Chapter 4 Set Up Internet Connection
- Chapter 5 TP-Link Cloud Service
- Chapter 6 Wireless Settings
- Chapter 7 Guest Network
- Chapter 8 USB Settings
- Chapter 9 HomeShield
- Chapter 10 OneMesh with Seamless Roaming
- Chapter 11 Network Security
- Chapter 12 NAT Forwarding
- Chapter 13 VPN Server
- Chapter 14 Customize Your Network Settings
- Chapter 15 Manage the Router
- FAQ
- Authentication
•The product should not be located in a place where it will be exposed to moisture or excessive heat.
•Place the router in a location where it can be connected to multiple devices as well as to a power source.
•Make sure the cables and power cord are safely placed out of the way so they do not create a tripping hazard.
•The router can be placed on a shelf or desktop.
•Keep the router away from devices with strong electromagnetic interference, such as Bluetooth devices, cordless phones and microwaves.
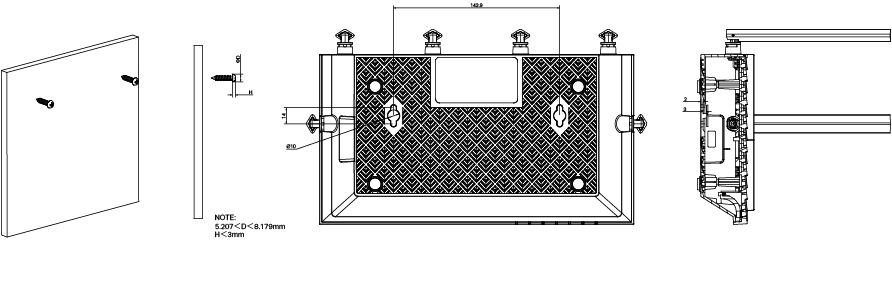
•Generally, the router is placed on a horizontal surface, such as on a shelf or desktop. The device also can be mounted on the wall as shown in the following figure.
 Note:
Note:
The diameter of the screw head, 5.207mm<D<8.179mm, and the distance of two screws is 143.9mm. The screw that project from the wall need around 5mm based, and the length of the screw need to be at least 20mm to withstand the weight of the product.
Before you start:
1 )Turn off your modem, if any, and remove the backup battery if it has one.
2 )Place the router horizontally and orient the antennas vertically.
If your internet comes from an Ethernet outlet instead of a DSL / Cable / Satellite modem, connect the router’s WAN port to it, then follow steps 3 and 4 to complete the hardware connection.
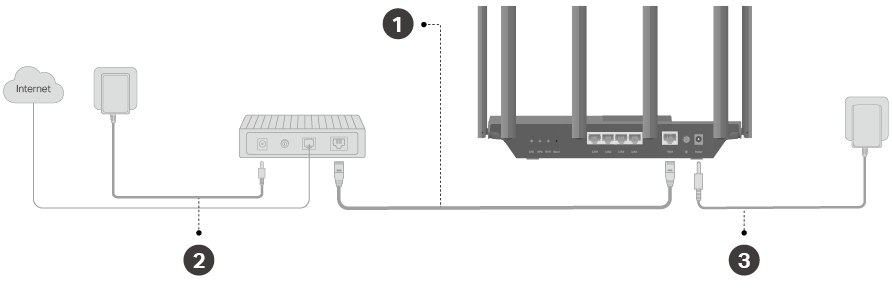
1.Connect the powered-off modem to the router’s WAN port with an Ethernet cable.
2.Turn on the modem, and then wait about 2 minutes for it to restart.
3.Connect the power adapter to the router and turn on the router.
4.Verify that the hardware connection is correct by checking the following LEDs.

5.Connect your computer to the router.
•Method 1: Wired
Turn off the Wi-Fi on your computer and connect the devices as shown below.

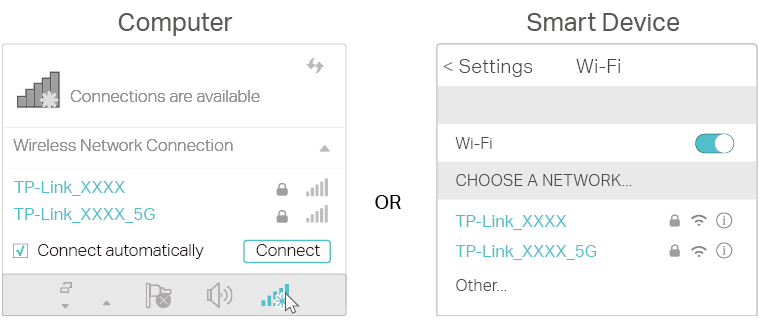
•Method 2: Wirelessly
1 )Find the SSID (Network Name) and Wireless Password printed on the label at the bottom of the router.
2 )Click the network icon of your computer or go to Wi-Fi Settings of your smart device, and then select the SSID to join the network.
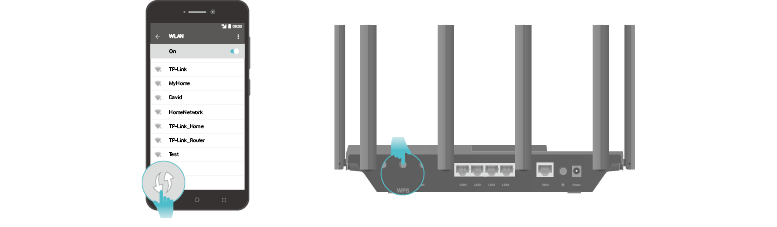
•Method 3: Use the WPS button
Wireless devices that support WPS, including Android phones, tablets, and most USB network cards, can be connected to your router through this method.
Note:
•WPS is not supported by iOS devices.
•The WPS function cannot be configured if the wireless function of the router is disabled. Also, the WPS function will be disabled if your wireless encryption is WEP. Please make sure the wireless function is enabled and is configured with the appropriate encryption before configuring the WPS.
1 )Tap the WPS icon on the device’s screen. Here we take an Android phone for instance.
2 )Within two minutes, press the WPS button on your router.