How to Configure HTTPS Certificate to Avoid Untrusted Certificate Error in VIGI NVR & IPC
Contents
Introduction
This article introduces the configuration steps for the HTTPs certificate with VIGI NVR and IPC using a Windows-based operating system.
Requirements
- A Windows or macOS based PC
- A VIGI IPC or NVR
Application Scenario
When accessing the VIGI NVR or IPC interface through a web browser using the domain name localhost:8081 (127.0.0.1:8081) or the device’s network IP address, the browser displays an untrusted certificate error message:
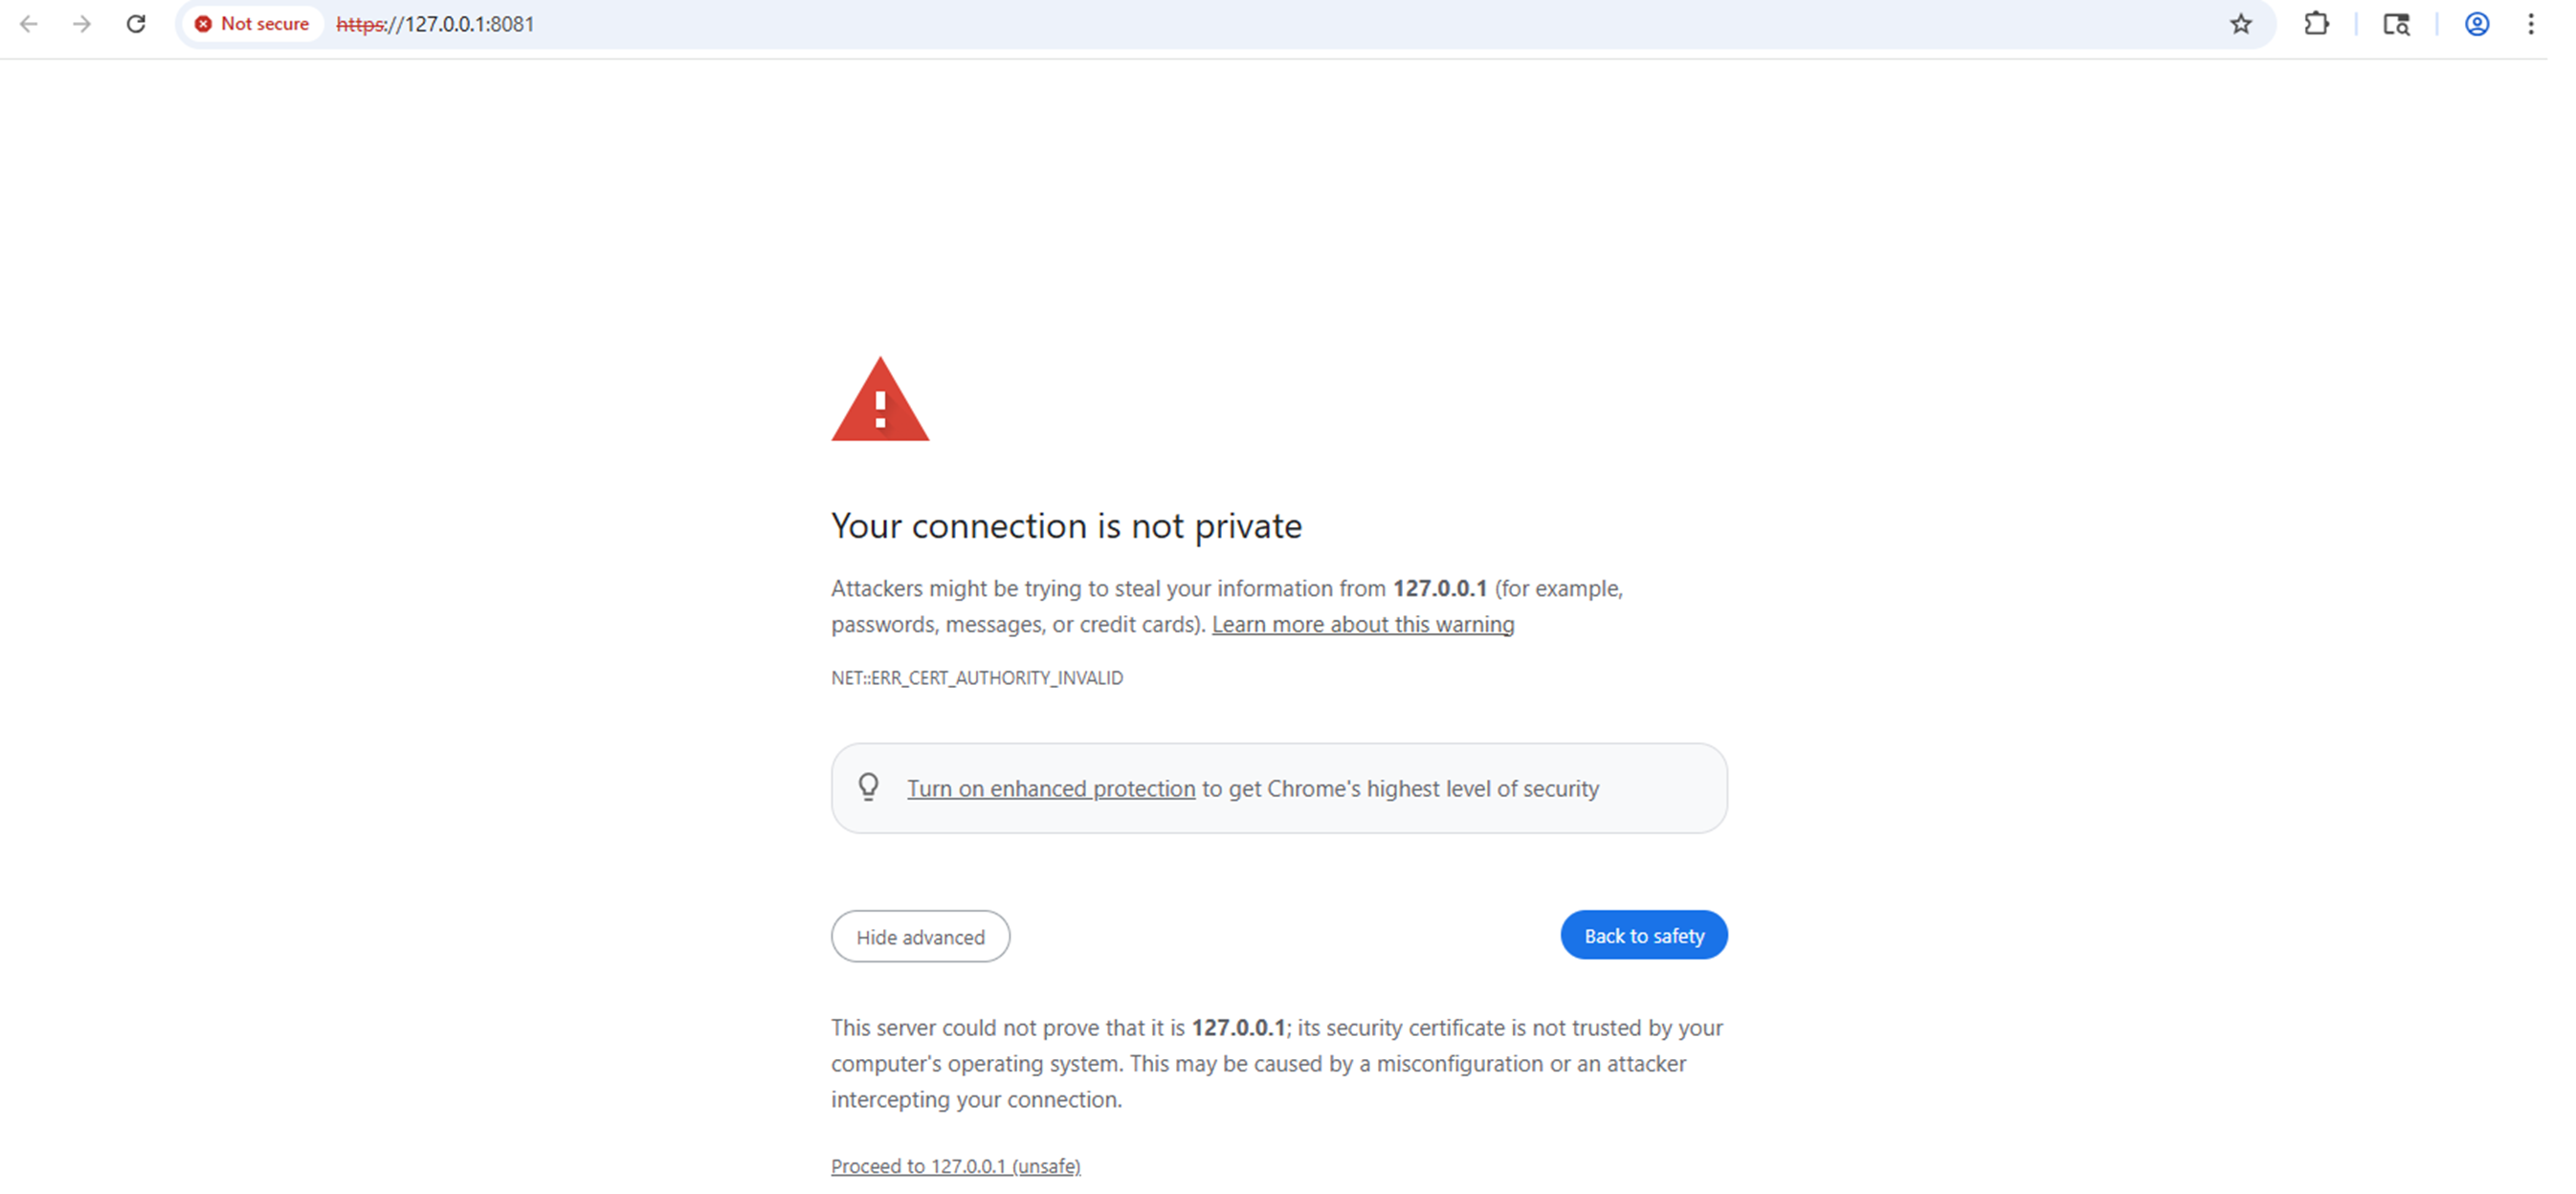
To resolve the untrusted certificate error that appears during login, export the Certificate from the Device and install the certificate on the system.
Configuration Steps
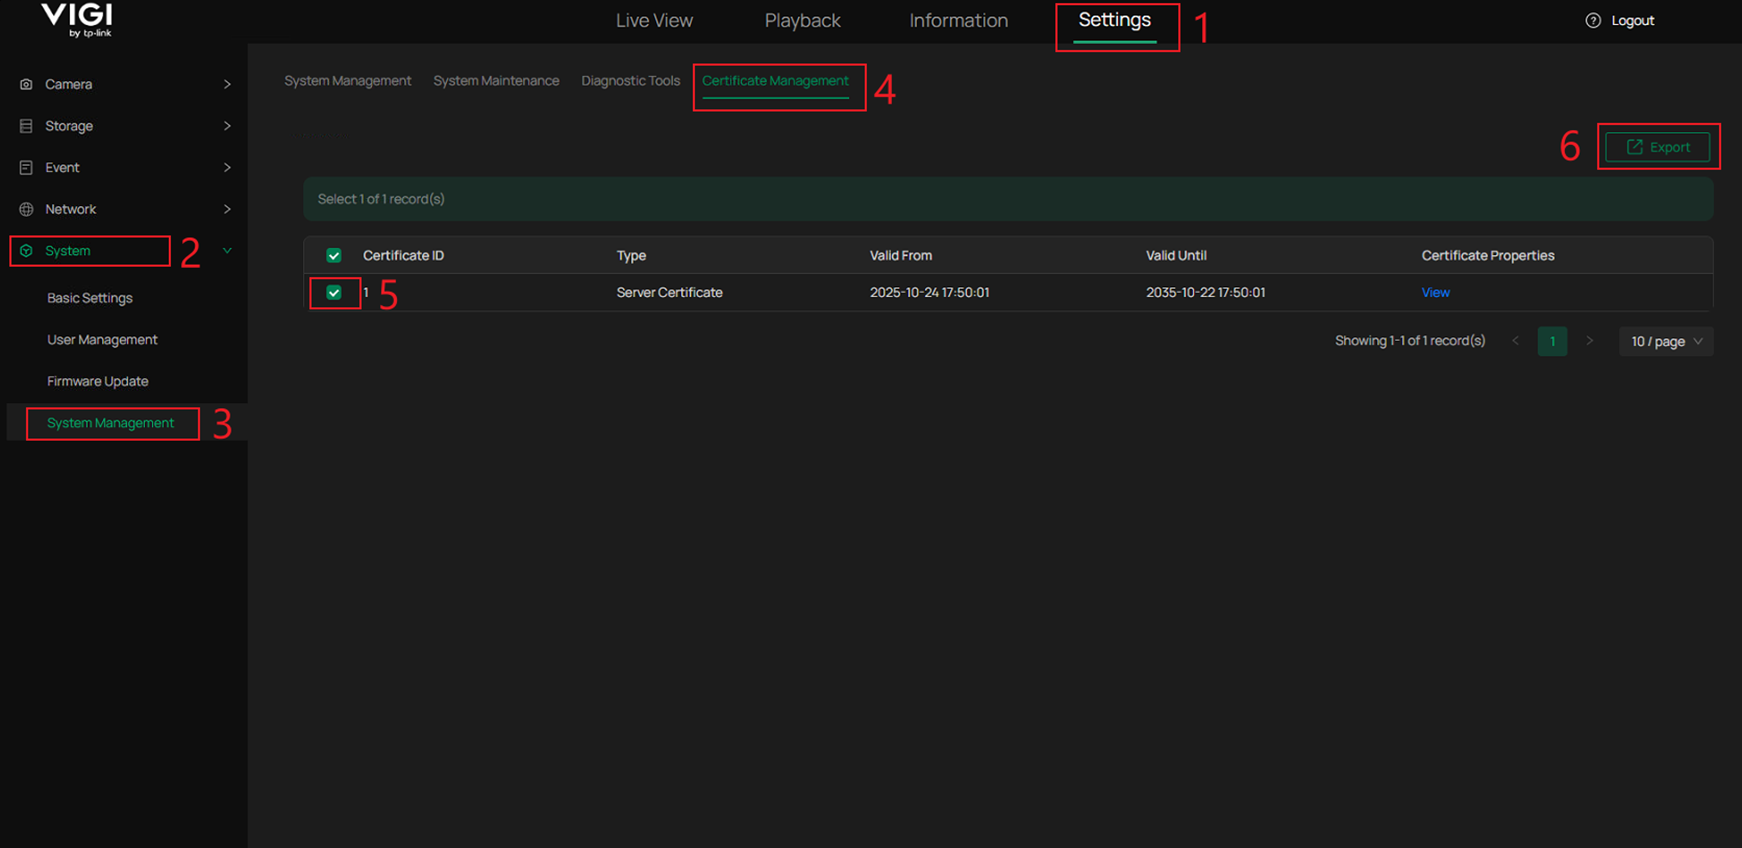
Step 1. Export the HTTP Certificate File.
Navigate to Settings > System > System Management. Click on the Certificate Management tab, select the Certificate , then click on Export.
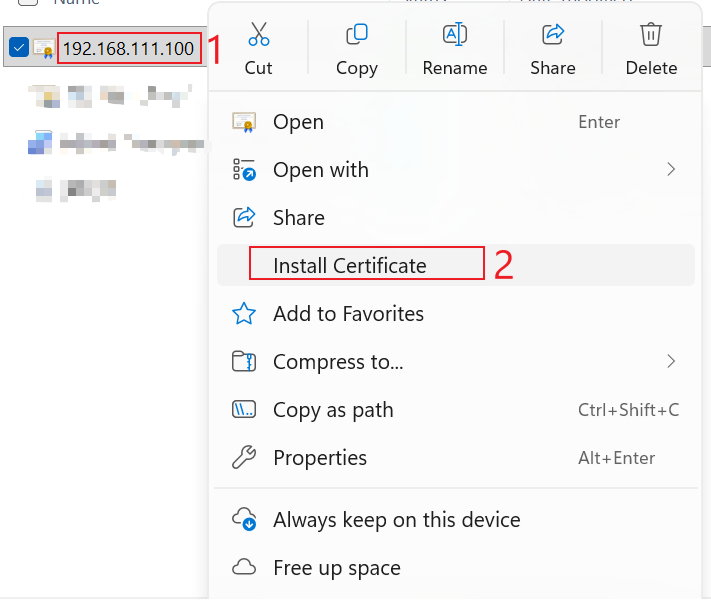
Step 2. Install the certificate.
The Certificate can be found in the default Downloads folder. Right-click the Certificate and click Install Certificate.
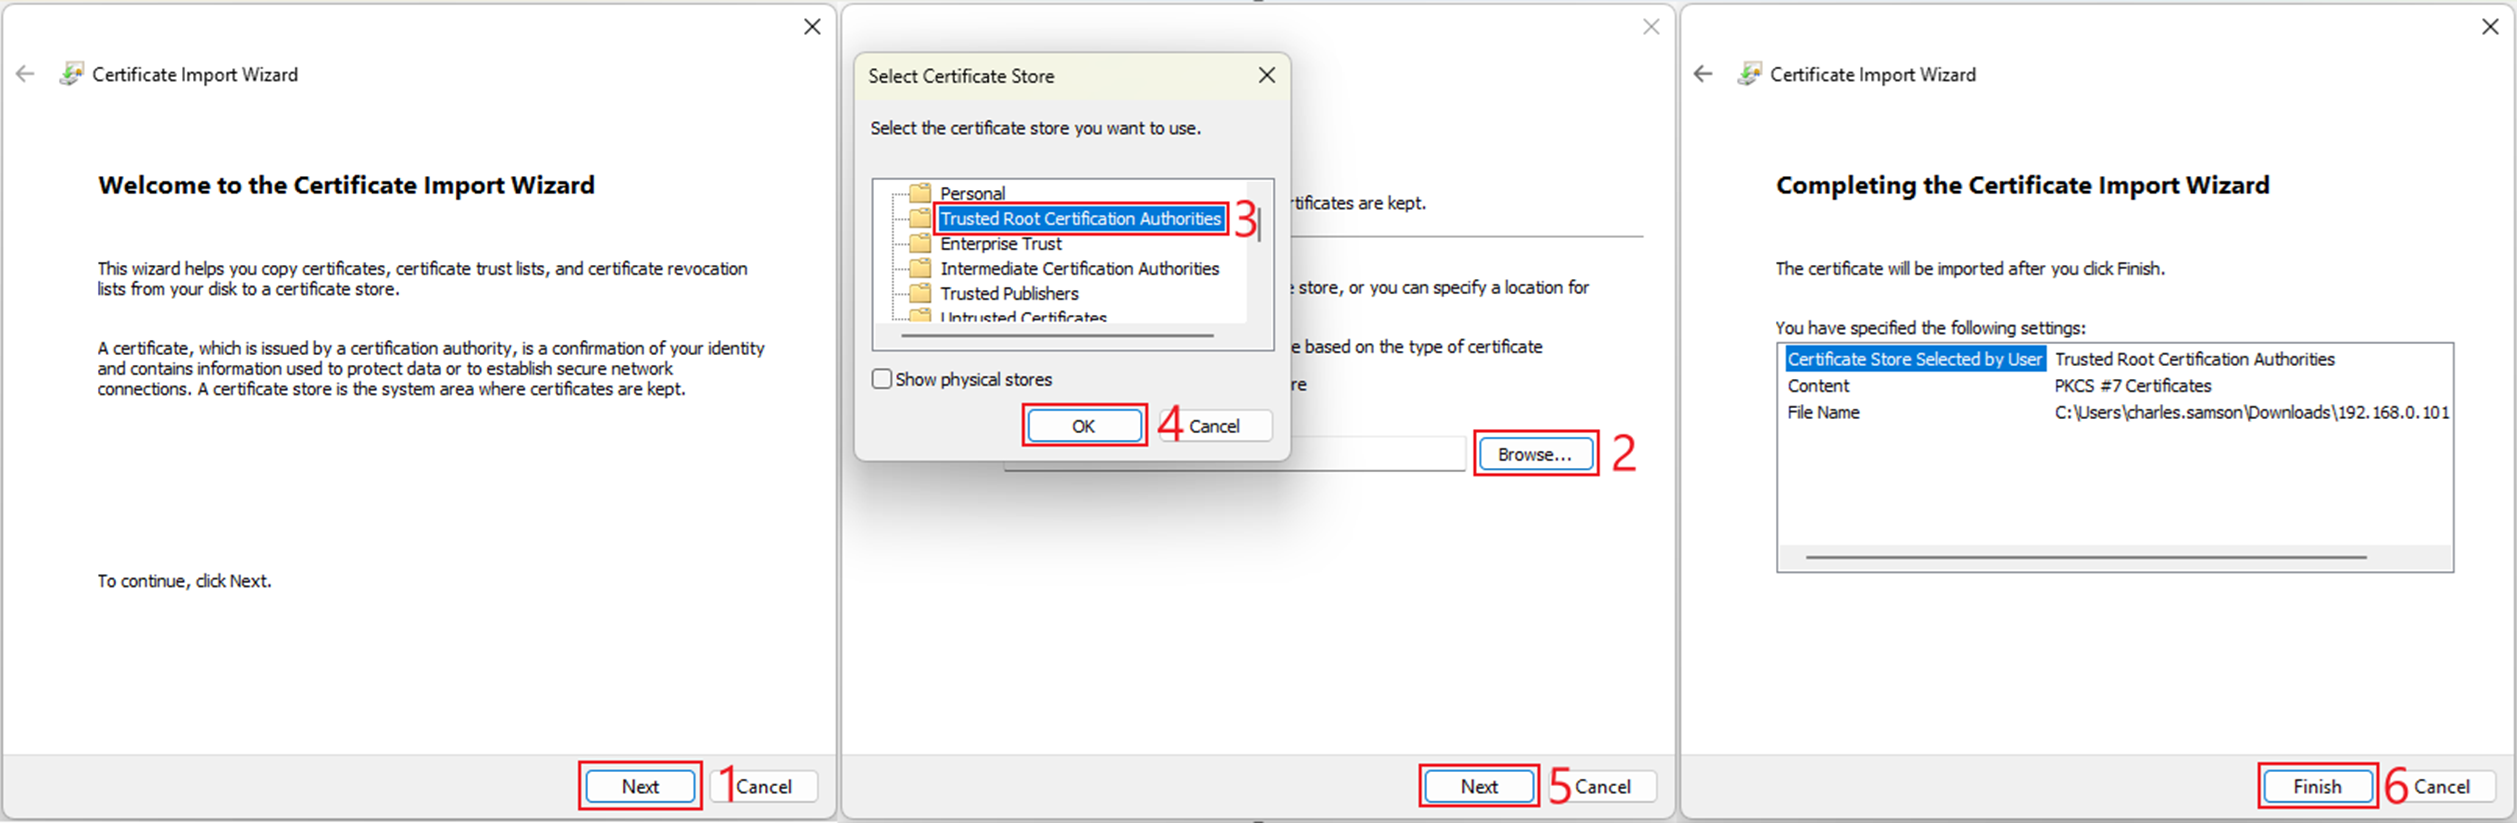
Step 3. Complete the Certificate Installation Wizard.
Click Next, Browse, and select the Trusted Root Certification Authorities option. Click OK and Next. On the summary screen, click Finish to complete the Certificate Installation.
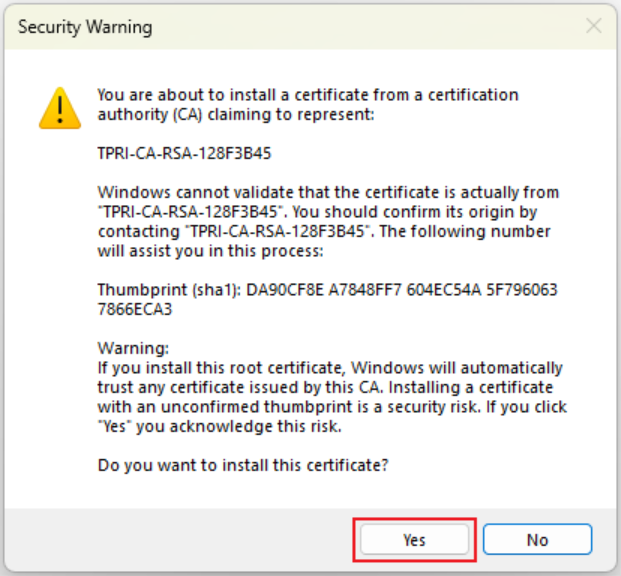
Step 4. A security warning may appear. Click Yes to confirm.
Verification
Restart or create a new tab in a browser and attempt to connect to the IP address of a VIGI NVR or IPC.

We have successfully accessed the VIGI device’s page, and there is no "untrusted certificate" error message.
QA
Q1: Why does the “untrusted certificate” message appear when accessing the VIGI NVR or IPC?
A1: The message appears because the browser does not recognize the default self-signed HTTPS certificate used by the device.
Q2: Can I ignore the “untrusted certificate” message?
A2: Yes. The VIGI device is trusted within a private network, and the message can be safely ignored. Installing a valid certificate only removes the warning.
Q3: Where is the exported certificate saved?
A3: The exported certificate file is saved in the system’s Downloads folder by default.
Q4: I do not see the Certificate Management option for VIGI NVR. Where is it?
A4: Please ensure that your VIGI NVR is running the latest firmware. Certificate Management is not available on VIGI NVR v1.0, but this feature will be added in a future update. Certificate Management is supported on VIGI NVR v2.0 Build 251211 firmware or later.
Q5: What should I do if the browser still shows a warning after installation?
A5: Clear the browser cache or restart the browser and reconnect to the device using the same IP or domain.
Q6: Will this work for all network devices?
A6: No. For devices with different IP Addresses, this will have to be done for each IP Address. This will also have to be done for each PC and each device IP Address on the network. In Safari, due to its policies, users still need to manually click to trust.
Q7: Can this be done on more than one device at a time?
A7: Yes. Contact your local administrator and they may be able to assist.
Q8: Does the certificate need to be reconfigured after the device's IP address is changed?
A8: No. Changing the device's (IPC/NVR) IP address does not require reinstalling the certificate. But if you reset the device, it is necessary to reinstall the certificate.
Get to know more details of each function and configuration please go to Download Center to download the manual of your product.
Is this faq useful?
Your feedback helps improve this site.


TP-Link Community
Still need help? Search for answers, ask questions, and get help from TP-Link experts and other users around the world.