Getting Started with a VIGI NVR
Contents
Initialize the NVR using the GUI
Initialize the NVR using the Web Management Interface
Initialize the NVR using the VIGI App
Initialize the NVR using VIGI VMS
Introduction
The VIGI NVR serves as the central storage and management device in the VIGI surveillance ecosystem, supporting both VIGI Cameras and third-party cameras for video recording and management.
The VIGI NVR can be initialized and configured through multiple management platforms, including the local GUI, Web Management Interface, VIGI App, and VIGI VMS. This article explains how to complete the initial setup using each method.
Requirements
- VIGI NVR
- One of the following management methods:
- Monitor and mouse (for GUI initialization)
- PC with a web browser (for Web Management Interface initialization)
- VIGI App installed on a mobile device
- VIGI VMS installed on a PC
Configuration
Initialize the NVR using the GUI
Connect a monitor to the VIGI NVR through either a VGA or HDMI connection to access the local graphical user interface (GUI).
Step 1. Connect the VIGI NVR and cameras, and build the network according to the recommended deployment topology.
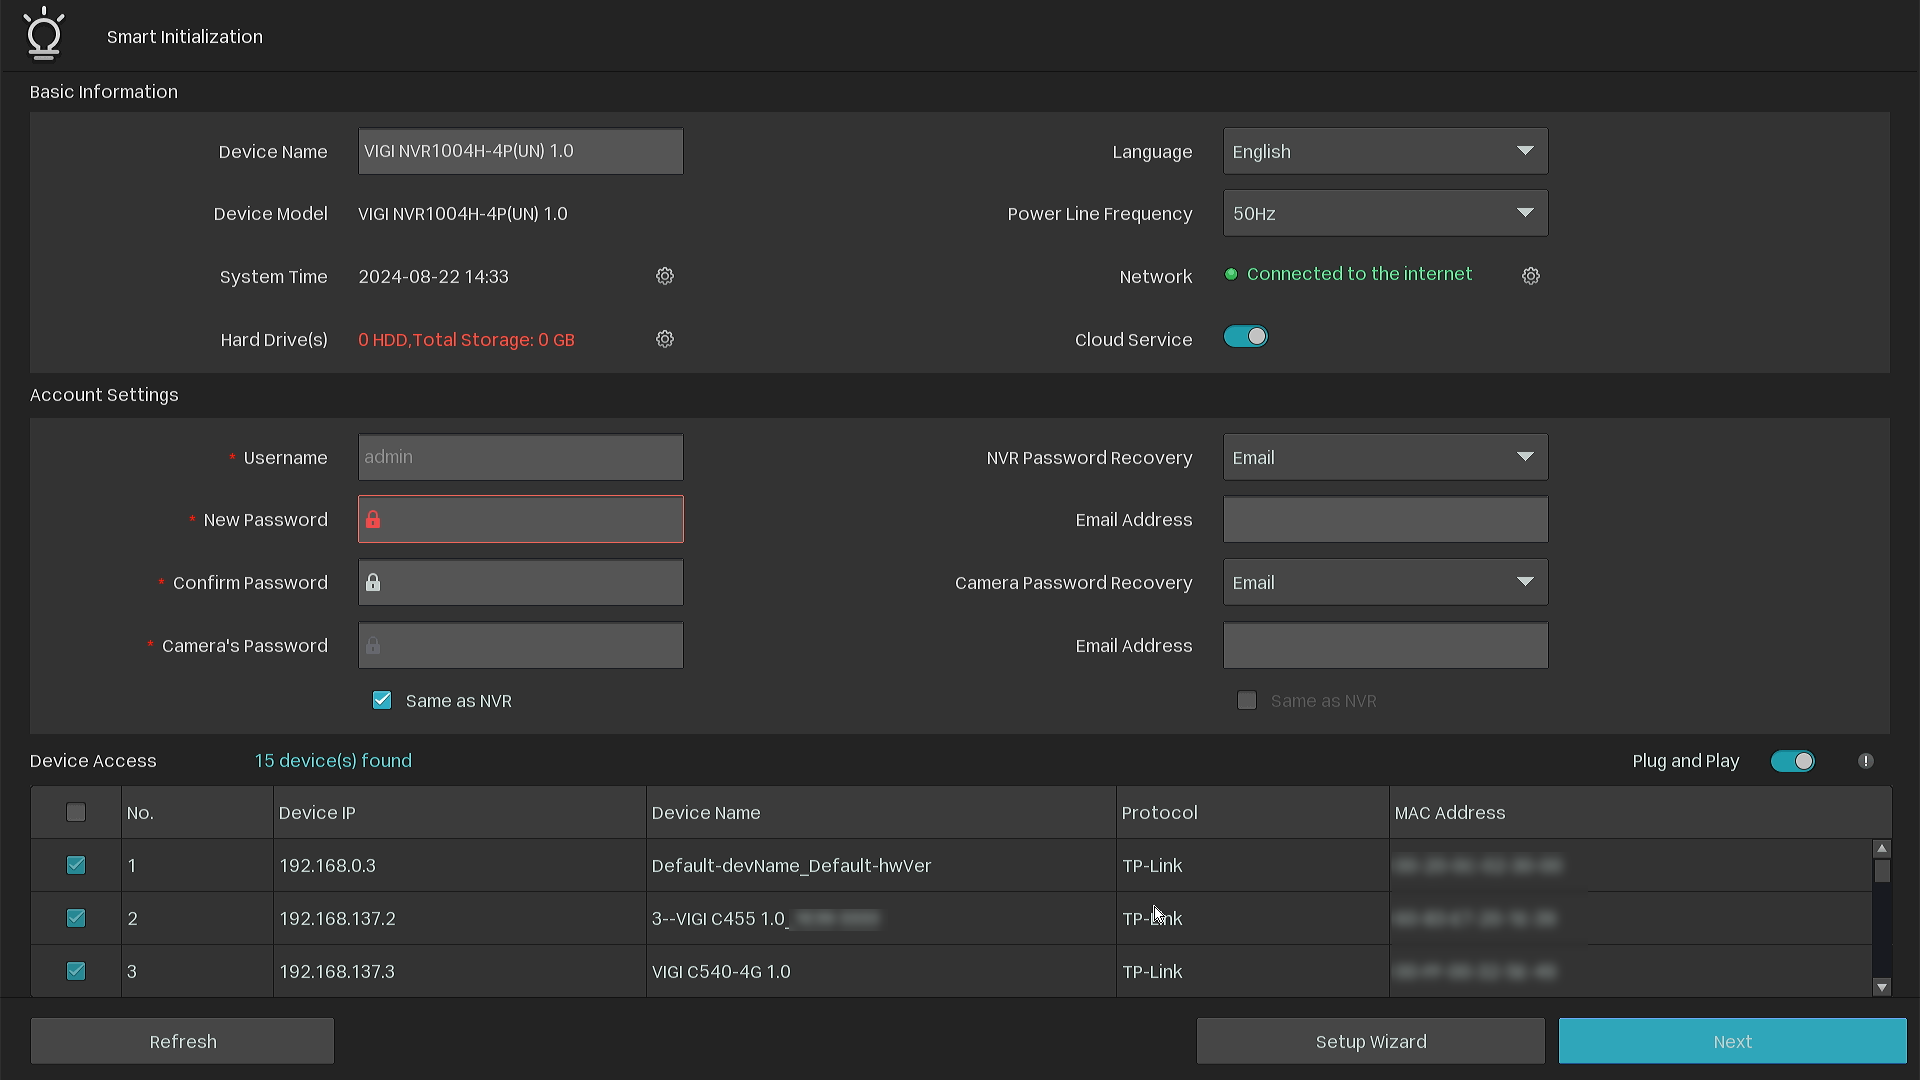
Step 2. Power on the VIGI NVR. Configure the device name, language, power line frequency, administrator account, and cameras to be added to the NVR, then click Next.
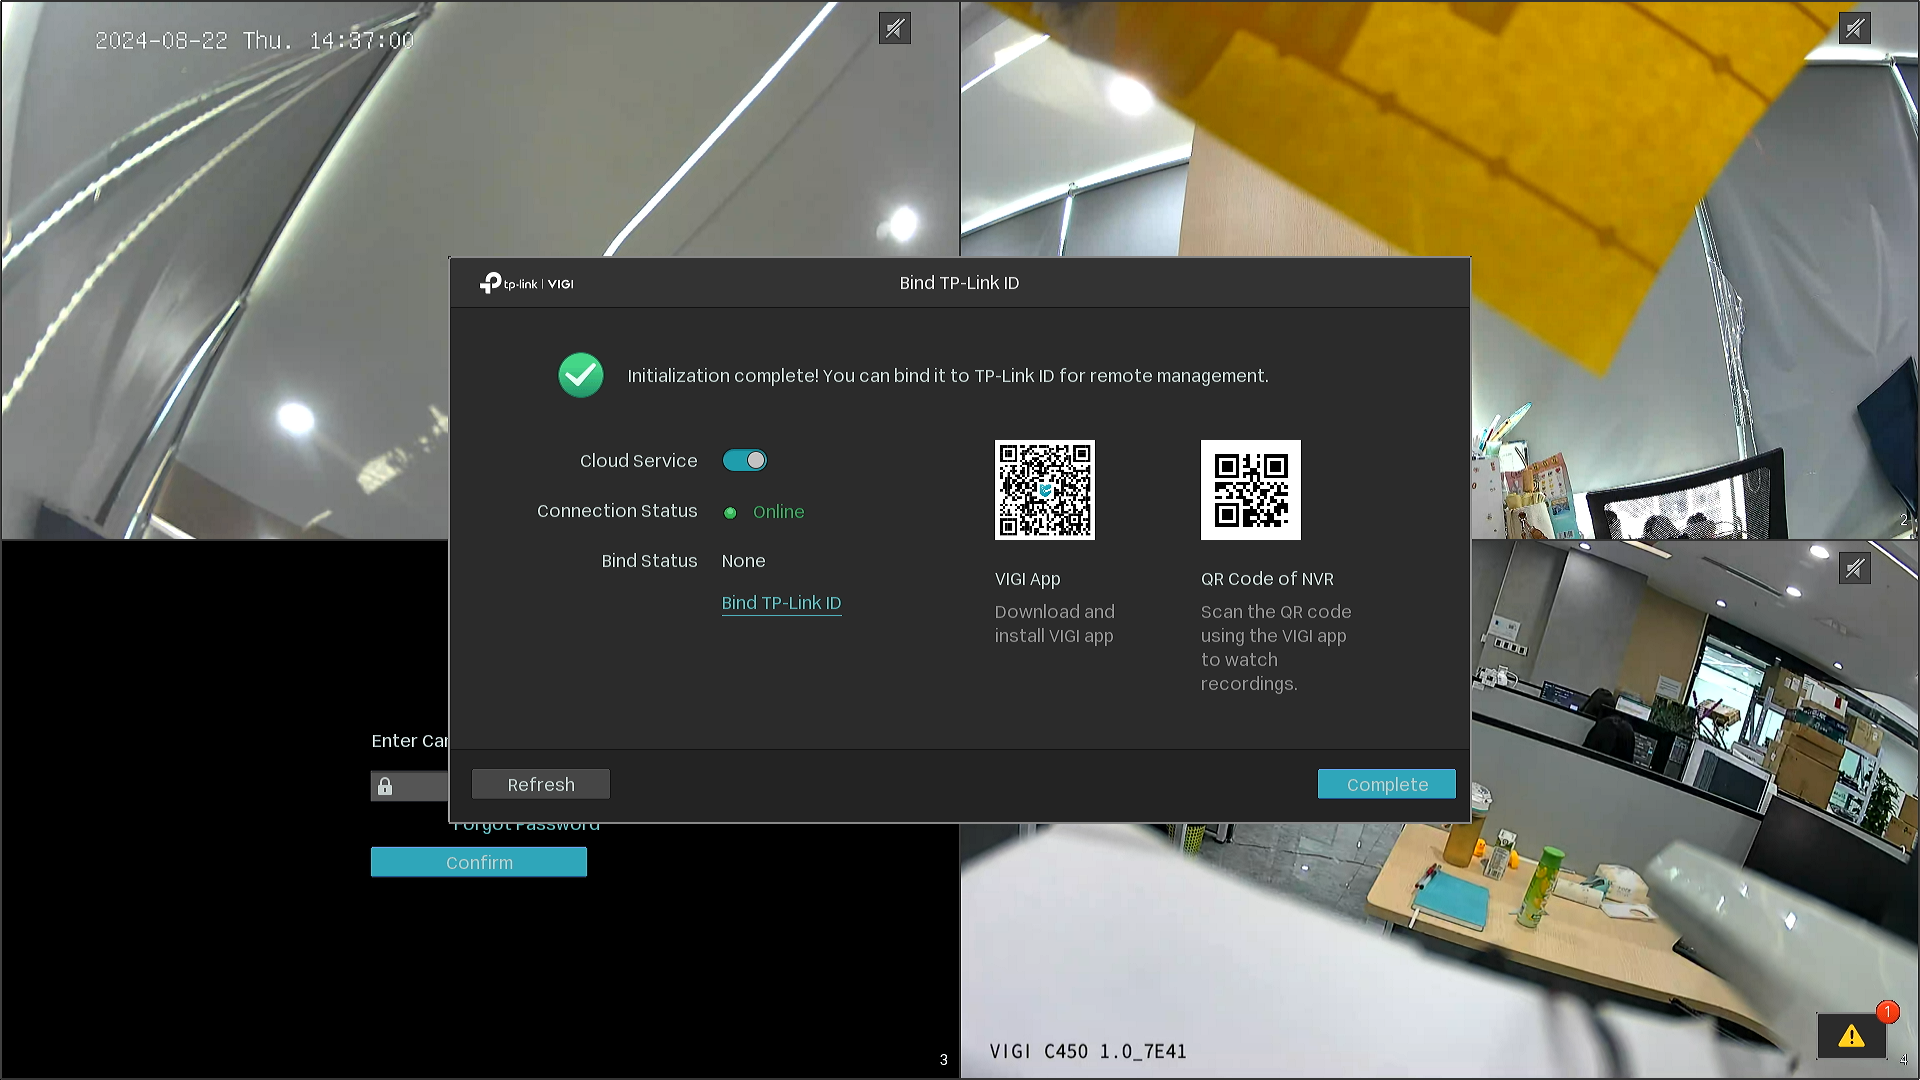
Step 3. Configure and bind a TP-Link ID if cloud-based management or remote access is required.
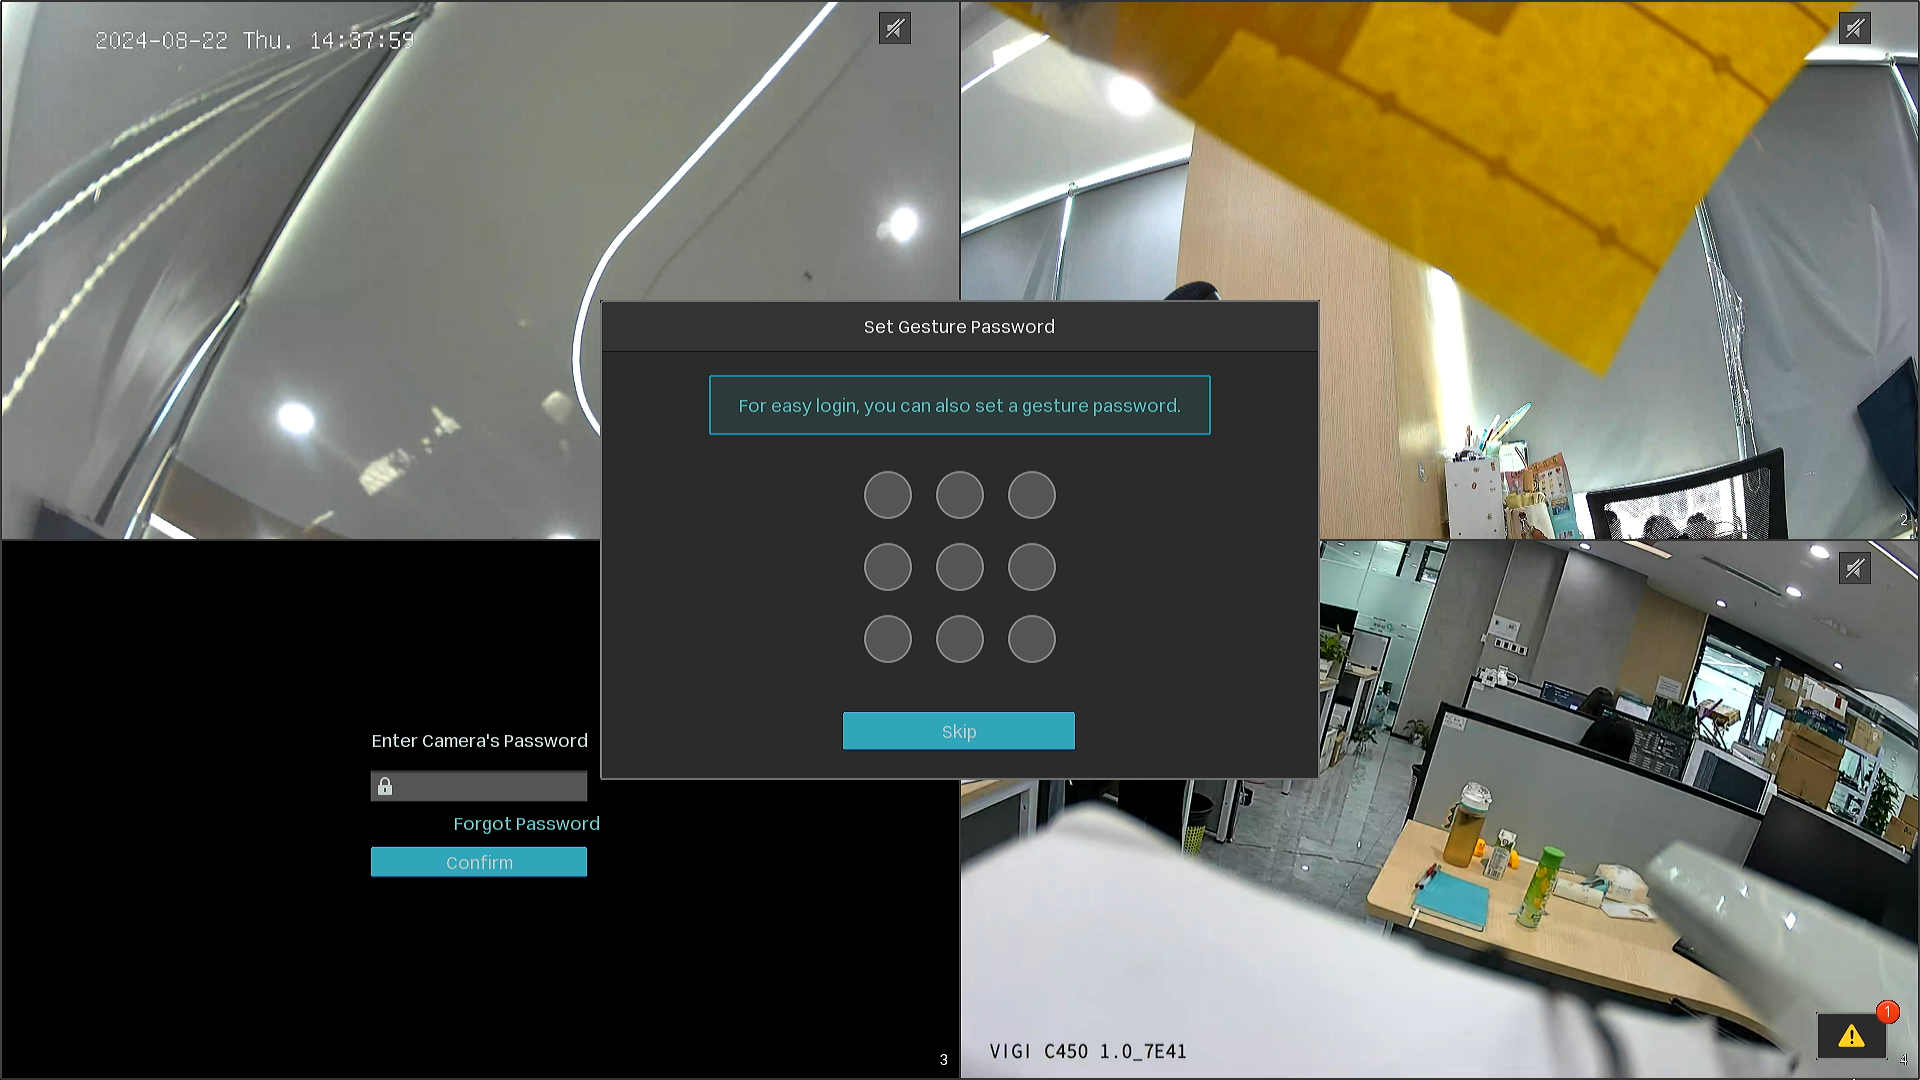
Step 4. Configure a gesture password if desired. If a gesture password is not required, click Skip.
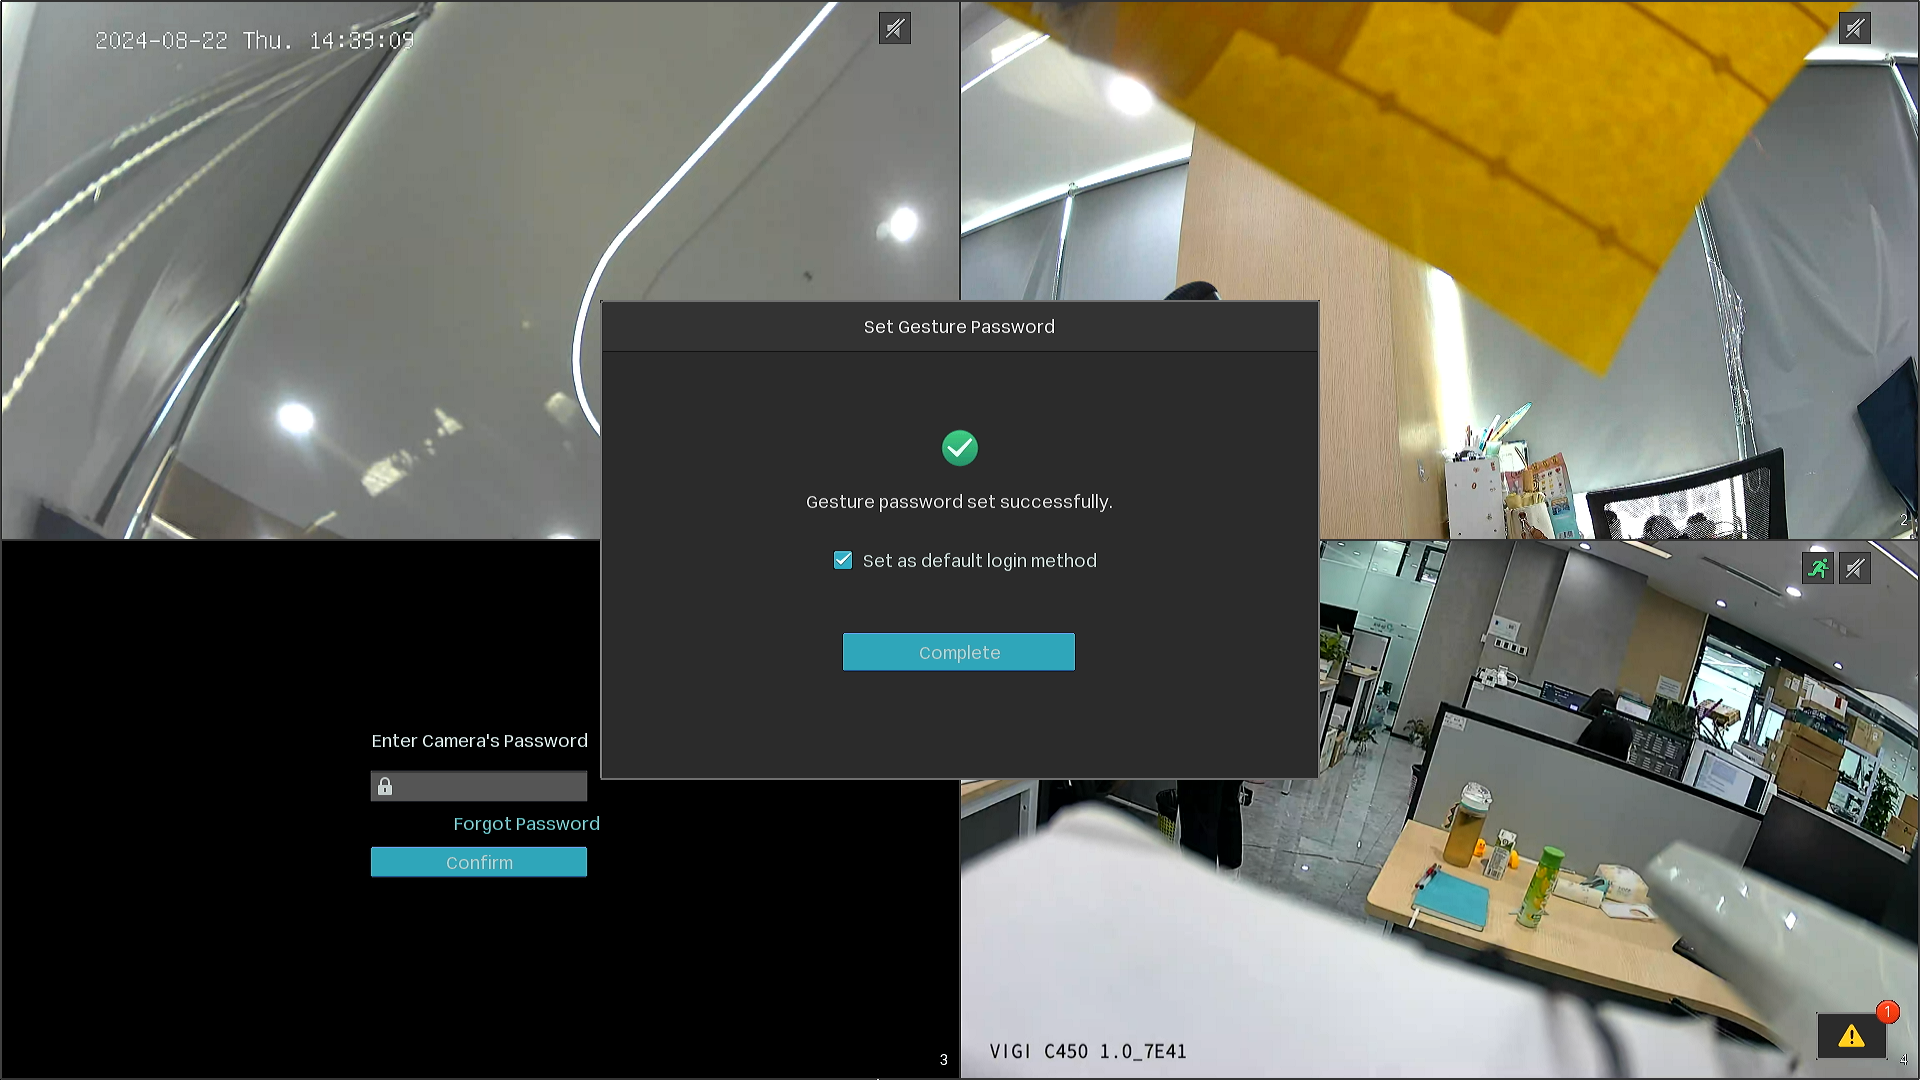
Step 5. Click Complete to finish the initialization process.
Initialize the NVR using the Web Management Interface
The Web Management Interface provides an alternative method for initializing and managing the VIGI NVR from a PC connected to the same network.
Step 1. Power on the NVR and connect it to the network. Connect a PC to the same network and access the NVR through its IP address.
Note: The default IP address of NVR is 192.168.0.240. The IP address may change if the NVR is connected to a DHCP server (gateway/router). If you cannot access NVR’s default IP address, please check the gateway/router’s management web to find the NVR’s IP. You may also connect the NVR to a monitor to configure its IP address via NVR GUI. Ensure that there is no IP address conflict in the subnet.
Step 2. Configure the language and administrator password for the NVR and cameras. The default language is English. The default username is admin and cannot be changed.
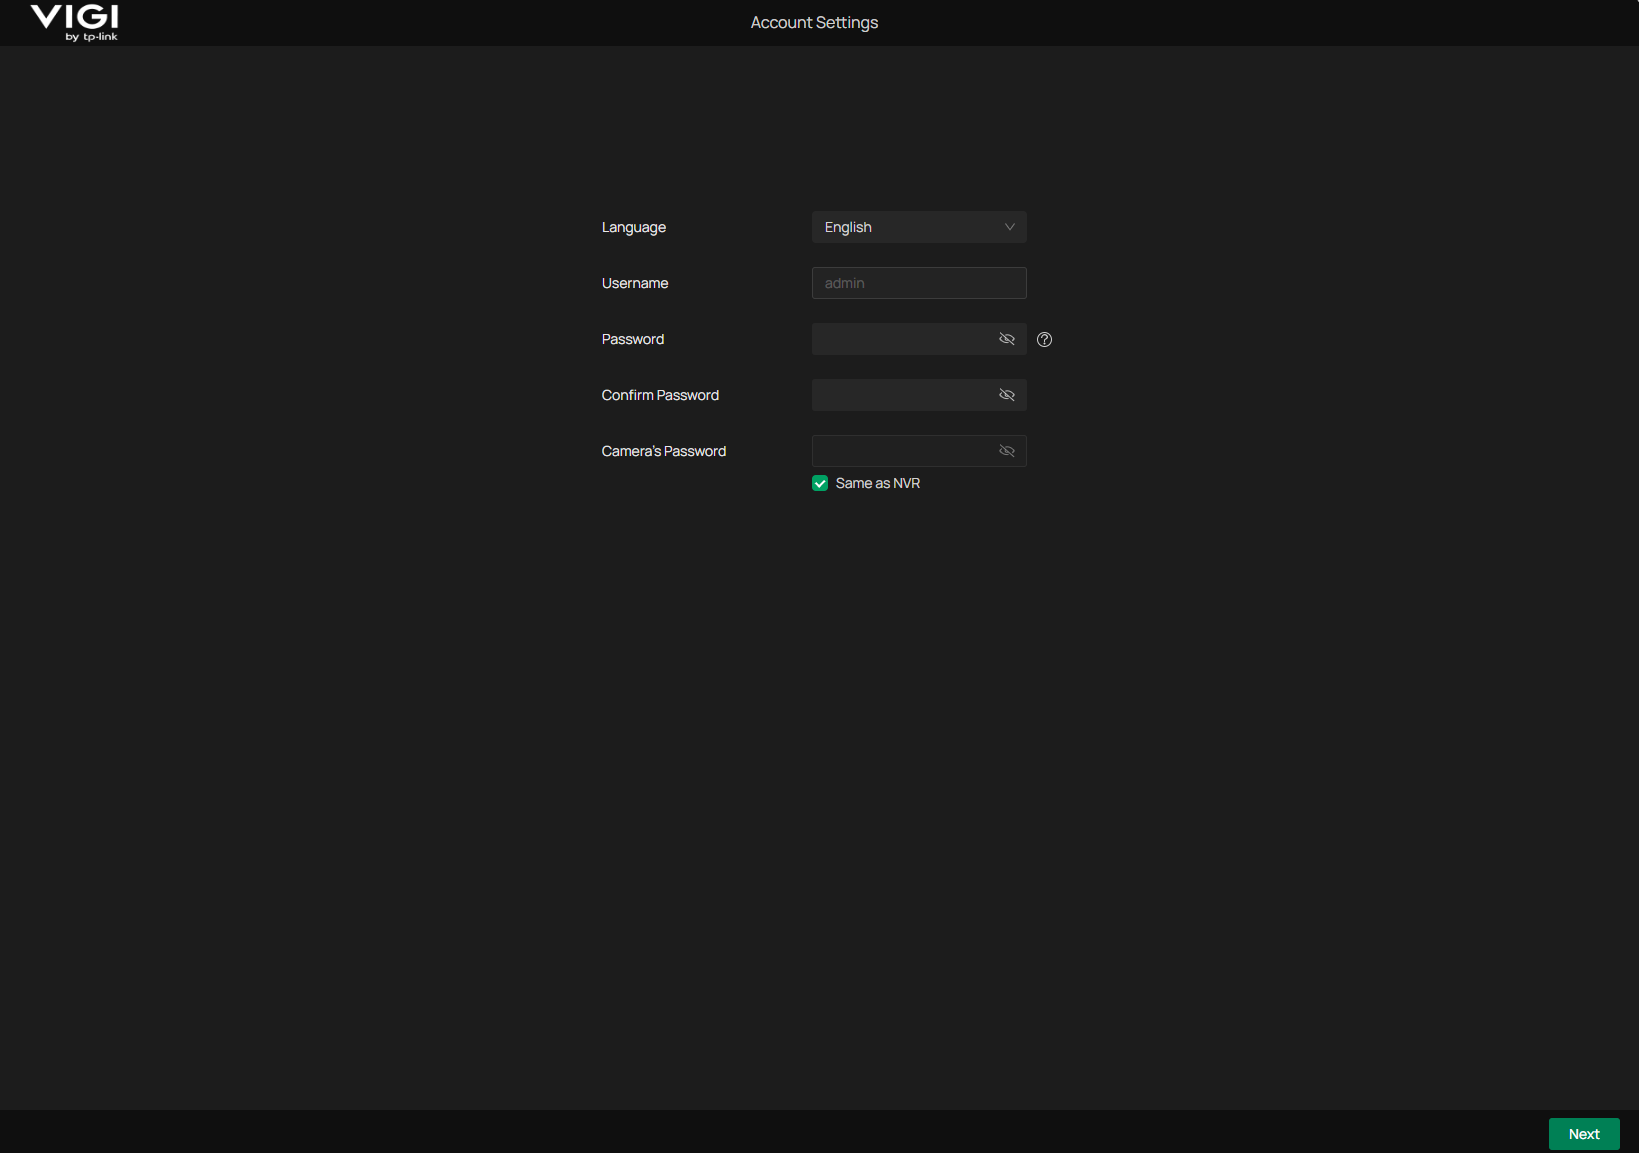
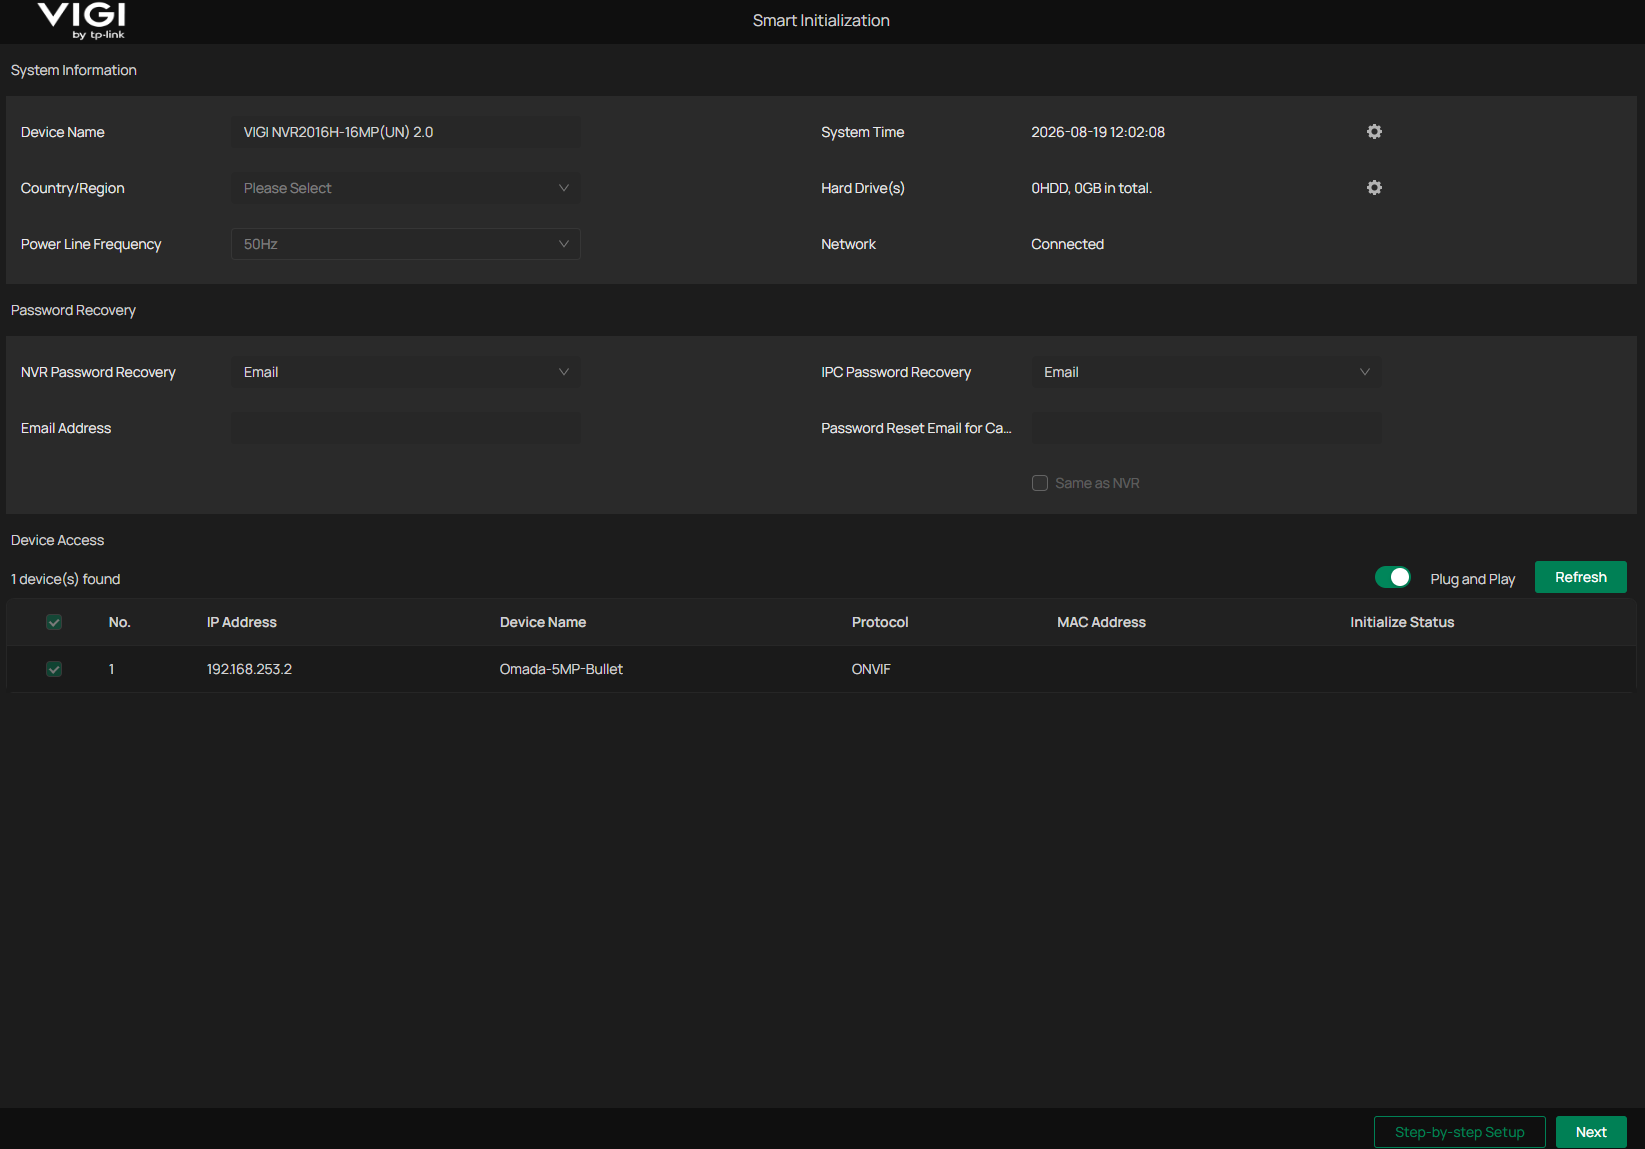
Step 3. Configure the system information, password recovery email address, and cameras to be added to the NVR. If password recovery is not required, this setting may be skipped. Click Next to continue.
Step 4. Enable VIGI Cloud Service if cloud-based management and remote access are required.
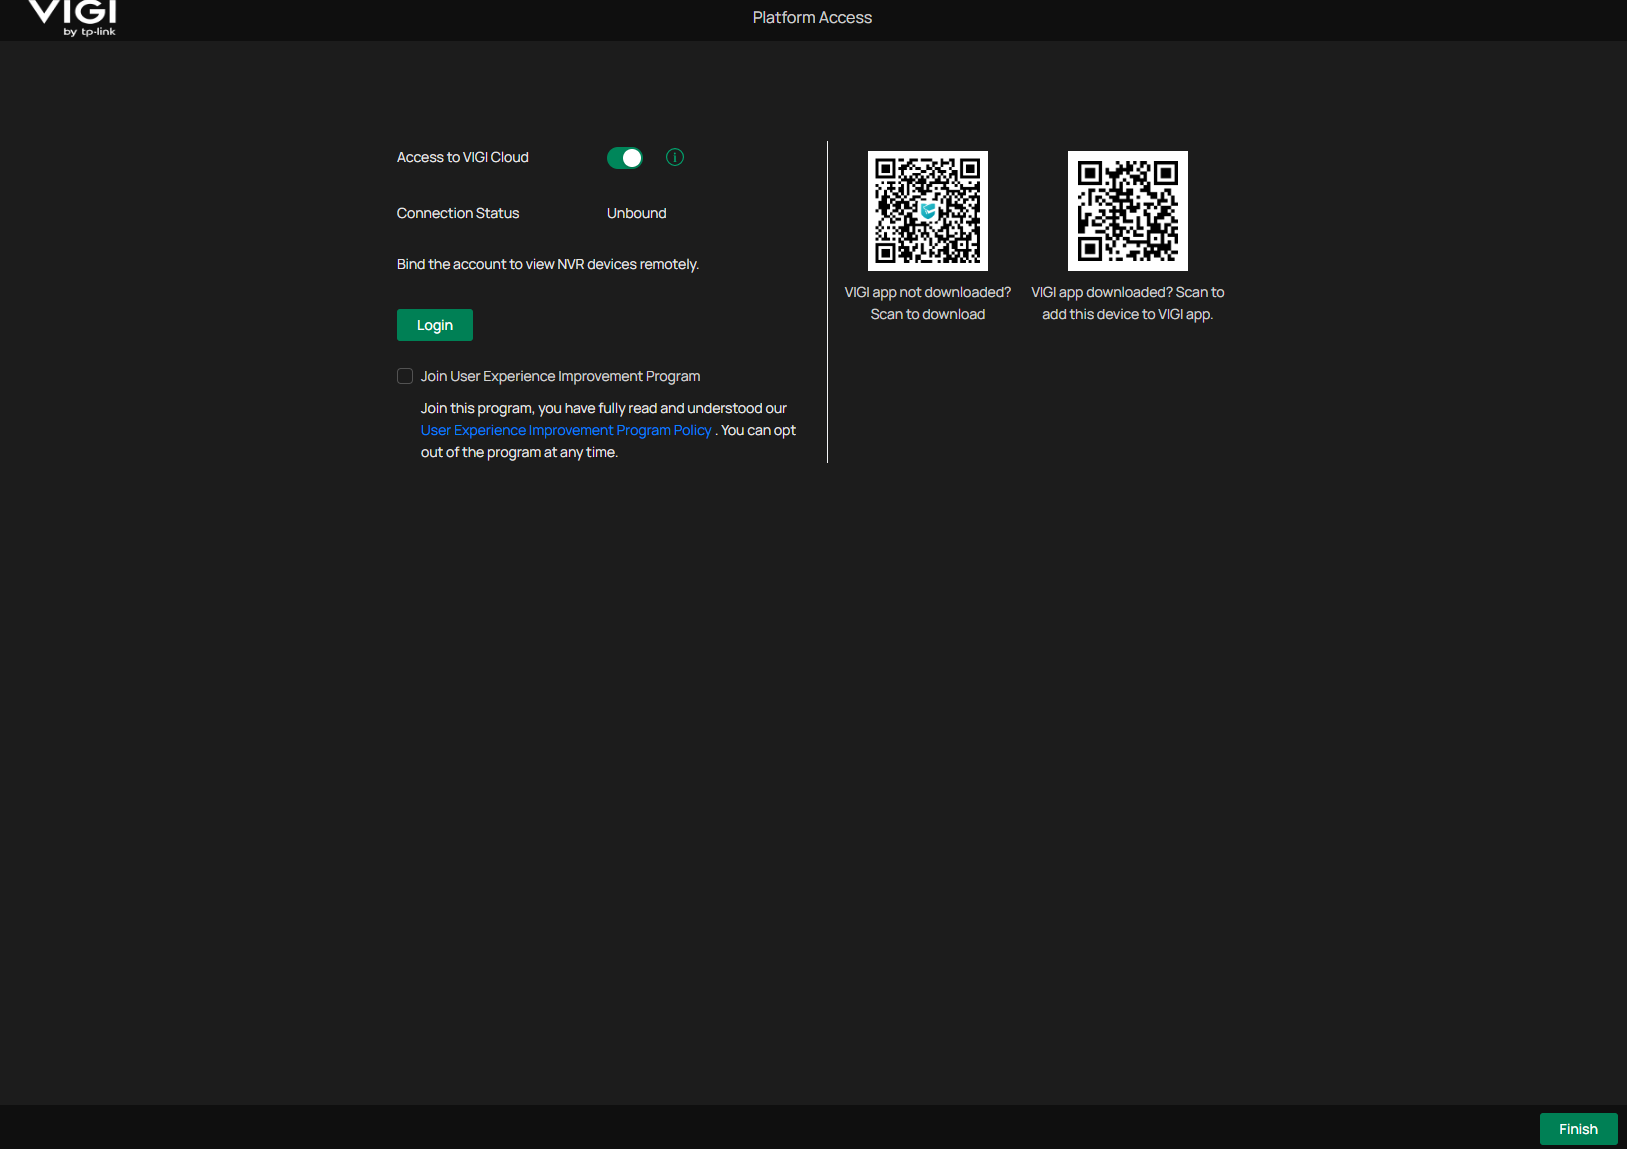
After completing the above steps, the initialization process is complete.
Initialize the NVR using the VIGI App
The VIGI App provides a convenient method for initializing and managing the NVR directly from a mobile device.
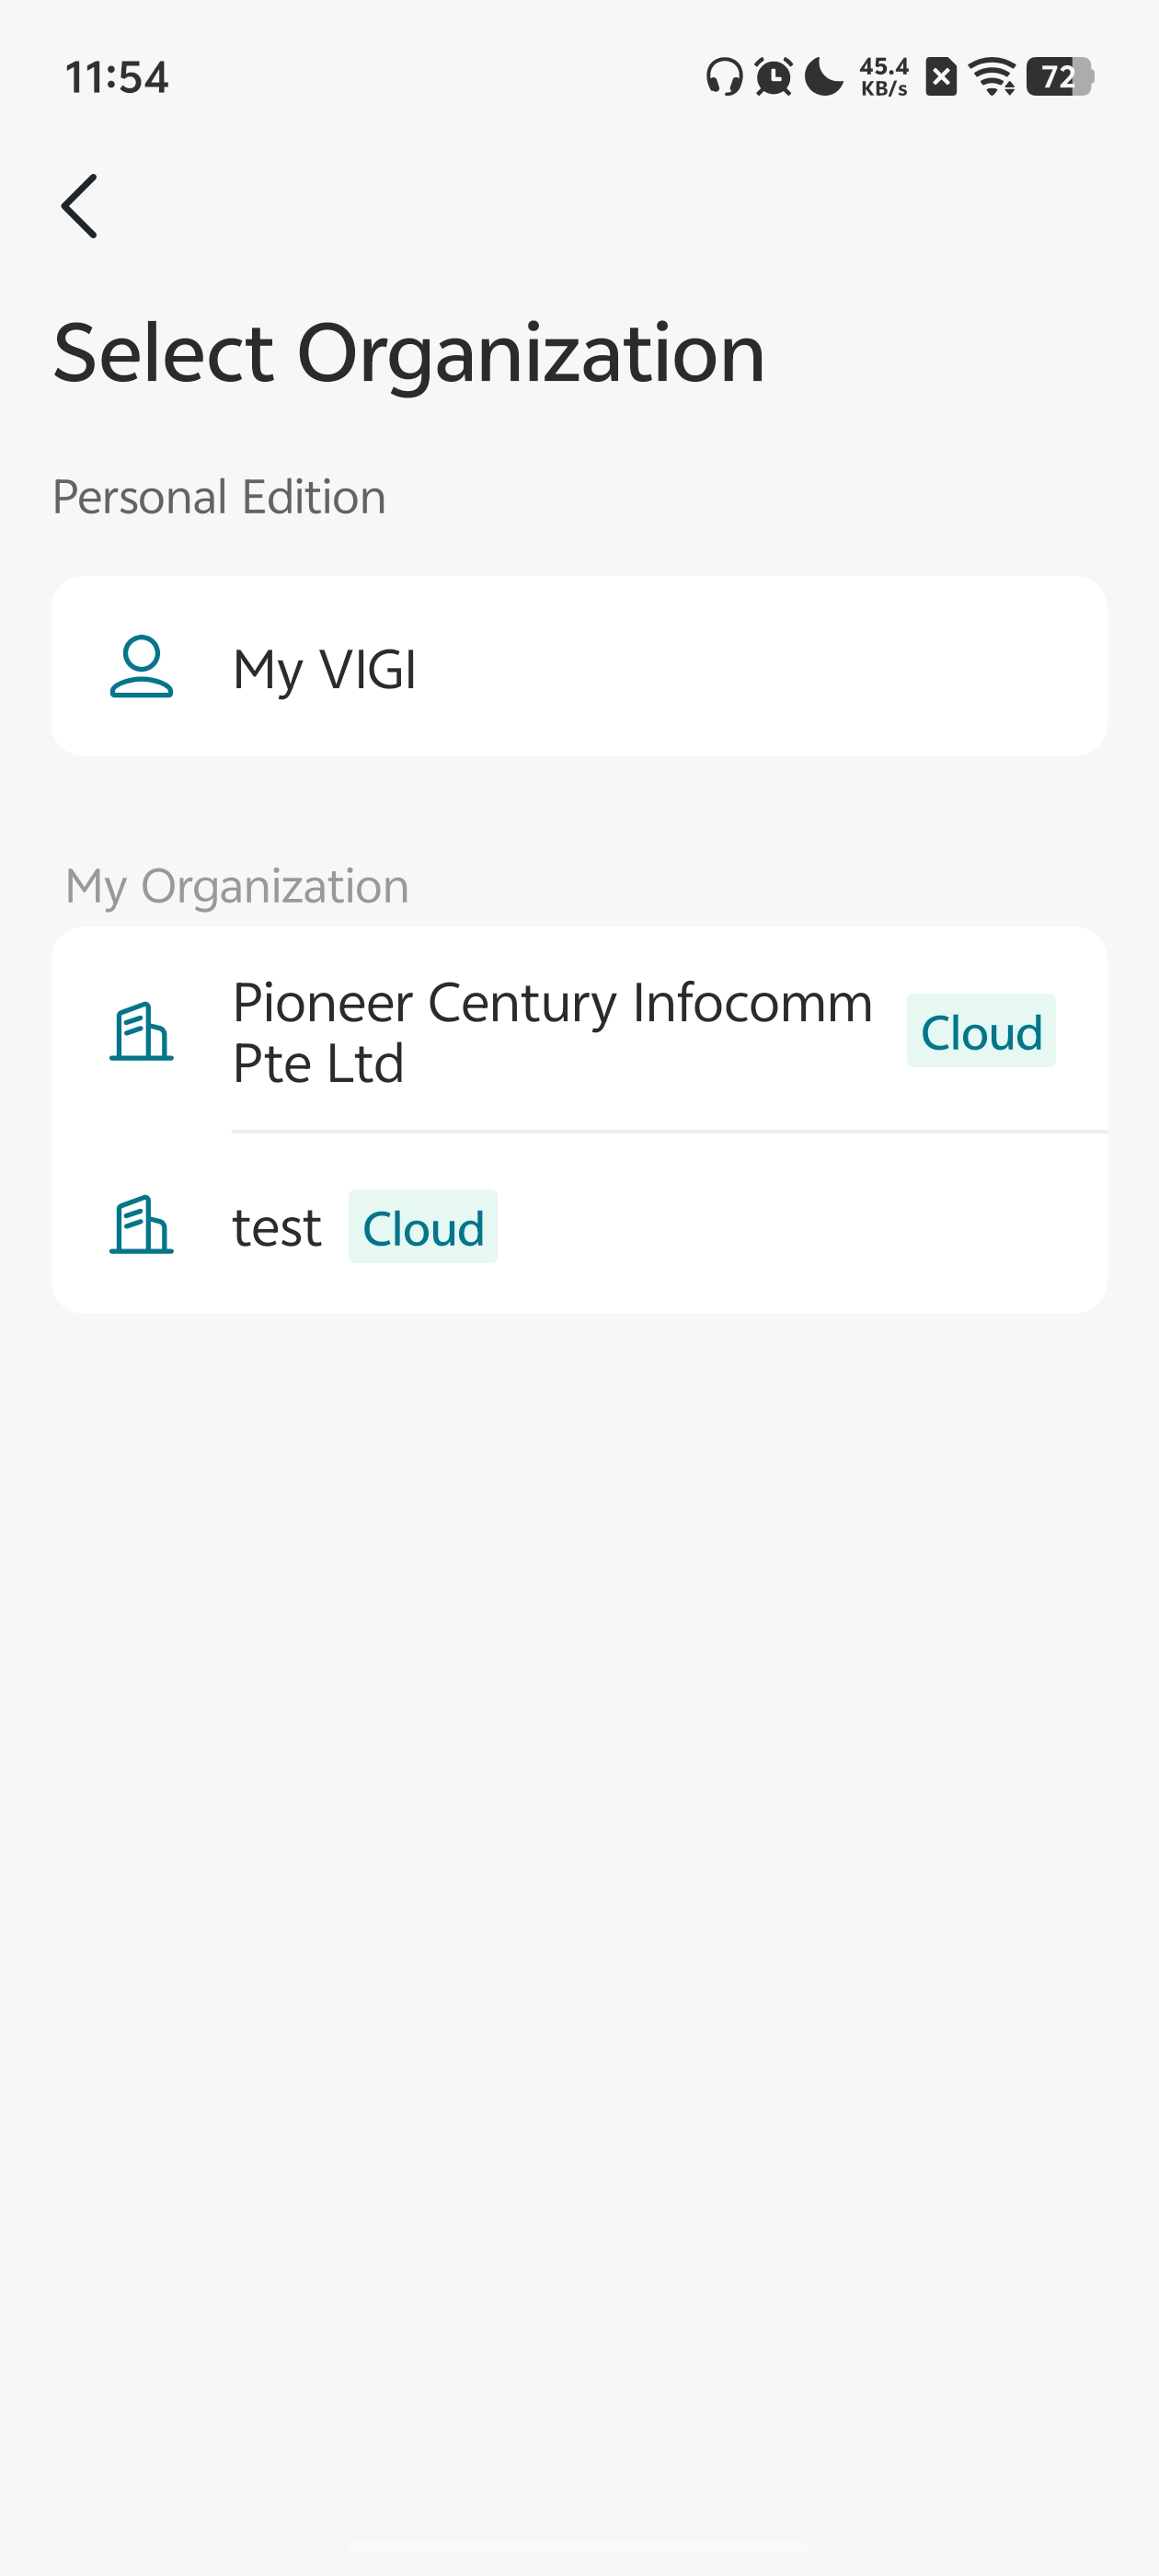
Step 1. Log in to the VIGI App and select the organization where the NVR will be added. For optimal device discovery and onboarding, ensure that both the mobile device and the VIGI NVR are connected to the same local network.
Step 2. Tap the + icon in the upper-right corner or select Add Devices. Devices can be added using either of the following methods:
- Scan/Add Device: Add a specific device by scanning the QR code on the device label.
- Auto Discover: Automatically discover devices on the local network, enabling the addition of a specific device or multiple devices at once.
The following example uses Auto Discover to add the device.
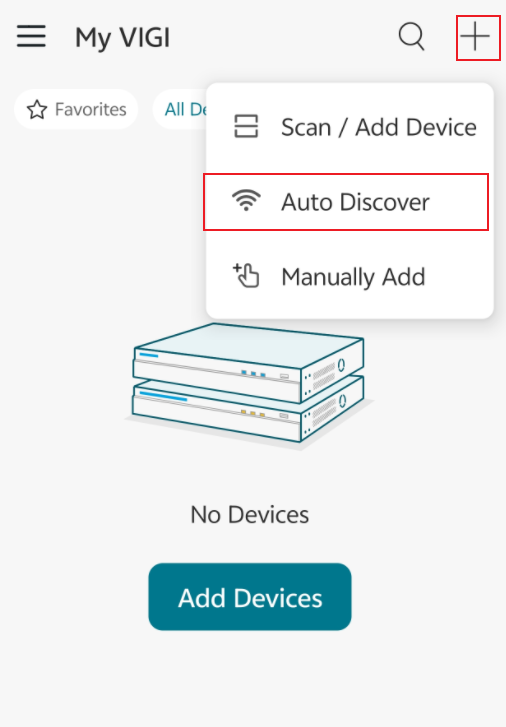
Step 3. Select a site and tap Next. After the device scan is complete, select the target NVR and tap Add.
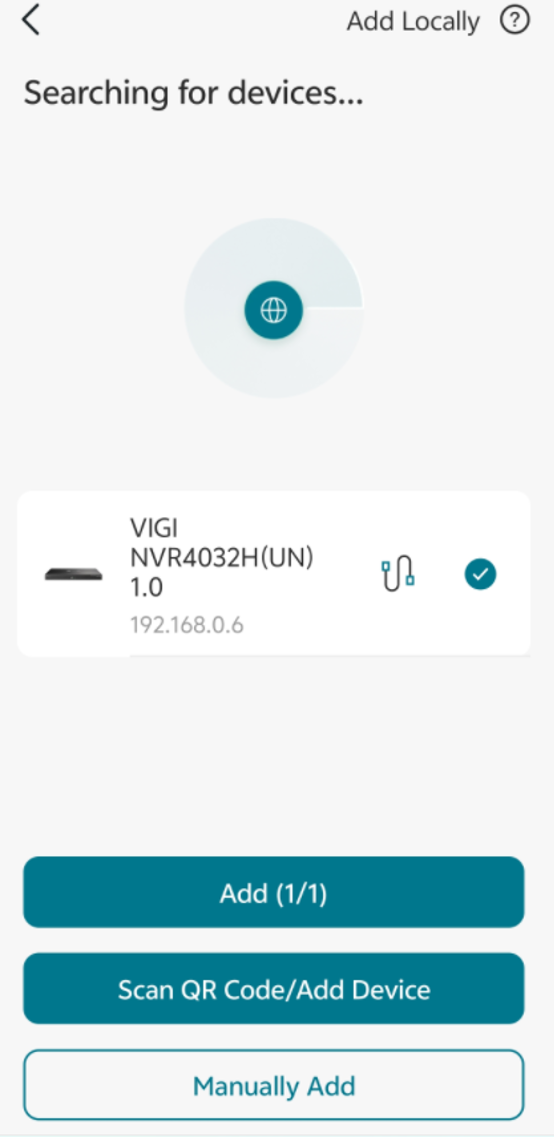
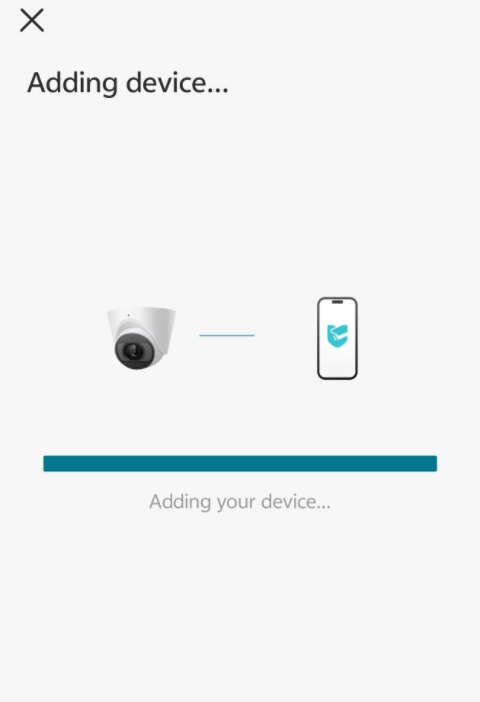
Step 4. Configure the device name and verify the initialization settings. The country or region and time zone settings are automatically synchronized with the mobile device. The preset password and email are automatically synchronized with the credentials configured for the NVR and do not require additional configuration.
Note: In the Personal Edition App, an email address is required during NVR initialization. In the Enterprise Edition App, the email address may be left empty.
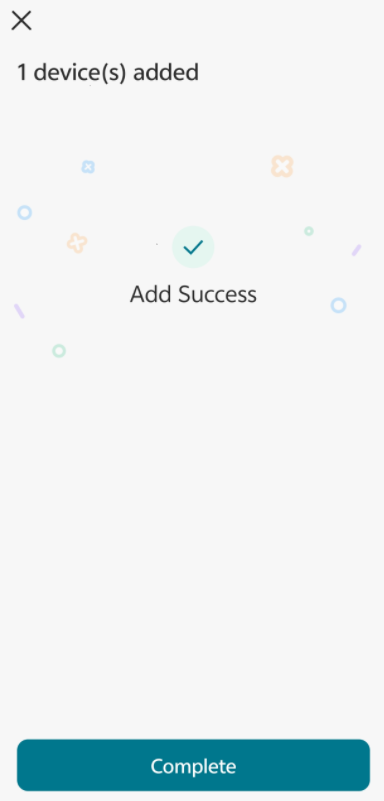
Step 5. Tap Confirm to add the device.
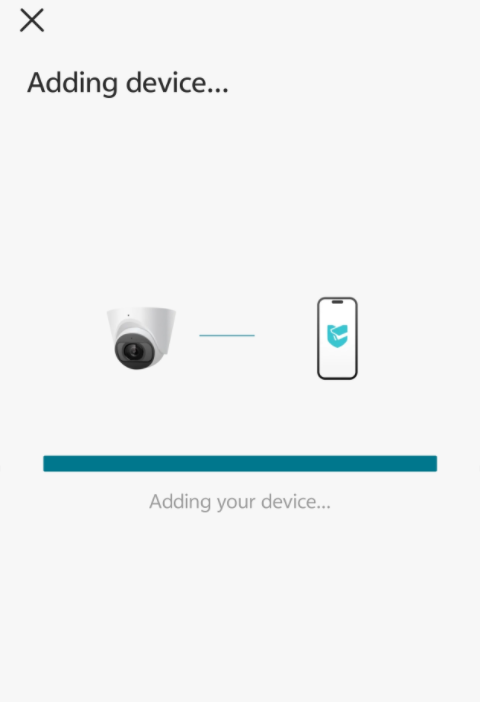
Step 6. After the device is successfully added, the initialization process is complete.
Initialize the NVR using VIGI VMS
VIGI VMS provides a centralized method for discovering, initializing, and managing VIGI NVRs from a desktop client.
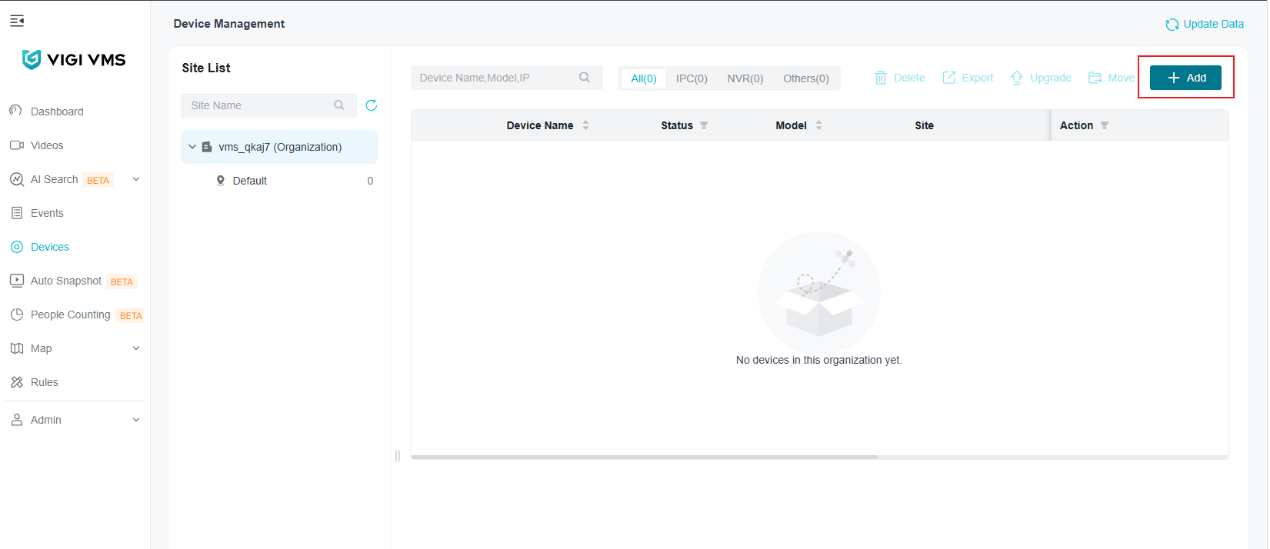
Step 1. Launch VIGI VMS and navigate to Devices > Device Management. Select the site and click Add to add a new device.
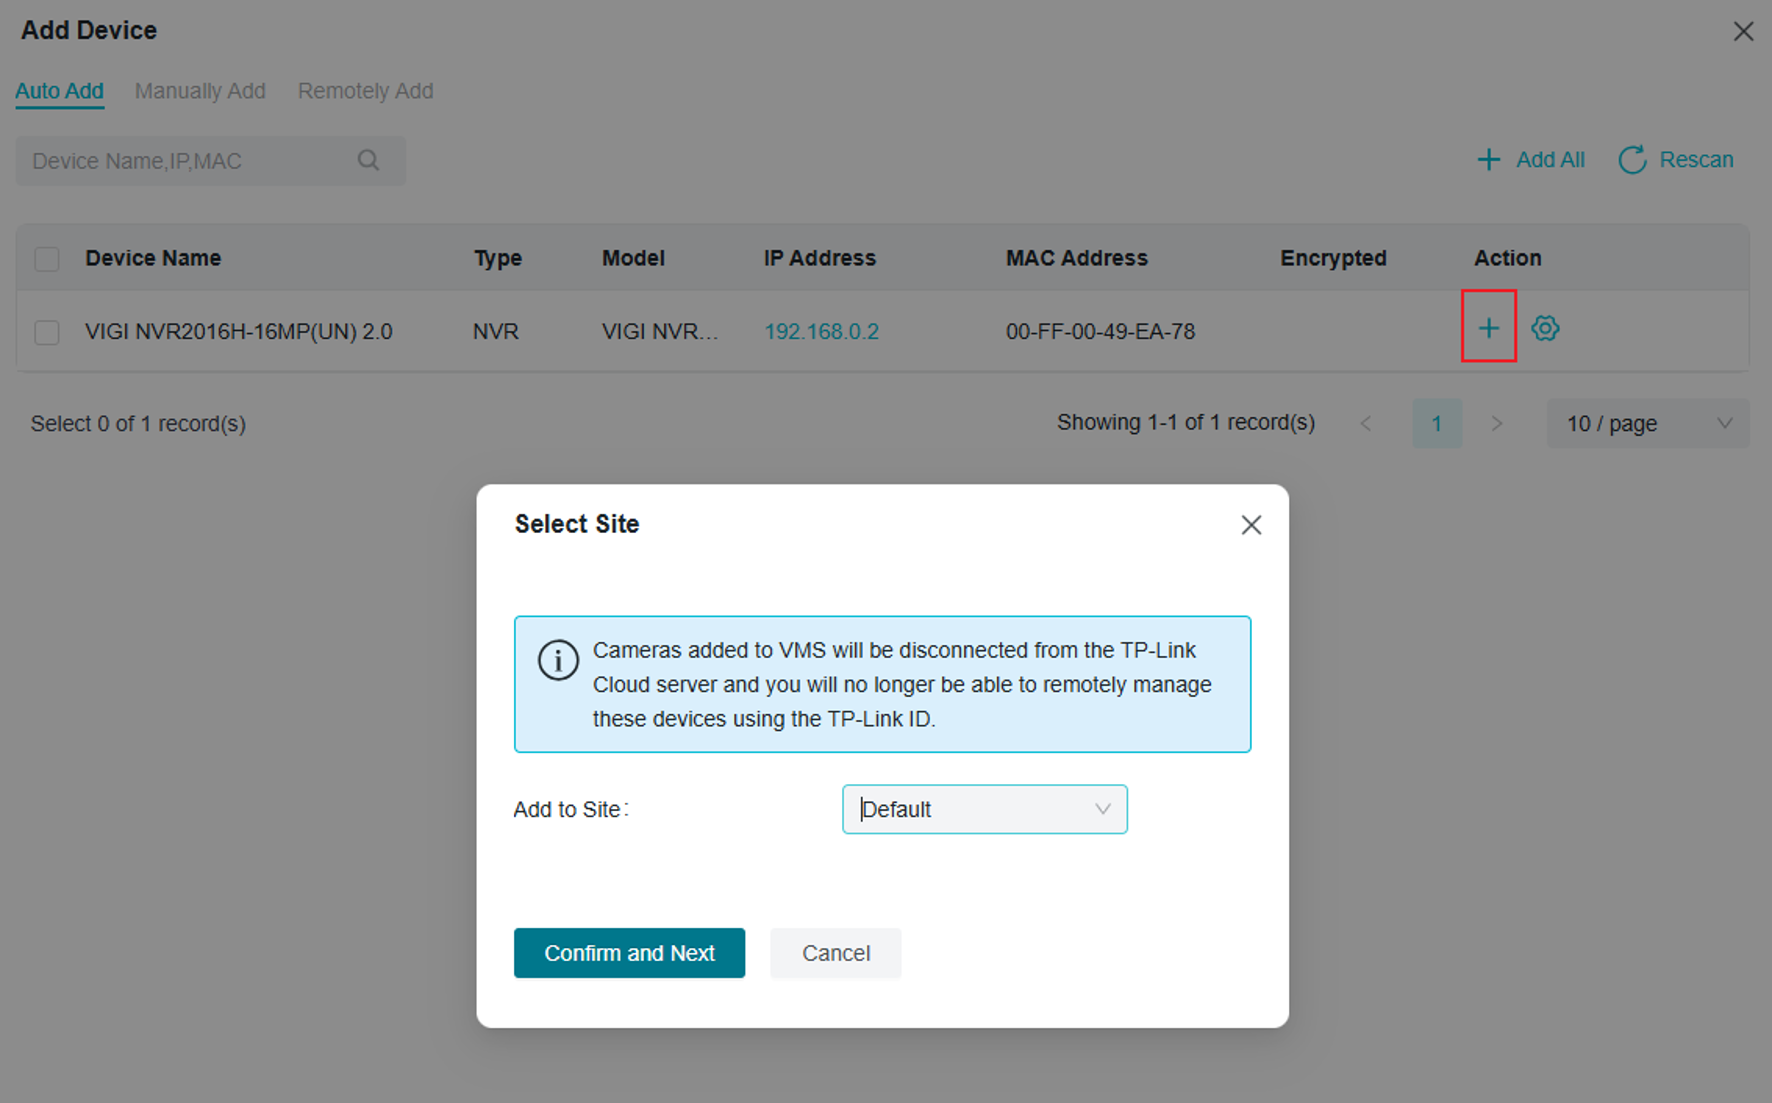
Step 2. In the Add Device window, VIGI VMS will automatically discover devices on the local network. Click the + icon next to the NVR, select the destination site, and click Confirm and Next.
Step 3. Configure the administrator password for the NVR and click Next.
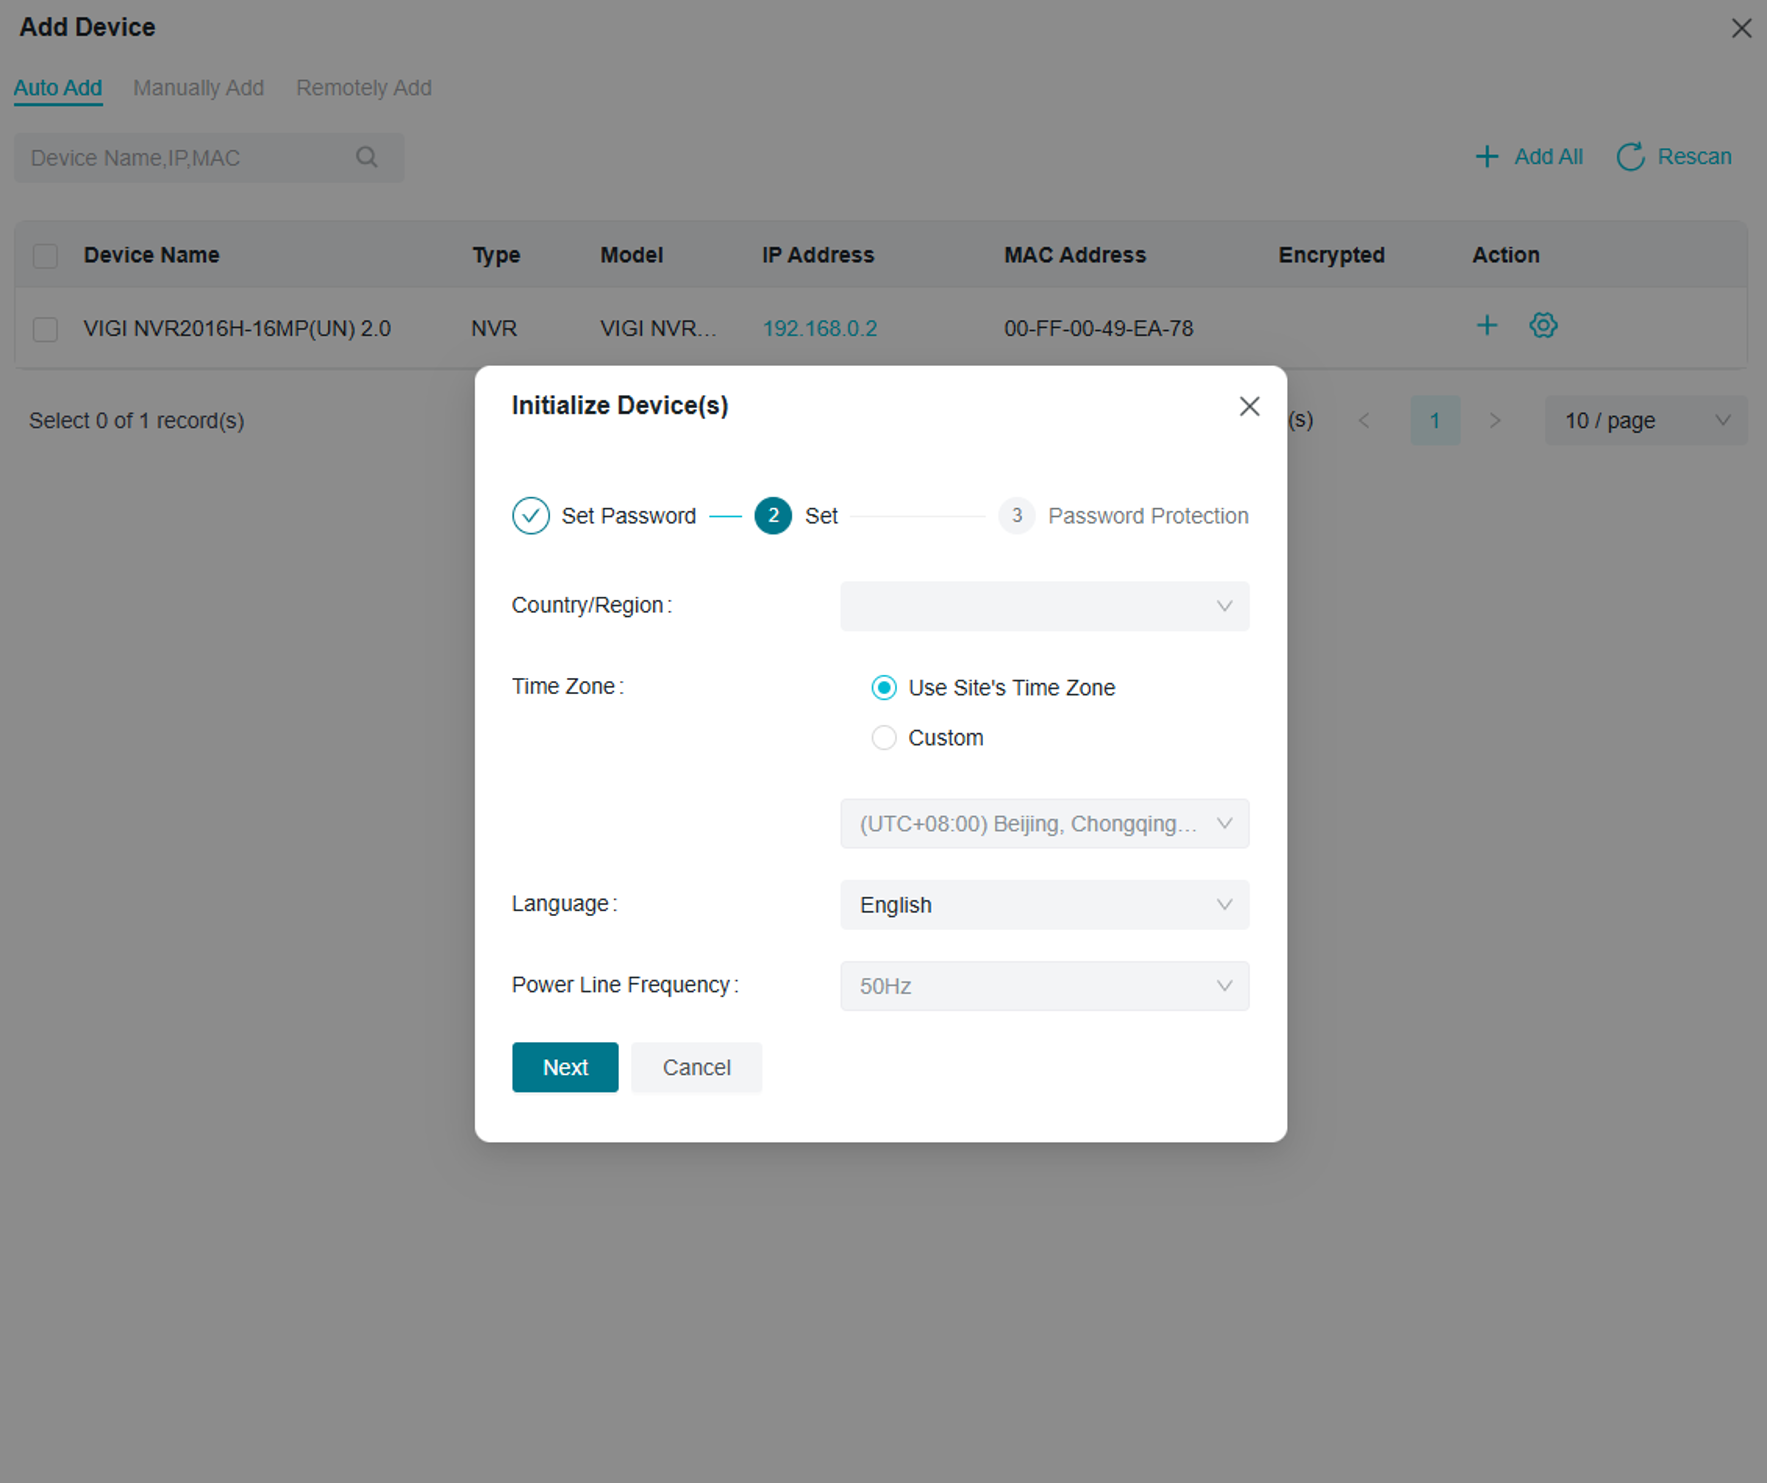
Step 4. Configure the NVR settings, including:
- Country/Region
- Time Zone
- Language
- Power Line Frequency
Click Next to continue.
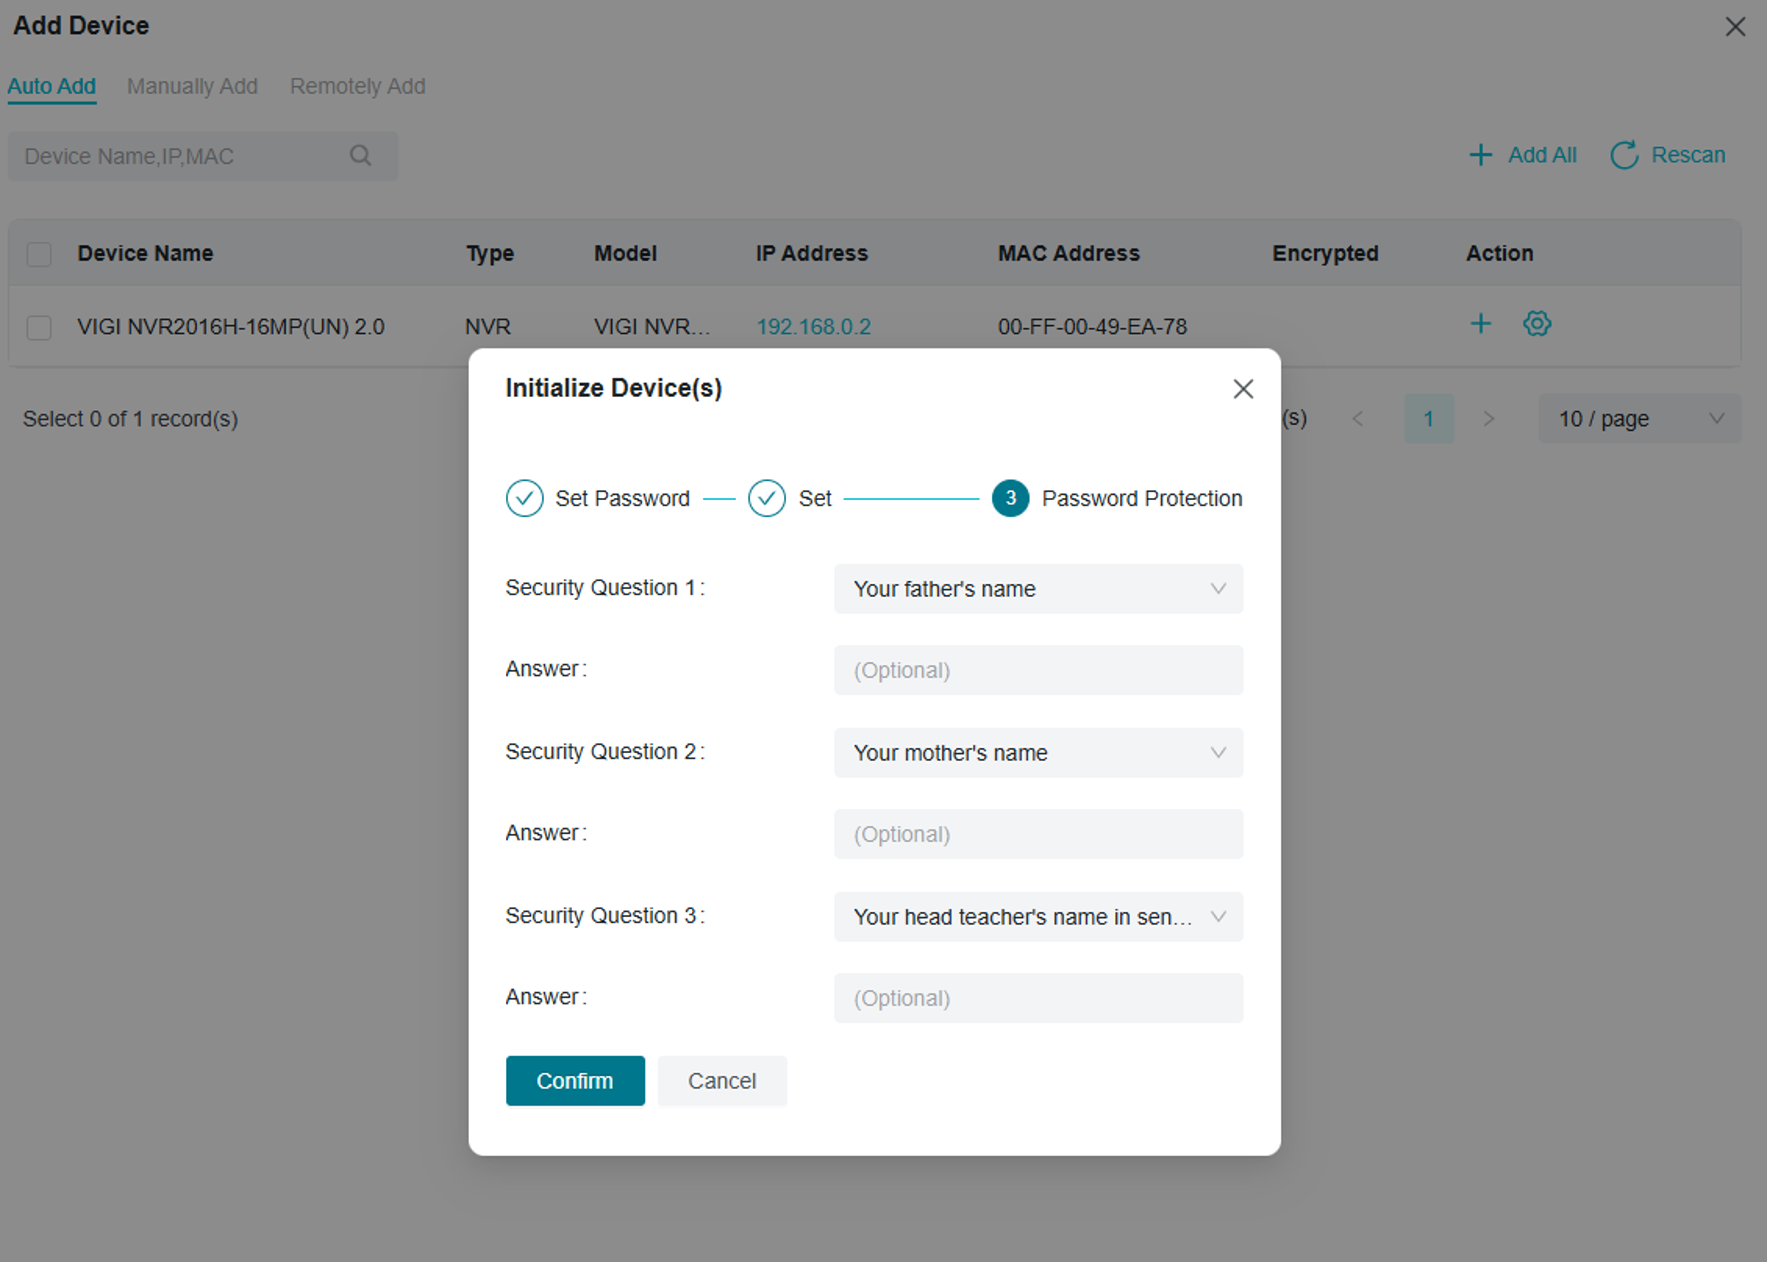
Step 5. Configure the password recovery settings for the NVR. Security questions can be configured to simplify password recovery. Click Confirm to complete the initialization process.
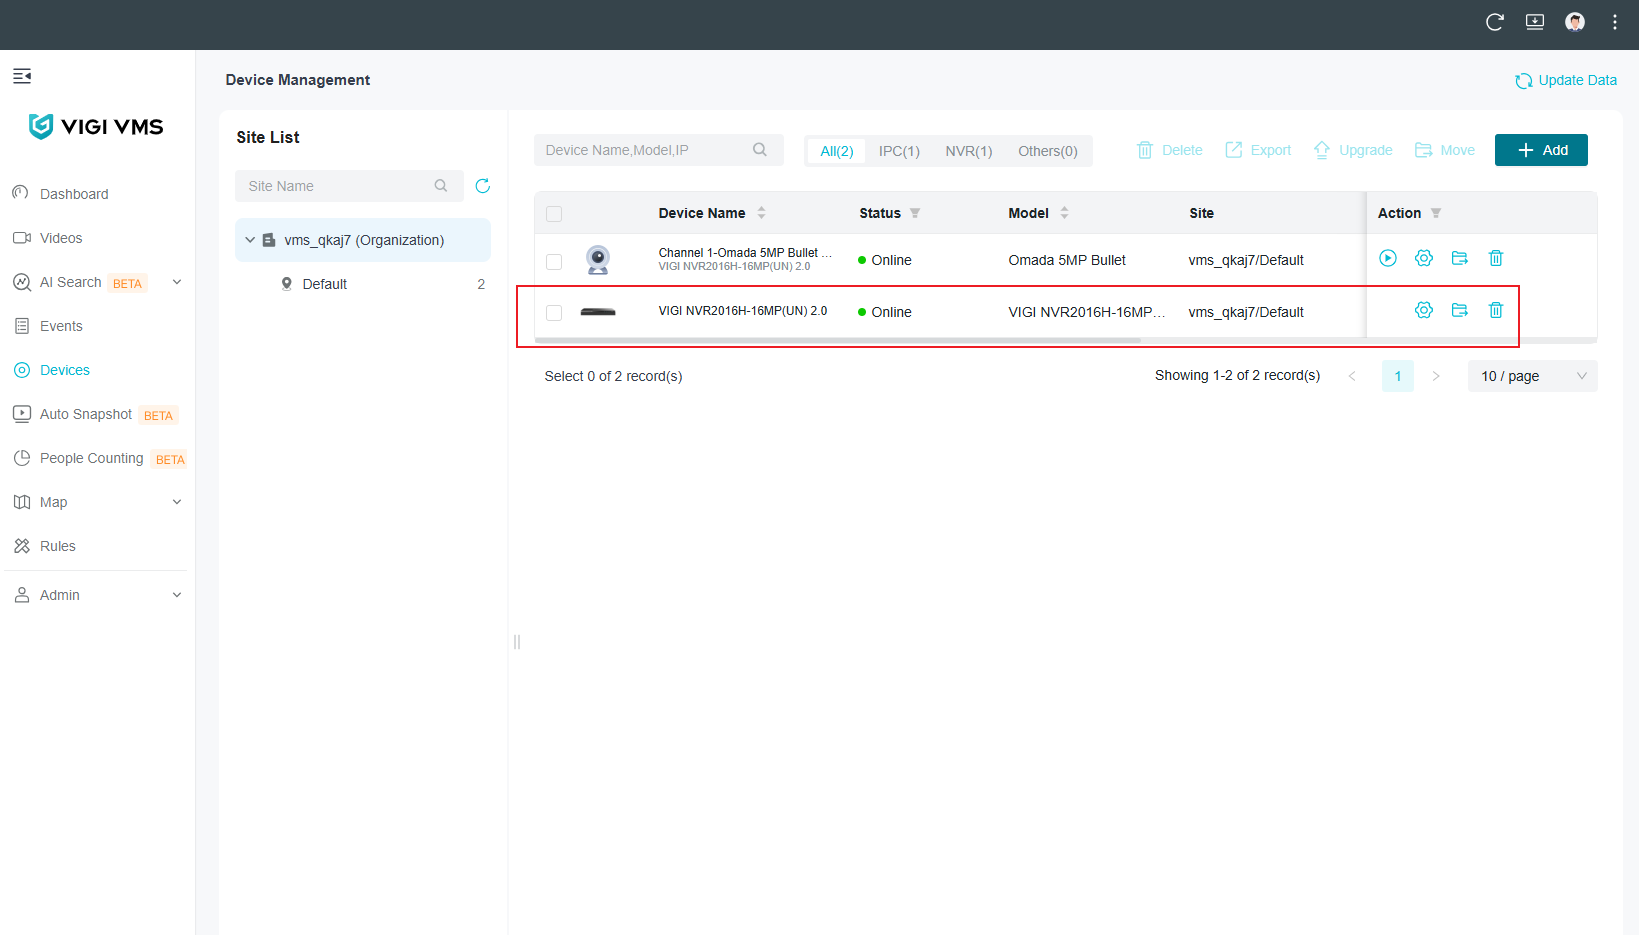
Step 6. After initialization is complete, the NVR appears in the device list with the status displayed as Online.
Conclusion
The VIGI NVR can be initialized through the local GUI, Web Management Interface, VIGI App, or VIGI VMS, allowing flexible deployment based on the available management platform. After initialization, the NVR is ready for camera management, recording configuration, and remote monitoring.
To learn more about each function and configuration, please visit Support Home to download or check the manual for your product.
Looking For More
Чи була ця стаття корисною?
Ваш відгук допомагає вдосконалити цей сайт.



TP-Link Community
Still need help? Search for answers, ask questions, and get help from TP-Link experts and other users around the world.