How to create Static Route on TP-Link ISP-customized Router
Introduction
The Static Route feature allows your network to manually specify the path that data packets should follow when reaching devices or subnets outside the main local network. By configuring static routes, you can ensure stable, predictable data transmission across network segments, especially in multi-router environments or advanced home/office network setups.
This article introduces the purpose of Static Routes and explains when and why you may need to use them, helping you understand how to manage traffic flow between multiple subnets safely and efficiently.
Configuration
In this example, we use NX510v(EU1) 1.0 as the demonstration model.
Step 1. Log in to the web portal with the login password.
Step 2. Go to Advanced > Network > Static Routing. Click Add  .
.
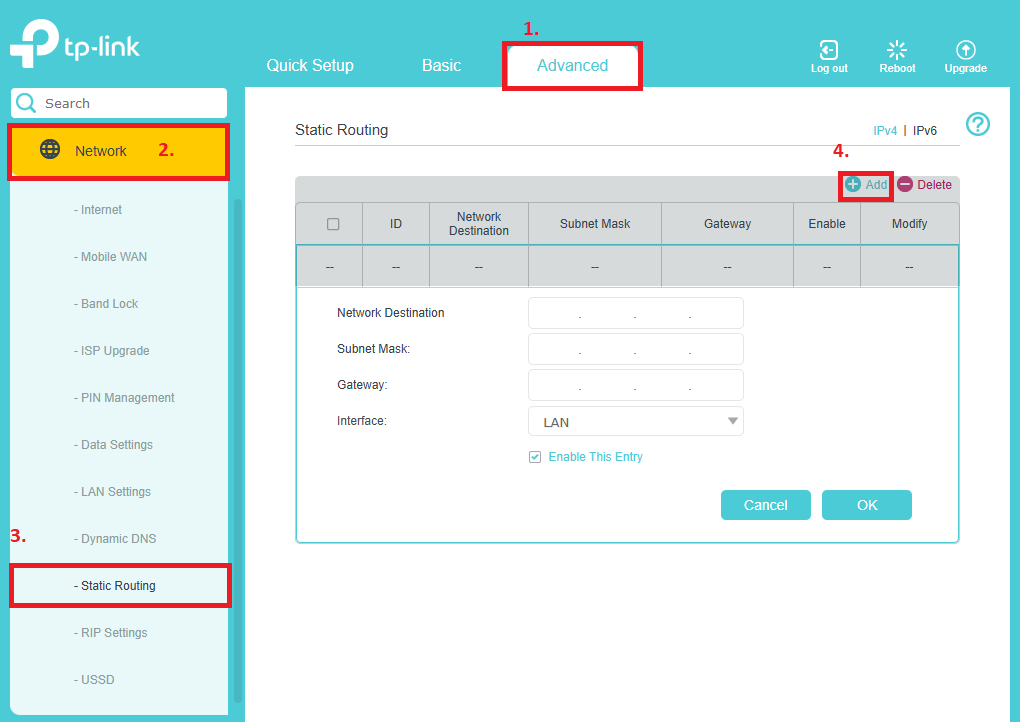
Step 3. Fill in the table according to the explanation:
- Network Destination: The destination network or host that you want this static route to reach.
- Subnet Mask: Defines which portion of the IP address belongs to the network and which portion to the host.
- Default Gateway: This is the IP address of the default gateway device that enables communication between the Router and the network or host.
- Interface: Select the outbound interface used to reach the destination network.
Step 4. Click Save. If the entry appears in the routing table, the static route has been added successfully.

Get to know more details of each function and configuration please go to Download Center to download the manual of your product.
Bu SSS faydalı mı?
Your feedback helps improve this site.