How to select 4G band manually via Web interface on TP-Link Mobile Wi-Fi devices
By default, the 4G band is set on Auto on our Mobile Wi-Fi devices; however, if the device is not working on the best 4G band or the 4G band always changes, which might cause an LTE disconnection issue, you could try to select the 4G band manually.
Note: Not all TP-Link Mobile Wi-Fi devices support to set 4G LTE band manually, please make sure you are using the latest firmware, and if you still don’t have the band option, it means it doesn’t support it yet.
Here we take M7350(EU) V7 for an example.
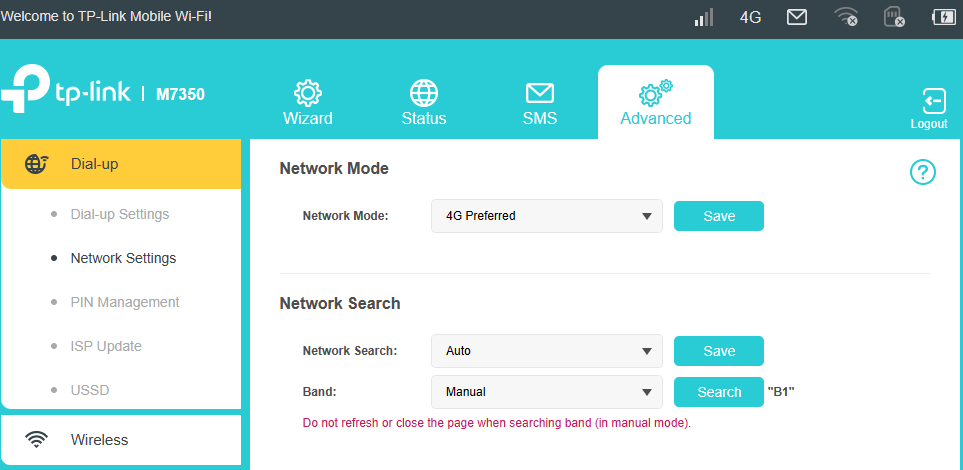
Step 1: Refer to How to log in the management interface of 4G LTE Mobile Wi-Fi to login web interface and go to Advanced->Dial-up->Network Settings page
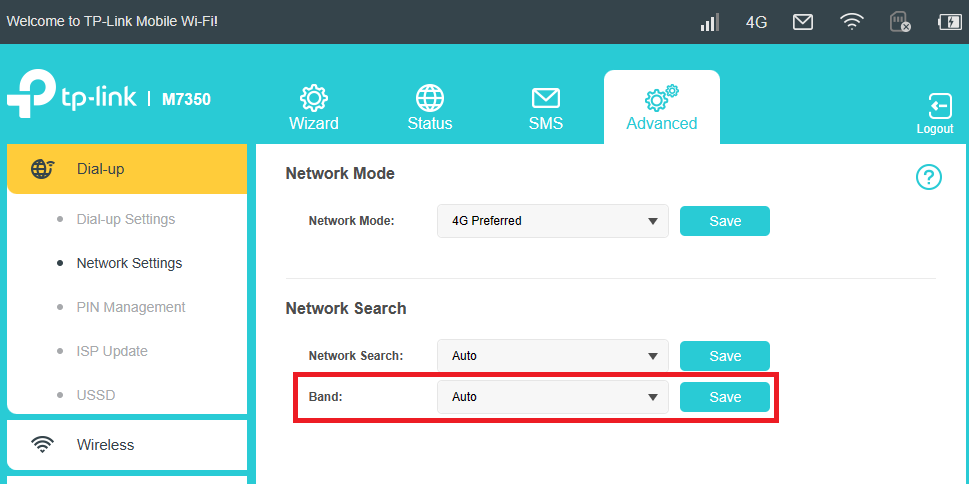
Step 2: Change Band from Auto to Manual, then click Search button to search available bands in the area.
Please note that LTE connection will be disconnected when searching 4G band manually.

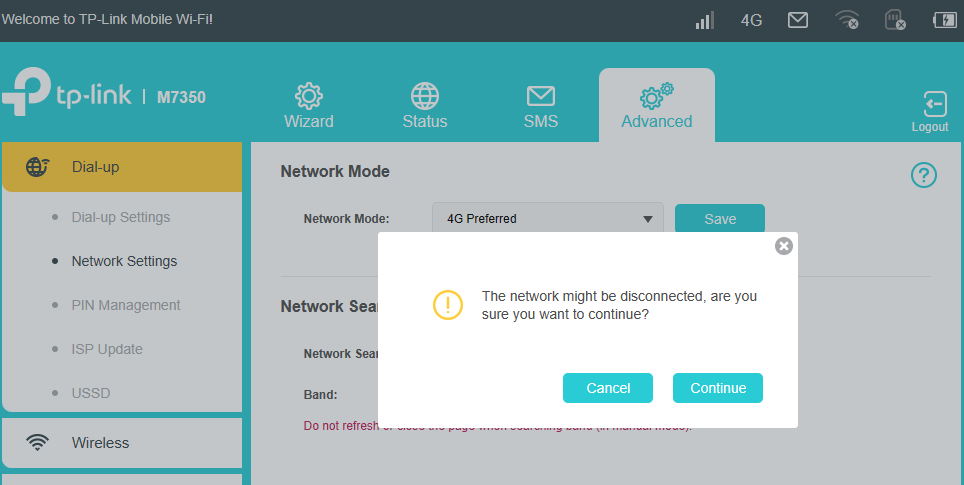
Step 3: Click Continue to start searching 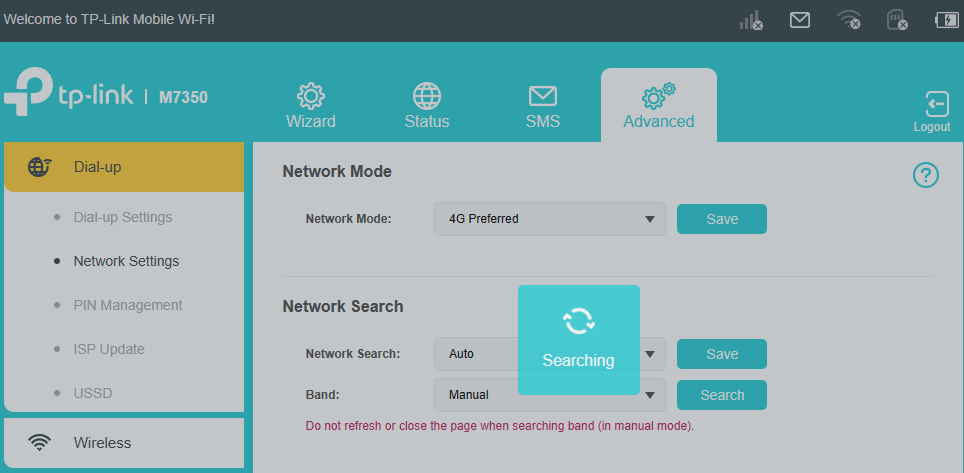
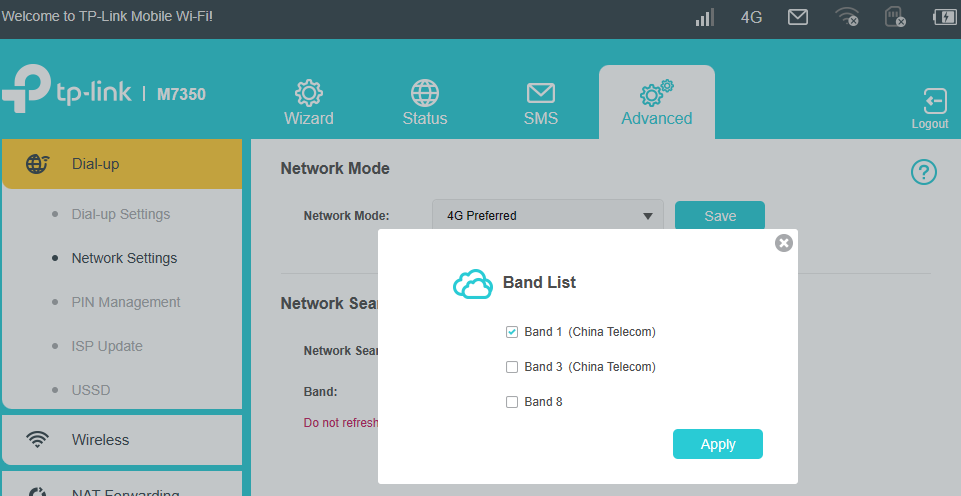
Step 4: Select the 4G band you would like to use from the band list, then click Apply.
Step 5: The selected band(s) will be displayed on the right side and you could also go to Status page to check the current band working on the device.
Note:
1) The band selection is for the 4G network, if the 4G band you selected is not supported by your carrier in the area, it might fall back to the 3G network or has no service at all.
2) If the band displayed on Status page is different from the band you’ve selected, please check if it falls back to WCDMA which is the 3G network, if so, it is normal. If you are sure the 4G signal in the area is strong and stable, you could change the Network Mode from 4G Preferred to 4G only on the More > Internet page.
Bu SSS faydalı mı?
Your feedback helps improve this site.
