Connect or Reconnect Your Kasa Light Bulb to Wi-Fi via the Kasa App
This guide covers how to connect your Kasa light bulb to Wi-Fi using the Kasa app. Whether this is your first time setting up a smart bulb or you are reconnecting a Kasa bulb to a new Wi-Fi network, the process only takes a few minutes. Your smart bulb requires a 2.4GHz Wi-Fi network and an always-on power supply. Download the TP-Link Kasa Smart app to manage your bulb on your iOS or Android device.
Key Takeaways
- To set up a Kasa light bulb, download the Kasa Smart app (available on iOS and Android), create a TP-Link Cloud account, and follow the in-app steps to add the bulb to your network.
- Kasa light bulbs only connect to 2.4GHz Wi-Fi networks. Make sure your phone is connected to your 2.4GHz network before starting setup.
- If you have a virtual private network (VPN) enabled on your phone, turn it off temporarily before setting up the bulb, as it can interfere with the connection process.
- During setup, the bulb should flash three times to confirm it is in pairing mode. If it does not flash, flip the switch off and on three times slowly with about a one-second interval between each.
- iOS users need to manually connect to the bulb's Wi-Fi network (named TP-LINK_Smart Bulb_xxxx) in their phone's Wi-Fi settings before returning to the Kasa app to complete setup.
Step 1: Create Your TP-Link ID
Open the Kasa app on your smartphone. If it’s your first time installing the smart bulb, create a TP-Link ID to manage your smart bulb: TP-Link ID Explained: What It Is and How to Create One?
Step 2: Add Your Kasa Smart Bulb
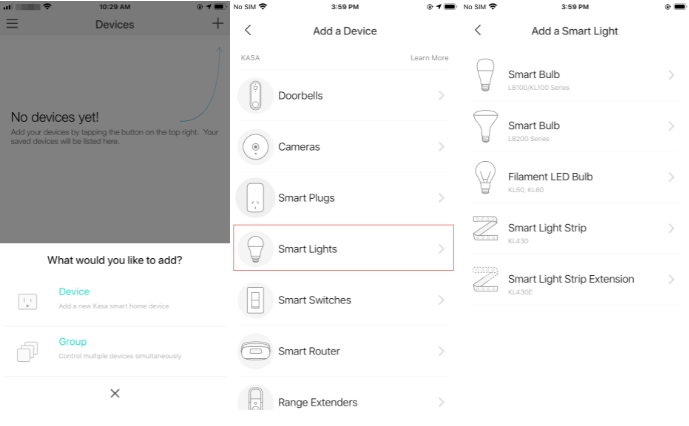
a. Tap the plus button in the top right corner, select Device > Smart Lights > Smart Bulb to add a new smart bulb.
b. Screw in your smart bulb and wait about five seconds — the bulb will flash three times.
If the bulb is not flashing, tap My Smart Bulb Didn’t Blink and follow the instructions to flip the switch off and on three times. Note that flip the switch slowly, with about a one-second interval between OFF and ON, and make sure the smart bulb blinks three times before you tap Next.

c. Kasa App Looking for Your Smart Bulb.
For Android: Kasa app will automatically search for your smart bulb — this may take about a minute.If you have trouble finding the smart bulb, please go to Wi-Fi Settings on your smartphone and manually connect to the smart bulb’s default Wi-Fi network (TP-LINK_Smart Bulb_XXXX).
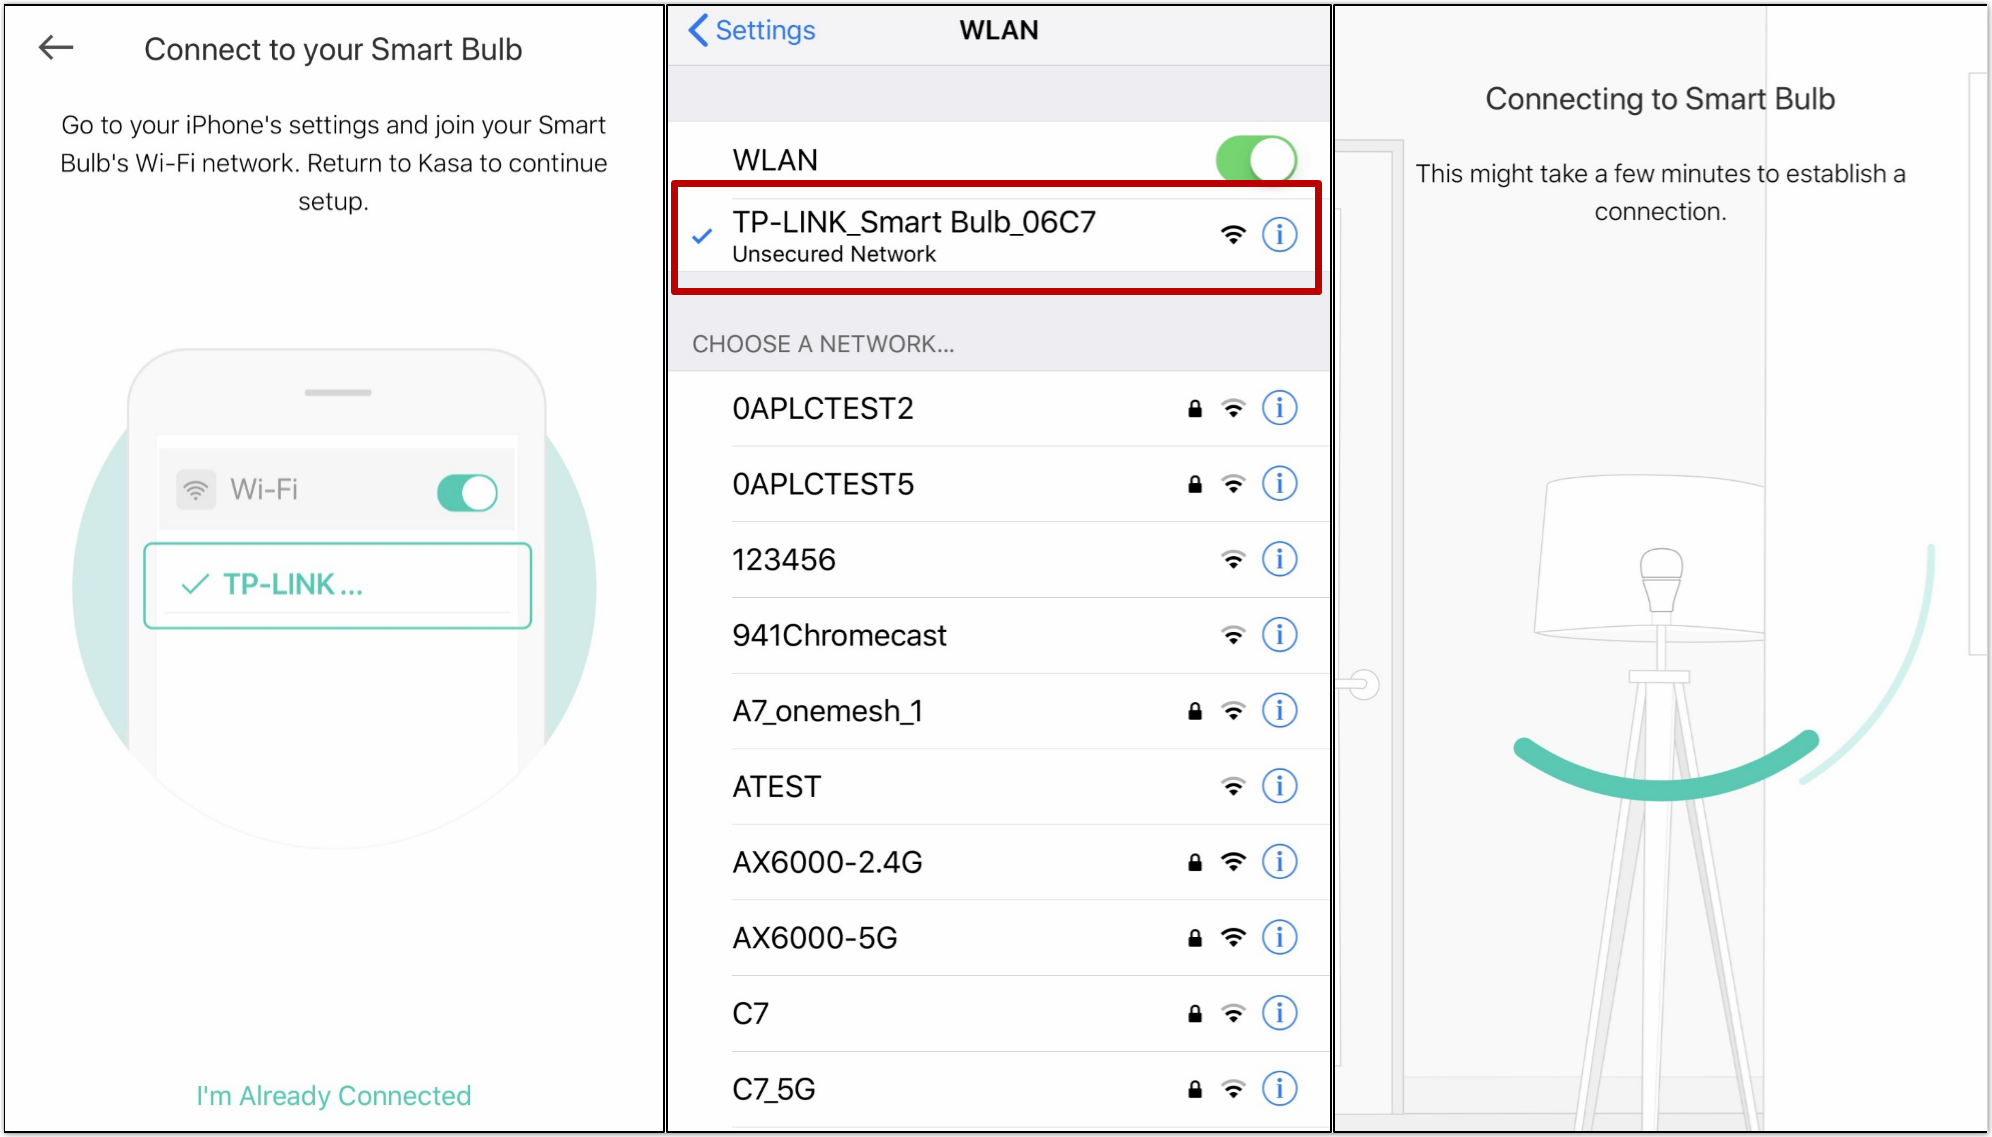
For iOS: You need to connect Smart Bulb’s Wi-Fi manually. Please go to Wi-Fi settings on your smartphone and manually connect to the smart bulb’s Wi-Fi network (TP-LINK_Smart Bulb_XXXX), and then go back to the Kasa app to continue the setup process.
If your phone displays a message that the Wi-Fi network is unsecured or unprotected, this is expected during setup. Select Connect Anyway, Keep Using This Wi-Fi, or Stay Connected (the option shown depends on your device) to continue.
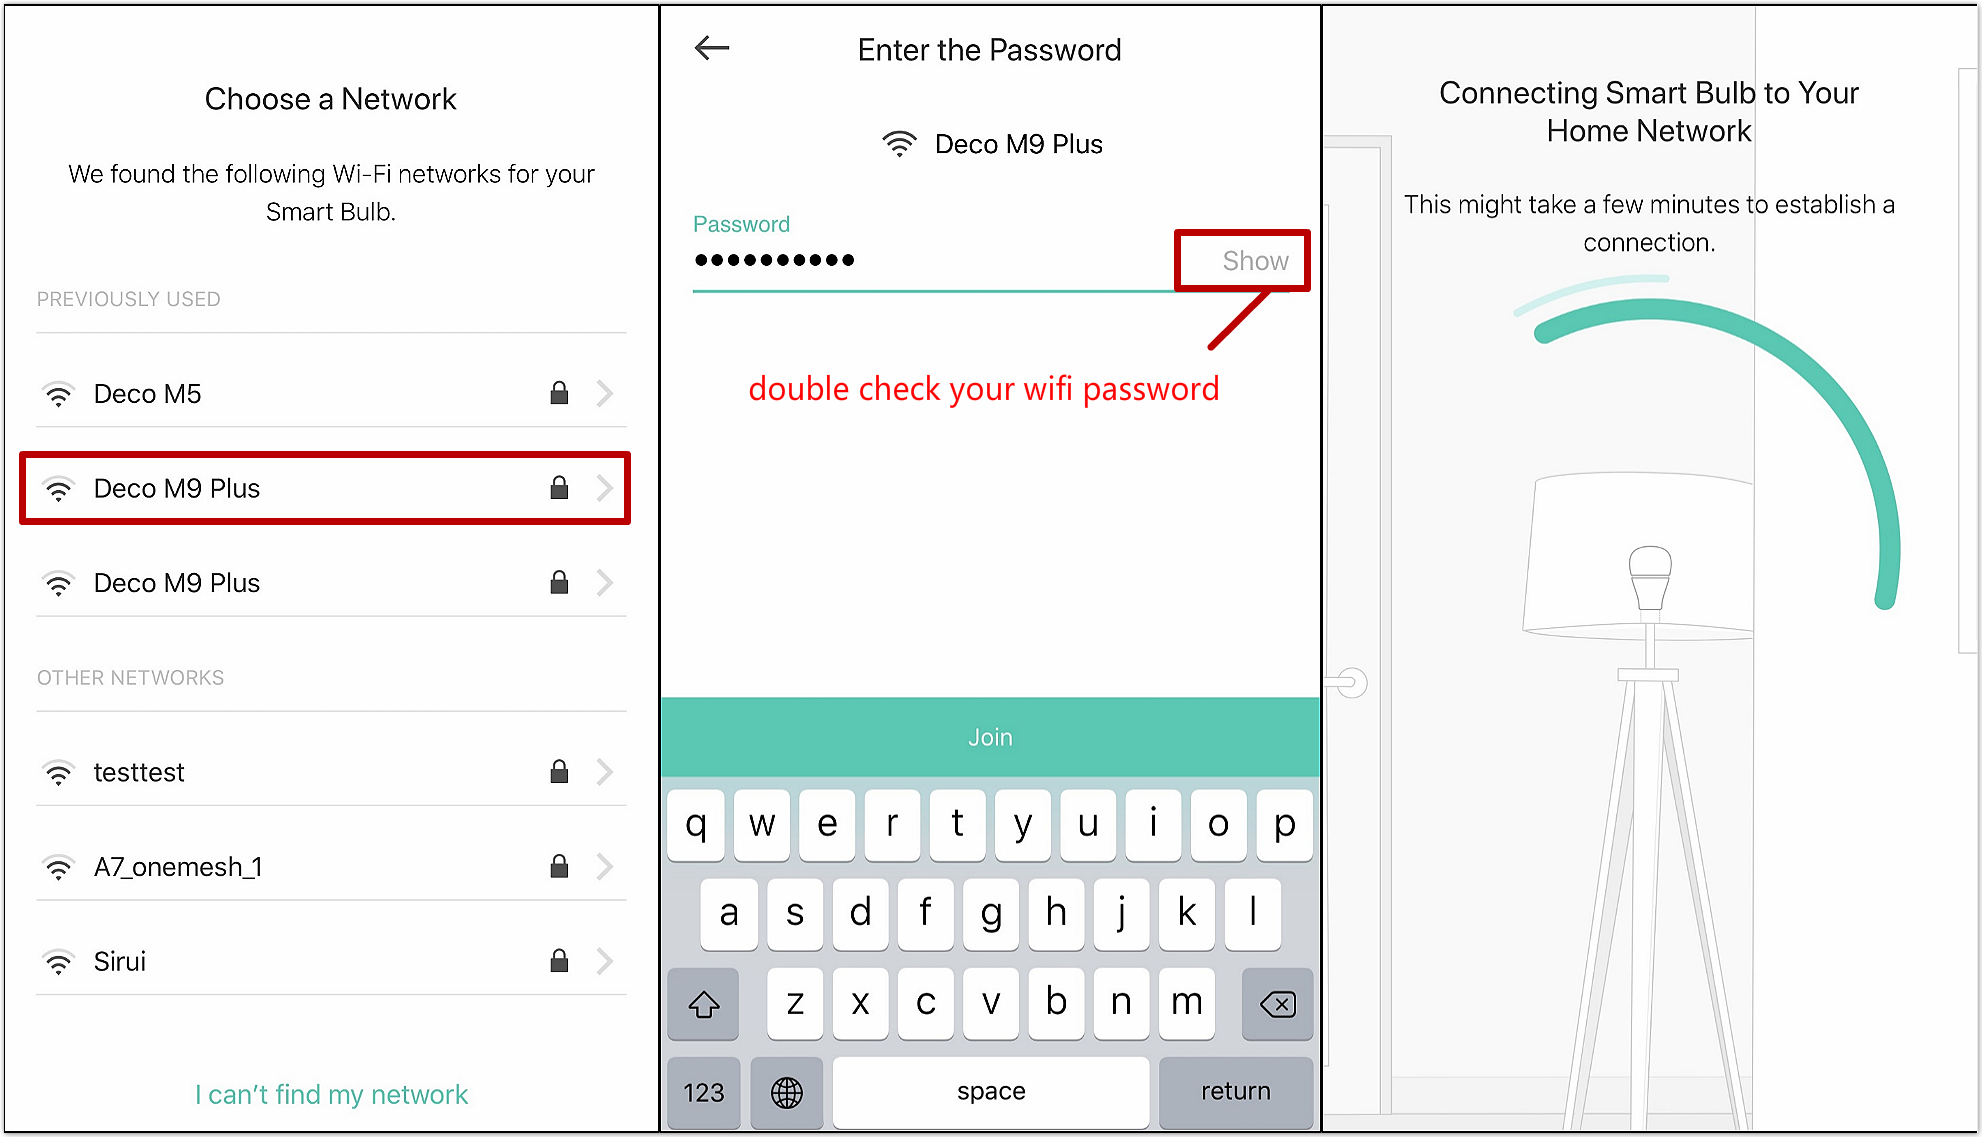
d. Connect your Smart Bulb to your home network.
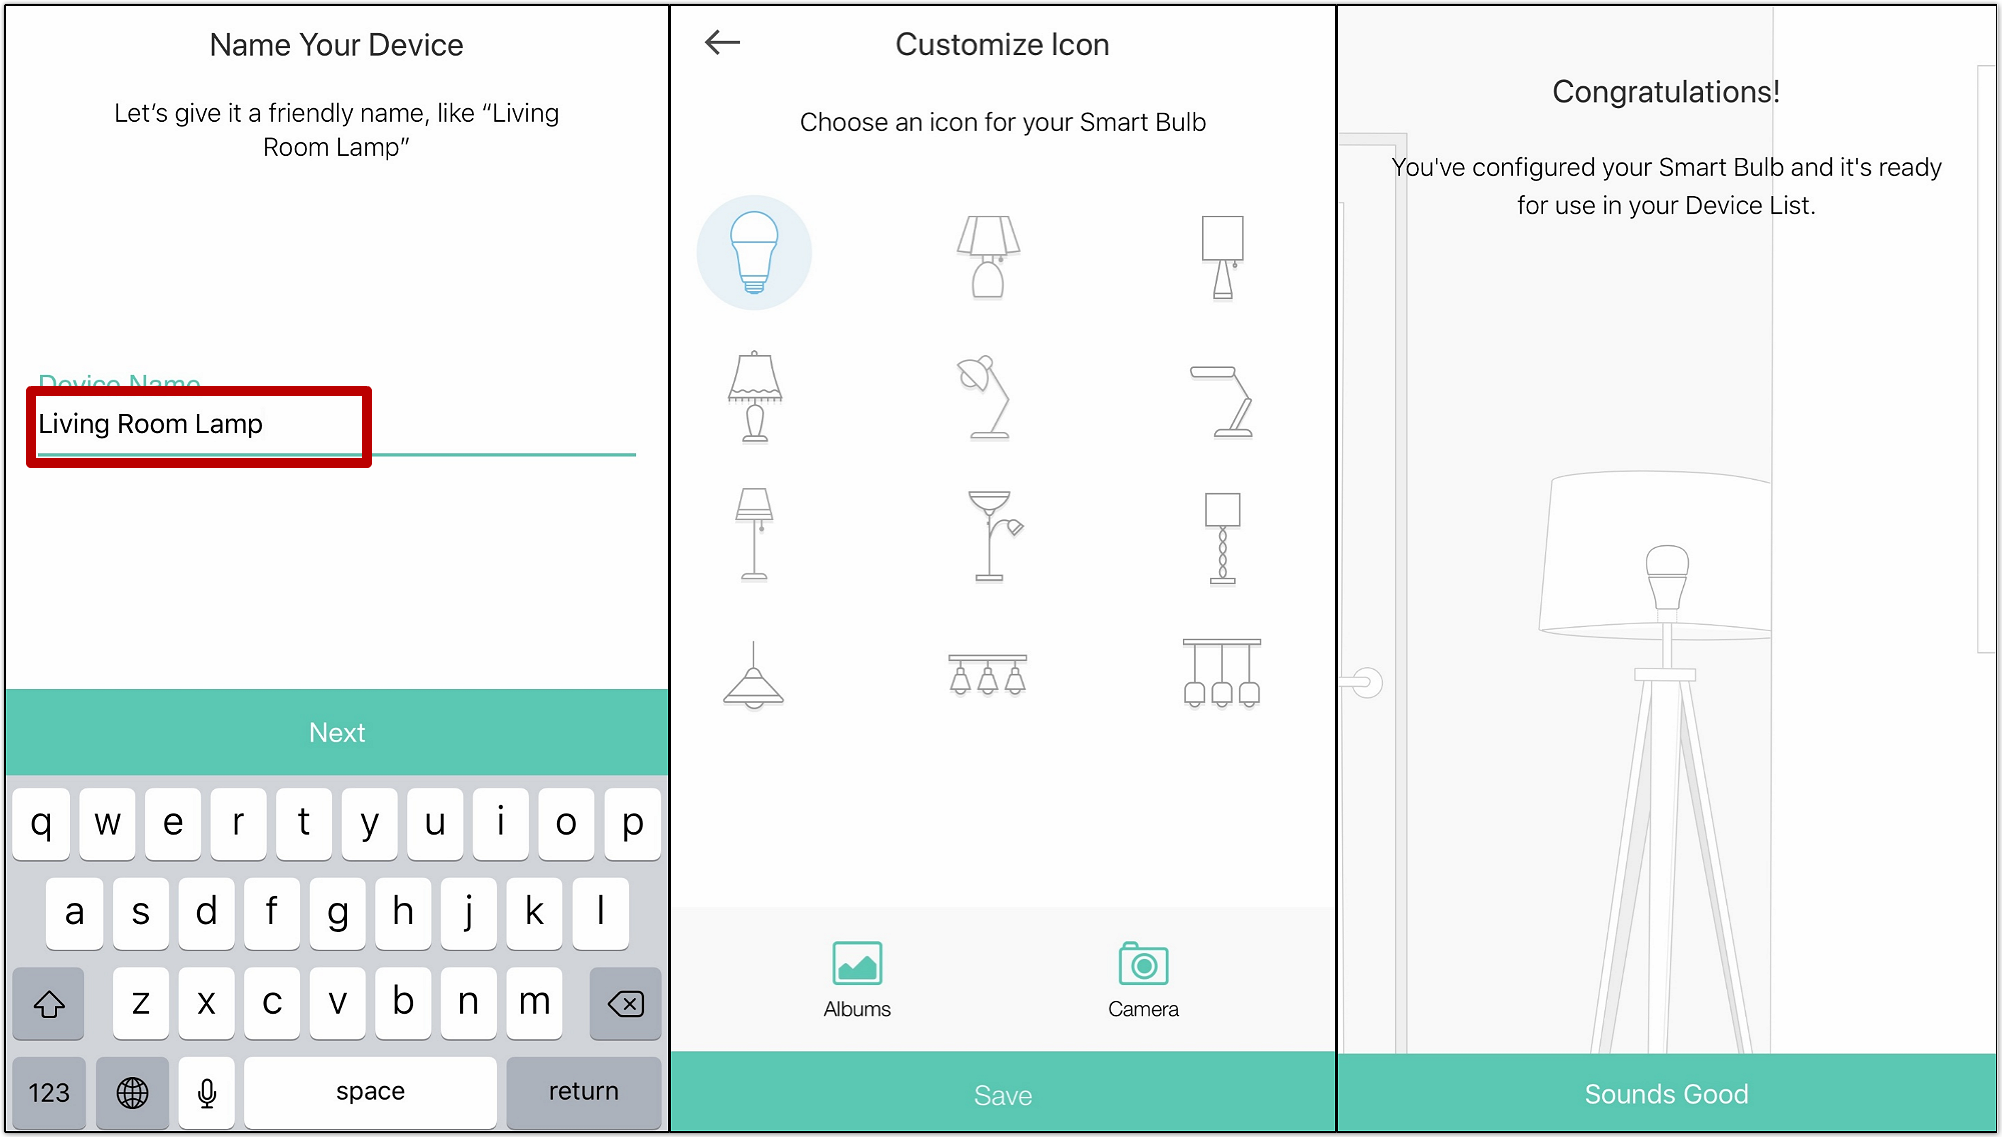
e. Name your Smart Bulb, and choose an icon for it. After that, we have completed the setup of the Smart Bulb.
Do remember Smart Bulb requires an “always-on” power supply to operate properly.
If you are still having trouble setting up your smart bulb, contact support for help.
Daha Fazlasını Arıyorum
Bu SSS faydalı mı?
Your feedback helps improve this site.
1.0-1_normal_1584416453289y.jpg)
1.0_1473152981214p.jpg)

TP-Link Community
Still need help? Search for answers, ask questions, and get help from TP-Link experts and other users around the world.