Simple Home Security Camera: What to Look For
If you’ve ever had that moment of doubt—Did the delivery arrive? Who rang the bell? Did the helper lock the gate?—you’re already in the right mindset for a home camera.
The problem is that cameras can get complicated fast: confusing settings, Wi-Fi dropouts, and surprise monthly fees that make you stop checking the app altogether.
This guide is for Filipino homeowners and renters who want the opposite: an easy to install Wi-Fi camera Philippines setup that’s easy to install, easy to check and easy to maintain.
Simple home security camera Philippines: a quick checklist
A “simple” camera isn’t the one with the longest spec sheet. It’s the one that stays useful after the first week.
Use this checklist to compare options quickly.
1) Put placement first (indoor vs outdoor)
Start with where the camera will live:
- Indoor cameras are best for living rooms, entryways, kids’ rooms, and checking on pets.
- Outdoor cameras need weather resistance.
2) Pick an indoor security camera with microSD (to avoid monthly fees)
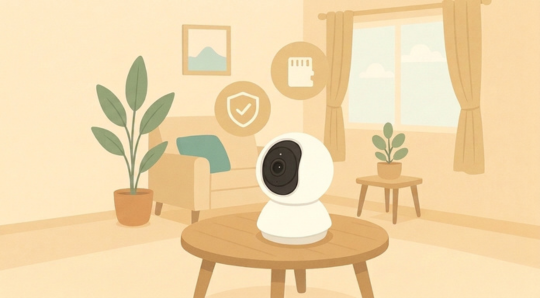
If you want a camera that stays simple long-term, look for an indoor security camera with microSD support. That way, you can record locally without relying on an ongoing subscription.
- microSD storage: video records locally to the card you install (you buy it separately)
- cloud storage: video uploads to cloud servers for event history and extra features, typically via a subscription
If you want cloud benefits (like richer notifications and event history), treat it as an optional upgrade.
TP-Link Philippines outlines what cloud features look like in Tapo Care (cloud storage and rich notifications).
⚠️ Warning: Don’t assume every camera supports the same microSD capacity. Always check the product page for the model you’re buying.
3) For outdoor installs, prioritize an outdoor security camera IP66 Philippines (when exposed)
Outdoor placement is where many “simple” setups fail—because rain exposure is underestimated.
- IP65 can handle rain and dust in many setups, especially if the camera is mounted under a roofline.
- For fully exposed gates and perimeter walls, prioritize an outdoor security camera IP66 Philippines rating.
4) Choose clarity and night vision that fits your space
For a simple setup, 1080p is the minimum you should consider. But if you’re buying new, 2K is often the better long-term choice because it holds up better when you zoom in.
Ask one practical question: How dark is the area you’re monitoring?
- Infrared (IR) night vision works well for most indoor rooms.
- Color night vision can be more useful outdoors when you want extra detail (like clothing color).
5) Prioritize alerts you won’t ignore
In busy neighborhoods, motion alerts can get noisy fast (cars, shadows, pets, street movement). Look for:
- activity zones
- adjustable sensitivity
- person detection features where available
This is one of the biggest differences between a camera that feels “simple” and one that feels like work.
6) Confirm Wi-Fi strength where you’ll mount it
Many home cameras use 2.4 GHz Wi-Fi, which usually reaches farther than 5 GHz—but concrete walls and metal gates can still weaken the signal.
Before you buy:
- test your Wi-Fi signal at the exact mounting spot
- plan for a router/mesh upgrade if the camera location is a dead zone
A simple starter setup for most homes (1–3 cameras)
If you’re upgrading from “no cameras” or “one cheap camera,” don’t overbuy. Most homes get solid coverage with 1–3 devices.
Starter setup A: 1 camera (small condo or apartment)
- 1 indoor camera pointed at the front door / main living area
Starter setup B: 2 cameras (typical home)
- 1 indoor camera for the living area
- 1 outdoor camera for the gate/driveway
Starter setup C: 3 cameras (more complete coverage)
- 1 indoor camera (main living area)
- 1 outdoor camera (gate/driveway)
- 1 camera for a back door / side entrance
Setup in 10 minutes: what “easy” should look like
If a camera is truly beginner-friendly, setup should follow a simple flow: download the app, sign in, power on, add device, connect to Wi-Fi, and name the camera.
For a practical walkthrough, follow Tapo camera setup steps from TP-Link Philippines in its setup guide for Tapo cameras.
If you get stuck, the most common issues are usually Wi-Fi signal strength, phone permissions during setup, or the camera not being in pairing mode.
Privacy basics you should enable on day one
A home camera should make you feel safer—not watched.
Two practical moves:
- Use Privacy Mode when you’re home. It’s the simplest way to pause monitoring without unplugging the camera. TP-Link Philippines shows how to toggle it in how to enable and disable Privacy Mode.
- Use privacy zones (or smart placement). If you don’t want the camera to capture a bedroom area, a mirror, or a neighbor’s doorway, block that part of the view—or adjust the angle so it isn’t recorded in the first place.
Example picks: simple Tapo cameras to start with
If you want something straightforward to install and manage, Tapo cameras are designed for app-based setup and flexible storage.
Here are two simple starting points, depending on where you’ll place the camera:
Indoor coverage with pan/tilt: Tapo C210
If you want one indoor camera to cover a room without obsessing over angles, a pan/tilt model is a practical choice.
A common example is the Tapo C210 (2K video, pan/tilt coverage, and local microSD storage up to 256GB).
Outdoor coverage for exposed spots: Tapo C520WS
For gates, driveways, and outdoor areas that take real rain, prioritize weather rating and coverage.
The Tapo C520WS is an outdoor model with IP66 weatherproofing, 2K QHD video, and pan/tilt coverage.
 If you want to browse what’s currently available, start with the official Tapo camera lineup.
Where NOT to place a camera (to keep things simple)
A lot of “this camera is bad” reviews are really “this camera is placed badly.” If you want a simple home security camera Philippines setup that works day-to-day, avoid these common placement mistakes:
- Pointing the camera at a busy street (you’ll get constant alerts and start ignoring them).
- Mounting too high for identification (you’ll capture heads and hats, not faces).
- Placing it behind glass at night (IR night vision can reflect back and wash out the footage).
- Mounting outdoors with no cover if the area gets direct rain—use an IP66-rated camera for exposed spots, or mount under an eave.
- Aiming at private spaces like beds or neighbors’ doors—use privacy zones or adjust the angle.
This one section alone usually improves alert quality and makes the whole system feel easier to live with.
FAQ: quick answers before you buy
Do I need to pay monthly to use a home camera?
Not necessarily. Many cameras can record locally to a microSD card with no monthly fee. Cloud storage is typically optional.
Will the camera still work if the internet goes out?
If you’re using local storage and the camera has power, it can keep recording locally. What you may lose temporarily is remote viewing and real-time notifications.
What’s the simplest way to reduce false alerts?
Use activity zones, lower sensitivity, and avoid pointing the camera at a busy street or moving trees.