How to Configure SAML SSO on VIGI VMS
Contents
Introduction
SAML SSO is an XML-based open standard for exchanging authentication and authorization data between parties, specifically between an identity provider (IdP) and a service provider (SP). It enables users to log in once and access multiple systems without needing to log in again at each one.
This article explains how to configure SAML SSO, using Microsoft Entra as an example.
Requirements
-
VIGI VMS
-
Microsoft Entra/Microsoft Azure
Configuration
The following steps will cover the configuration of the identity provider.
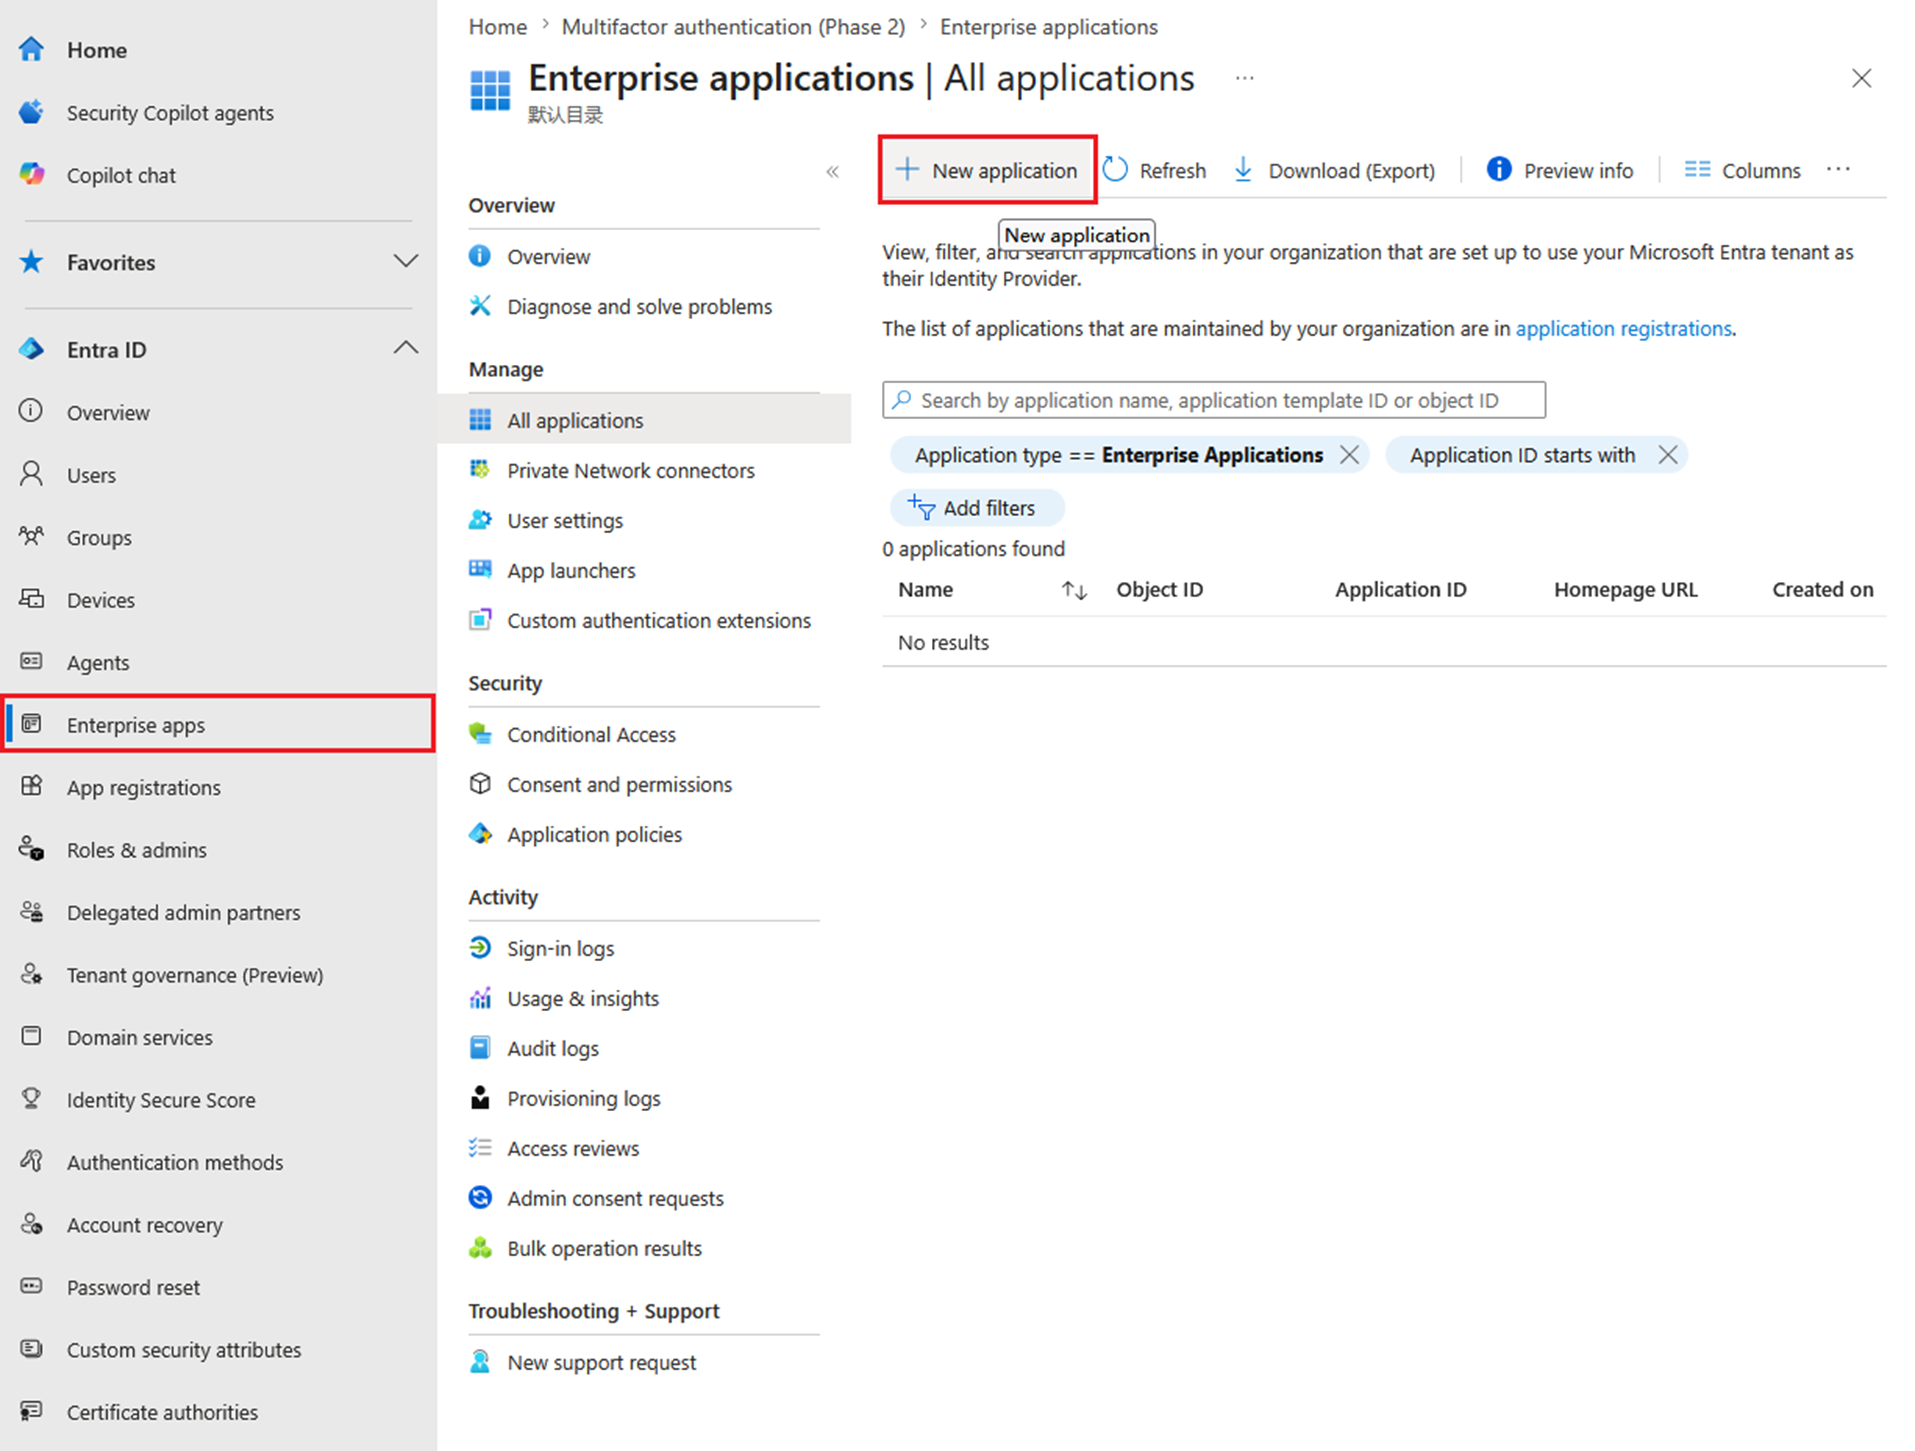
Step 1. Go to Microsoft Entra Admin Center: Microsoft Entra Admin Center. Click Enterprise apps and create a new application.
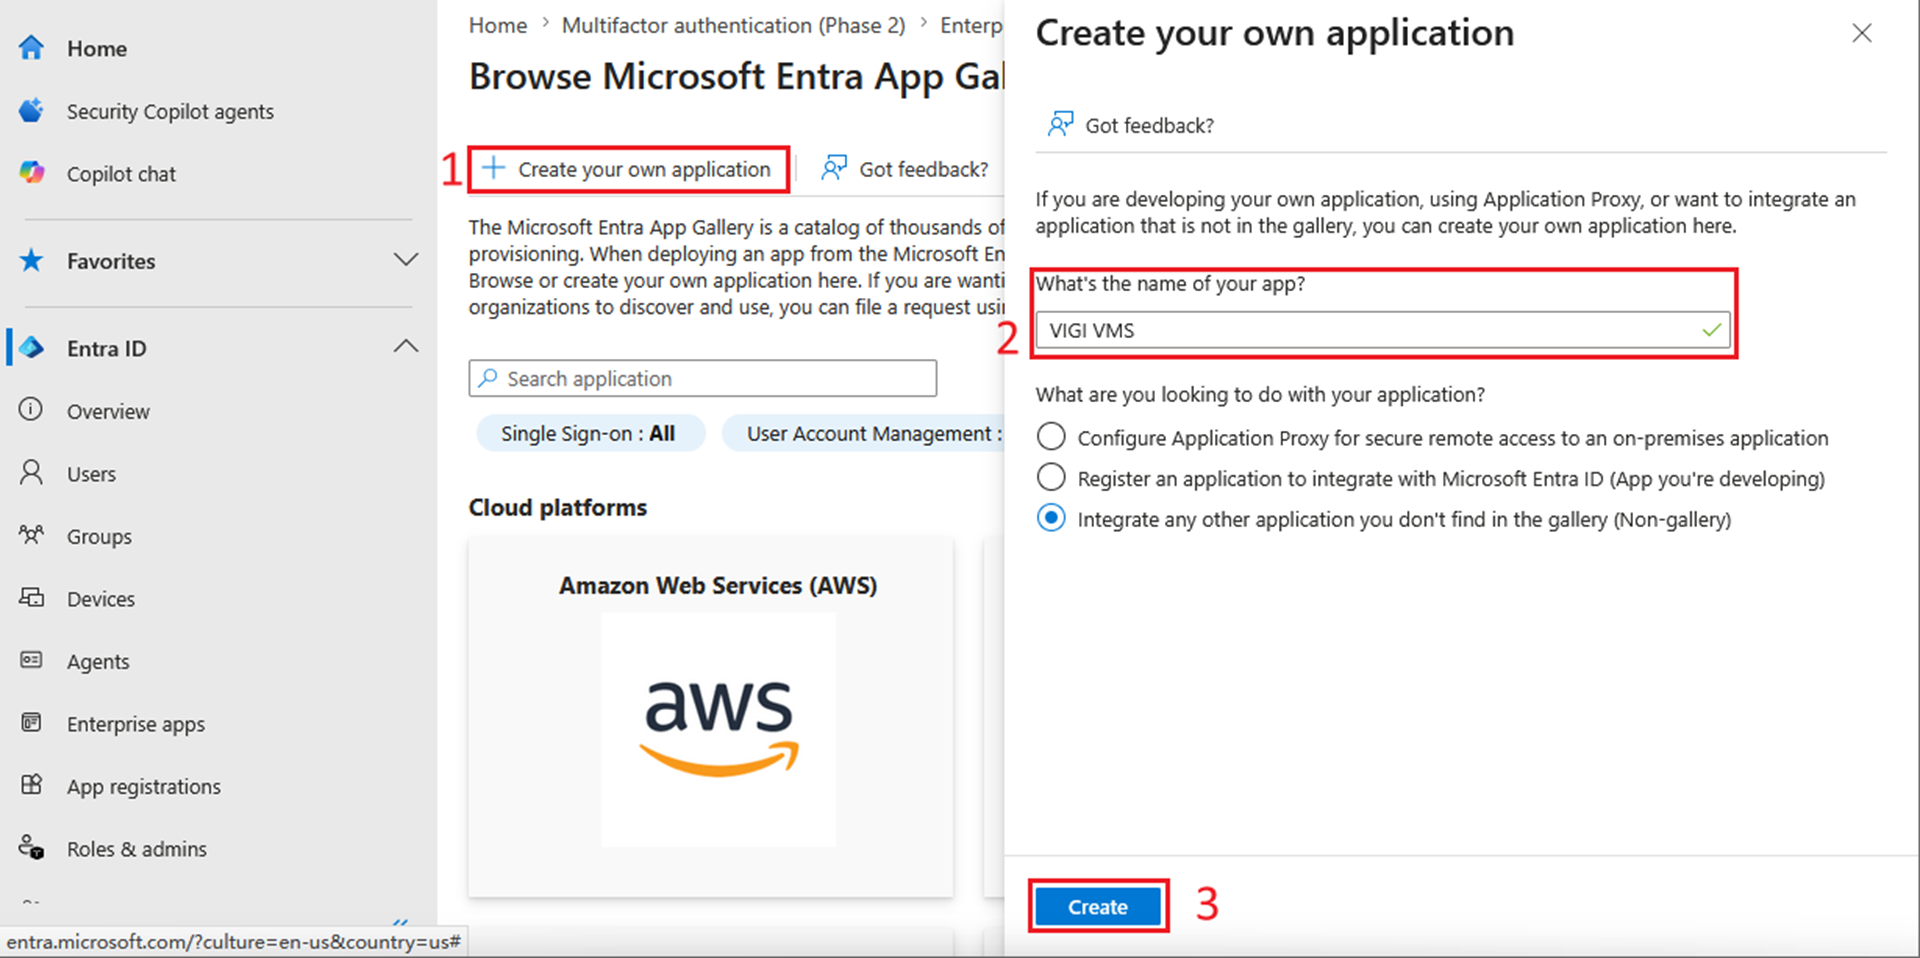
Click Create your own application. Enter the name of the application and click Create.
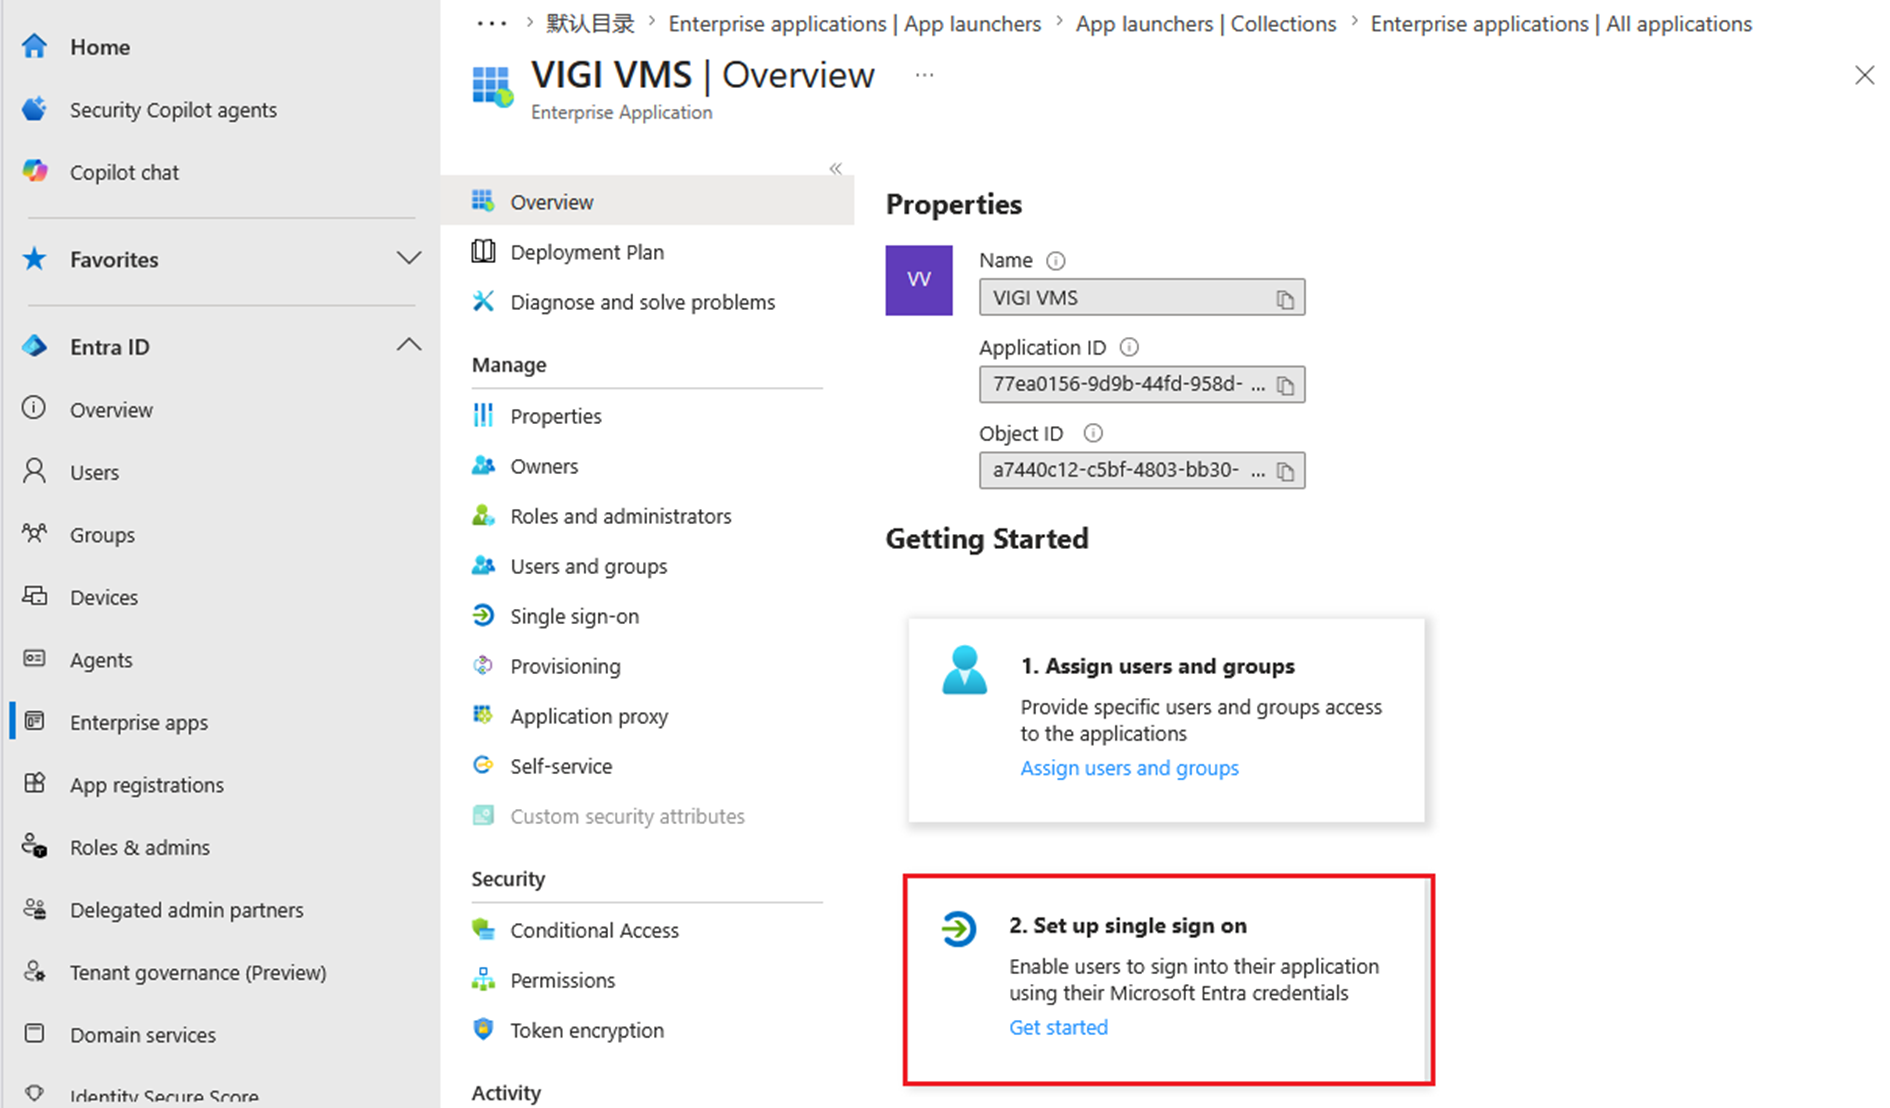
Step 2. Initialize single sign on and obtain the identity provider metadata file.
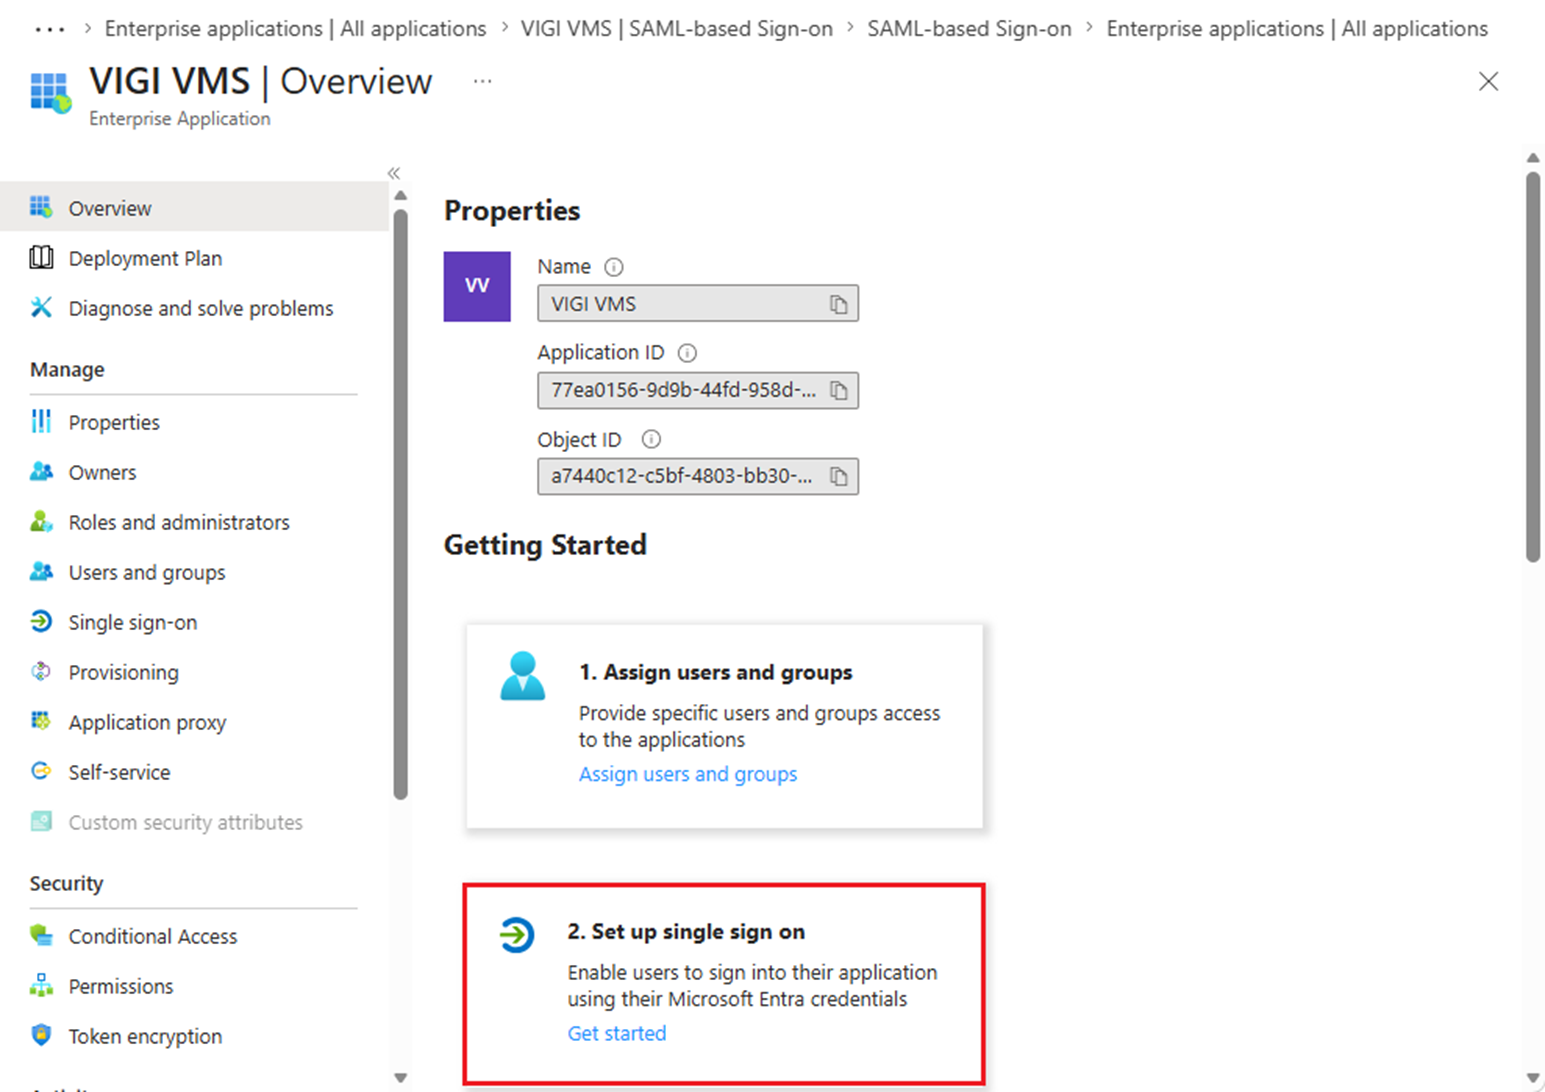
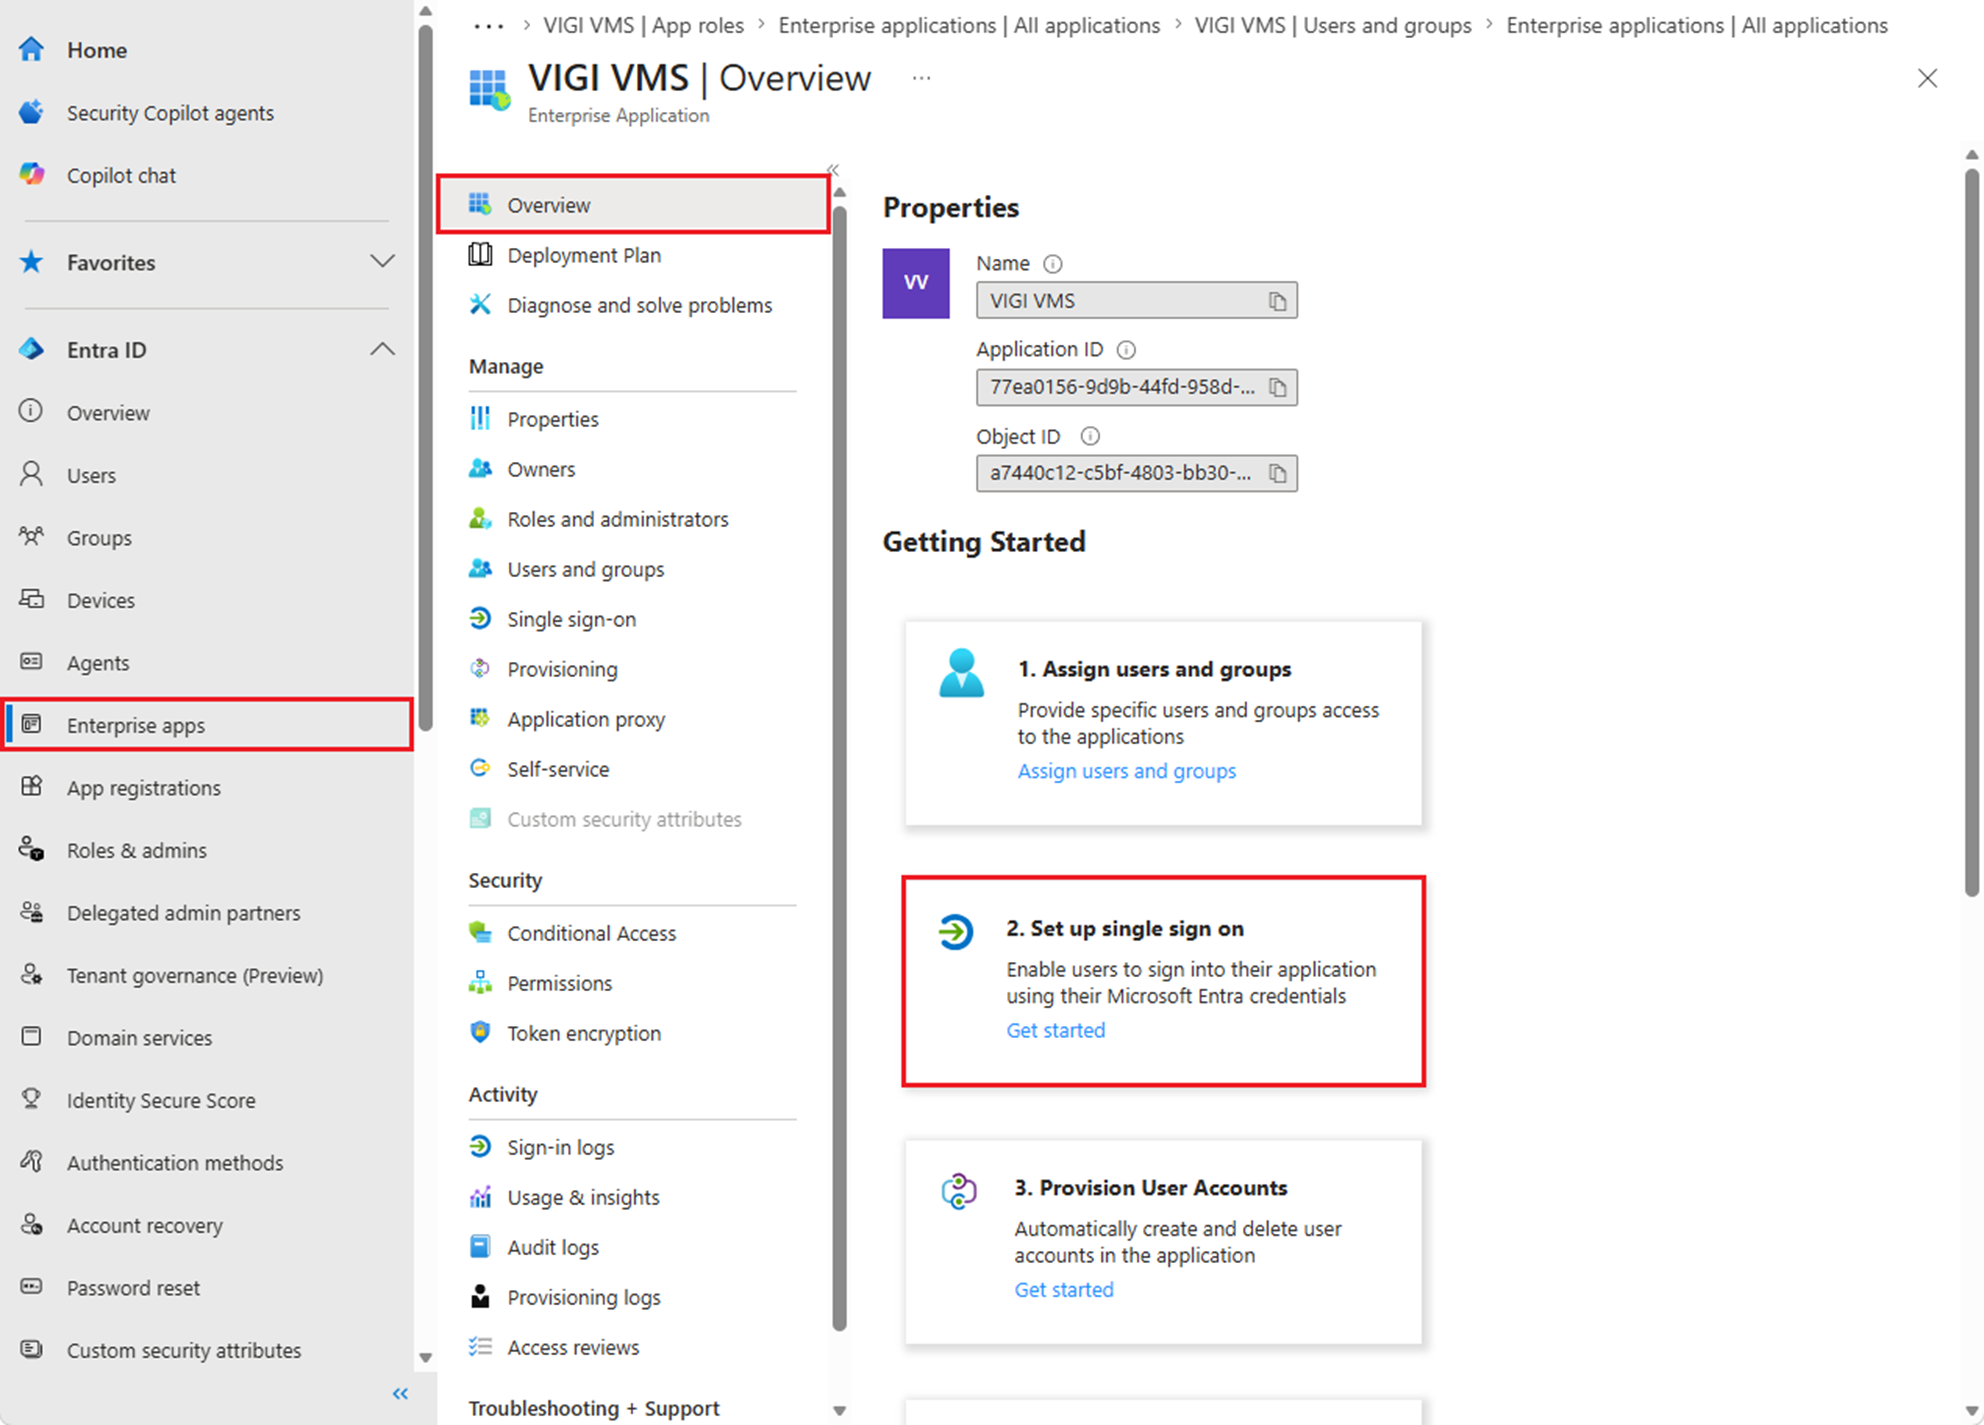
Click Set up single sign on.
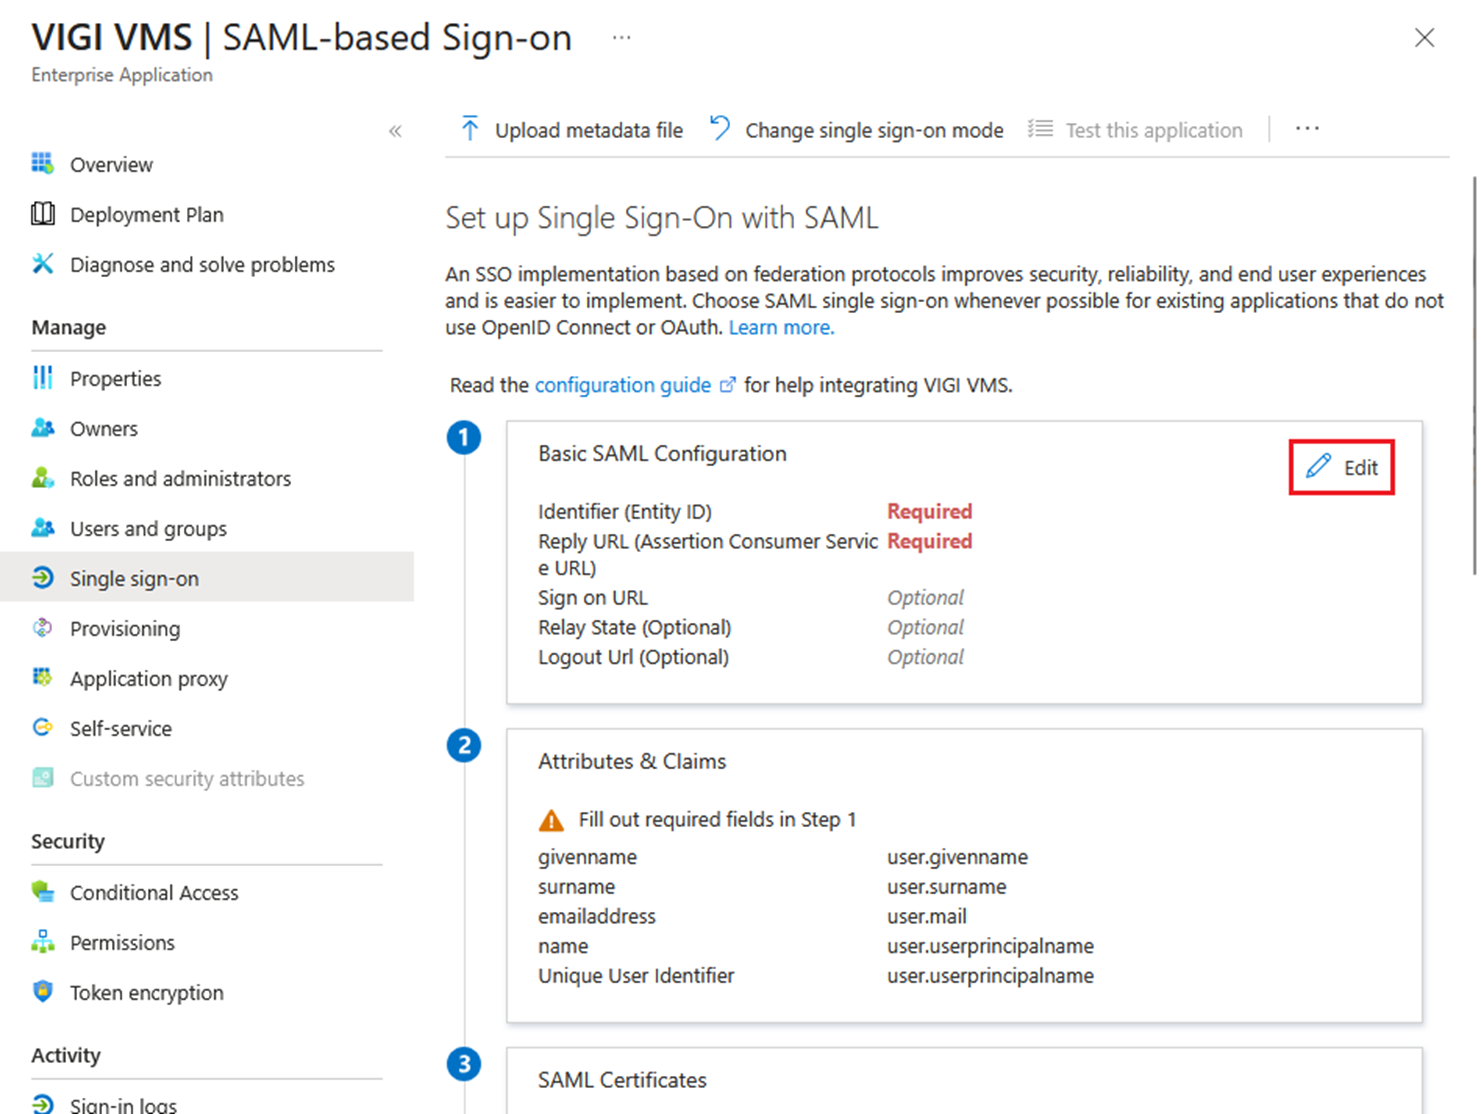
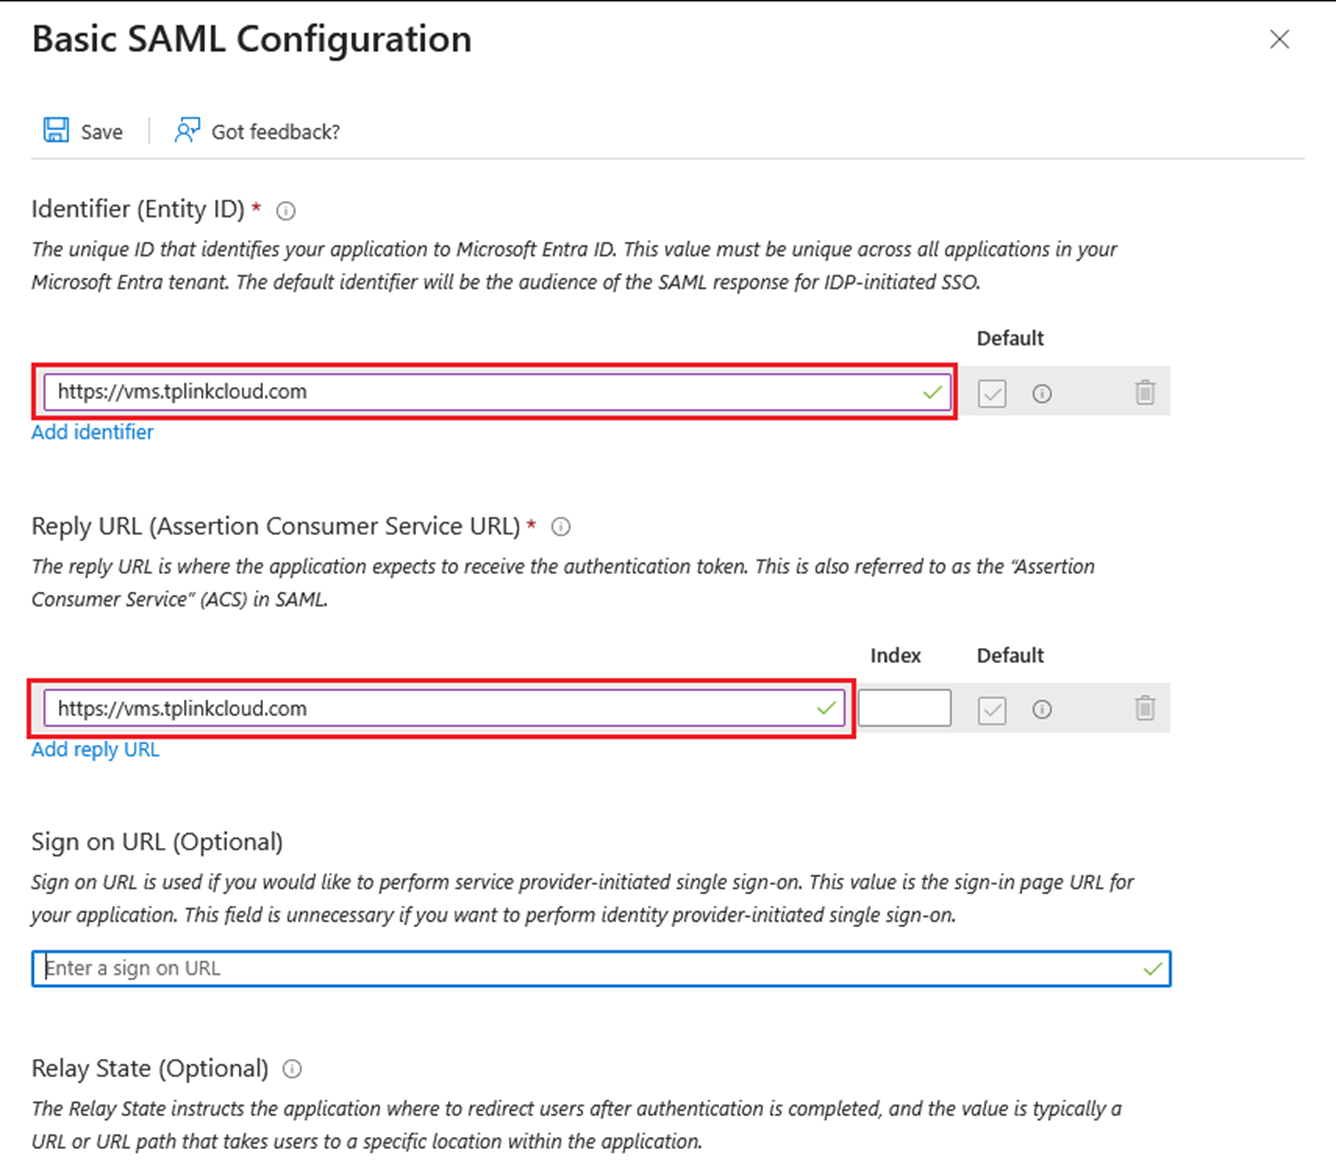
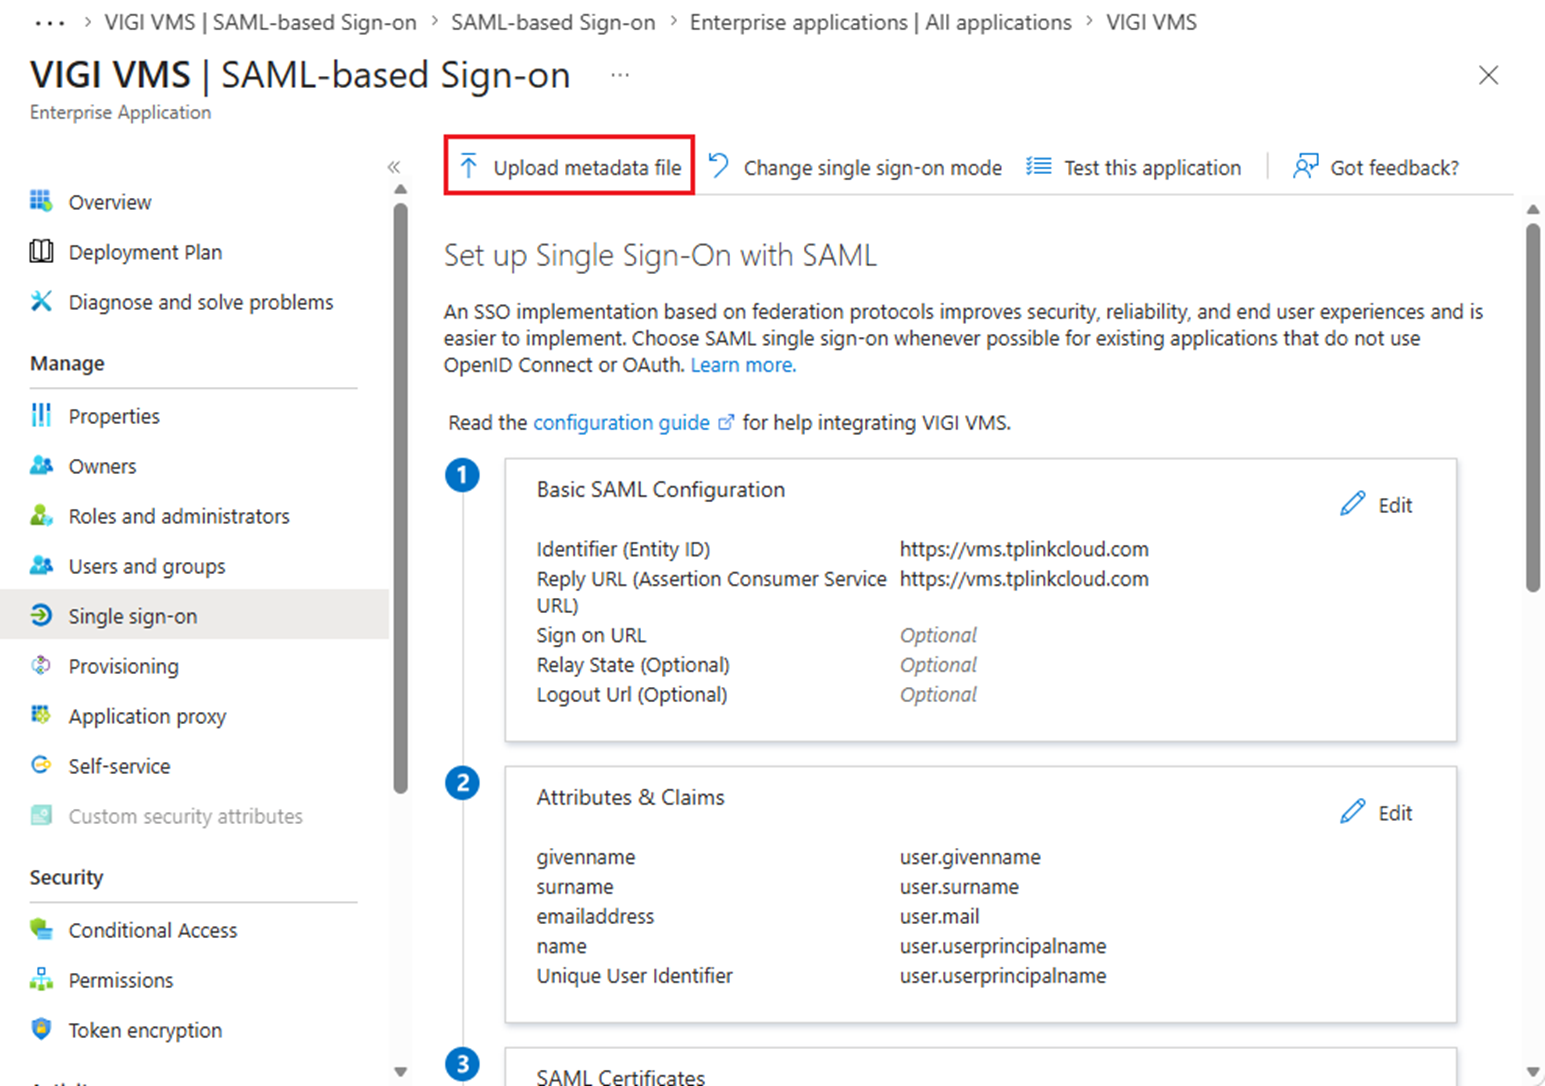
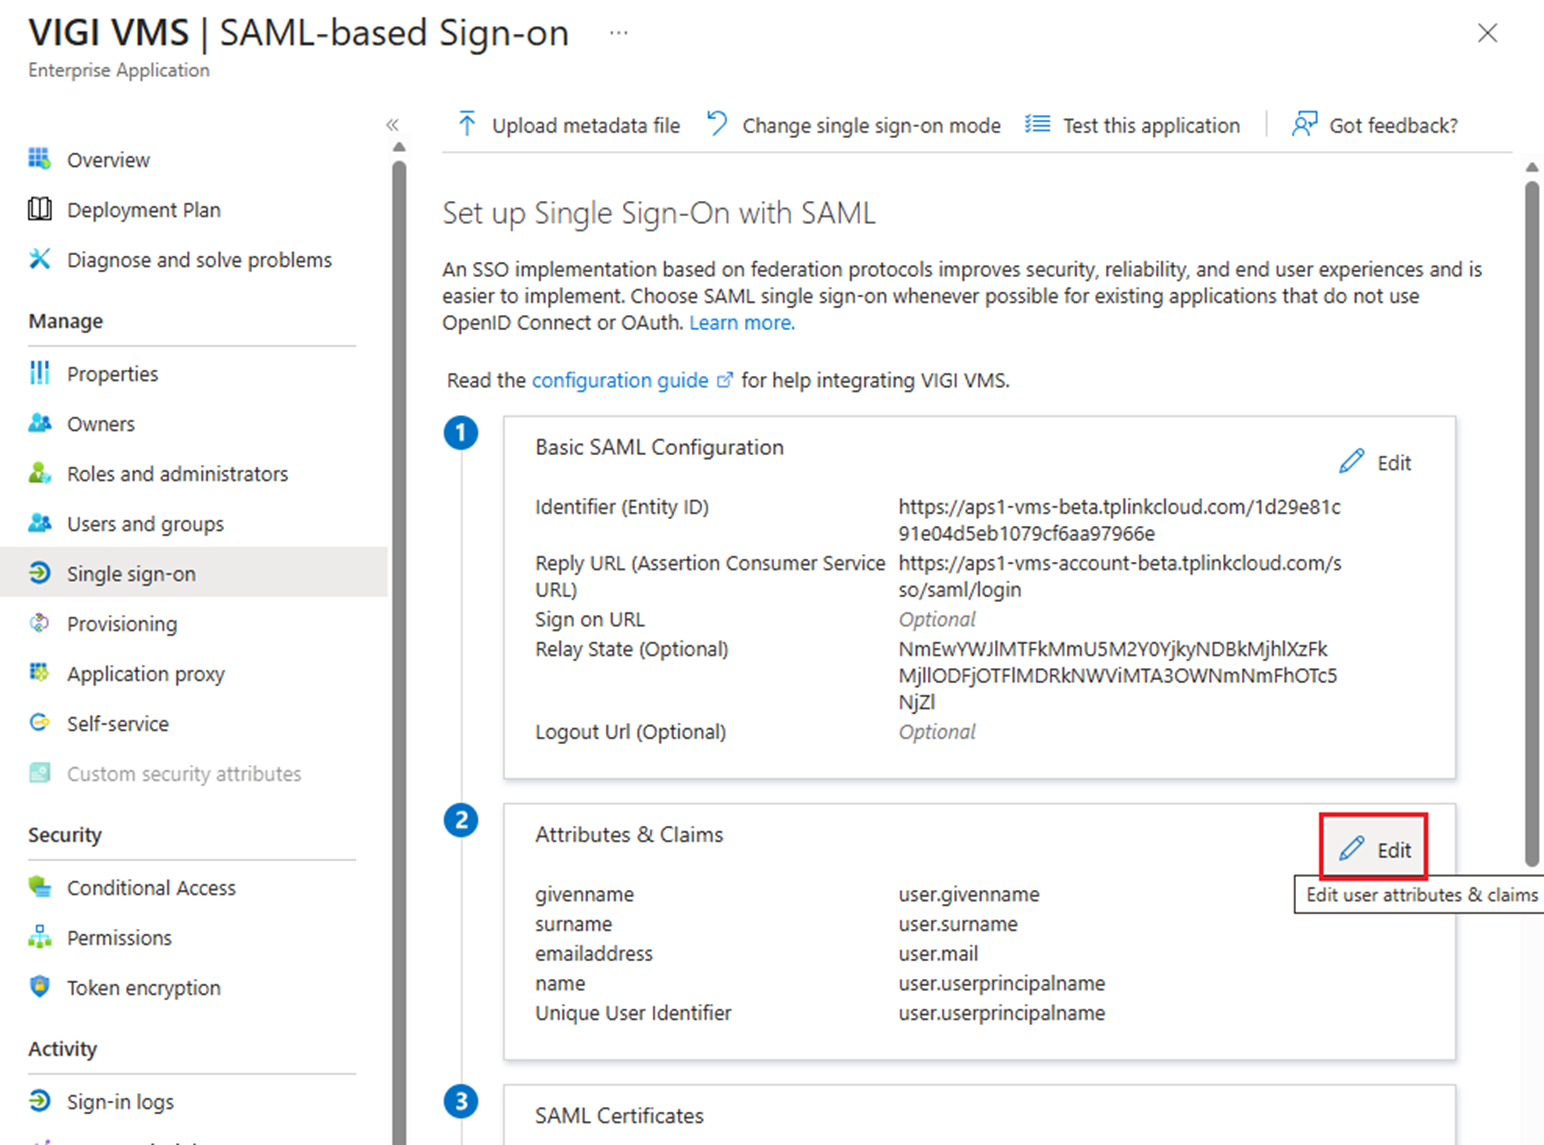
Click Edit in Basic SAML Configuration to configure Identifier and Reply URL.
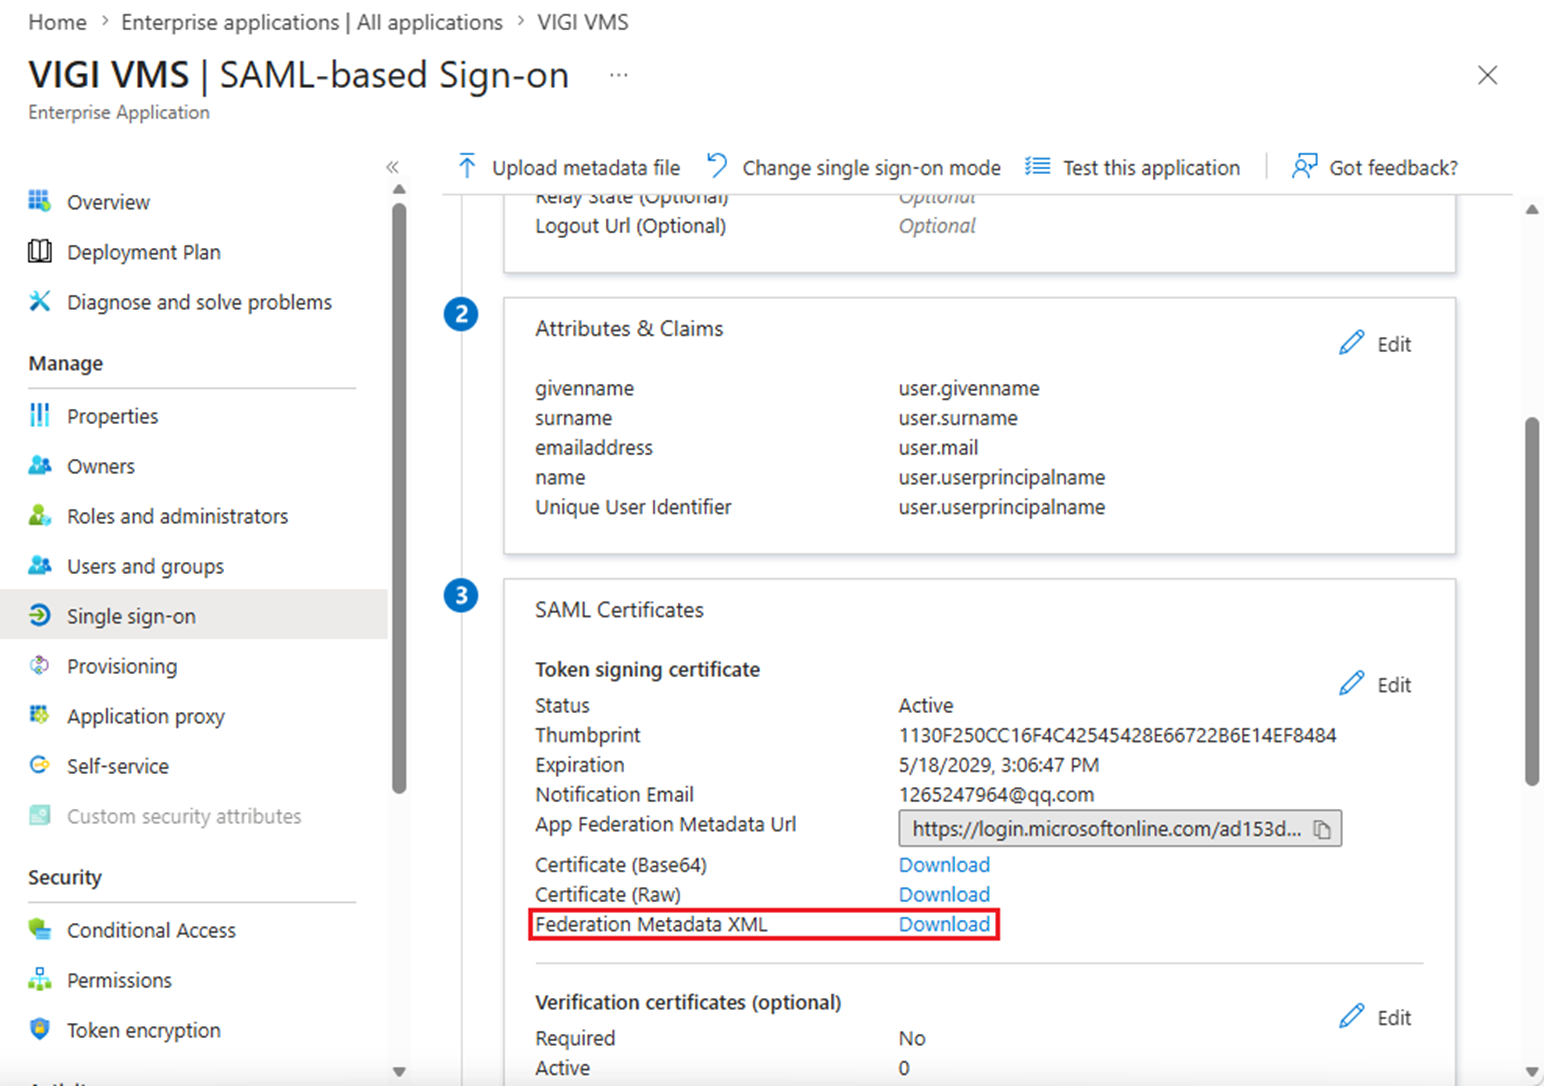
Go to SAML Certificate > Federation Metadata XML and click Download to download the IdP metadata file.
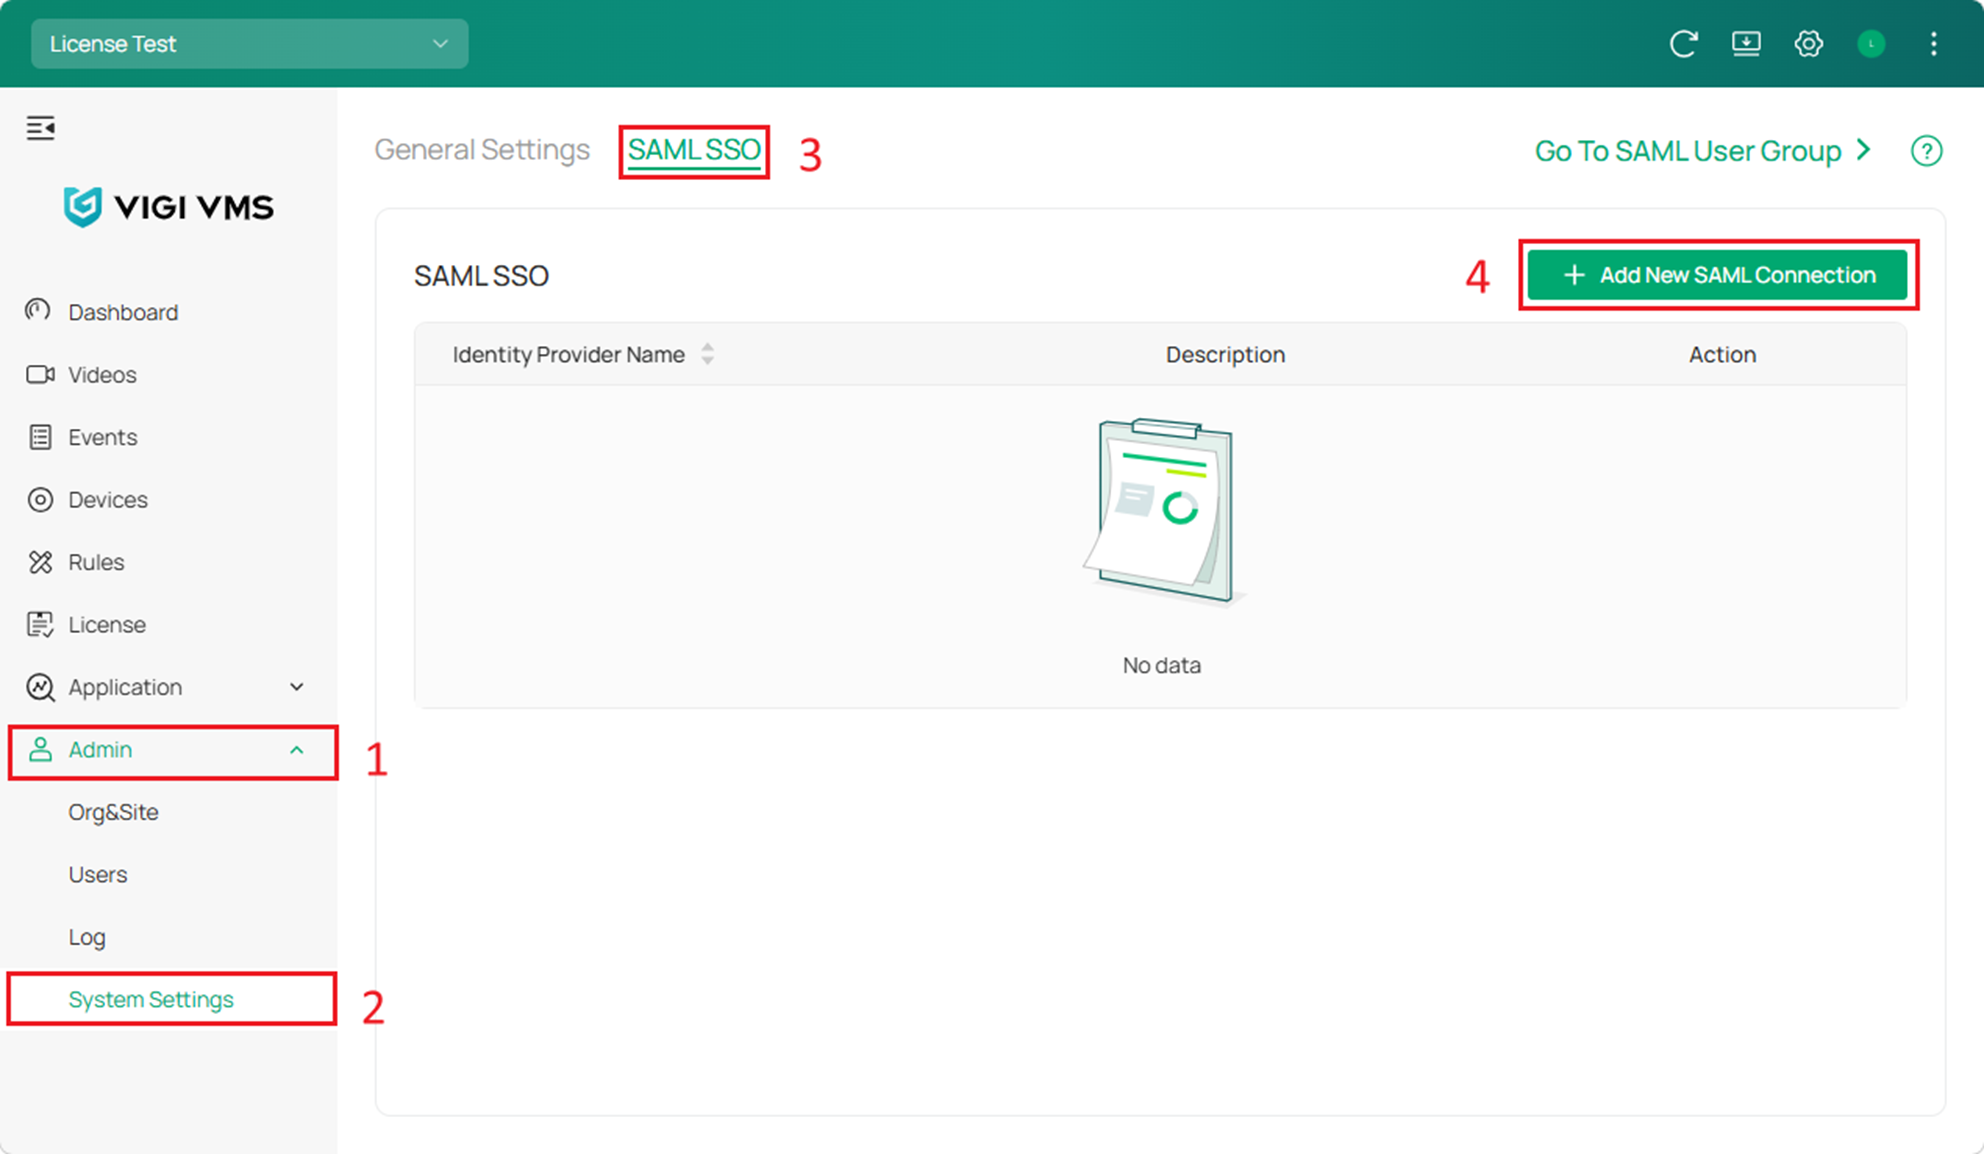
Step 3. Create a new SAML connection and a new SAML user group on the VIGI VMS.
Go to System Settings > SAML SSO, then click Add New SAML Connection.
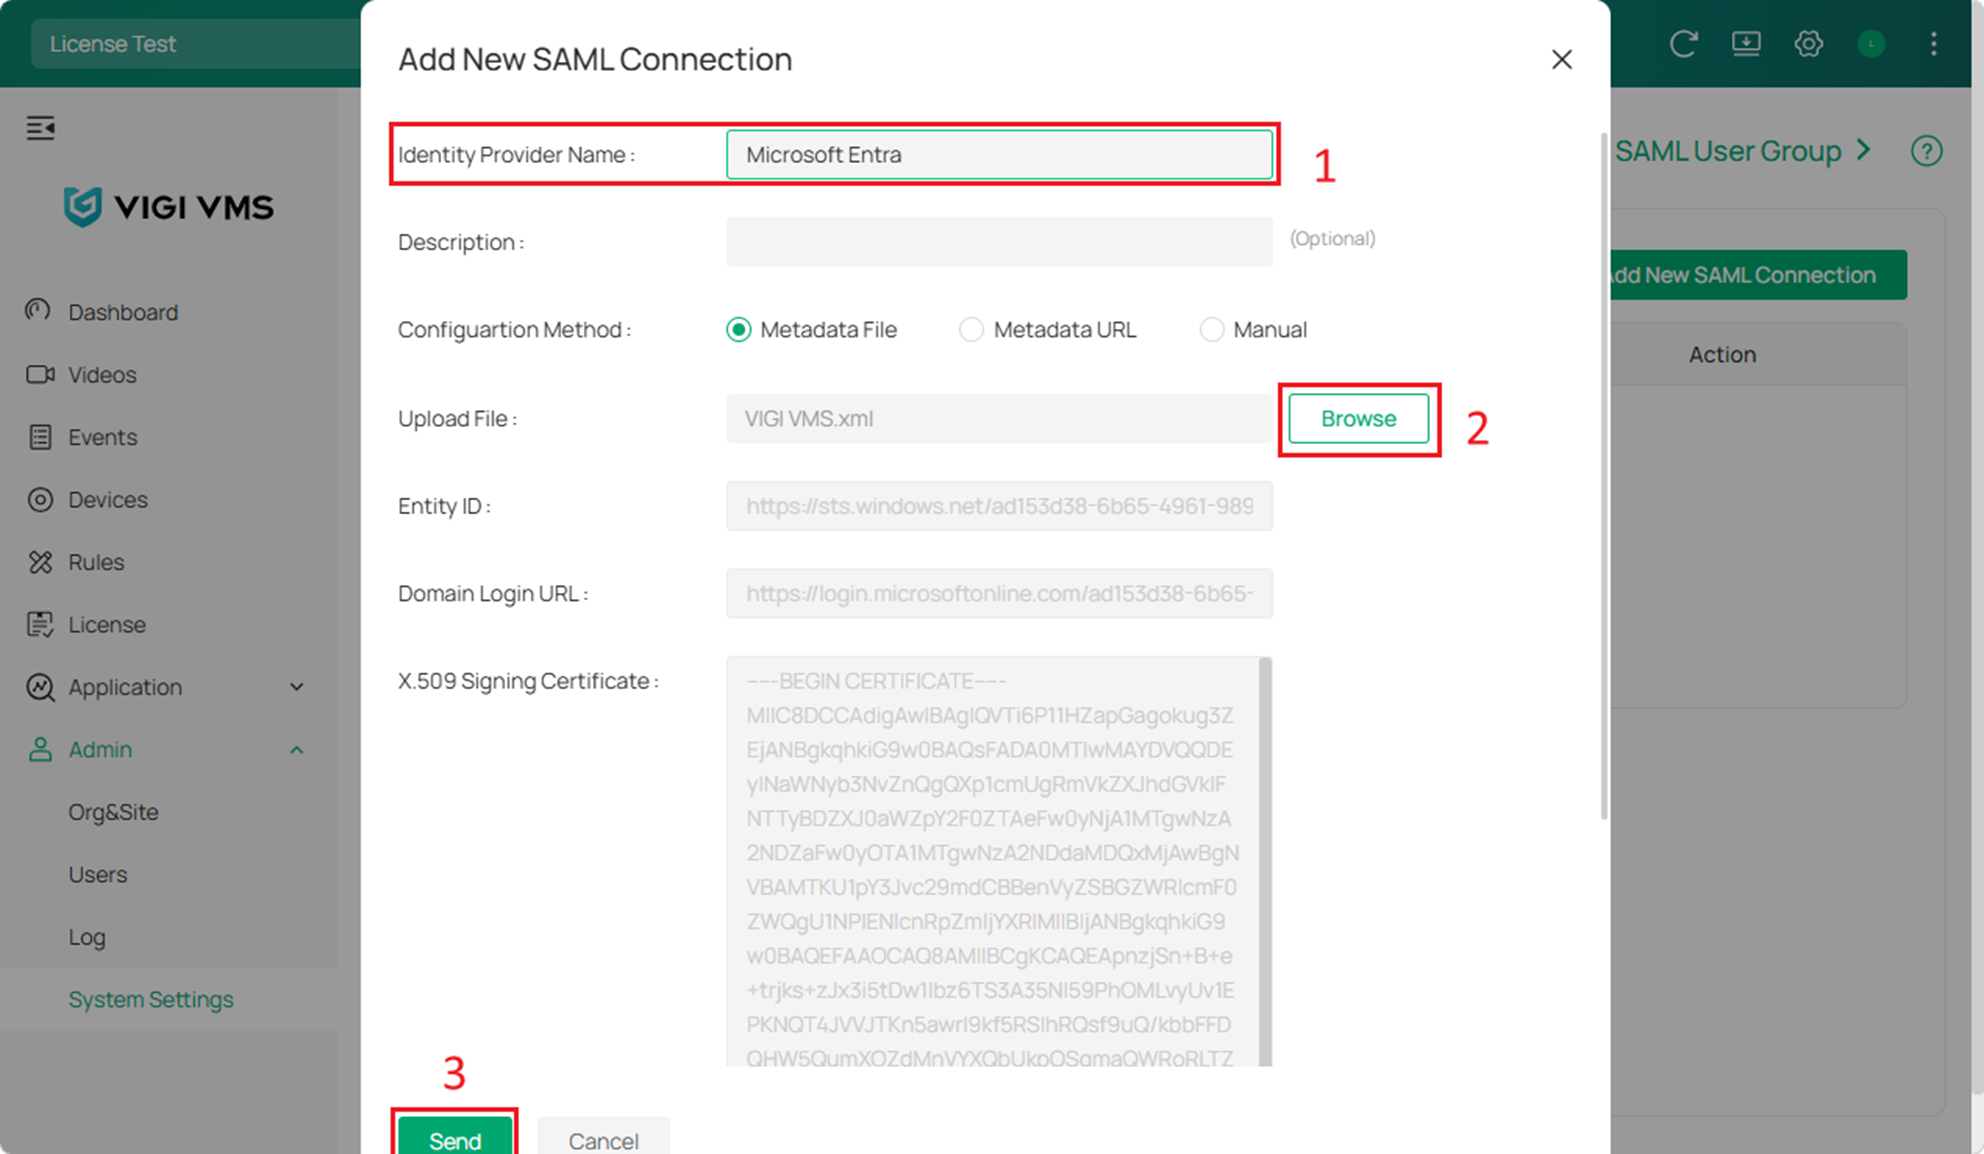
Input an Identity Provider Name, upload the Metadata.xml file we just downloaded, and click Send.
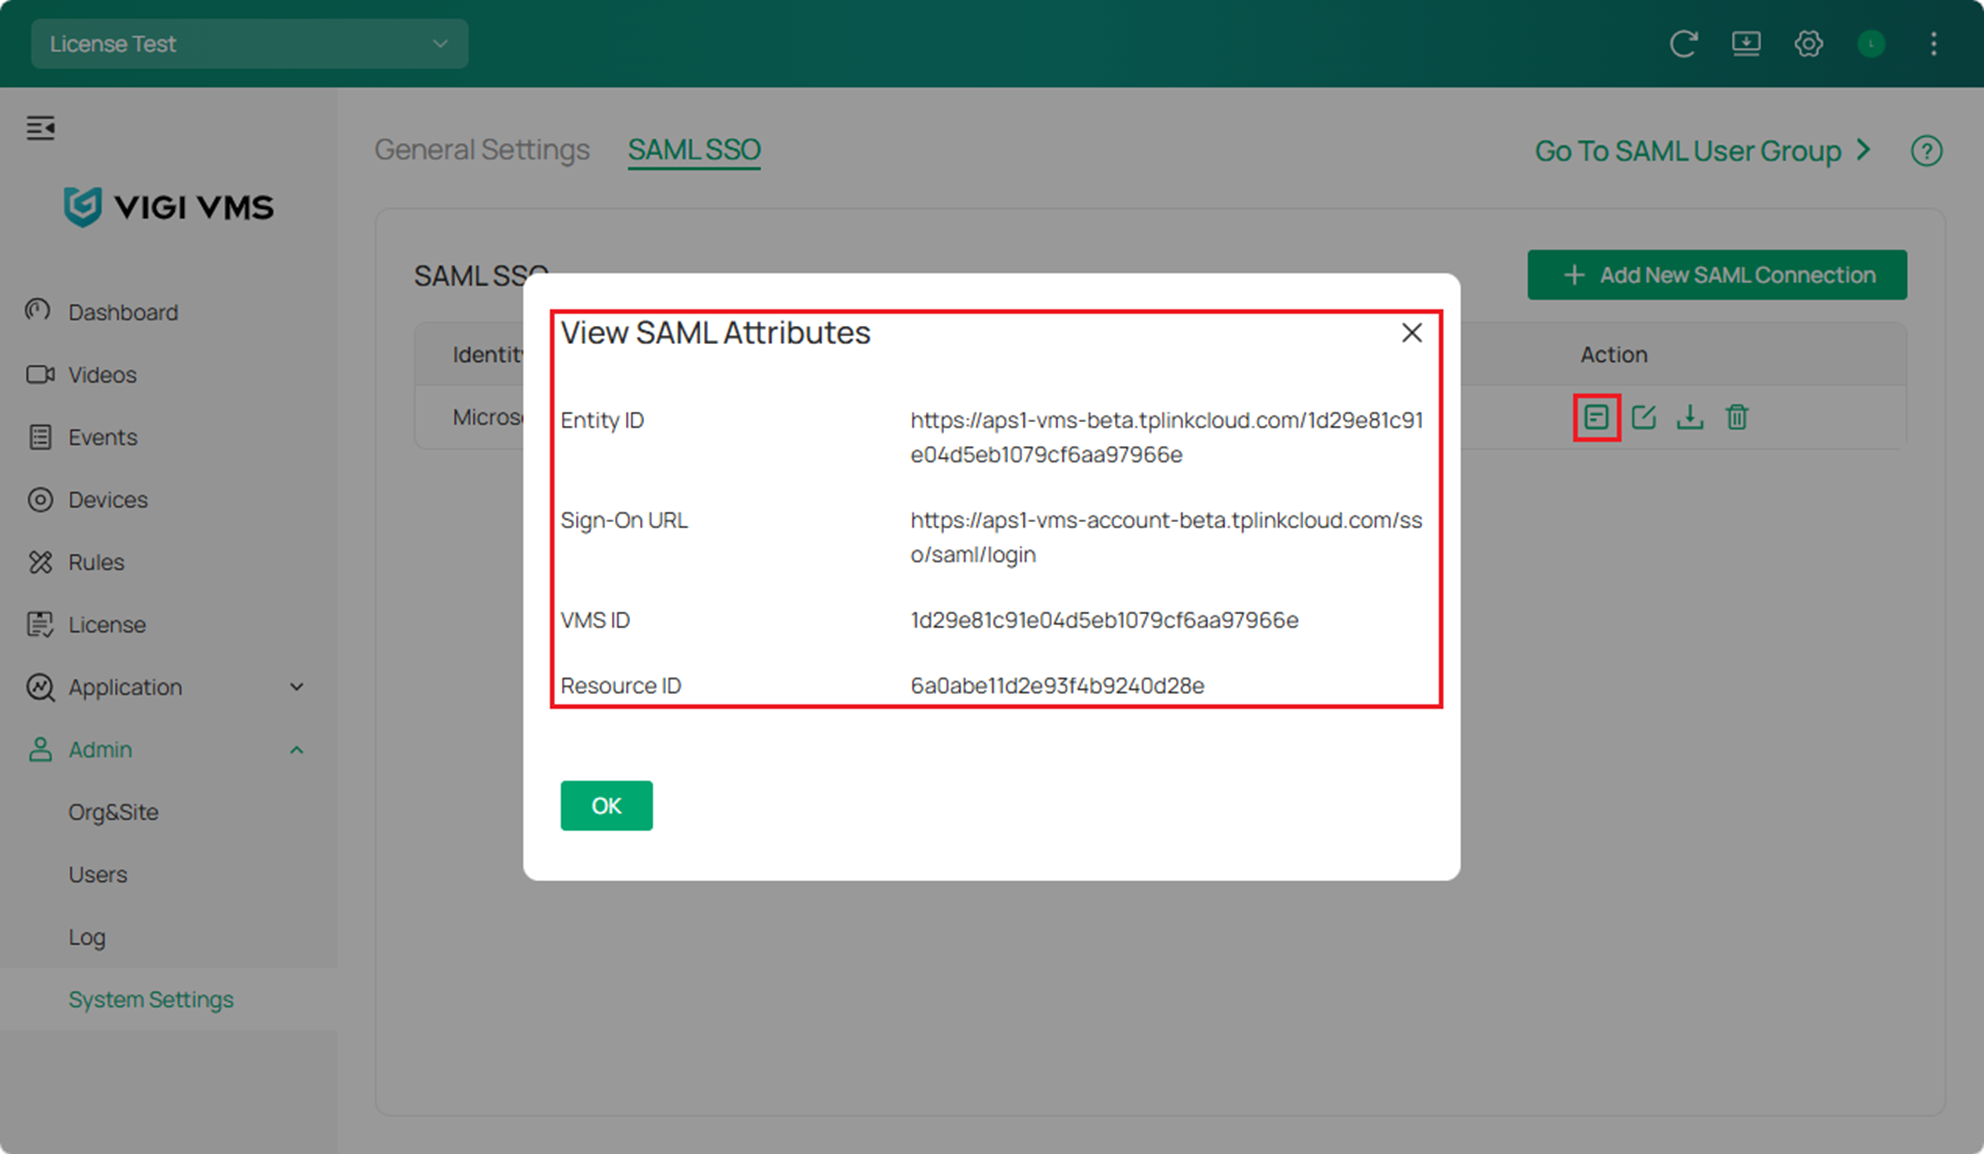
Check the Details of the entry we just created. Here we can see the Entity ID, Sign-On URL, VMS ID, and Resource ID.
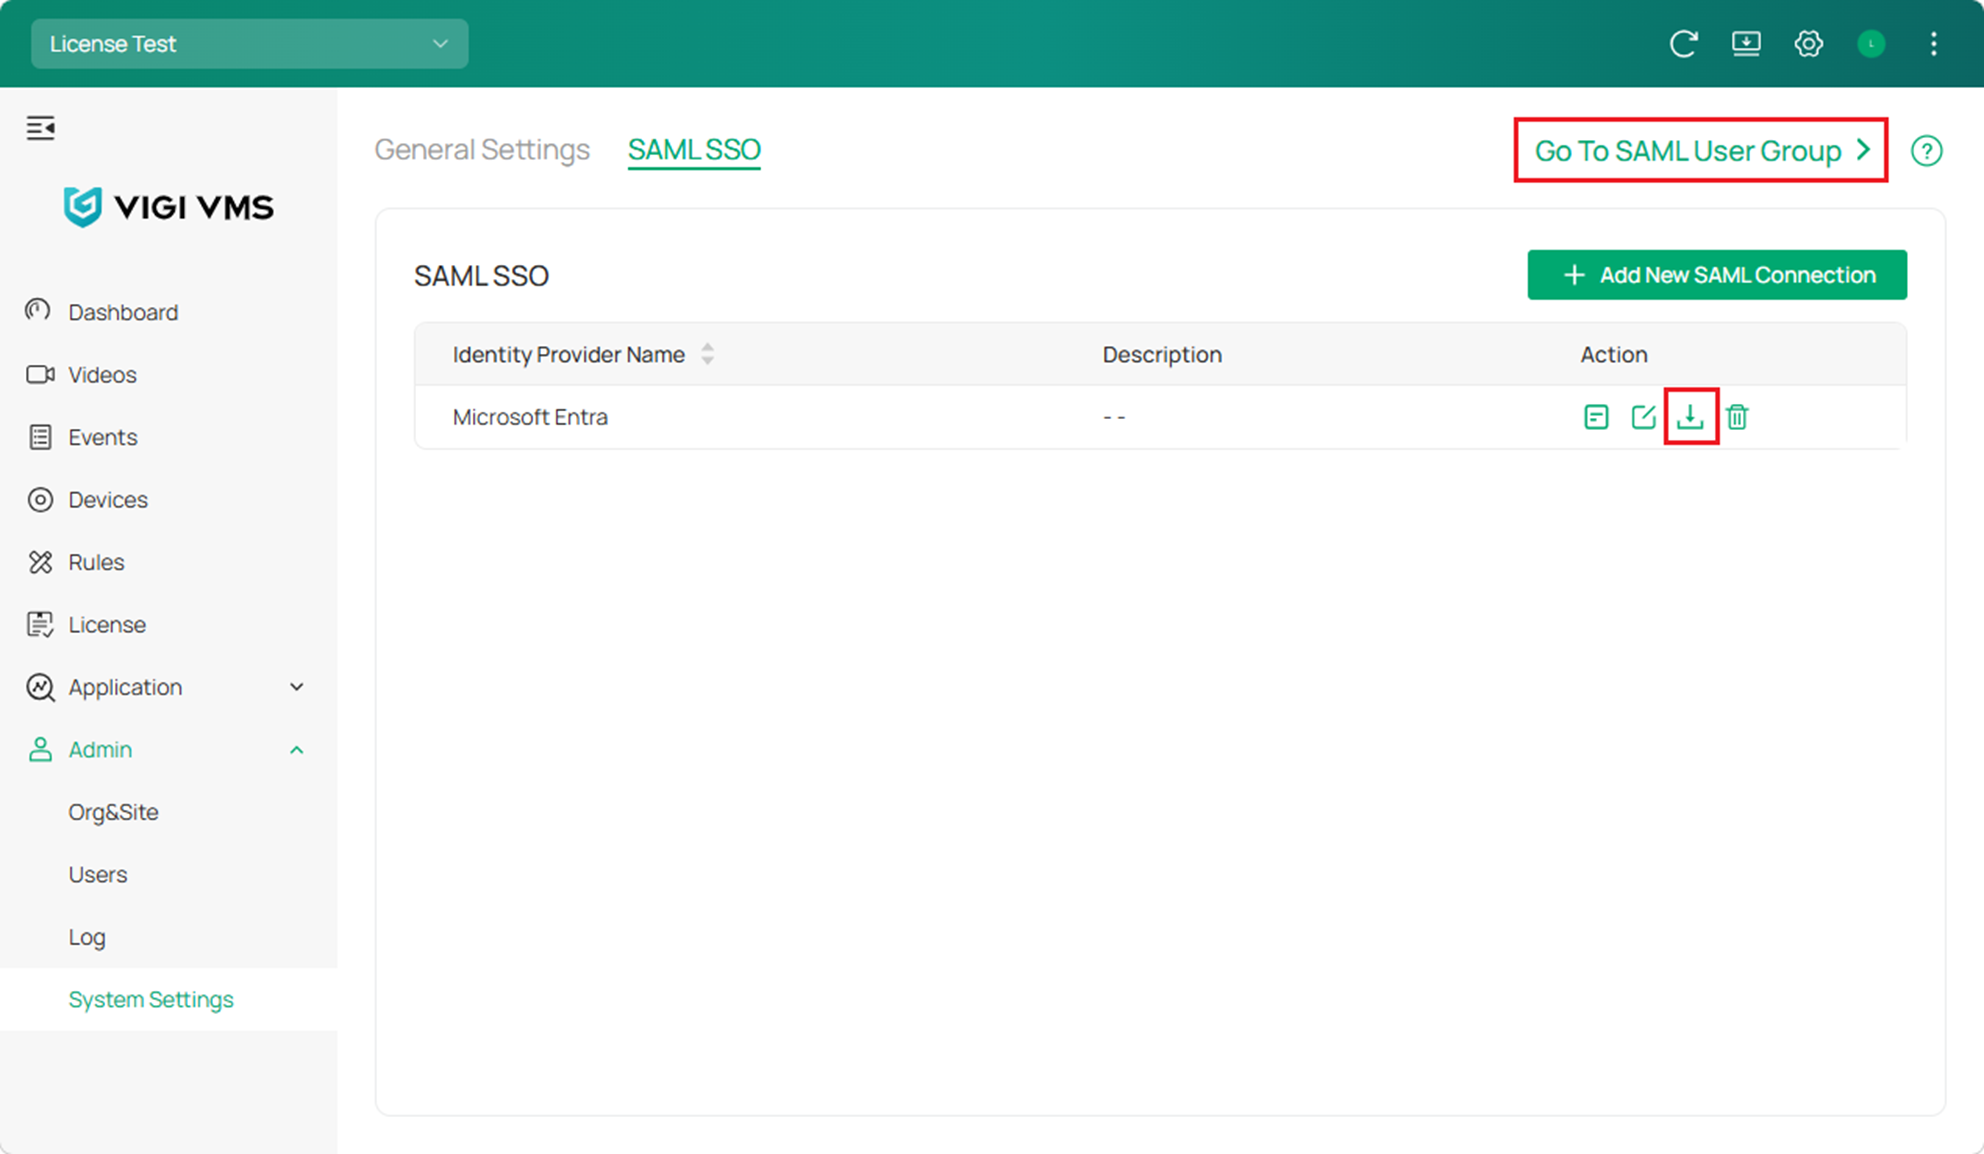
Click the download button to get the metadata.xml file and then click Go To SAML User Group.
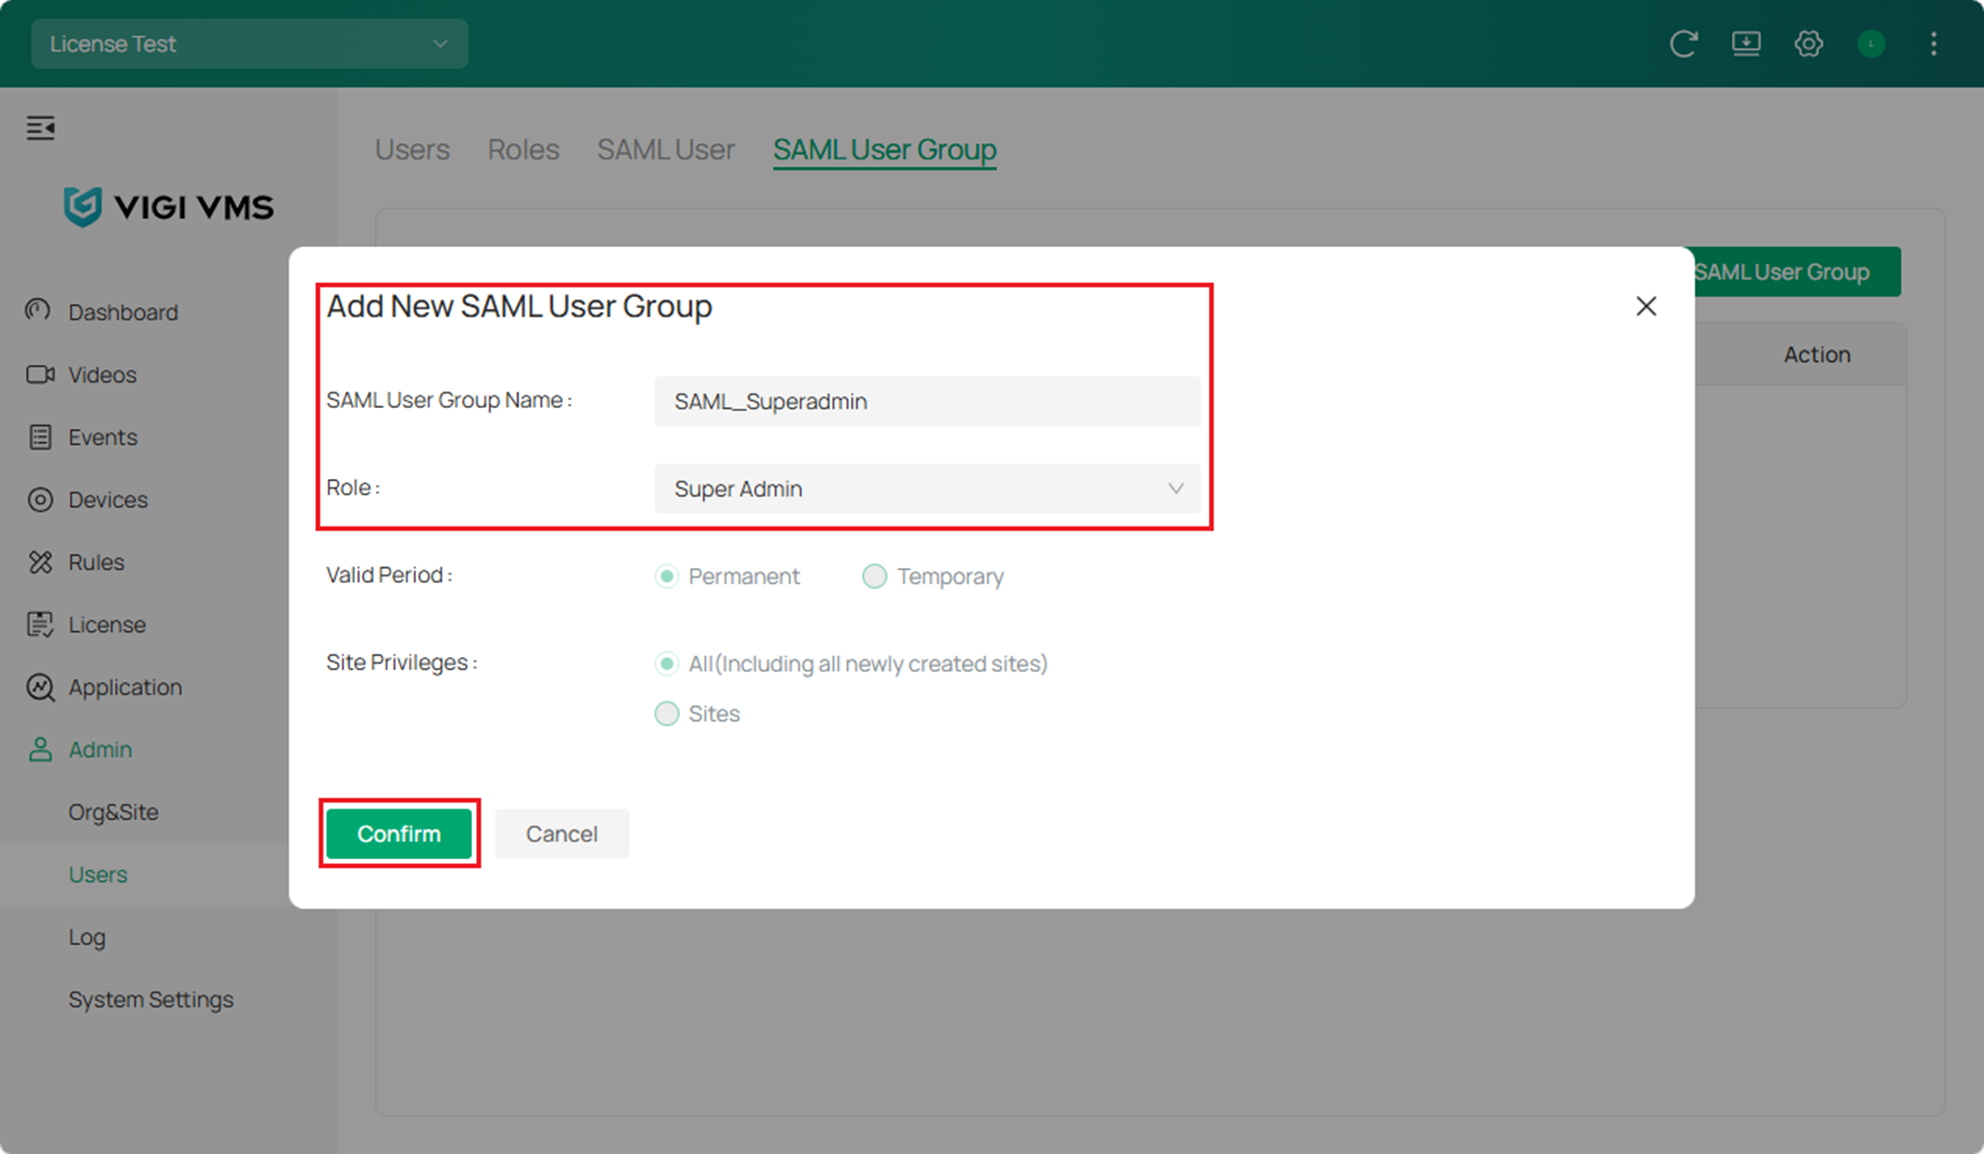
Click Add New SAML User Group.
Step 4. Continue configuring single sign-on on the Microsoft Entra
On Entra's homepage, click Enterprise apps. Click the application we created before.
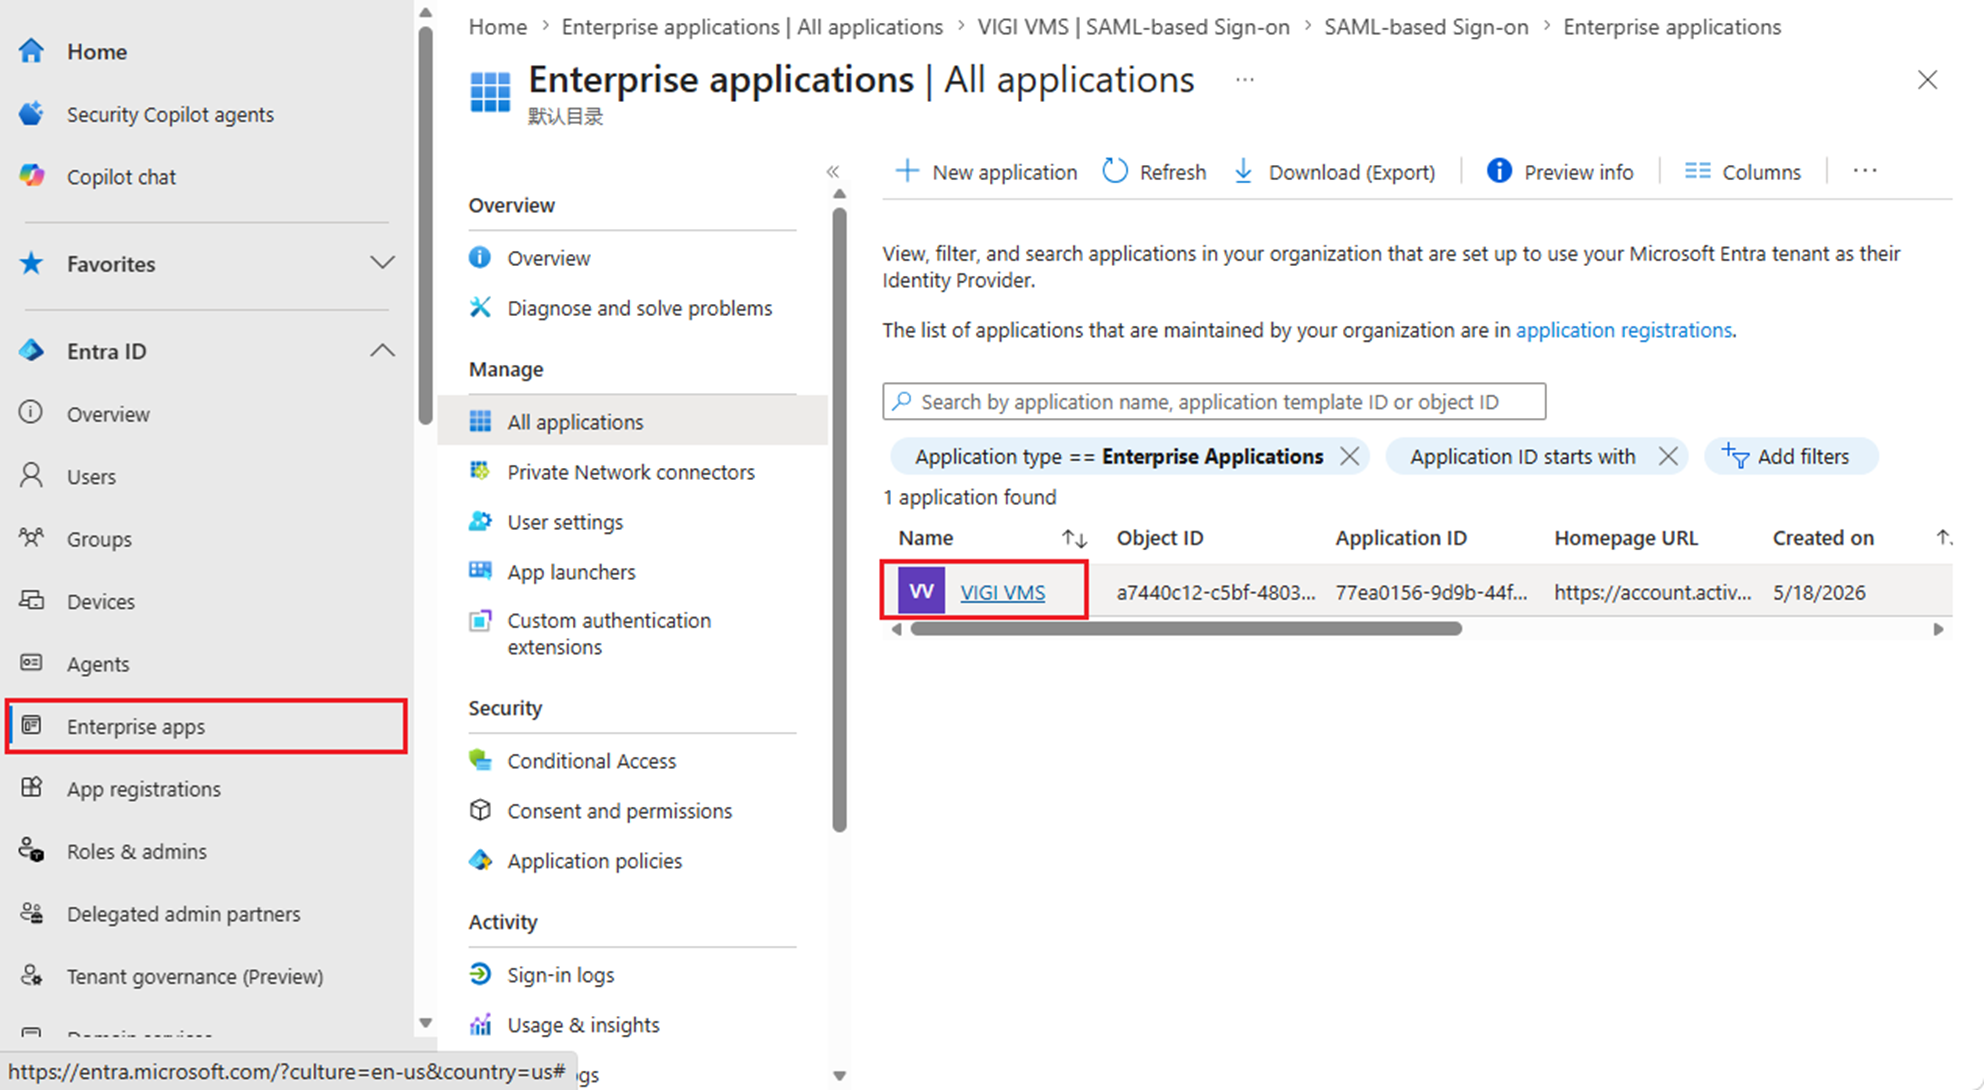
Click Get started button of Set up single sign on.
Click Upload metadata file to upload the metadata.xml file we got in Step 3.
Some fields will be automatically filled in based on the metadata, for other fields, please refer to the prompts in the image for filling in the information.
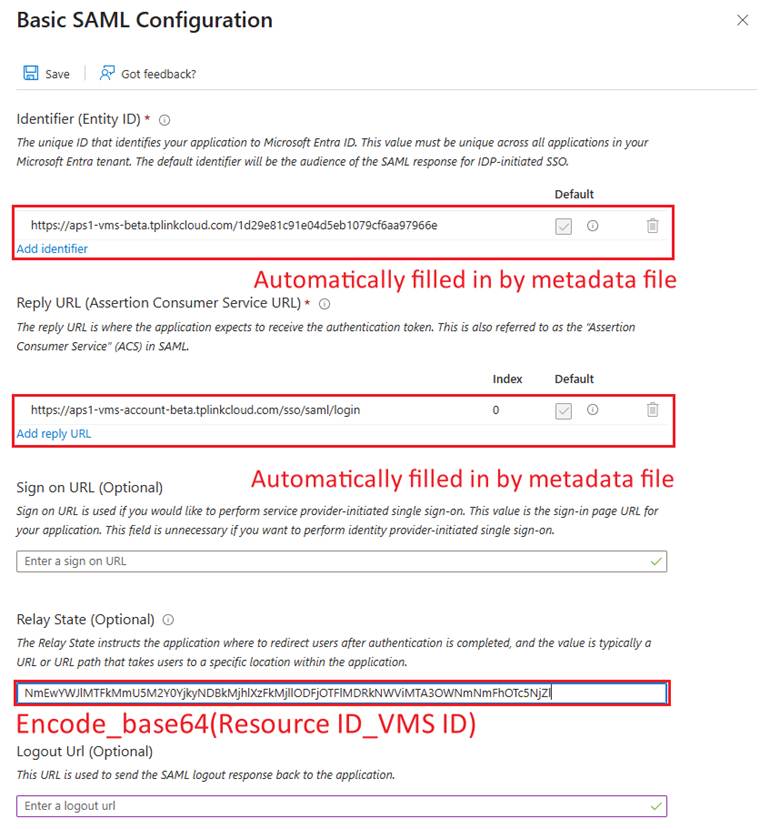
The Relay State can be represented as: Base64(Resource ID_VMS ID). Don't forget the underscores.

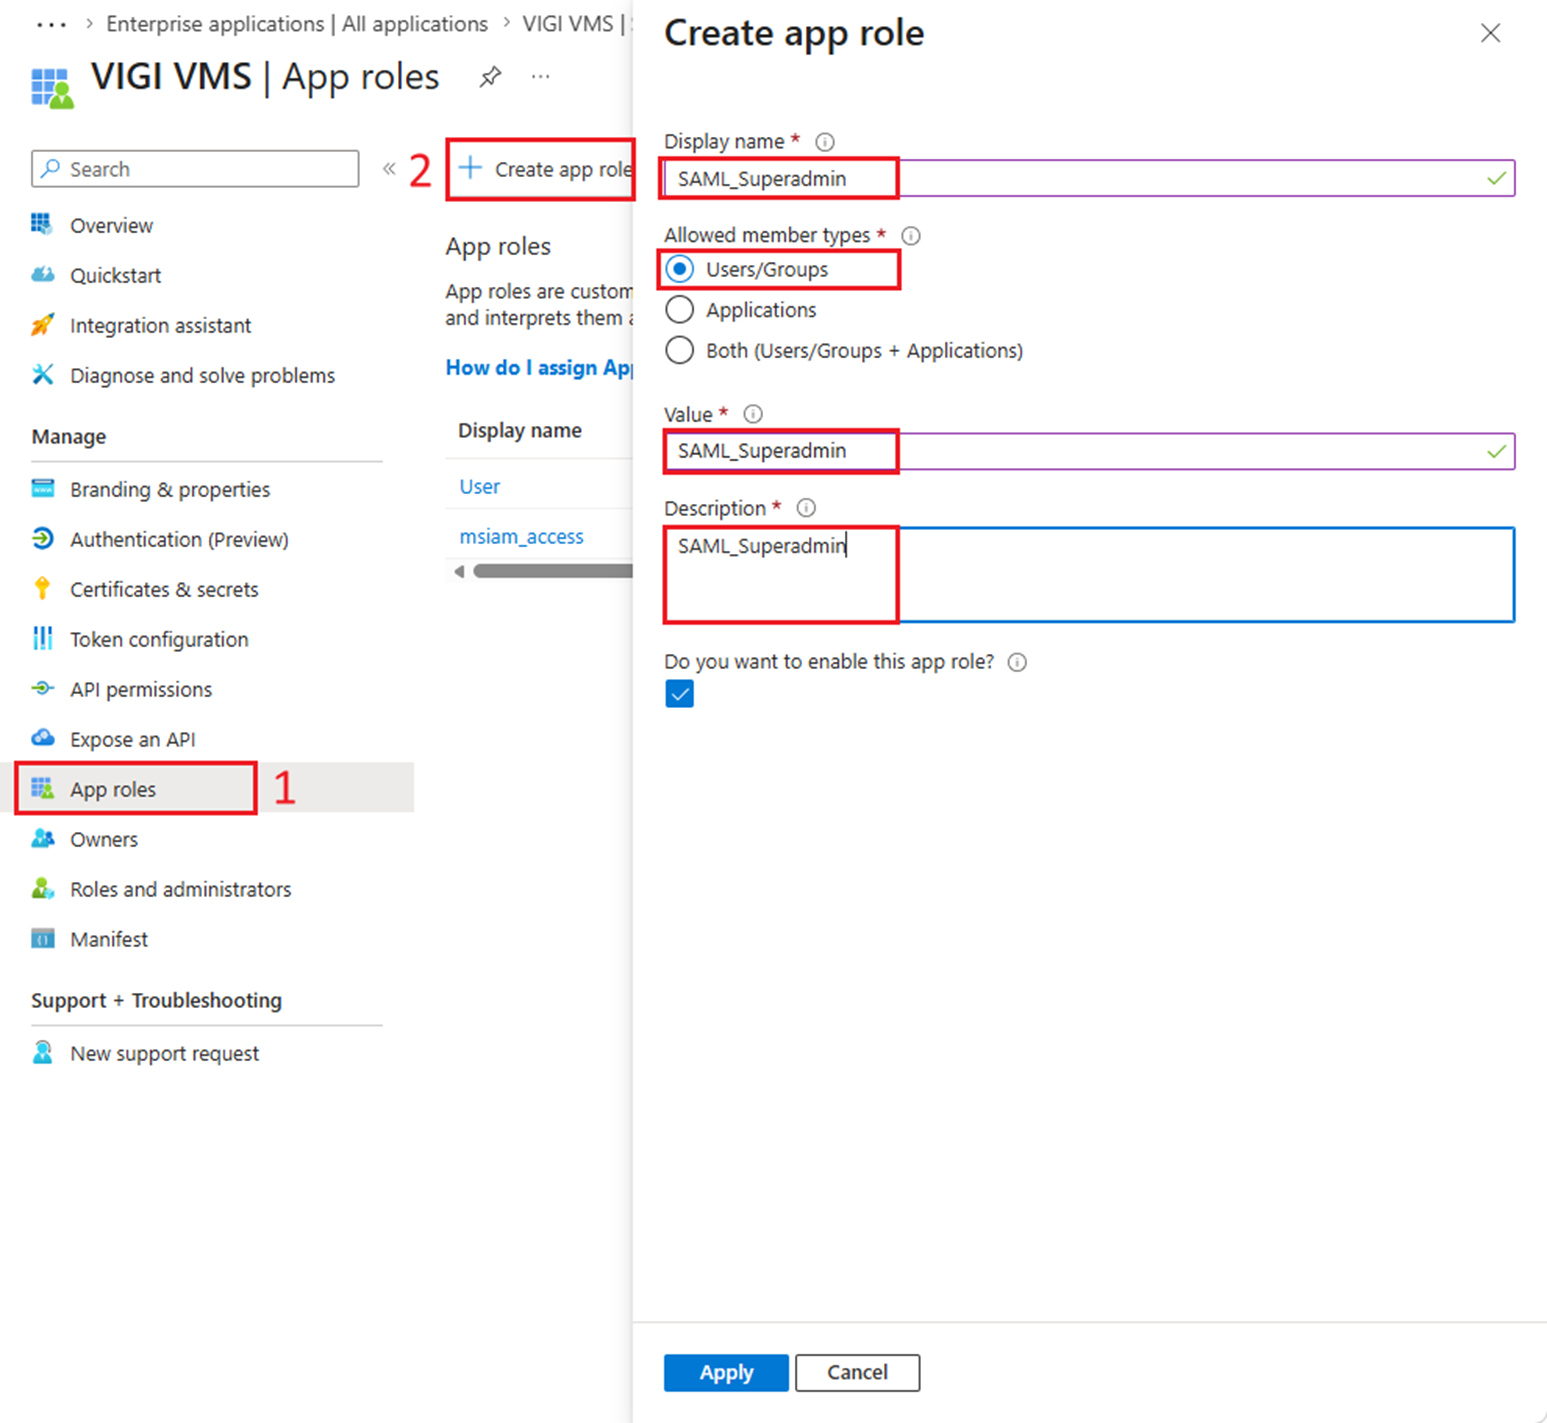
Step 5. Create a new app role.
Go back to App registrations > All applications and click the application we created before to continue configuring.
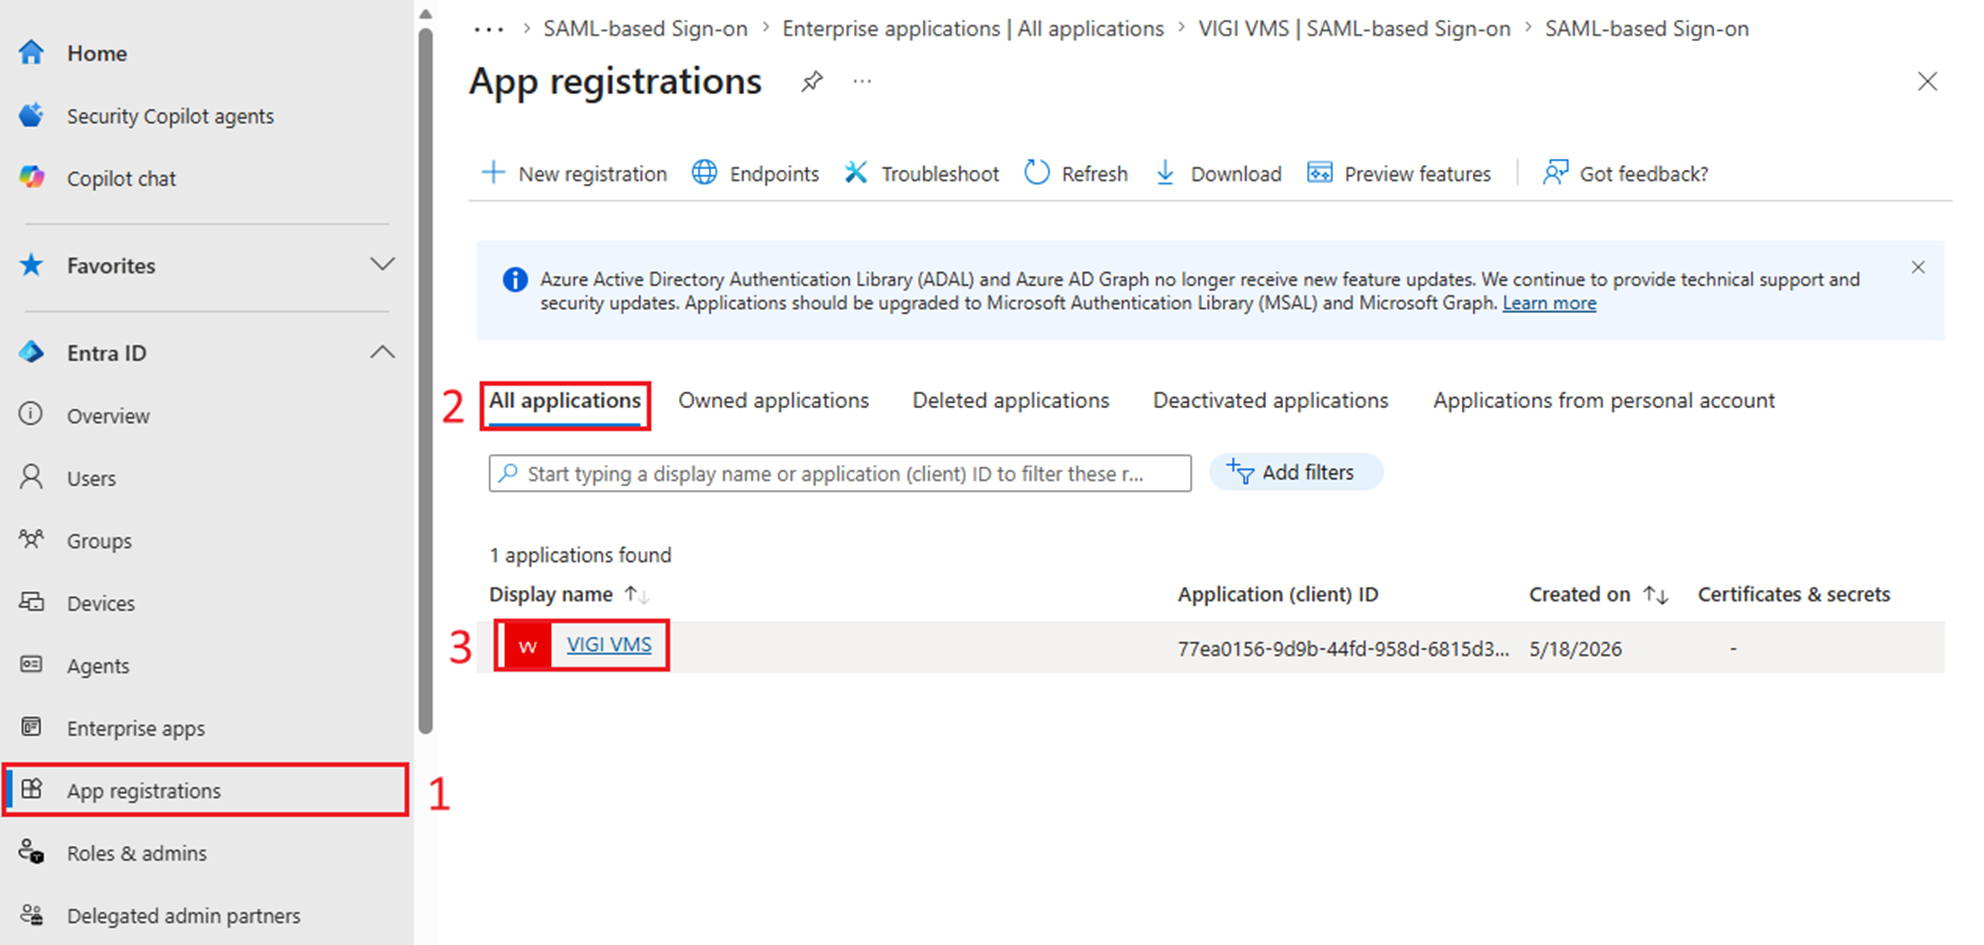
Go to App roles and click Create app role.
Step 6. Assign the role to specific users.
Go back to Enterprise App on Entra's homepage, click the application we created before.
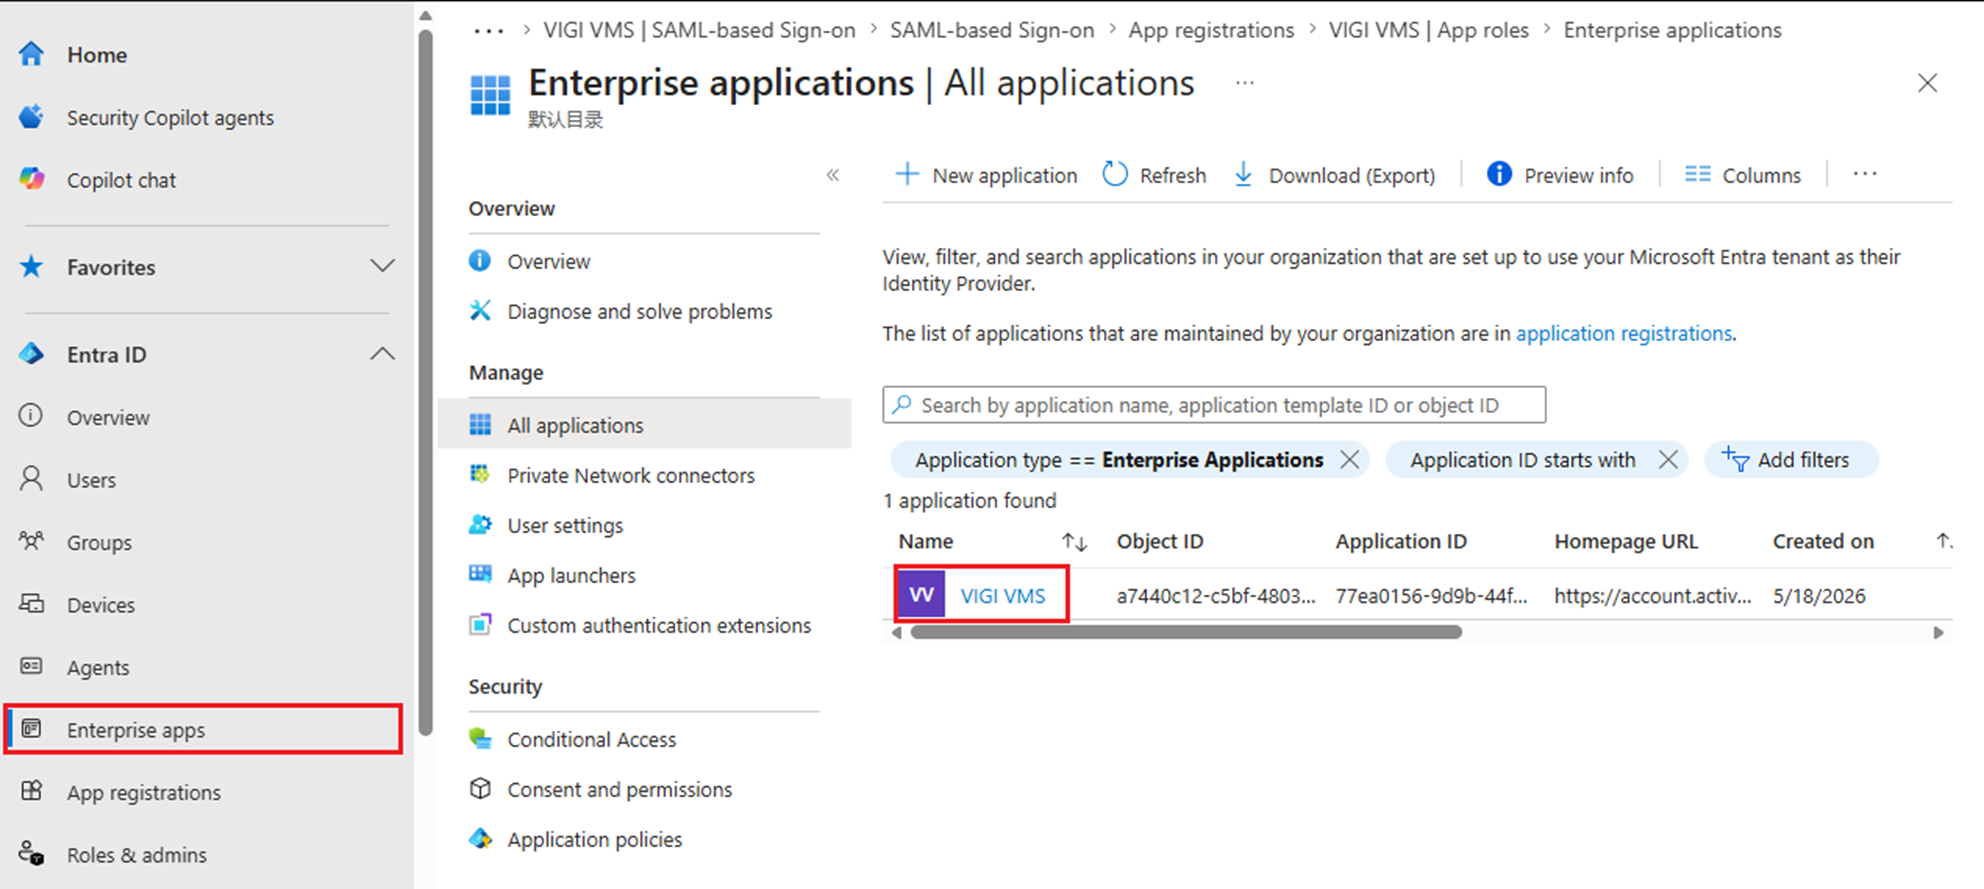
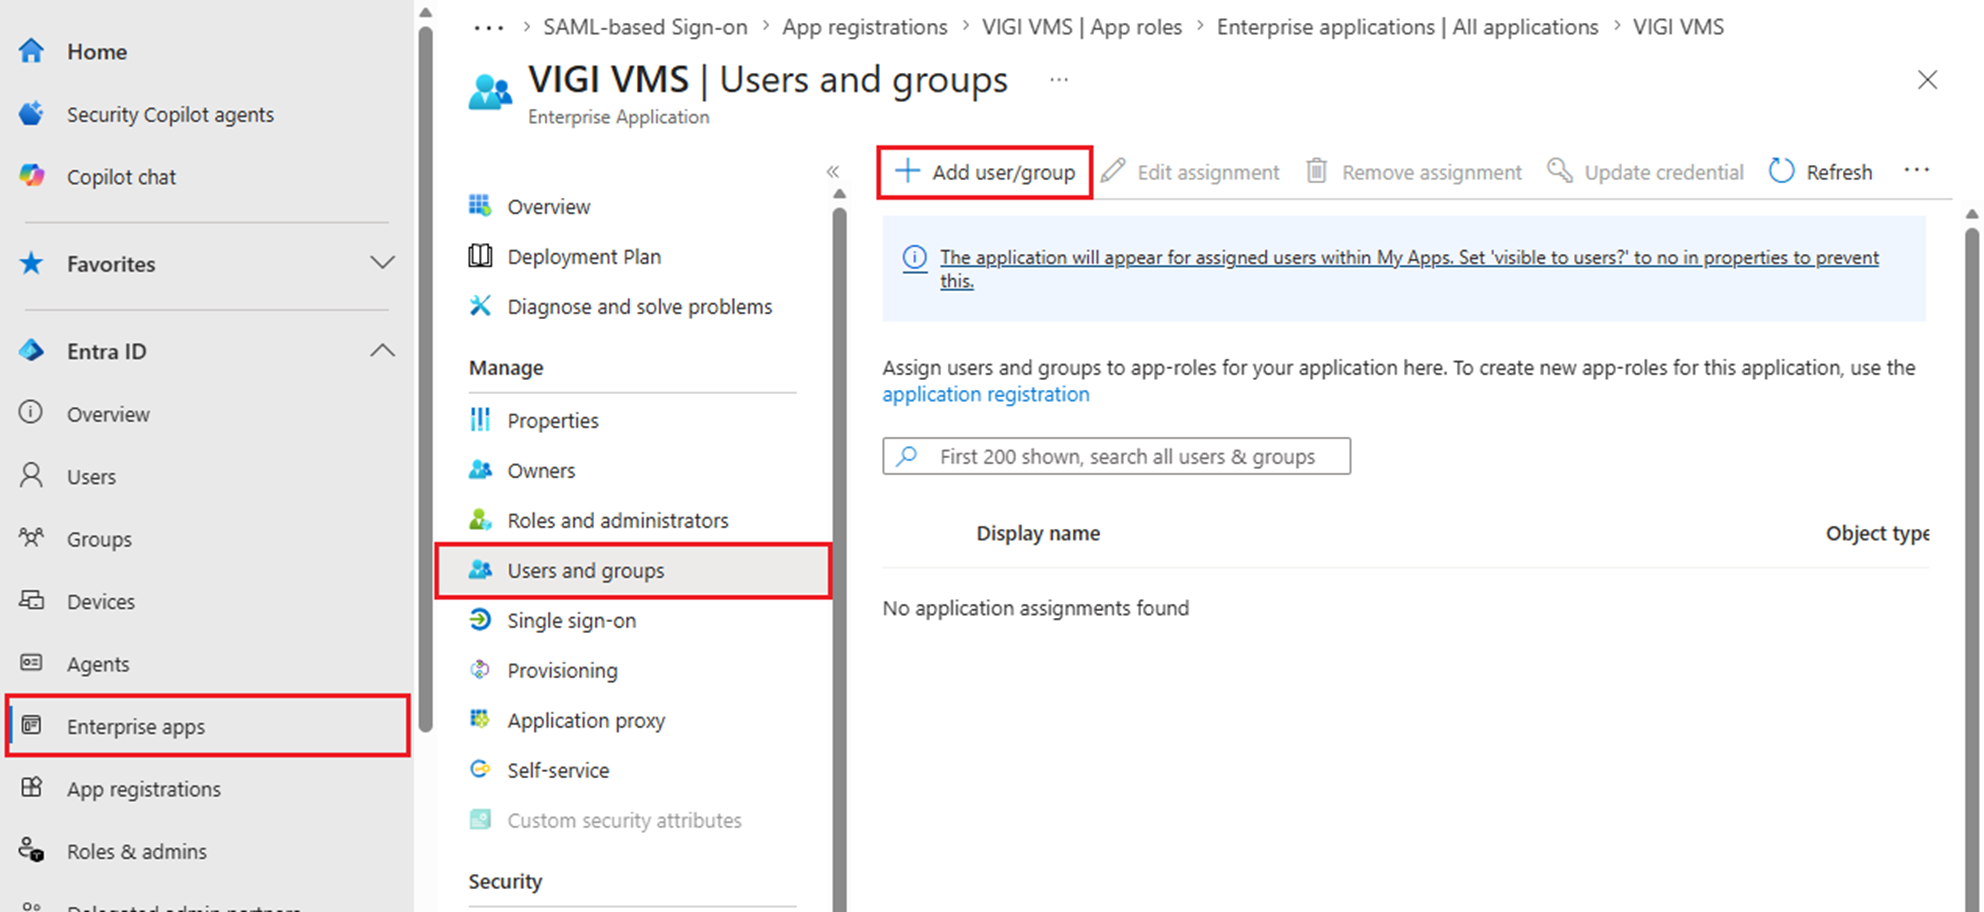
Go to Users and Groups and click Add user/group.
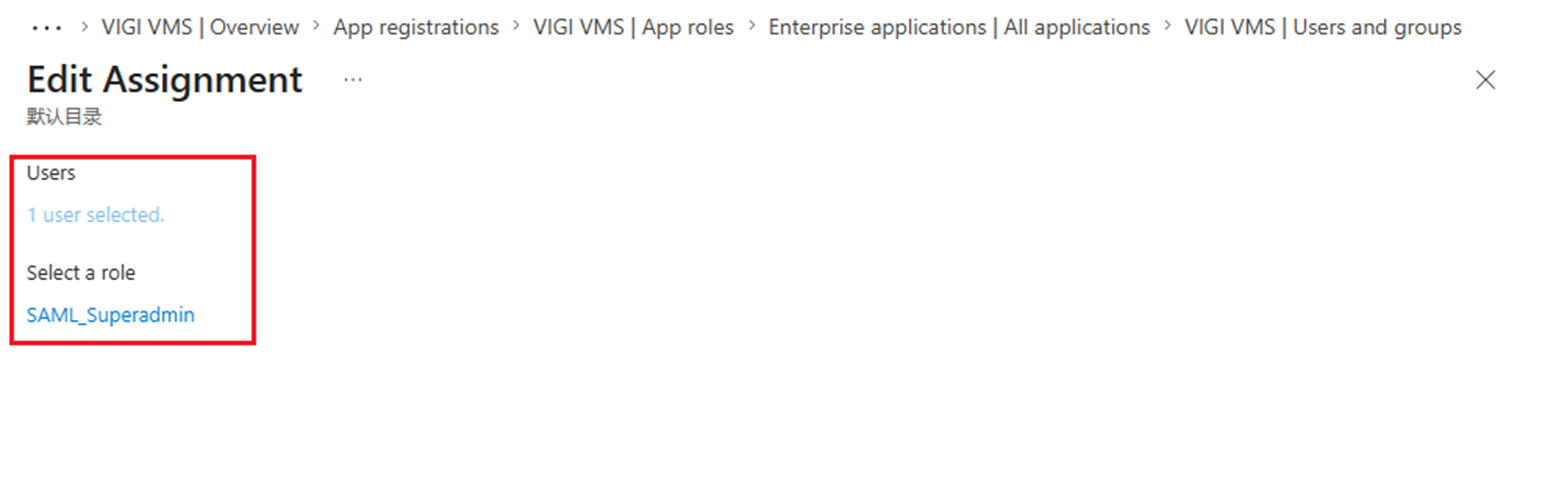
Select the role we created before.
Step 7. Continue configuring single sign-on on Entra.
Go back to Enterprise App on Entra's homepage, click the application we created before. Then go to Set up single sign on.
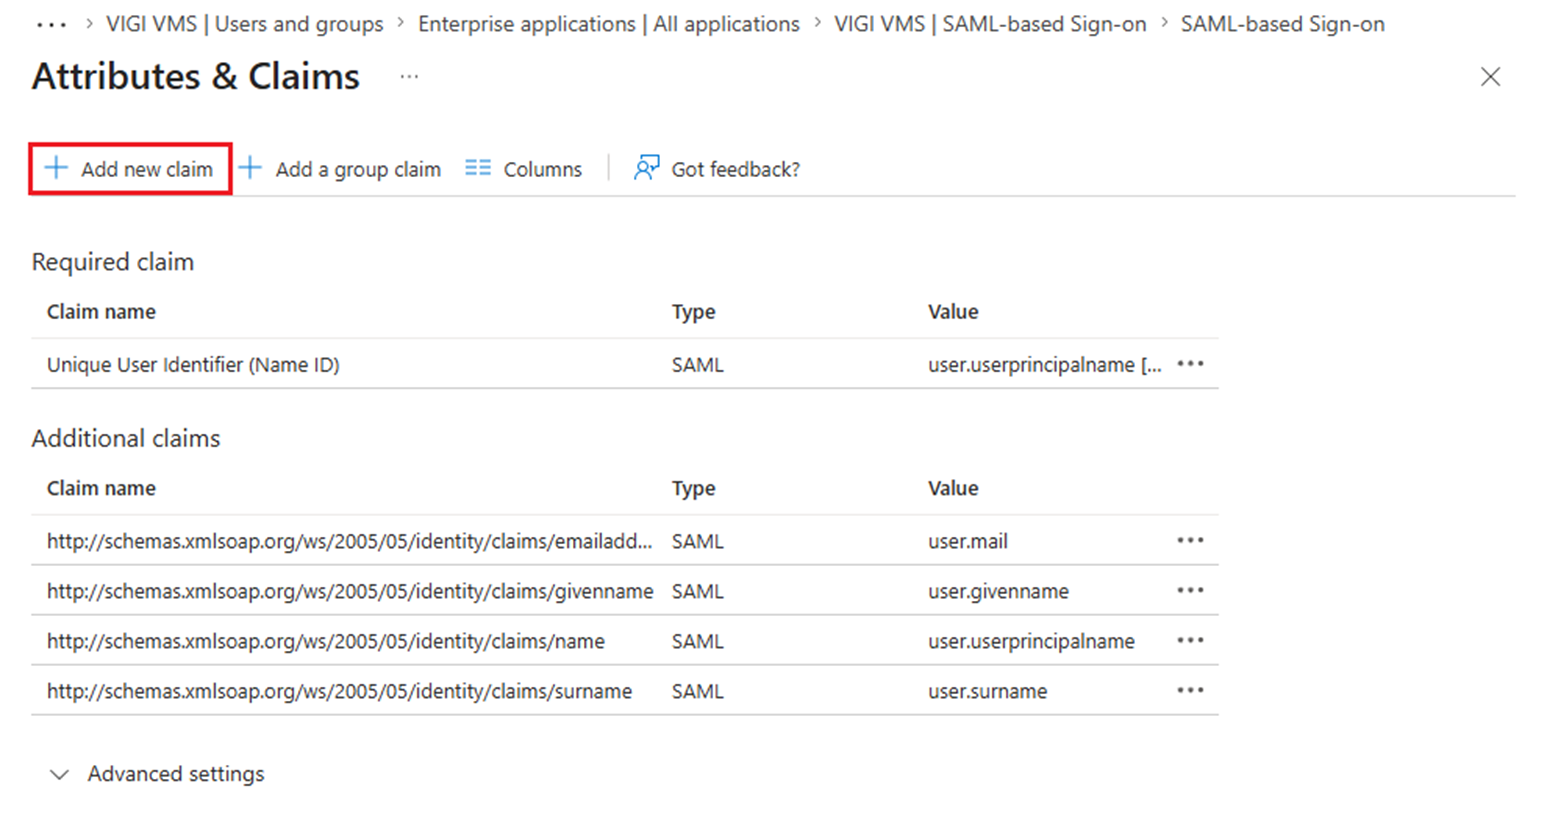
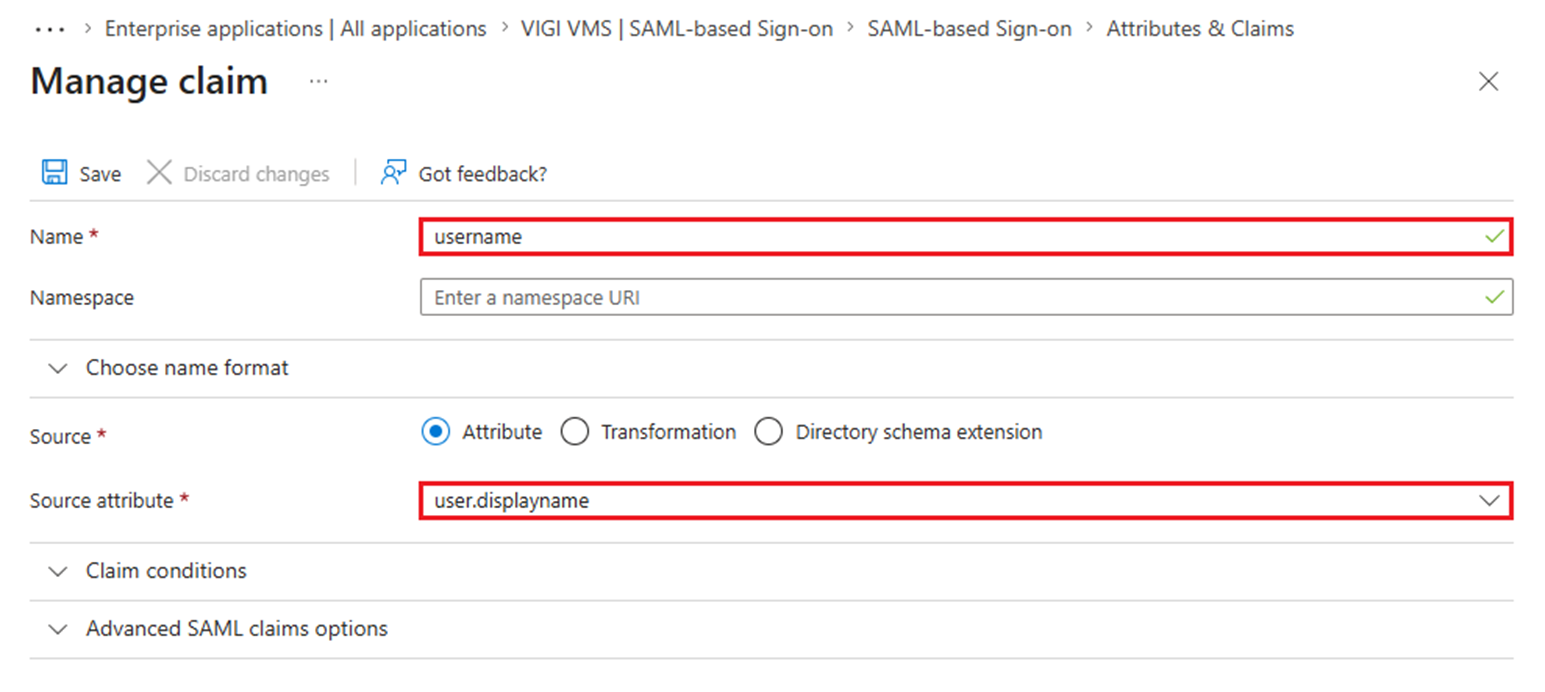
Click Edit in Attributes & Claims to edit the attributes.
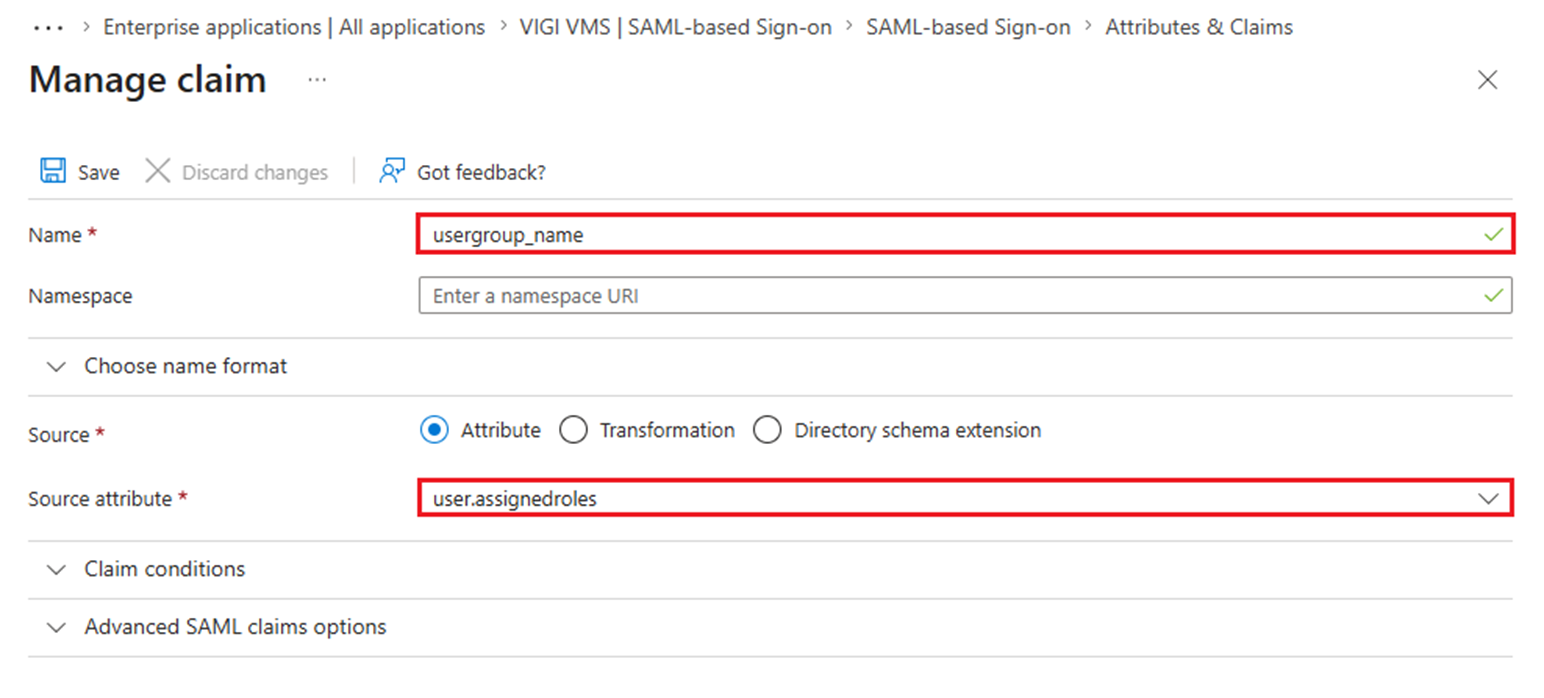
Click Add new claim.
Verification
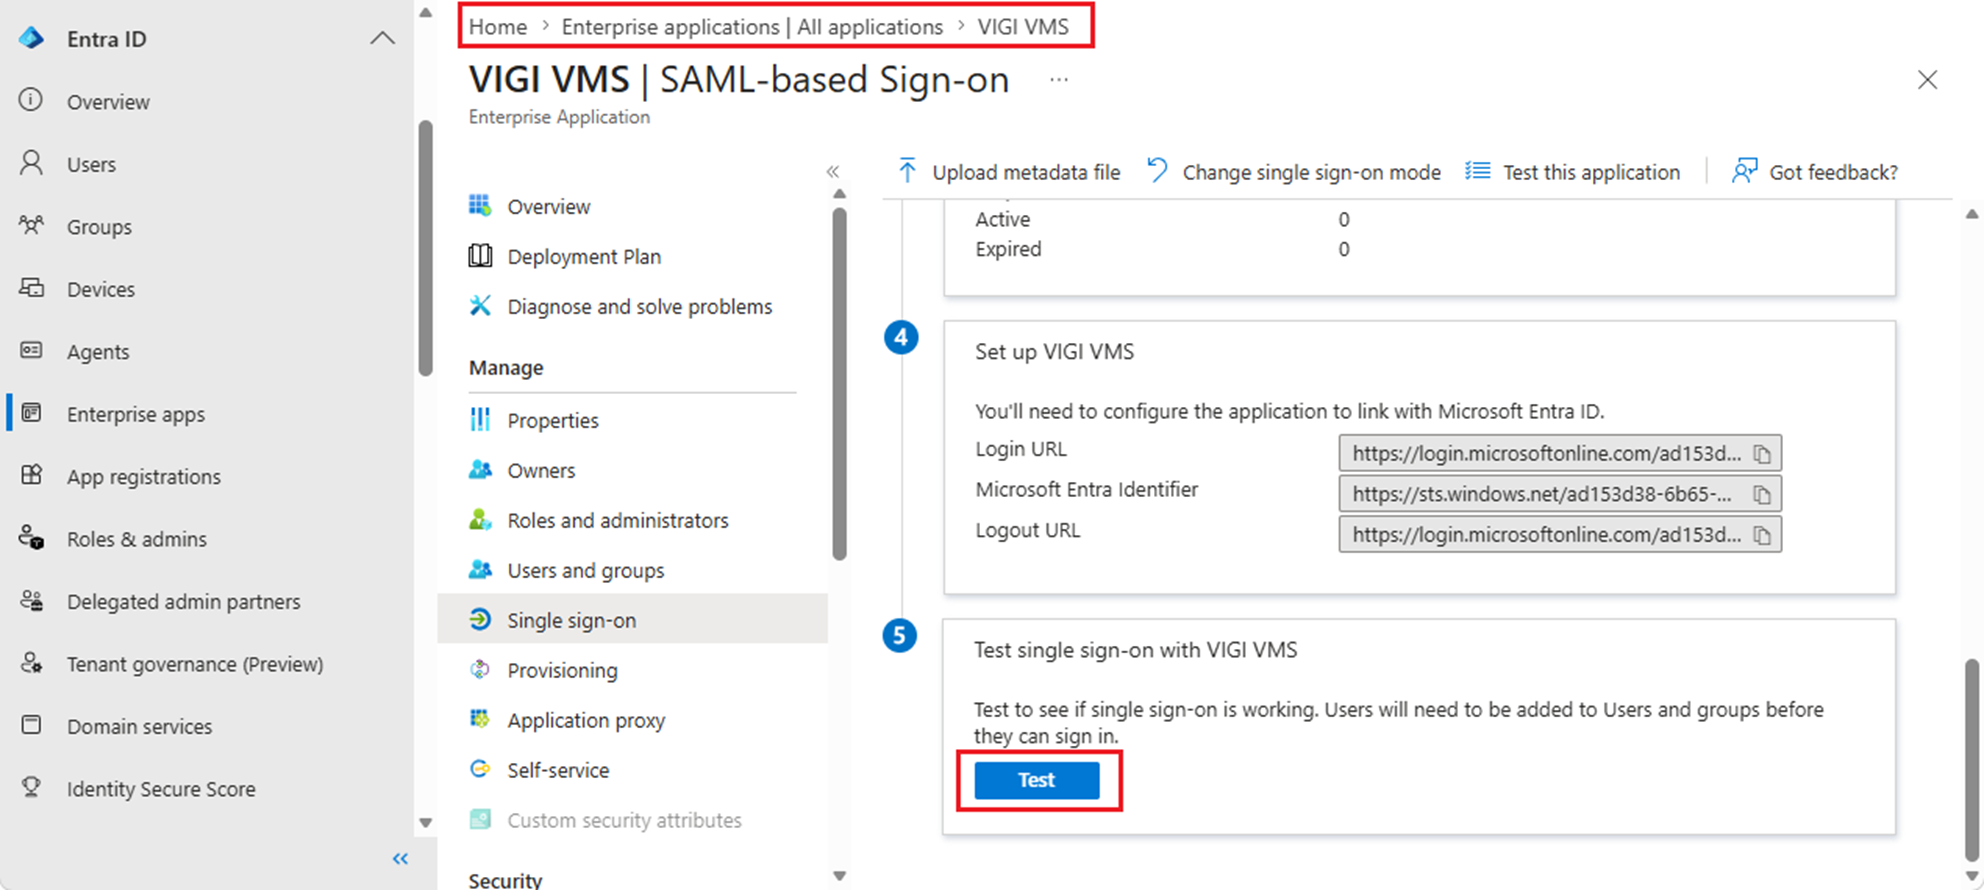
Go to the interface of SAML-based Sign-on settings and click Test sign in to test. The browser should redirect us to the VMS and log in.
Conclusion
We have successfully configured the SAML SSO of VIGI VMS with Microsoft Entra/Azure ID.
Get to know more details of each function and configuration please go to Download Center to download the manual of your product.
Looking For More
Is this faq useful?
Your feedback helps improve this site.



TP-Link Community
Still need help? Search for answers, ask questions, and get help from TP-Link experts and other users around the world.