How to Migrate Devices from the VIGI App Personal Edition to VIGI Cloud VMS
Contents
Migrate devices to VIGI Cloud VMS
Introduction
Devices added to the VIGI App Personal Edition (My VIGI) are managed independently and are not automatically displayed in Enterprise Edition (My Organization) or VIGI Cloud VMS. To centrally manage these devices through VIGI Cloud VMS, you can migrate them to an organization and site in VIGI Cloud VMS.
This article explains how to migrate devices from the VIGI App Personal Edition to VIGI Cloud VMS.
Requirements
- VIGI Cloud VMS
- VIGI App
- VIGI Camera or VIGI NVR
Configuration
Follow the steps below to migrate devices from the VIGI App Personal Edition to VIGI Cloud VMS.
Migrate devices to VIGI Cloud VMS
Step 1. Open the migration page
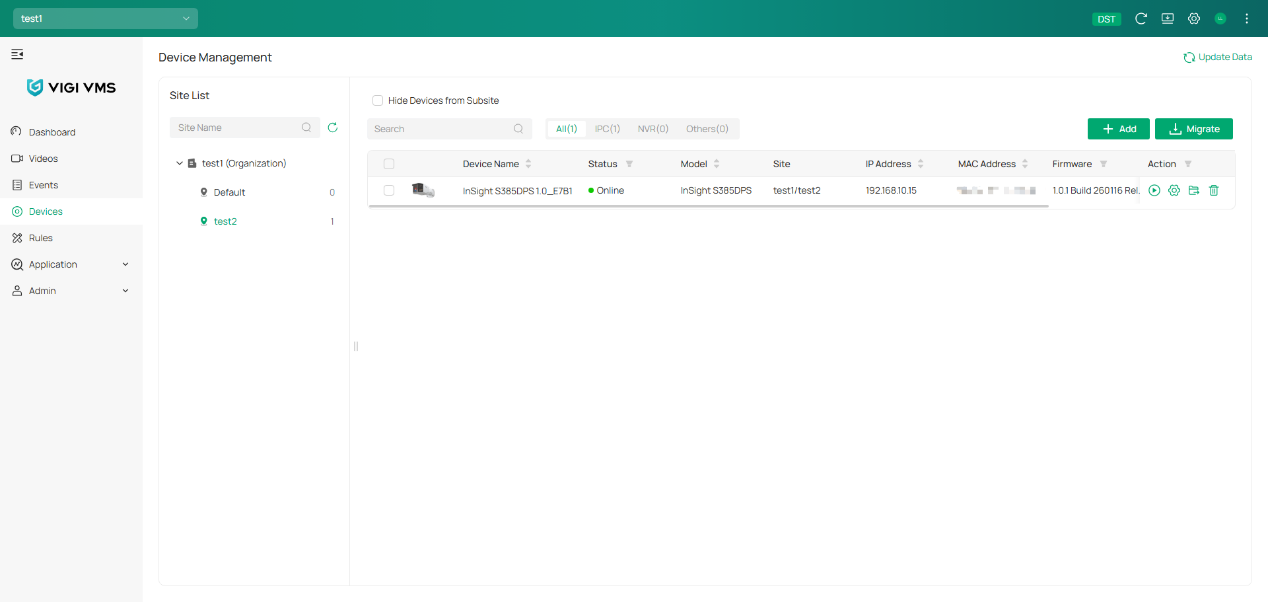
Log in to the VIGI Cloud VMS web portal (https://vms.tplinkcloud.com). Navigate to Devices > Migrate.
_20261010080650k.png)
Step 2. Start the migration process
In the migration window, click Migrate to continue.
_20261010074611j.png)
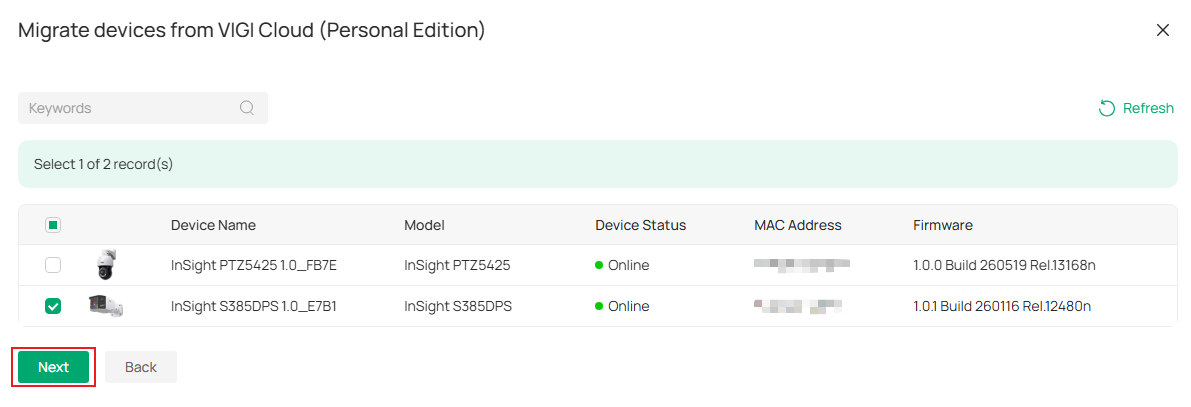
Step 3. Select devices
Select the devices that you want to migrate from Personal Edition. Click Next.
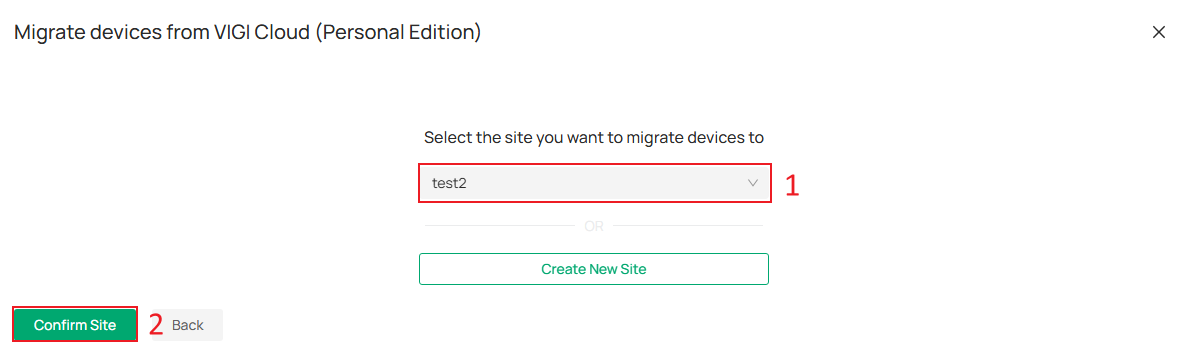
Step 4. Select the target site
Select the destination site where the devices will be managed in VIGI Cloud VMS, then click Confirm Site.
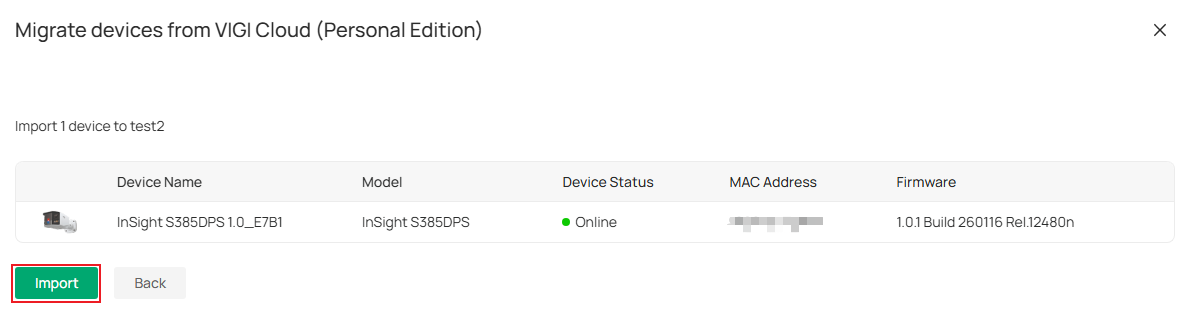
Step 5. Submit the migration request
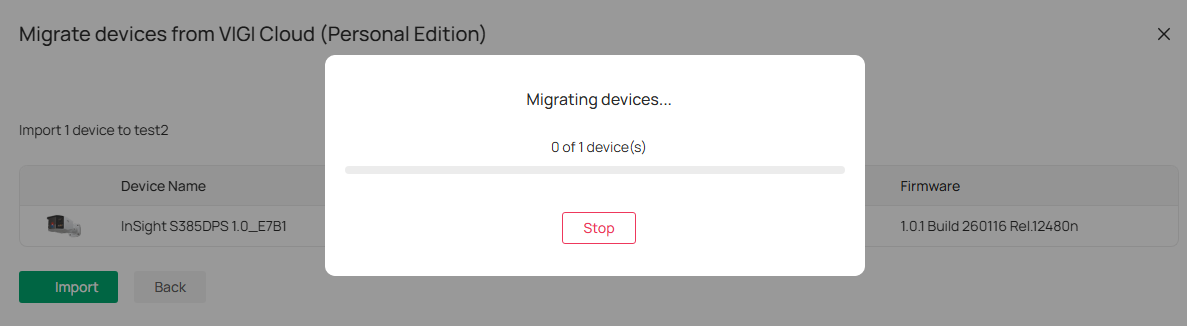
Click Import to submit the migration request.
A confirmation email will be sent to the email address associated with your TP-Link ID.
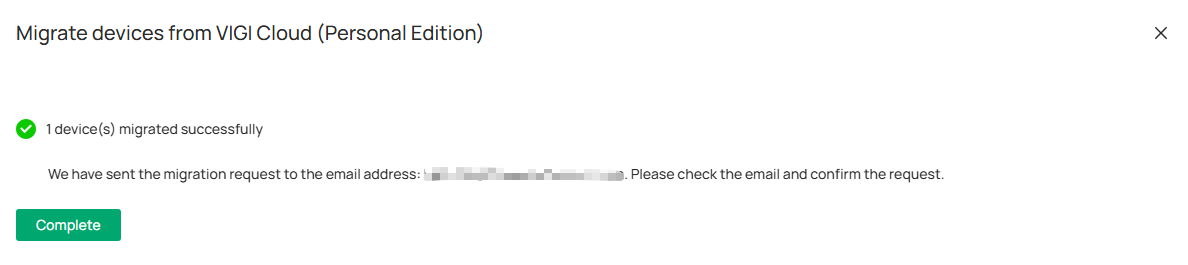
Step 1. Open the confirmation email.
Click the Click to Start Migrate button.
Note: The migration confirmation email is valid for 30 minutes.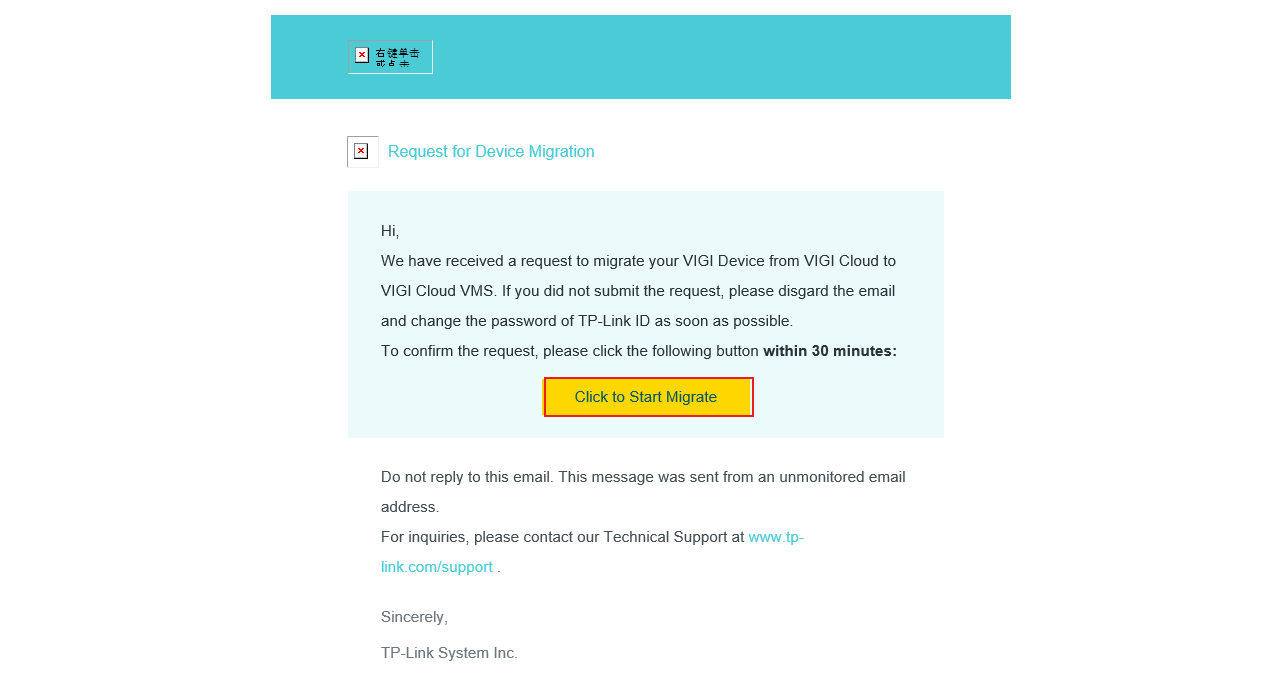
Step 2. Confirm the migration
Click Migrate on the redirected page.
_20261010074307l.png)
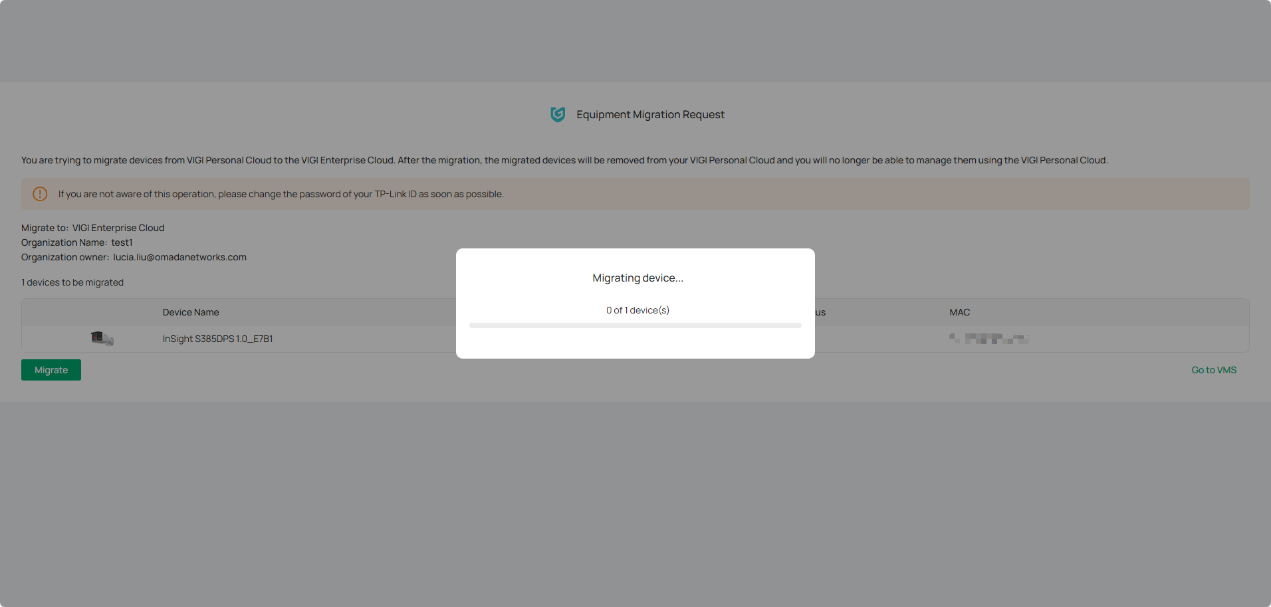
Step 3. Migration is completed
After the migration is complete, you can view the device in VIGI Cloud VMS.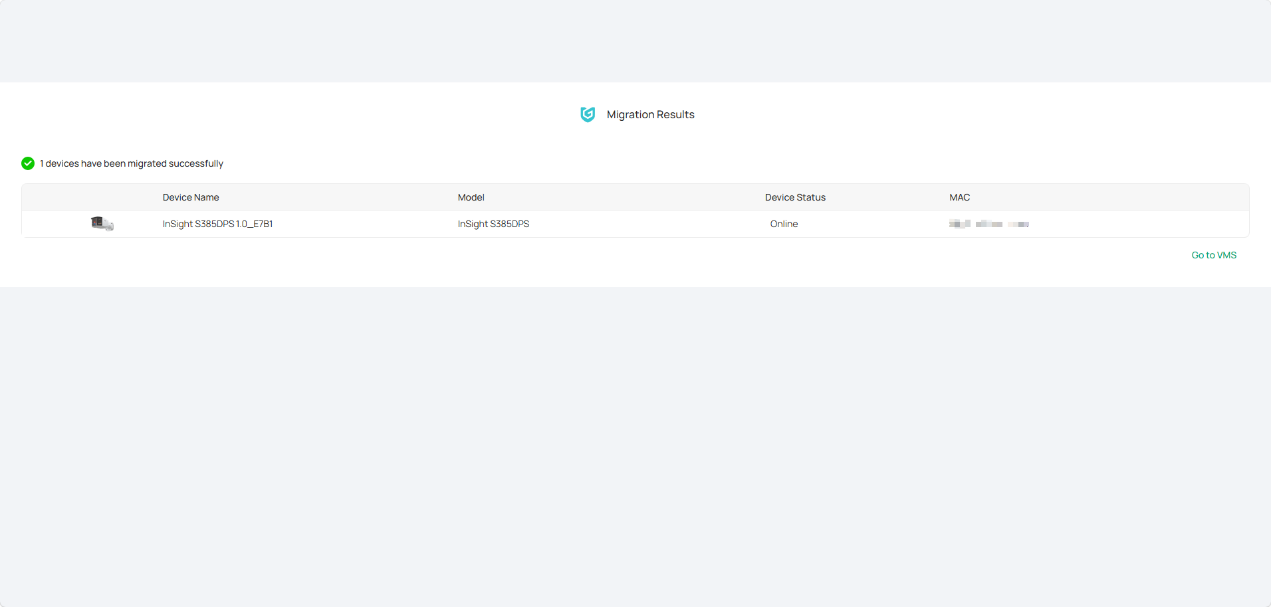
Conclusion
You have now successfully migrated devices from the VIGI App Personal Edition to VIGI Cloud VMS. After migration, devices can be managed through the selected organization and site within VIGI Cloud VMS, providing centralized cloud-based management and monitoring.
To learn more about each function and configuration, please visit Support Home to download or check the manual for your product.
QA
Q1: Why don't my devices appear in the migration list?
A1: Only devices managed under the VIGI App Personal Edition (My VIGI) and associated with the current TP-Link ID can be selected for migration. Verify that the devices are online and bound to the same TP-Link ID used to access VIGI Cloud VMS.
Q2: How long is the migration confirmation email valid?
A2: The migration confirmation email is valid for 30 minutes. If the migration is not confirmed within this period, the request will expire, and the migration will not proceed. In this case, submit a new migration request from the Device Migration page in VIGI Cloud VMS and confirm the new email.
Q3: Will migrated devices still appear in Personal Edition?
A3: After migration, device management should be performed through VIGI Cloud VMS and the associated organization and site. If you want to manage the device through Personal Edition again, remove the device from the organization and add it again through the VIGI App Personal Edition (My VIGI).
Looking For More
Is this faq useful?
Your feedback helps improve this site.



TP-Link Community
Still need help? Search for answers, ask questions, and get help from TP-Link experts and other users around the world.