How to set up the VIGI solar system controller
Contents
Scenario 1: Using the VIGI App
Scenario 2: Using the VGI config tool
Scenario 3: Using the VIGI Cloud VMS
Introduction
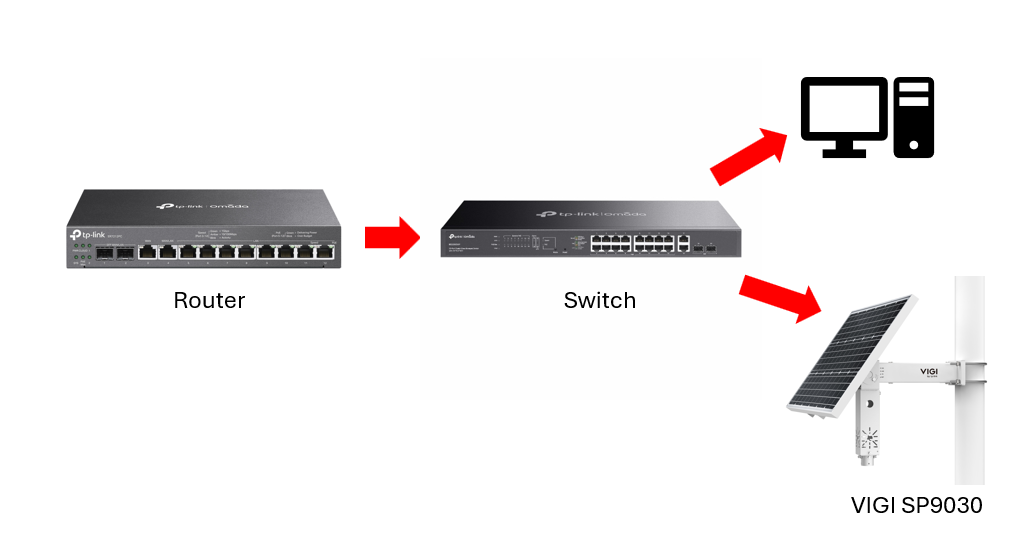
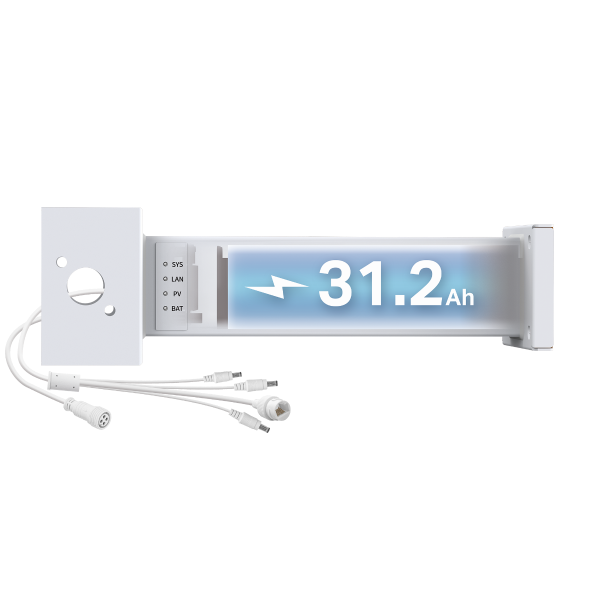
The VIGI SP9030 solar system features the PS30 solar controller, which includes a built-in battery capable of delivering 90W of constant power to outdoor equipment, such as PtP bridge devices and cameras. In this article, we’ll walk you through the setup of the solar controller.
Requirements
- VIGI PS30 or VIGI PS90.
- VIGI App.
- A computer that is connected to the same network.
Configuration
There are several ways to set up the solar controller, including through the VIGI App, VIGI Config Tool, or VIGI Cloud VMS.
Scenario 1: Using the VIGI App
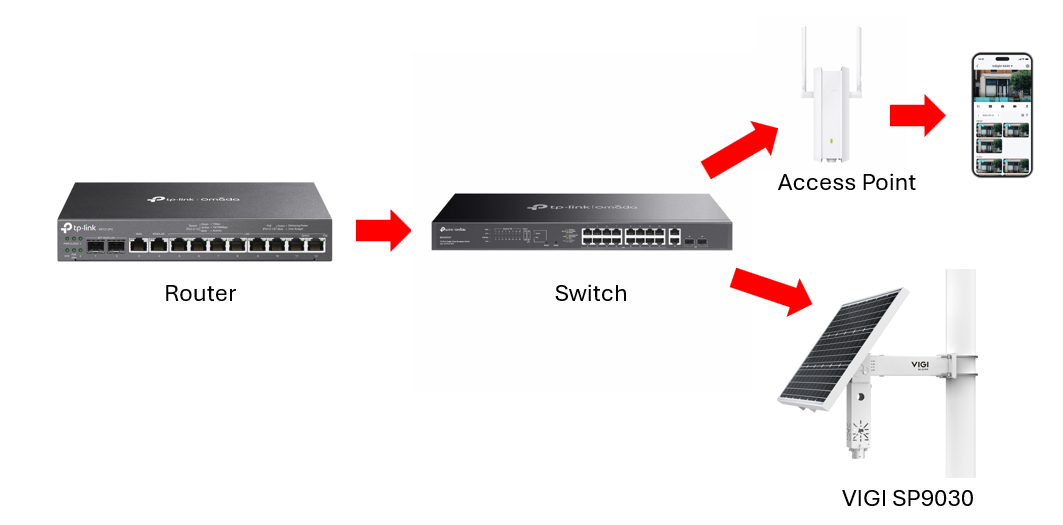
Step 1. Connect a phone to the wireless network
Note: You may consider connecting an access point to the network.
Step 2. Once installed, sign in to the app with your TP-Link ID.
Step 3. On the home page, please press the Add Device button and select the appropriate method to add the device. You can choose either to scan a QR code, auto-discover, or manually add. The Scan QR code is selected in this example for demonstration.
_20250831110727u.png)
Note: The phone might be connected to mobile data while scanning the QR code. Auto Discover works if the phone is connected to the broadcast domain (VLAN) as the Solar System controller. Manual Add via IP requires that the device can be accessed from the phone’s network, whether on the same network or a different one.
Step 4. The app will prompt you to set up a password for the device and verify that it is powered on and connected to the network. You can follow the steps and press the Next button to continue the setup.
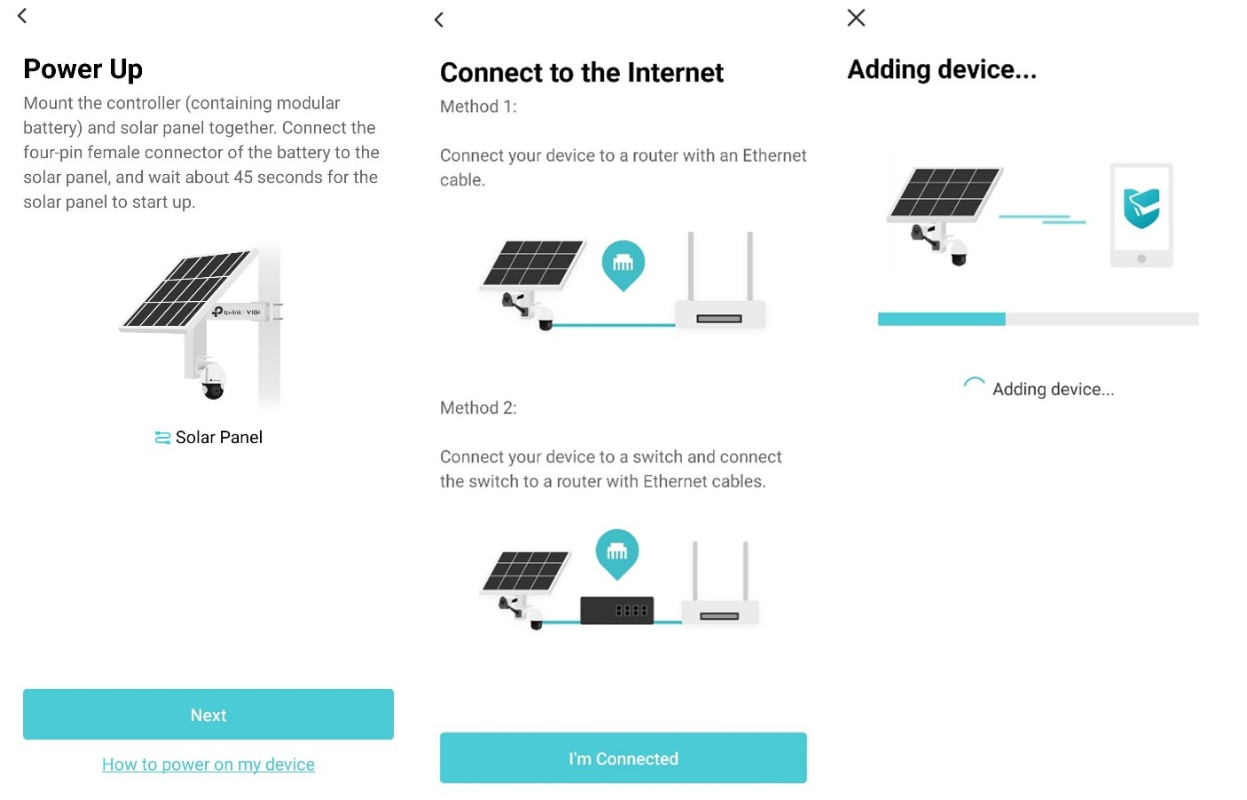
Note: Please ensure the solar controller is powered and receives an IP address from the DHCP server before adding it.
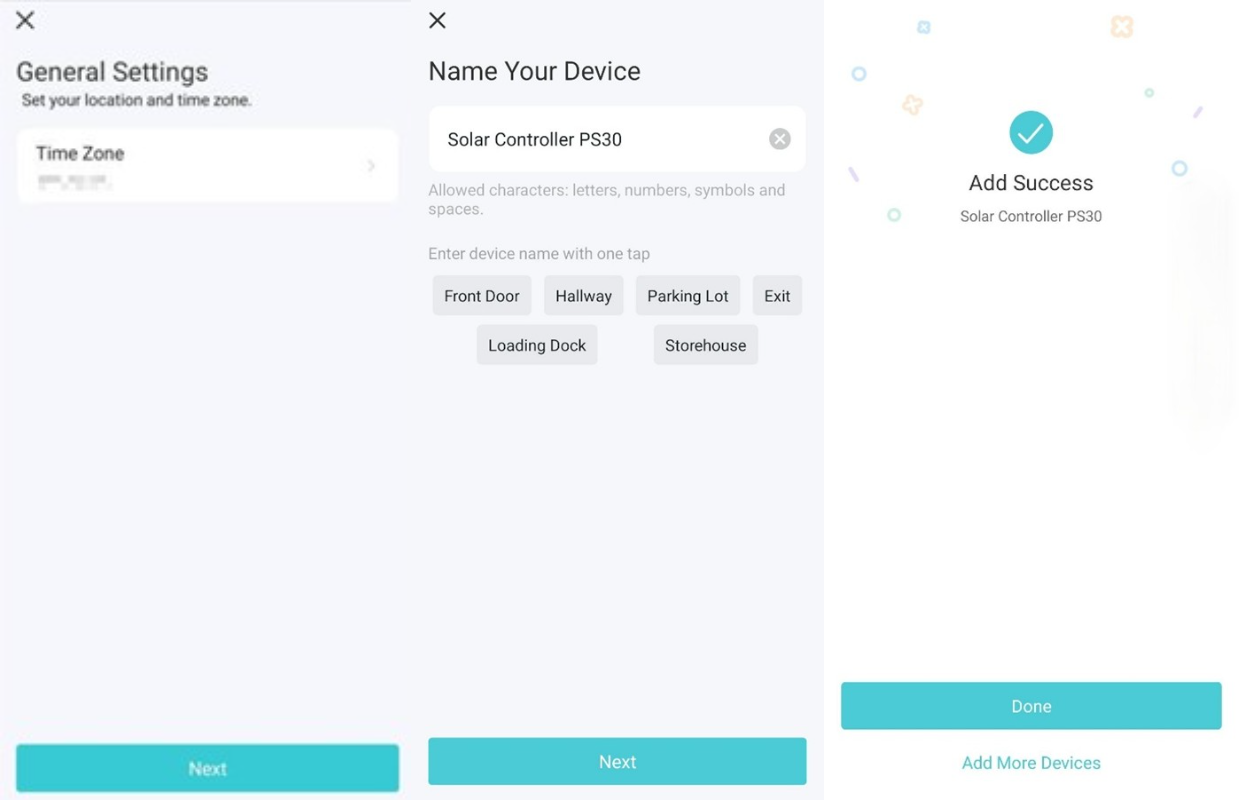
Step 5. Once the app starts communicating with the solar controller, it’ll ask for a name for this particular controller (you can insert a name of your own and press any of the suggested names), adjust the time zone accordingly, and press the Next button.
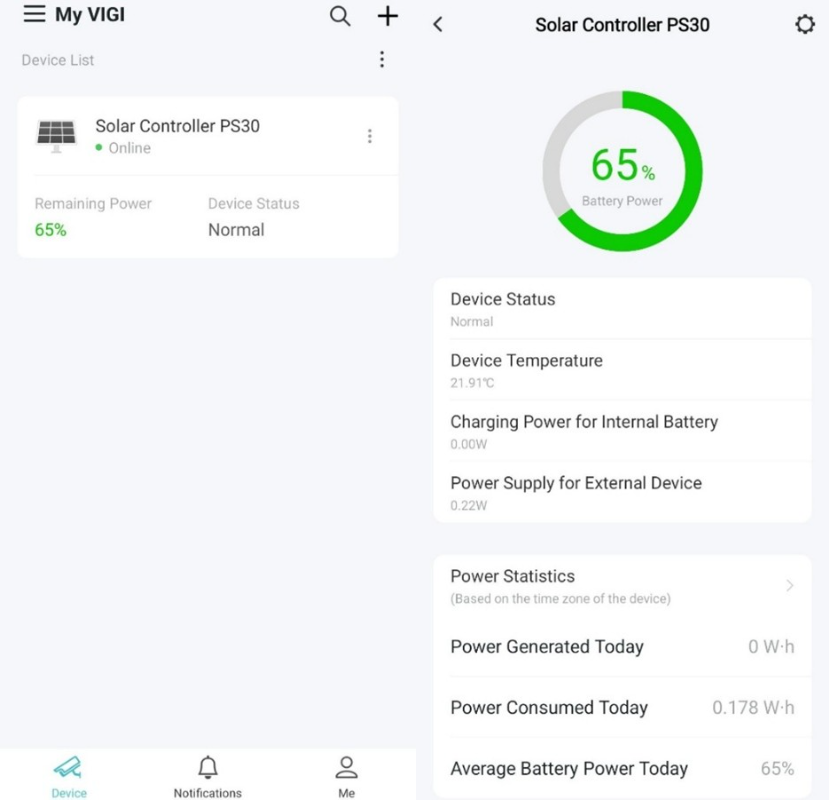
Step 6. The solar controller will show up in the devices list as online. You may press it to view the power statistics and adjust the settings if needed.
Scenario 2: Using the VGI config tool
Step 1. Install the VIGI config tool on a computer connected to the same network as the solar controller. You can download the VIGI config tool from the link below, https://www.vigi.com/support/download/vigi-config-tool/.
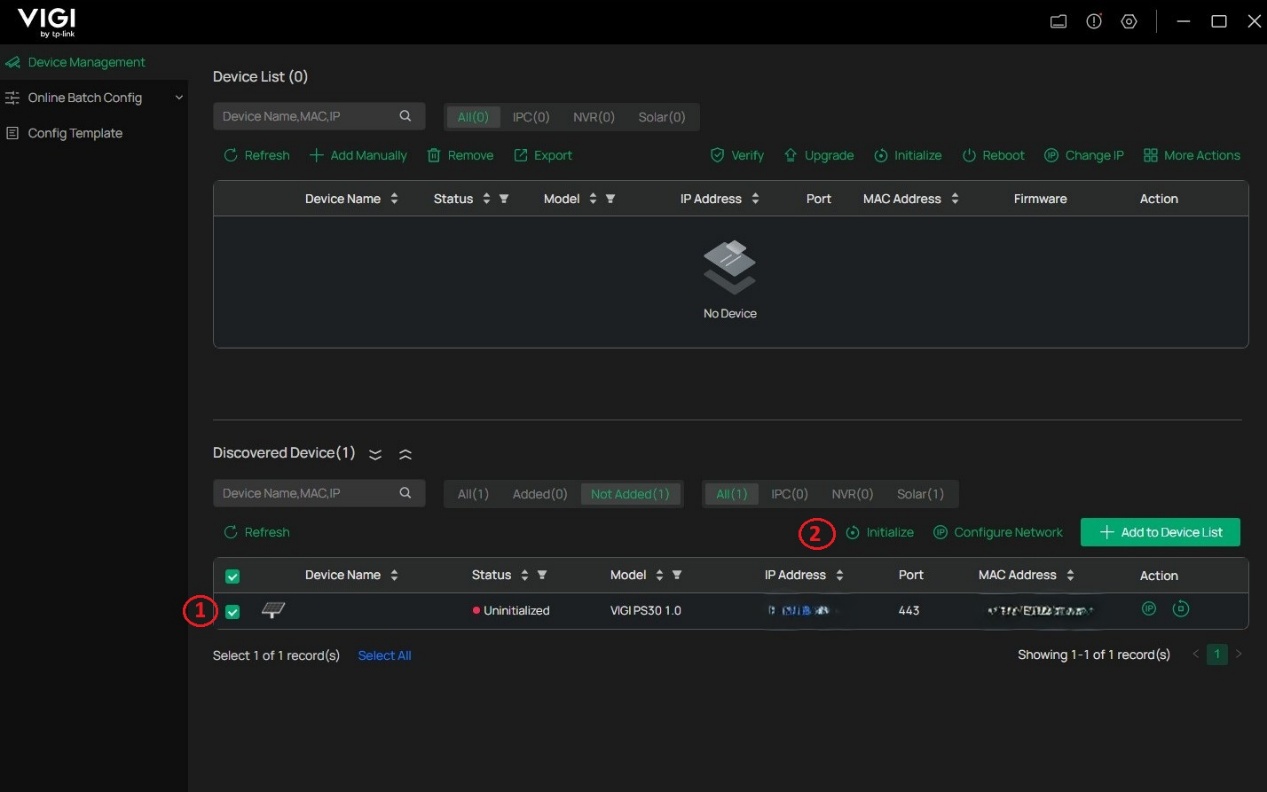
Step 2. Once the VIGI config tool is installed and opened, it will automatically detect any VIGI devices on the network. Please select the desired device (in this case, the VIGI PS30) and press the Initialize button, as shown in the screenshot below.
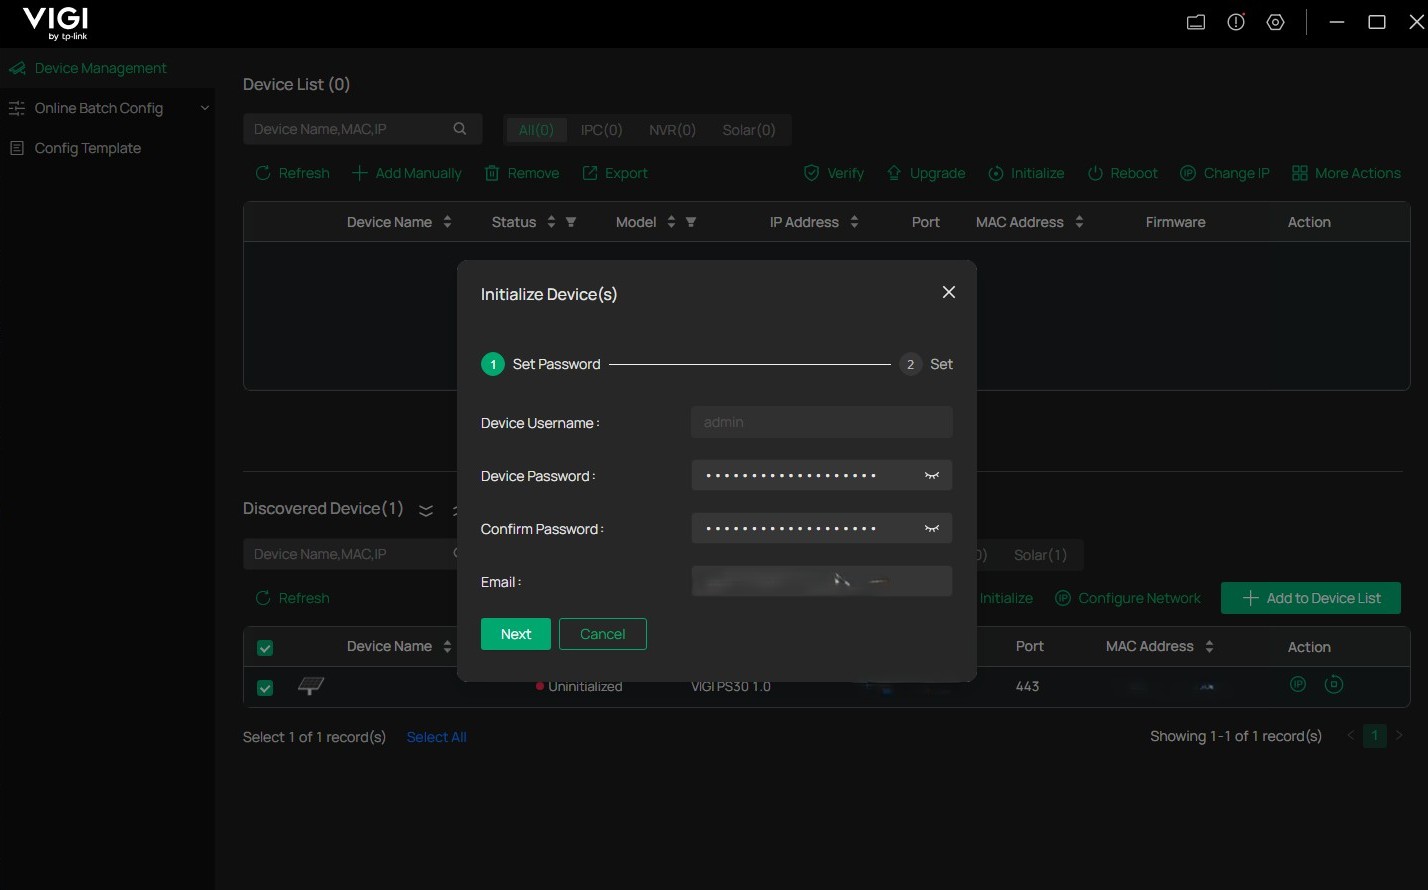
Step 3. Next, set up a login password for the solar controller PS30 (by default, the login name is set to 'admin'). Additionally, add an email address that will be used in case the password needs to be reset.
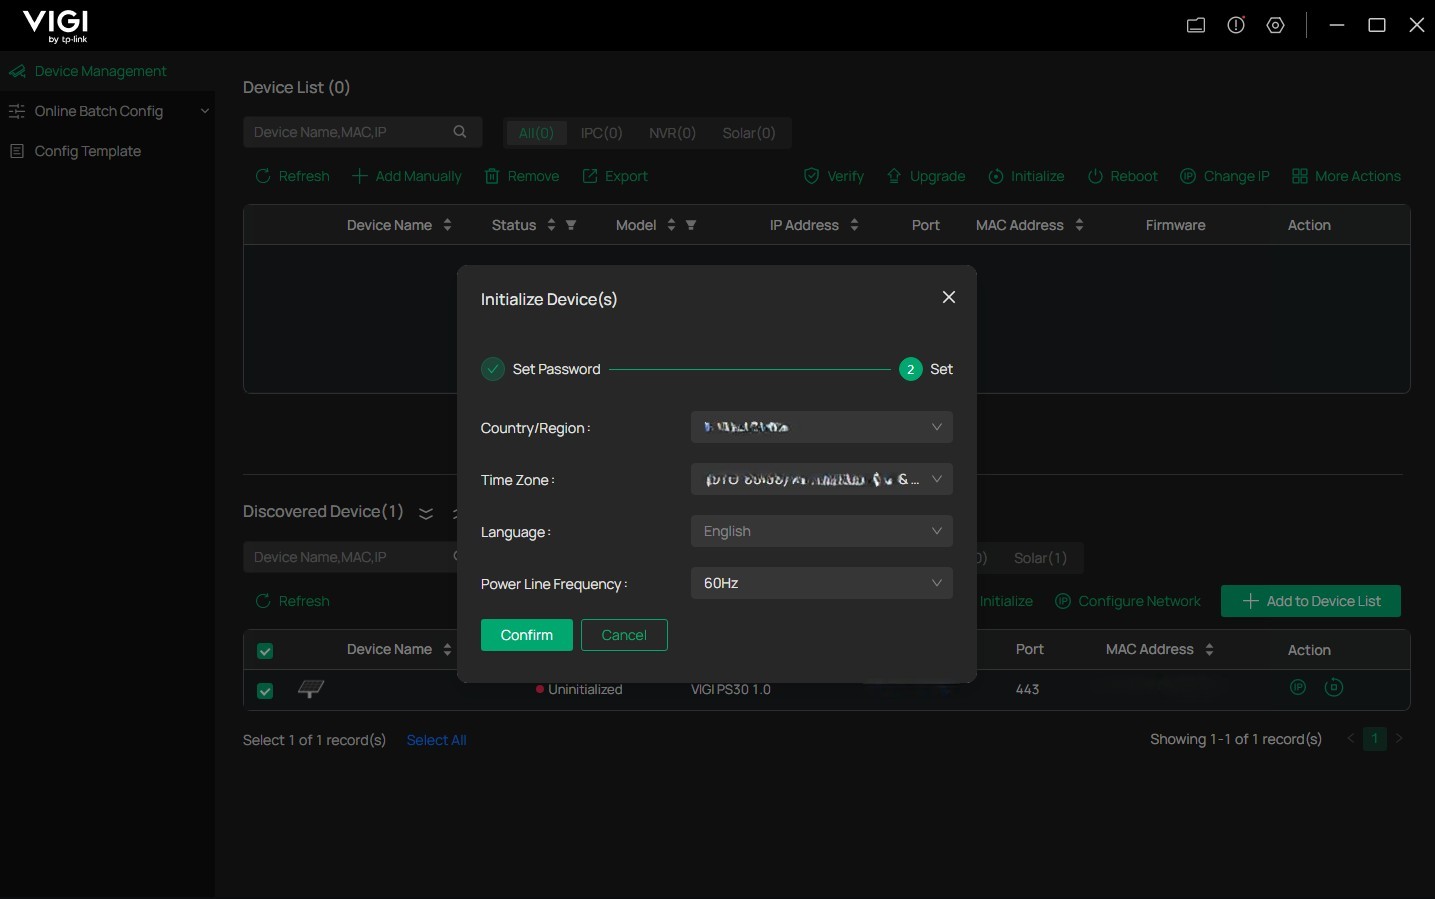
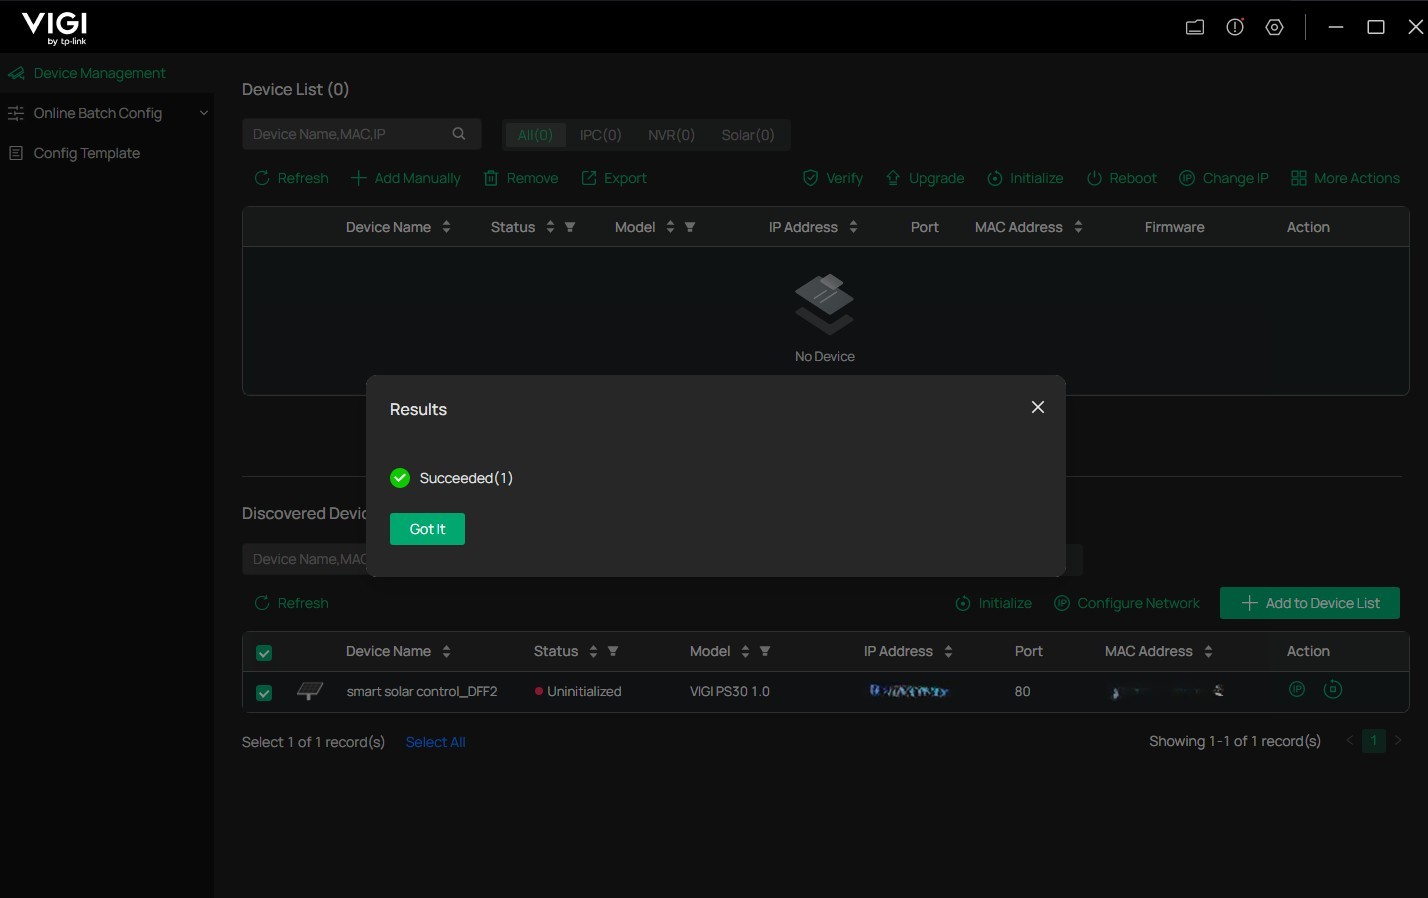
Step 4. Please select the corresponding region and time zone to finalize the setup. If the setup is completed, a message will be displayed indicating the result as successful, as shown in the screenshots below.
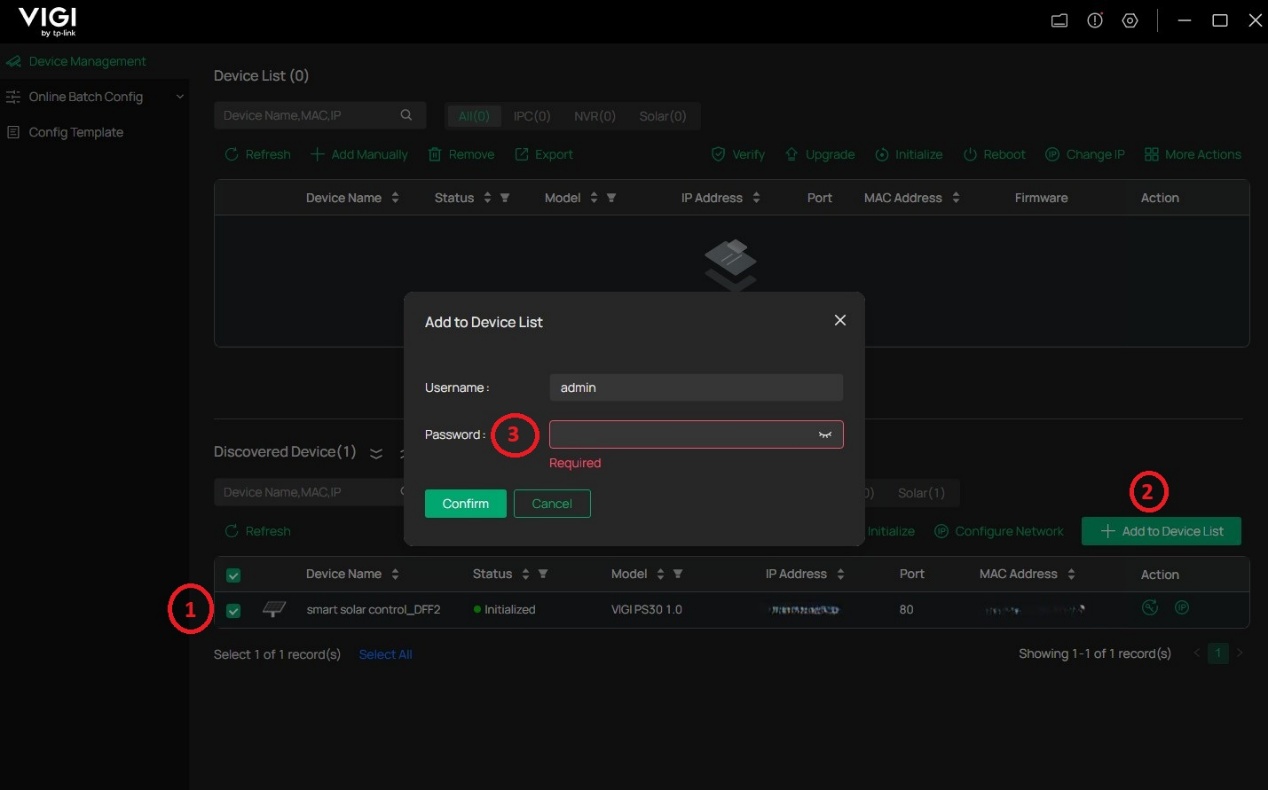
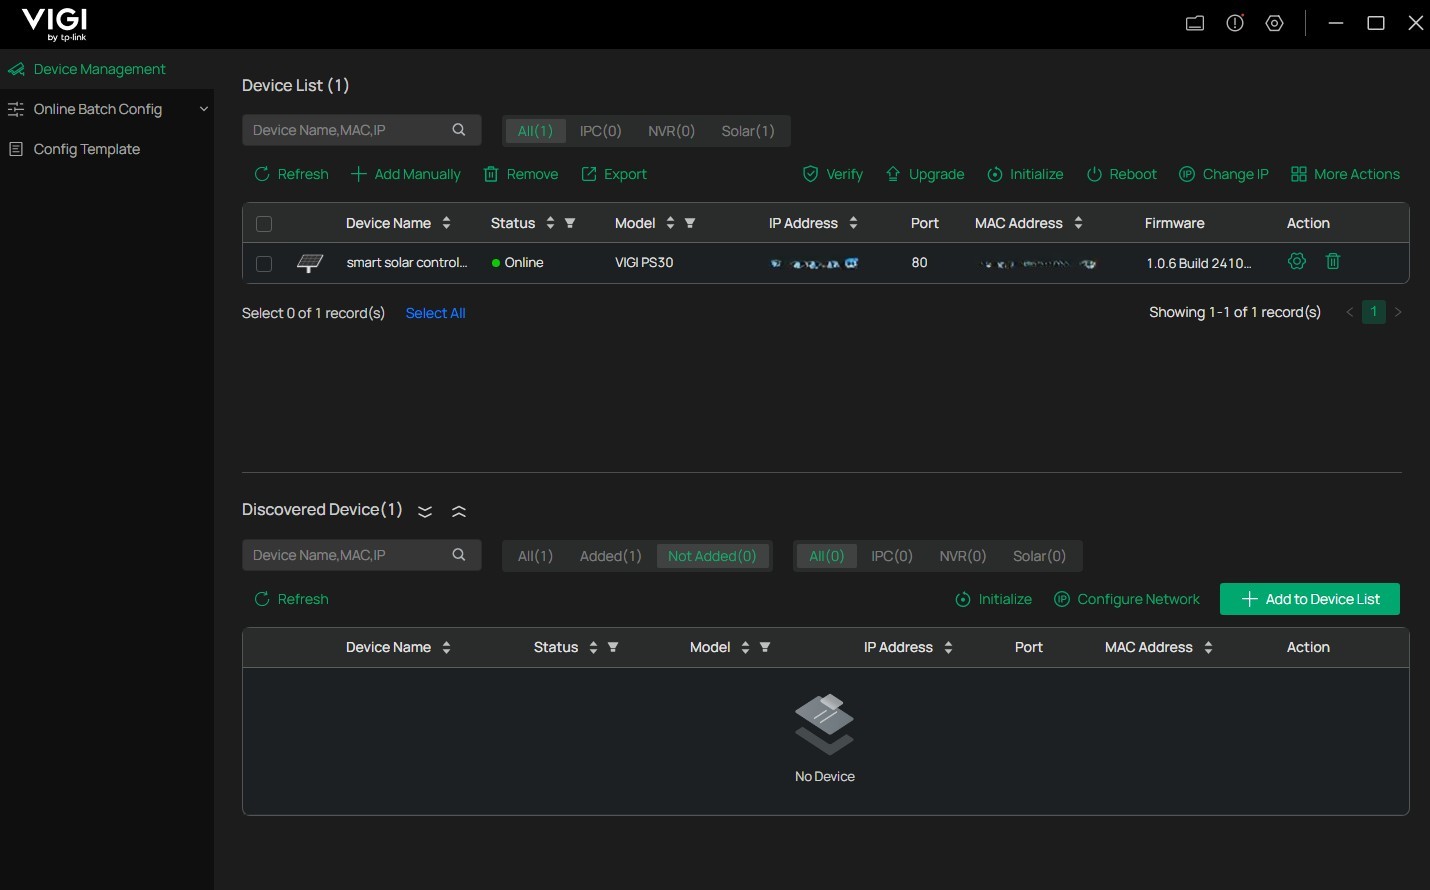
Step 5. Start adding the VIGI PS30 to the device list by selecting the device, pressing the "Add to Device List" button, and entering the device’s password. This will move the device to the top of the device list in the VIGI config tool’s window.
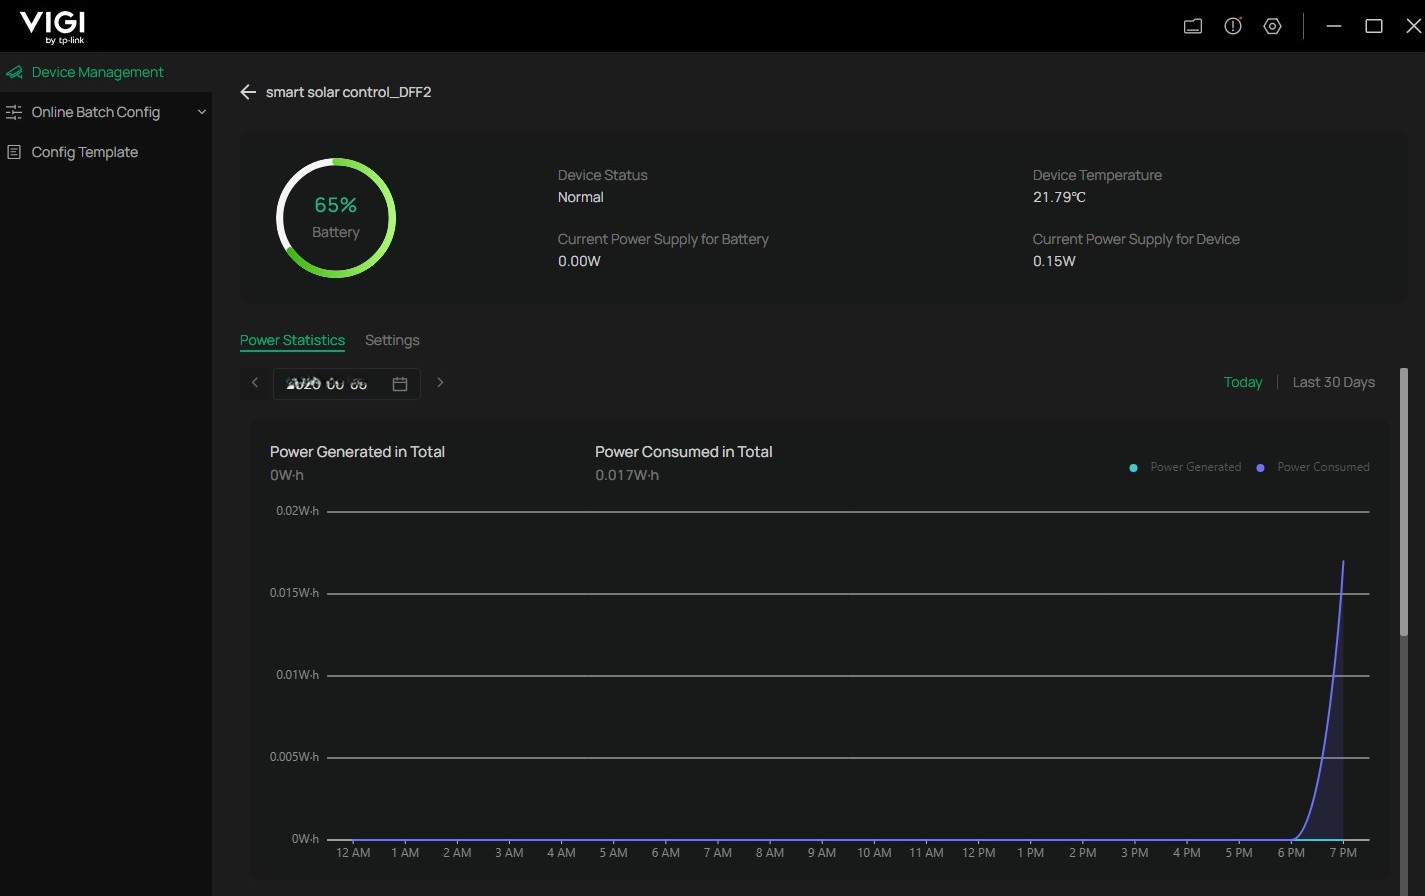
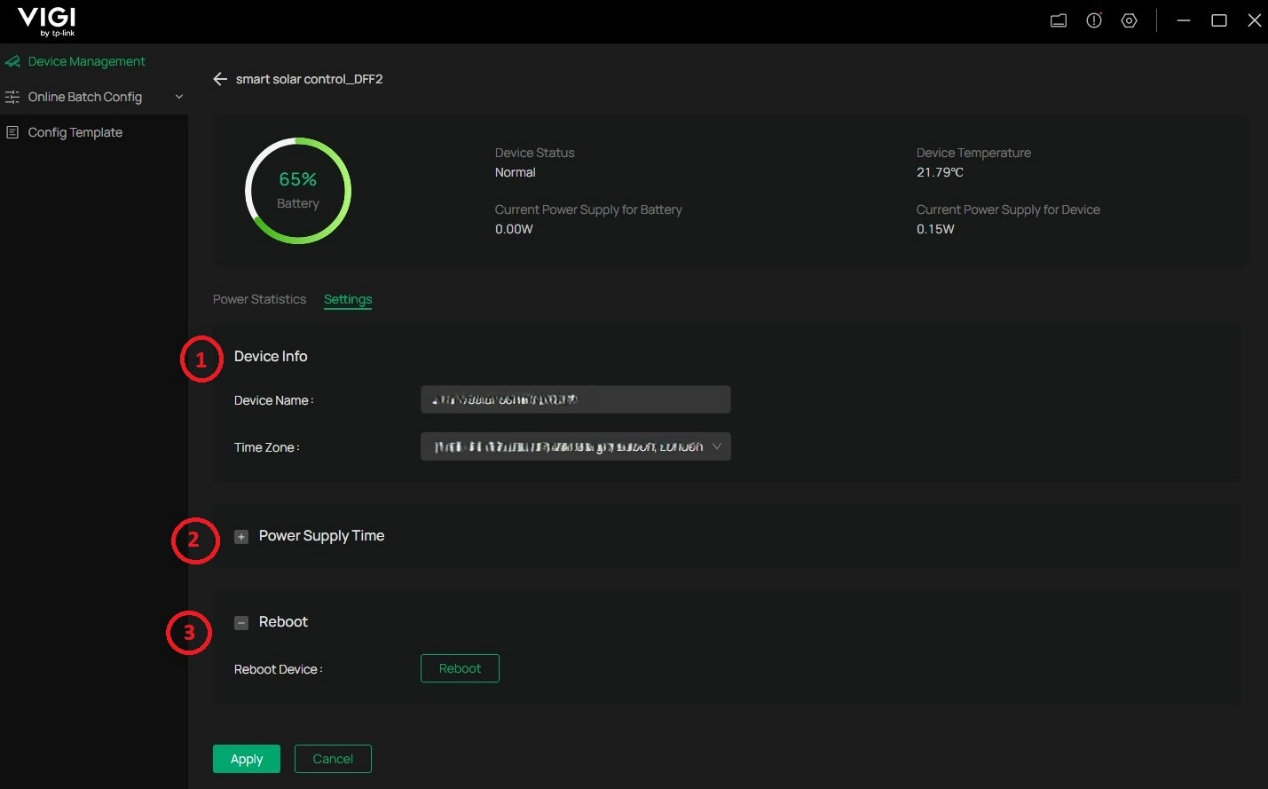
Step 6. By pressing the gear button located under the Action column, you can monitor the power supplied to the VIGI camera, adjust the device name and time zone, schedule a timer to turn the camera on or off, and reboot the solar controller.
Scenario 3: Using the VIGI Cloud VMS
Step 1. Log in to the VIGI Cloud VMS https://vms.tplinkcloud.com/ with your TP-Link ID.
Step 2. Select the site (or create a new site) that has been created under your organization.
Step 3. Press the Add button to start adding the solar system controller.
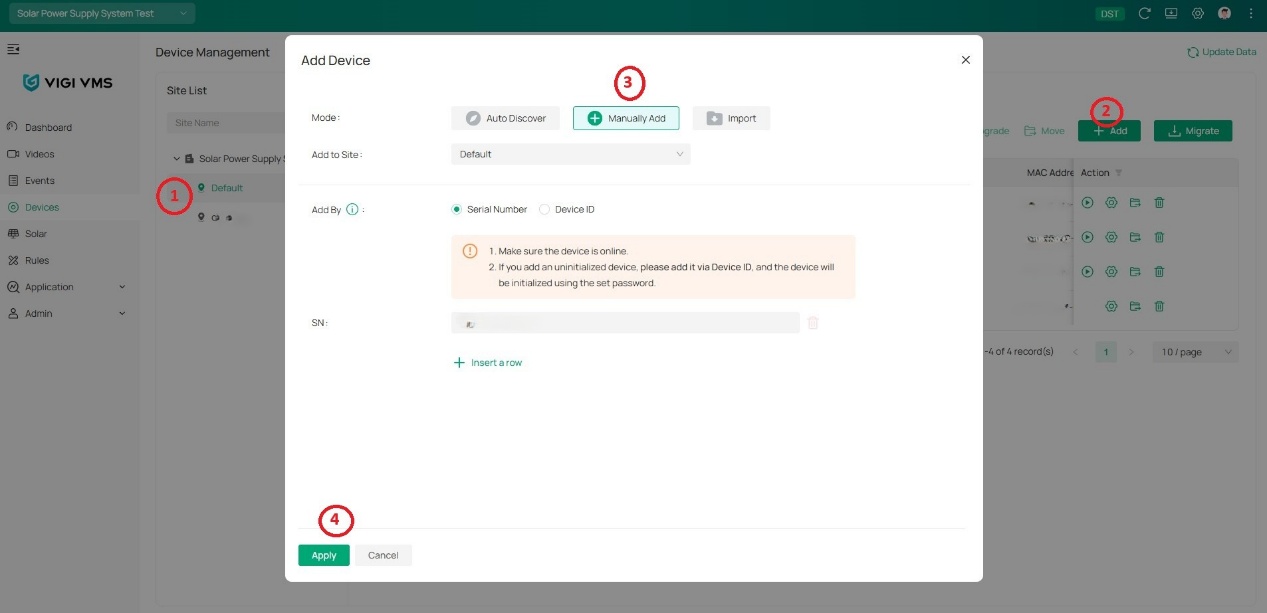
Step 4. Select the appropriate method to add the device. You can select Auto Discover, Manually Add, or Import file. The Manually Add method is used in this example for demonstration.
Note: Auto Discover works if the computer used to access the VIGI Cloud VMS is connected to the same network as the solar system controller.
Step 5. Enter the serial number or device ID (The serial number and Device ID are printed on the device label) and press the Add button.
Step 6. A window will appear, confirming the success of adding the device.

Conclusion
By using the VIGI App or the VIGI config tool, you can set up the solar controller and monitor power draws, as well as perform basic troubleshooting tasks such as rebooting and factory resetting.
Get to know more details of each function and configuration please go to Download Center to download the manual of your product.
QA
Q1. What if the VIGI tools failed to discover the solar system controller?
A1. Please ensure the solar controller’s SYS, LAN, and BAT lights are on. The device (either a phone or a computer) used for setup is connected to the same network.
Q2. Can I receive notifications when the battery is running low?
A2. You can receive notifications on the VIGI App whether the solar system controller is added under the personal edition “My VIGI” or under an organization.
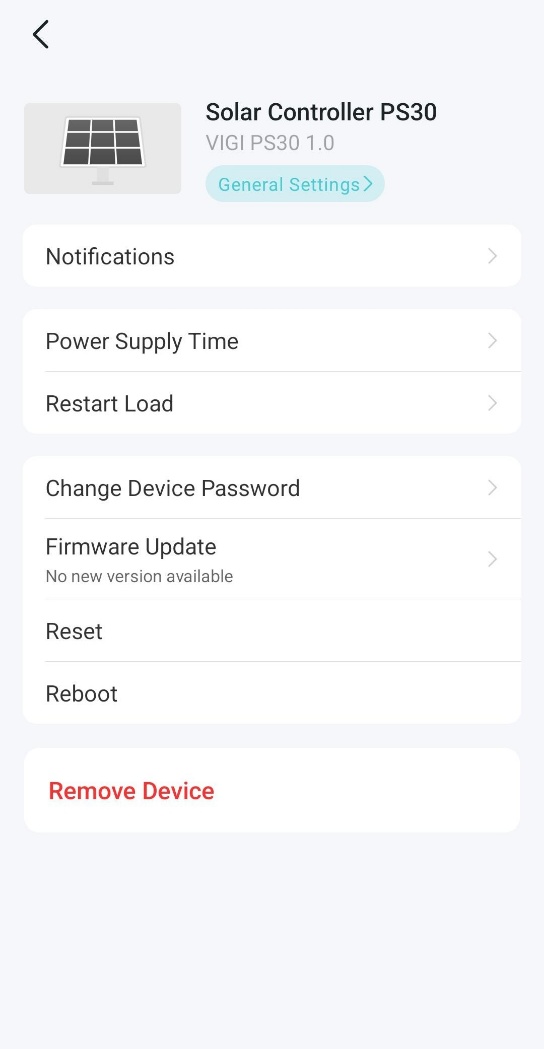
Q3. What actions does the VIGI App offer for basic troubleshooting?
A3. Once you select the solar controller, press the settings button (the gear button at the top right corner) for more actions, such as restart load (this feature allows power cycling the connected device, such as an IP camera, to recover it in case it goes offline), firmware upgrade, reboot, reset, or change the device’s password.
Q4. What actions does the VIGI config tool offer for basic troubleshooting?
A4. By clicking on the More Actions list, you can factory reset the solar controller, change the password, reset the settings (without resetting the network settings), set an NTP server, and add it to the VIGI Cloud VMS for remote monitoring.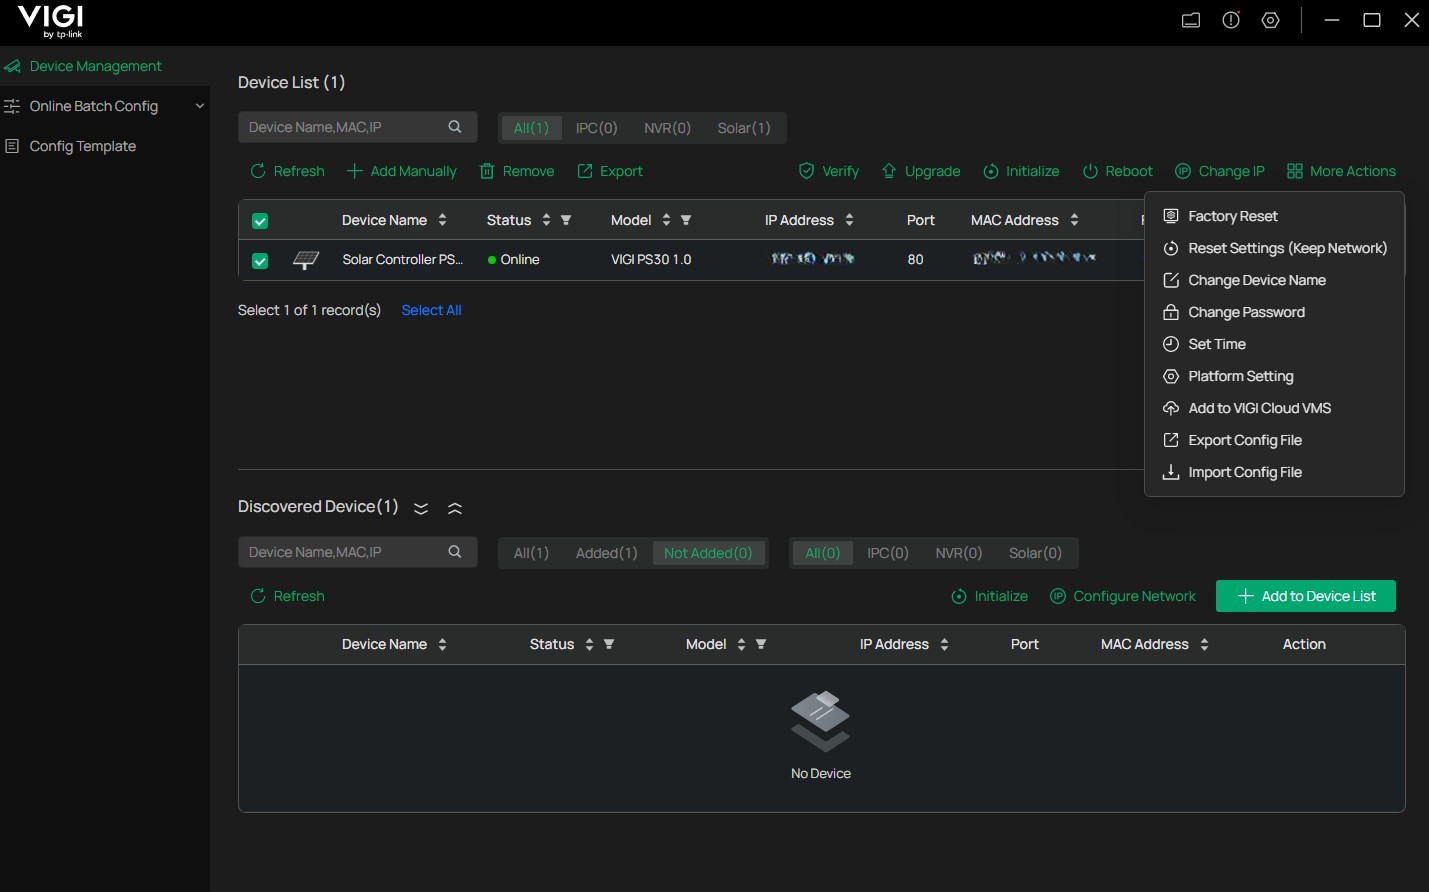
Is this faq useful?
Your feedback helps improve this site.

TP-Link Community
Still need help? Search for answers, ask questions, and get help from TP-Link experts and other users around the world.