How to set up Guest Network on Archer C2_V5
Guest Network allows you to provide Wi-Fi access for guests without disclosing your host network. When you have guests in your house, apartment, or workplace, you can create a guest network for them. In addition, you can customize guest network settings to ensure network security and privacy.
Note: Archer C2_V5 is used for demonstration in this article.
1. Login the router. For how to do that, please refer to How do I log into the web-based Utility (Management Page) of TP-Link wireless router?
2. Go to Guest Network.
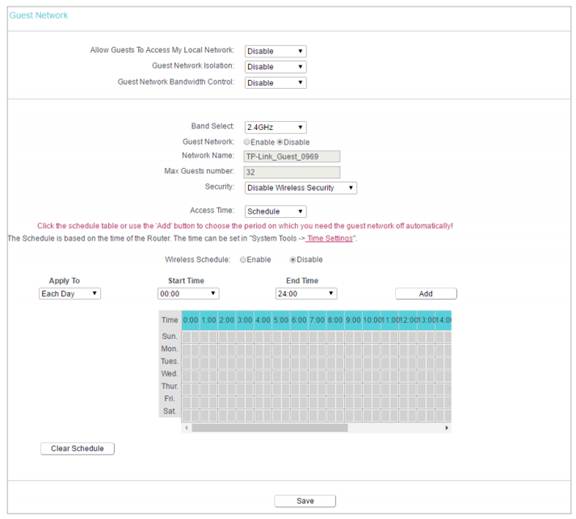
3. Enable the Guest Network function.
4. Create a network name for your guest network.
5. Select the Security type and create the Password of the guest network.
6. Select Schedule from the Access Time drop-down list and customize it for the guest network.
Note: The schedule is based on the time of the router. The time can be set in How to configure system time of Archer C2_V5?
7. Click Save.
• Allow Guest To Access My Local Network - If enabled, guests can access the local network and manage it.
• Guest Network Isolation - If enabled, guests are isolated from each other.
• Enable Guest Network Bandwidth Control - If enabled, the Guest Network Bandwidth Control rules will take effect.
Note: The range of bandwidth for guest network is calculated according to the setting of Bandwidth Control on the Bandwidth Control > Control Settings page.
Get to know more details of each function and configuration please go to Download Center to download the manual of your product.
해당 FAQ가 유용했나요?
여러분의 의견은 사이트 개선을 위해 소중하게 사용됩니다.