


How to establish a PPTP Server by Omada Gateway in Standalone mode
Application Scenario
Taking an example for ER7206 to explain how to establish a PPTP server by Omada Gateway in standalone mode. The connection topology is as follows:
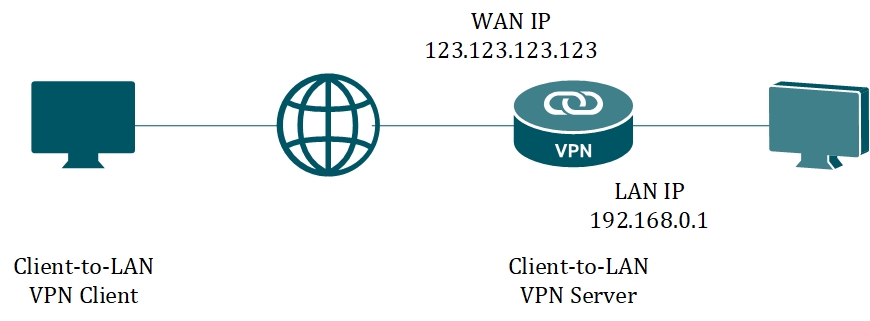
We configure ER7206 as the PPTP server.
Configuration Steps
Step 1. Check the network status.
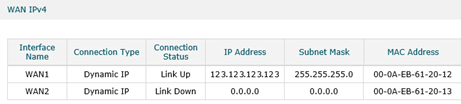
Connect ER7206 according to the network topology and make sure that the Internet is available. Log into the router page, record the IP address (123.123.123.123) of the WAN port, and the LAN IP is 192.168.0.1/24 in default.
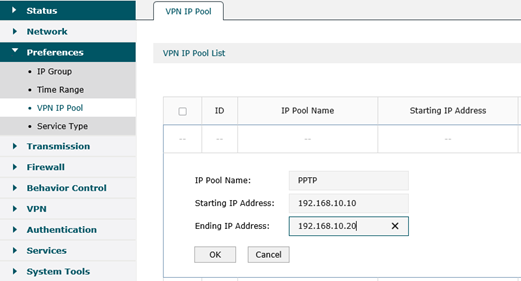
Step 2. Create the VPN IP Pool.
When the VPN client is applying to connect, the VPN server will assign a virtual IP address, which is from the VPN IP Pool. Go to Preferences --> VPN IP Pool, Click Add.
On the popup page, here we name the IP Pool Name as PPTP, configure Starting IP Address as 192.168.10.10, Ending IP Address as 192.168.10.20, then click OK to save the settings. You may set the values according to your network.
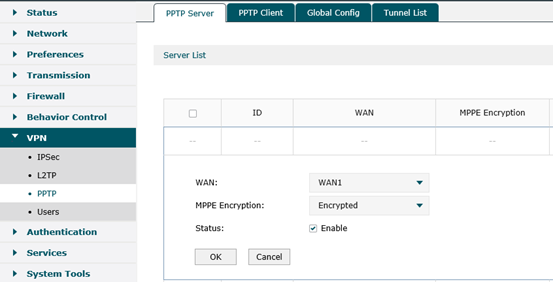
Step3. Enable PPTP VPN Server.
Go to VPN --> PPTP --> PPTP Server, click Add. On the popup page, choose WAN port as WAN1, specify MPPE Encryption as Encrypted, then click OK to save the settings.
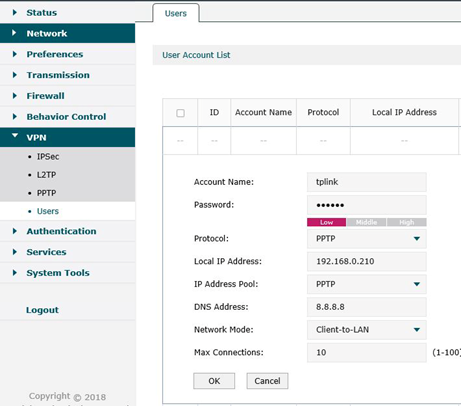
Step4. Create a PPTP VPN User.
Go to VPN ---> Users, click Add. Here we specify Account Name as tplink, Password as tplink, select Protocol as PPTP, configure Local IP Address as 192.168.0.210 (Local IP Address is the IP address of the virtual VPN adapter. It’s recommended configuring it in the same subnet with the LAN IP). On the below options, we specify IP Address Pool as PPTP we created above, DNS Address as 8.8.8.8, Network Mode as Client-to-LAN, Max Connections as 10, then click OK.
Till now, we have finished the configuration of the PPTP VPN Server on the Omada Gateway.
Please follow this FAQ to configure the VPN client on Windows PC: How to configure PPTP/L2TP client on remote PC?
このFAQは役に立ちましたか?
サイトの利便性向上にご協力ください。

