How to configure wired print server through its web management interface for printer sharing
This Article Applies to:
Note: This article is only suitable for printer sharing, please ignore the article and use the CD to install MFP software if you want to use multi-function of the TL-PS310U.
For better guidance, let's assume there is a following demand for the network and take TL-PS110U for instance:
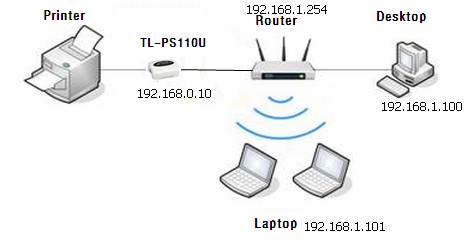
The Default IP of the print server is 192,168.0.10. Before doing the settings, please confirm the IP of the router. Normally, it’s the gateway IP of your computer.
The wireless router is the center of the internal network and every host will communicate with the TL-PS110U through the wireless router. In this example, the router’s IP is 192.168.1.254 and the local network is 192.168.1.*/255.255.255.0. (Please check the IP of your own router, contact router’s support if you are not sure.)
The foregoing analysis shows that TL-PS110U is not in the same subnet with the router. In that case, we need to configure the IP of TL-PS110U so as to add it into the network of router.
Here are the steps to achieve the goal:
Step 1
Power on TL-PS110U and connect it to your USB printer. And connect a computer and TL-PS110U by cable line. If you need to reset the TL-PS110U, please refer to the FAQ
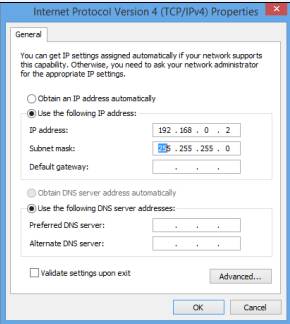
Step 2
Refer to the instruction below to assign static IP of the Local Area Connection on the computer: IP Address is 192.168.0.2; Subnet Mask is 255.255.255.0.
Step 3
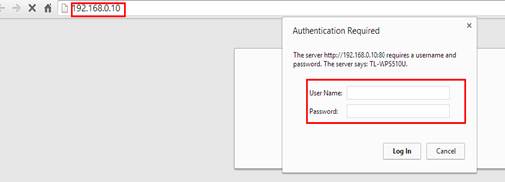
Log into the TL-PS110U.
Open the browser, type in 192.168.0.10, press Enter; It will ask for Username and Password to log in, type in admin for both.
Then click Setup →TCP/IP→Use the following TCP/IP settings and type in the IP information for the Pinter server.
Note: The printer server’s IP Address is 192.168.0.10 by default, it may not be in the same network as your router’s. If so, please change the IP address to be in the same network. In the example, the router IP is 192.168.1.254 and IP range is 192.168.1.*, so we put in 192.168.1.10 for the printer server, 255.255.255.0 for the Subnet Mask and 192.168.1.254 for Default Router.
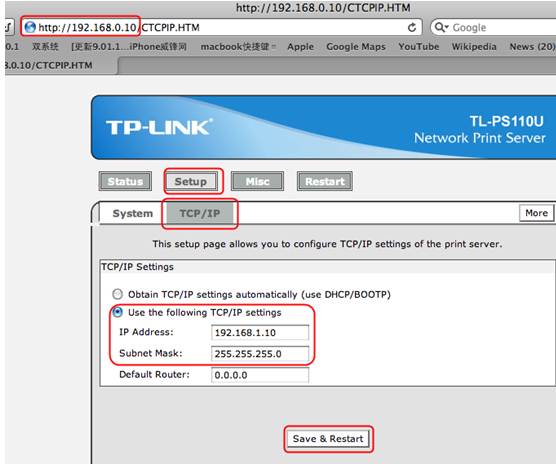
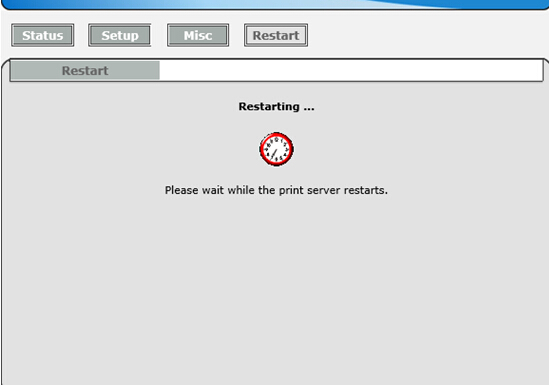
Click Save&Restart and wait for a while.

Step 4
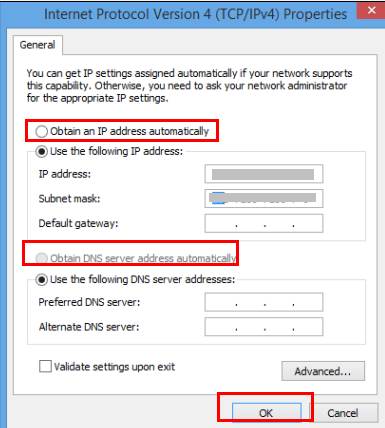
Change the computer’s Local Area Connection back to ‘Obtain an IP address automatically’ and ‘Obtain DNS server address automatically’.
Please refer to Step 2 if you don’t remember how to change the IP settings on the computer.
Step 5
Try whether you can ping the TL-PS110U which is 192.168.1.10.
Please refer to How to Use the Ping Command
If the ping test is successful,that means the TL-PS110U is configured in the same subnet with the router and can communicate with the wireless router and the local clients.
Step 6
Add a Standard TCP/IP port for the printer.
Please refer to this FAQ to add a Standard TCP/IP port.
Congratulations! You may share your printer in your network now.
Is this faq useful?
Your feedback helps improve this site.
TP-Link Community
Still need help? Search for answers, ask questions, and get help from TP-Link experts and other users around the world.