How to Configure Guest Network on TD-W8968(v2 and later), TD-W8960N(v5 v6), TD-W8950N, TD-W9980(B), TD-W9970,Archer D2/D5/D7/D9
Note: This article applies to TD-W8968 v2 and later, TD-W8960N of v5 v6, TD-W8950N, TD-W9980(B),Archer D5, Archer D7, Archer D9, Archer D2
Guest Network Access provides secure Wi-Fi access for guests to share your home or office network. When you have visitors in your house, apartment, or workplace, you can enable the guest network for them. You can set different access options for Guest Network users, which is very effective to ensure the security and privacy of your main network.
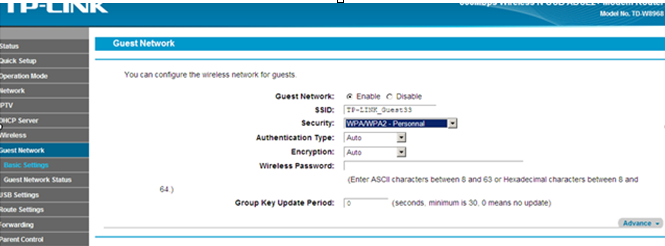
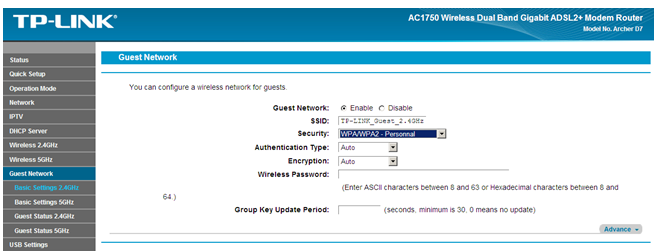
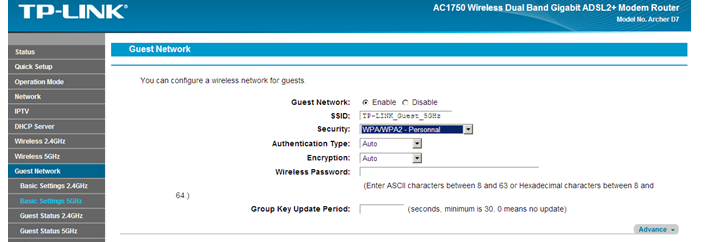
Step 1: Please login the web management page with the IP address 192.168.1.1.
Step 2: Please go to Guest Network page.


The explanation of the above 4 options:
1. Allow Guest to access my Local Network:
If you want to allow the clients in the guest network to access the clients in your Local Network, please select Enable. If not, please keep it disabled.
2. Allow Guest to access my USB Storage Sharing:
If you want to allow the clients in the guest network to access the USB Storage Sharing, please select Enable. If not, please keep it disabled.
3. Guest Network Isolation:
If you select Enable, the clients in the guest network will not be able to communicate with each other.
4. Guest Network Bandwidth Control:
With this feature, you can limit the Bandwidth of the guest network.
1) Select Enable, then you will be reminded to enable the Bandwidth Control Function.

2) Please click “here”, then you will go to the Bandwidth Control page. Check “Enable Bandwidth Control” and set the “Total Upstream Bandwidth” and “Total Downstream Bandwidth”.

3) Please Click Save, then you will be back to the Guest network page, and you can set the Bandwidth Control for guest network.

Get to know more details of each function and configuration please go to Download Center to download the manual of your product.
Is this faq useful?
Your feedback helps improve this site.


TP-Link Community
Still need help? Search for answers, ask questions, and get help from TP-Link experts and other users around the world.