How to install and format SD card for Tapo camera
Introduction
This article explains how to correctly install and format a microSD card in your Tapo camera. It provides step-by-step guidance for different camera types, including normal security cameras, Pan & Tilt cameras, outdoor cameras, and battery-powered devices that work with a hub. Following these instructions will help ensure proper installation and reliable local video storage.
Requirements
- A compatible microSD card with Tapo cameras.
- A screwdriver is required for installing SD card in outdoor cameras.
Installation
Scenario 1: Install the SD card
Note: When inserting an SD card, ensure it is oriented correctly. Do NOT insert at an angle or use force. If you are unable to insert the card properly, please check the direction of the card slot and avoid forcing it in.
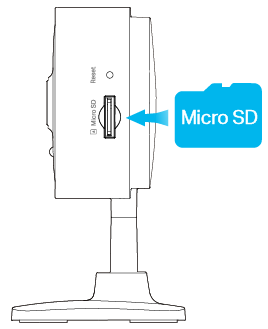
Case 1: For Standard Security Camera
Step 1. Find the SD card slot on the side panel.
Step 2. Holding the card in the correct orientation, carefully insert the SD card into the slot. Push in the SD card until you hear a clicking sound.
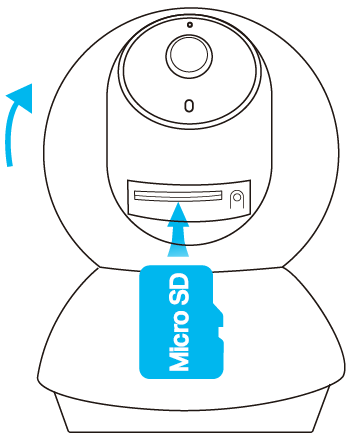
Case 2: For Pan&Tilt Security Camera
Step 1. Tilt the camera lens up, then locate the SD card slot.
Step 2. Holding the card in the correct orientation, carefully insert the SD card into the slot. Push in the SD card until you hear a clicking sound.
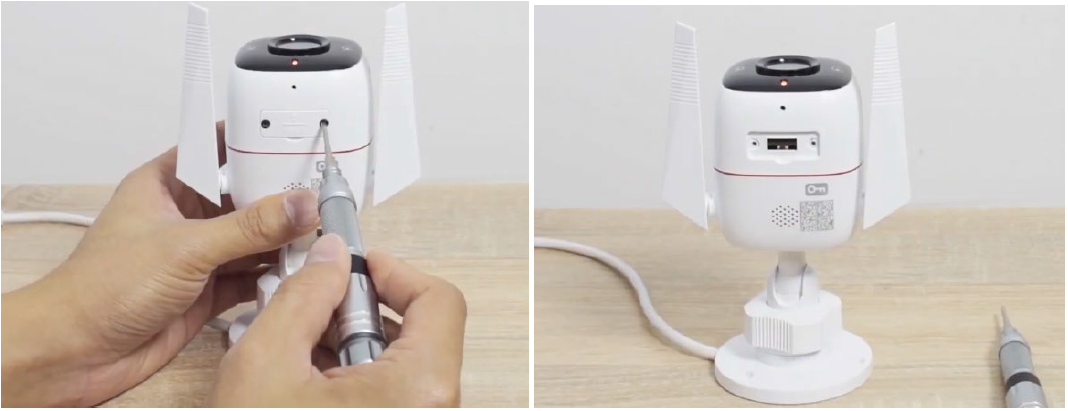
Case 3: For Outdoor Security Camera
Step 1. Loosen the screws on the back panel, remove the cover, and you’ll find the SD card slot.
Step 2. Holding the card in the correct orientation, carefully insert the SD card into the slot. Push in the SD card until you hear a clicking sound.
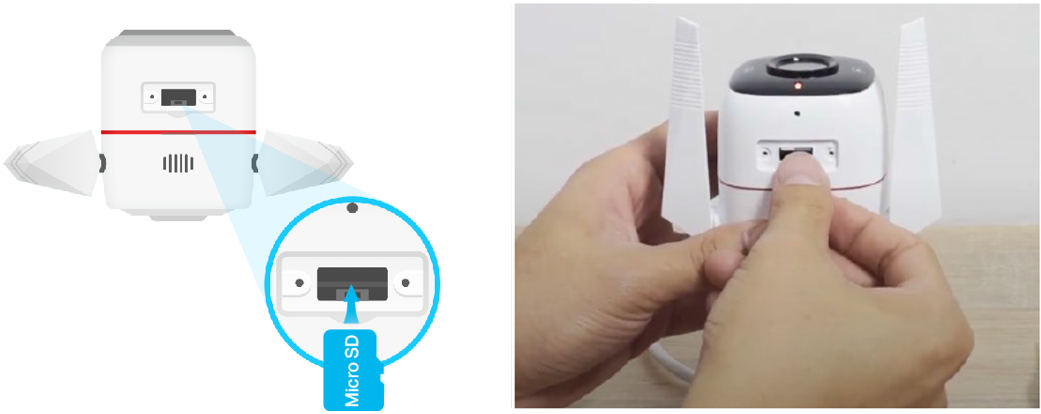
Step 3. Reinstall the SD card cover and ensure it is positioned correctly. Do not install it in the reverse direction to avoid water ingress.
Case 4: For battery-powered cameras and doorbells that work with the hub
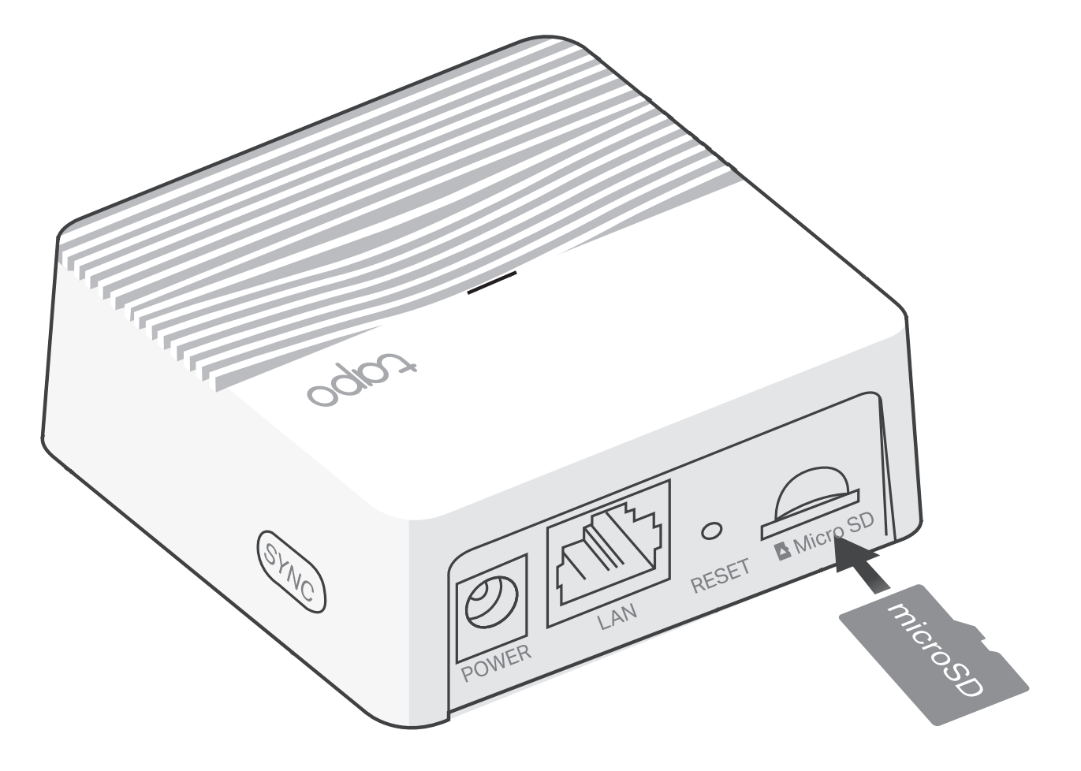
For cameras connected to a hub, the microSD card must be installed in the hub.
You can find the microSD card slot on the back of the hub. Hold the card in the correct orientation, carefully insert the SD card into the slot, and push it in until you hear a clicking sound.
Scenario 2: Format SD card
When you insert a microSD card into a Tapo camera or Tapo hub, the app will prompt you to format it for video recording. Formatting ensures compatibility but will erase all existing data, so be sure to back up important files in advance. The formatting steps may vary slightly depending on where the microSD card is installed. Follow the appropriate instructions below.
Case 1. To format a microSD card inserted into the Tapo camera
Step 1. Open the Tapo app and tap your camera device card.
Step 2. Tap the gear icon in the top right corner to enter Device Settings.
Step 3. Go to Storage & Recordings > Local Storage.
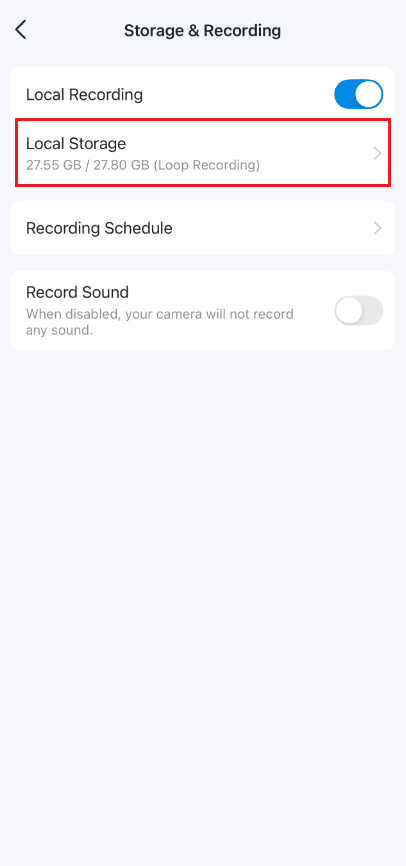
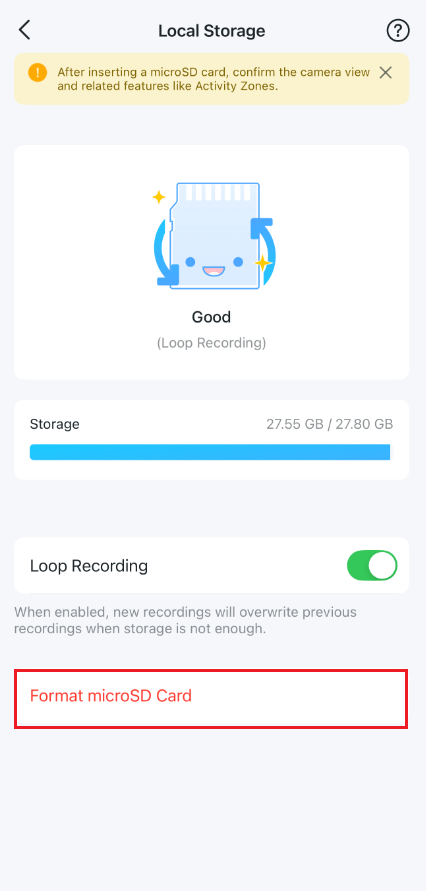
Step 4. Tap Format microSD Card.
Case 2. To format a microSD card inserted into the Tapo hub
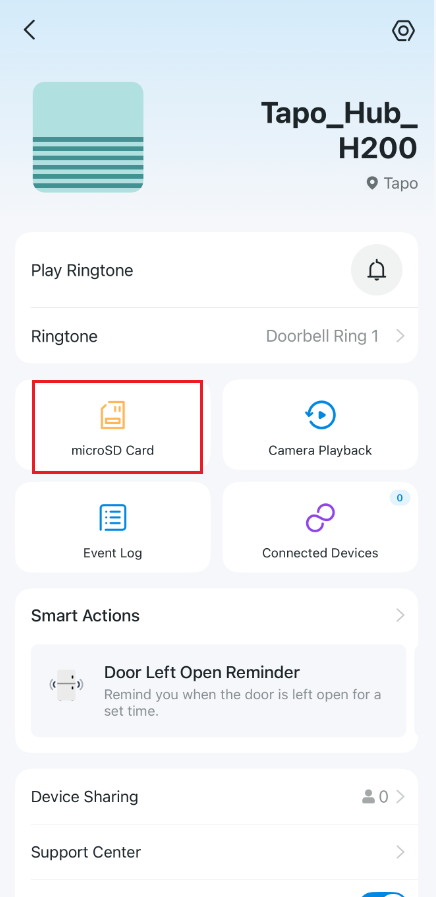
Step 1. Open the Tapo app and tap your hub device card.
Step 2. Navigate to the microSD Card page, then tap Format microSD Card at the bottom of the page.

Get to know more details of each function and configuration please go to Download Center to download the manual of your product.
Is this faq useful?
Your feedback helps improve this site.


TP-Link Community
Still need help? Search for answers, ask questions, and get help from TP-Link experts and other users around the world.