How to Configure Email Notifications Triggered by Alarm Input
Contents
Introduction
Currently, certain models of NVRs are equipped with Alarm Input interfaces. These allow you to configure Alarm Input on the NVR, and when an event is triggered, the system can send email notifications to pre-configured mail addresses. This helps to promptly draw attention to abnormal situations.
Requirements
- NVR equipped with Alarm Input interface
- Input devices (such as various sensors)
Configuration
Next, we will first demonstrate how to configure the Mail Server on the NVR, and then introduce how to use the Alarm Input function on the NVR and enable email notifications.
Step 1. Configure the Mail Server
To set the mail server successfully, we need to make sure the third-party mail server already enables the SMTP service and allows us to log in. Take Gmail as an example:
Gmail enables SMTP service by default, but direct login is not possible. We need to set an APP password for Gmail and then use this password to log in via the VIGI NVR GUI or webUI. About how to set the APP password for Gmail, you can refer to https://support.google.com/accounts/answer/185833?hl=en.
Different mailboxes may have different ways to support third-party access. You need to configure this function based on your mailbox.
You can send a test email to one of your other mailboxes. If you set the mail server successfully, you will receive a success message. Otherwise, you will receive a failure notification reported by the NVR.

Step 2. Configure Alarm Input
Navigate to Settings > Event > Alarm Device > Alarm Input, and enable the corresponding terminal port. For Alarm Type, select Normally Closed or Normally Open based on the actual alarm input device’s operation mode.
For example, if a normally open alarm switch is connected—meaning the switch is open under normal conditions and closes only in an emergency to trigger an alarm—then select Normally Open.
Conversely, if the alarm switch remains closed under normal conditions and opens to trigger an alarm during an emergency, then select Normally Closed.
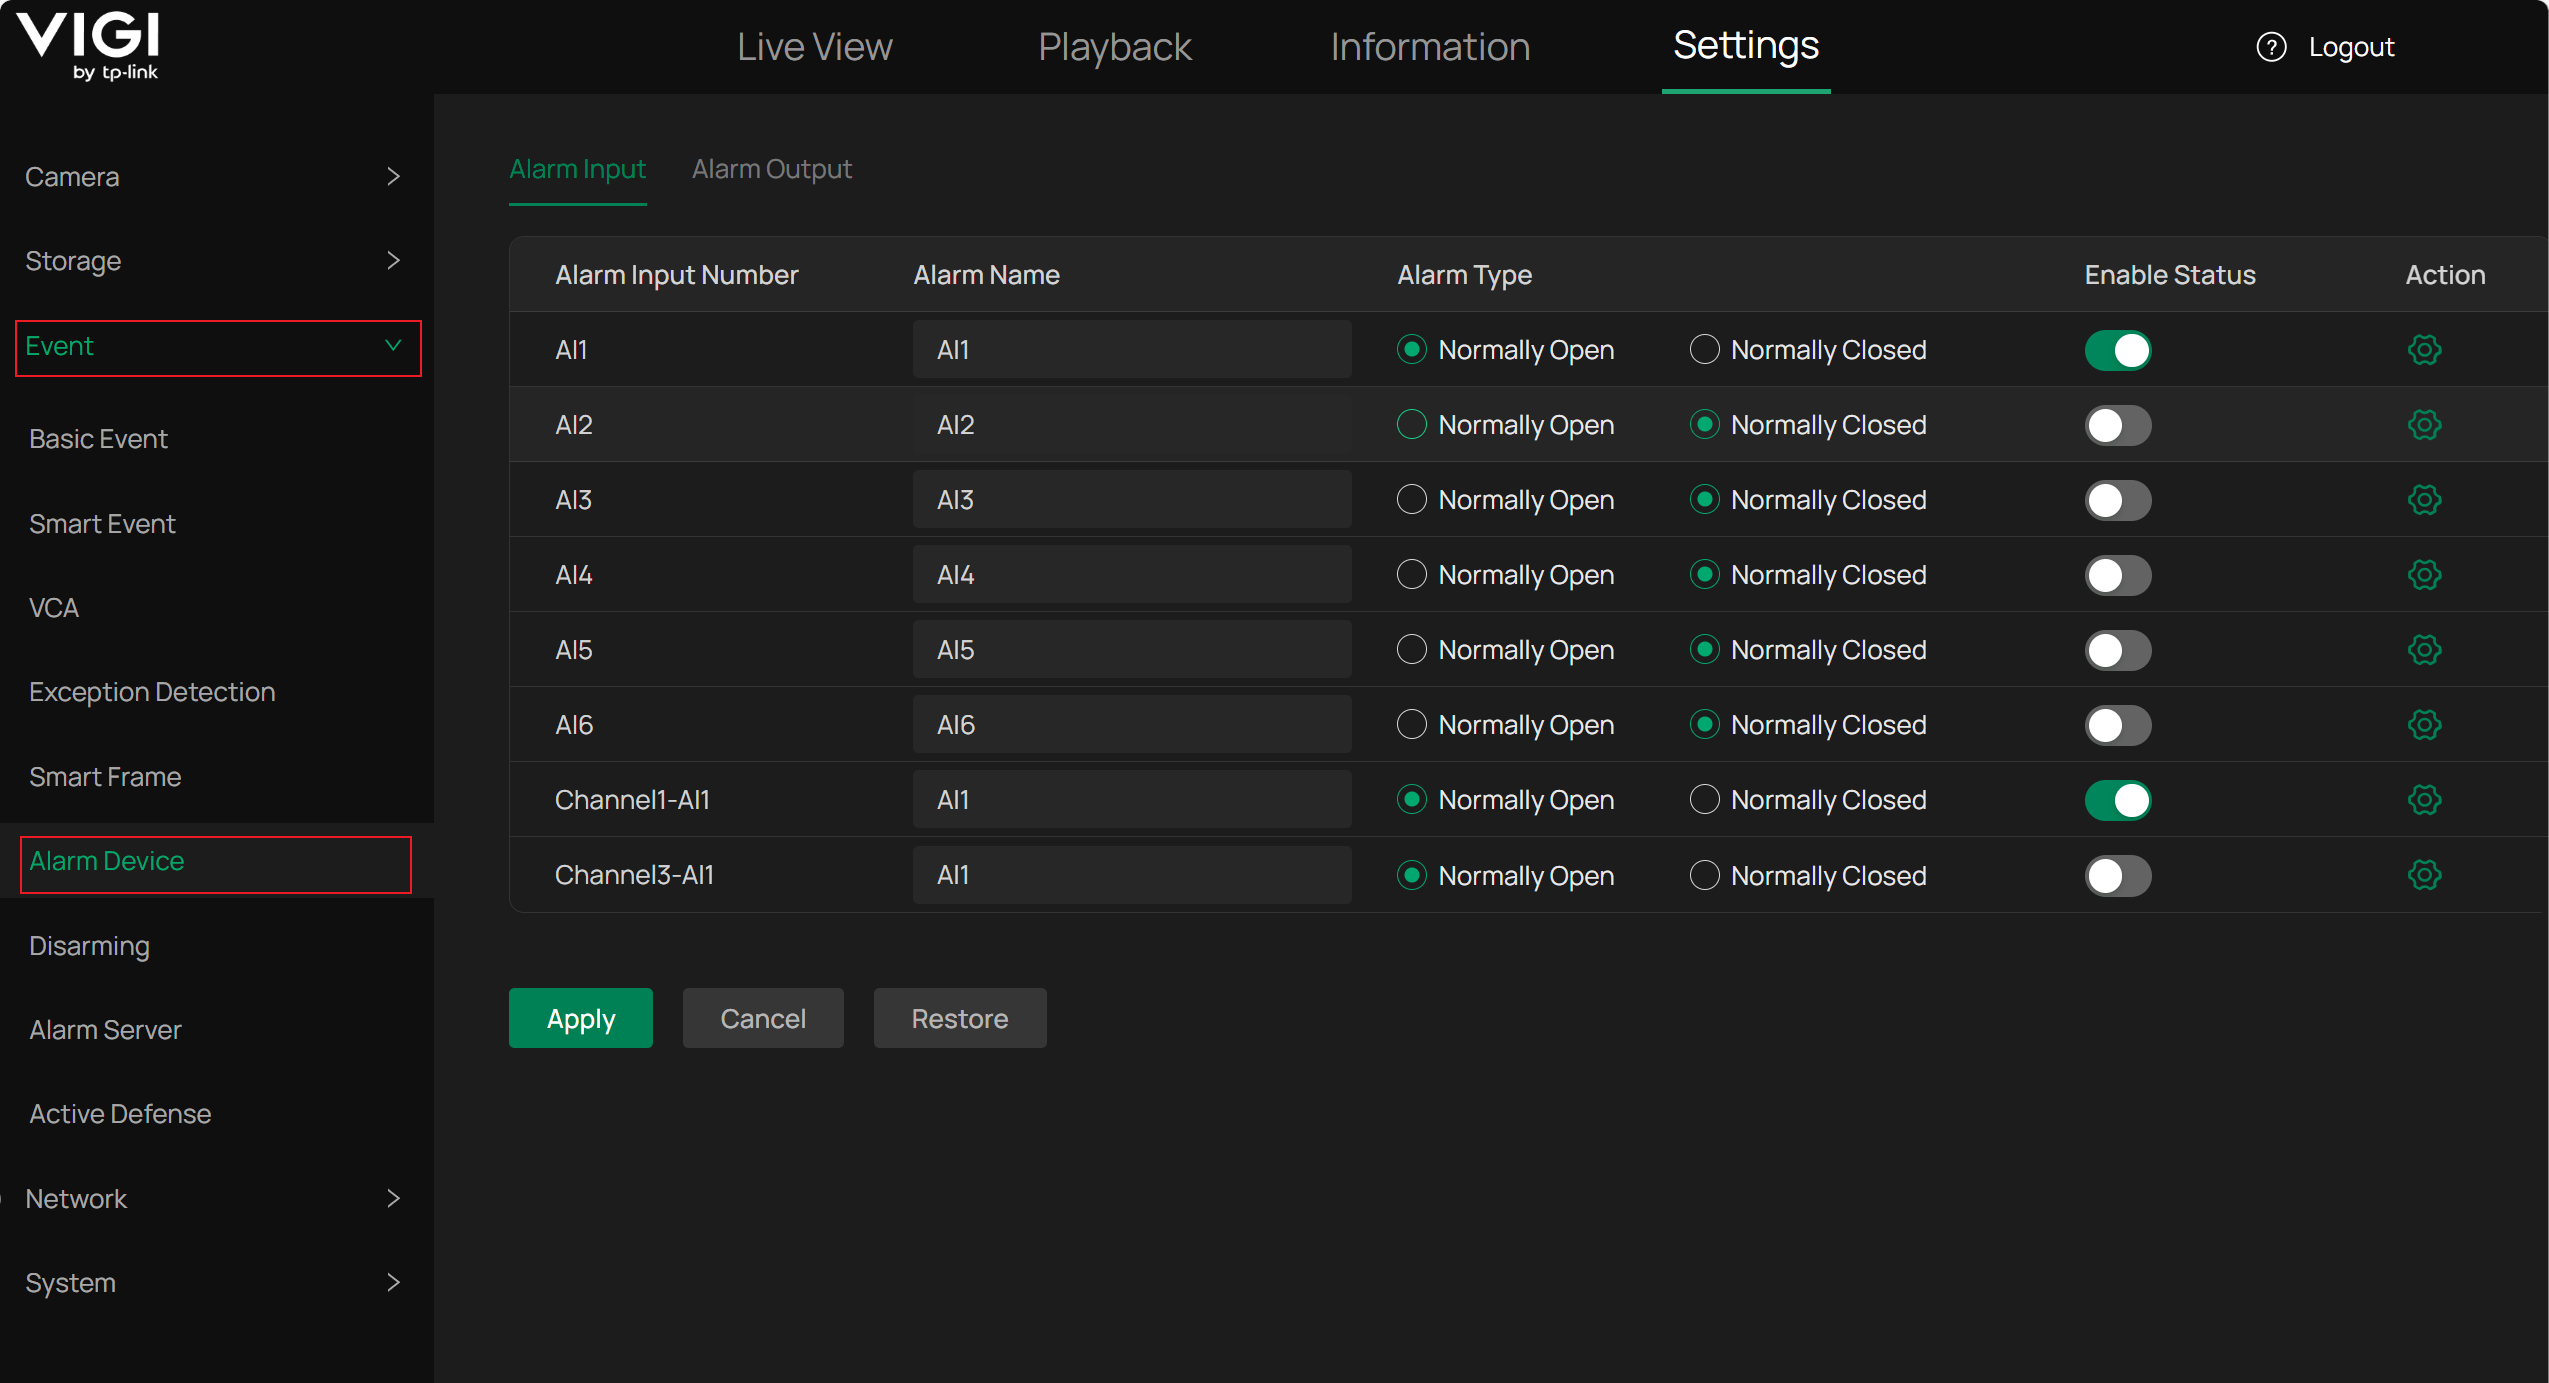
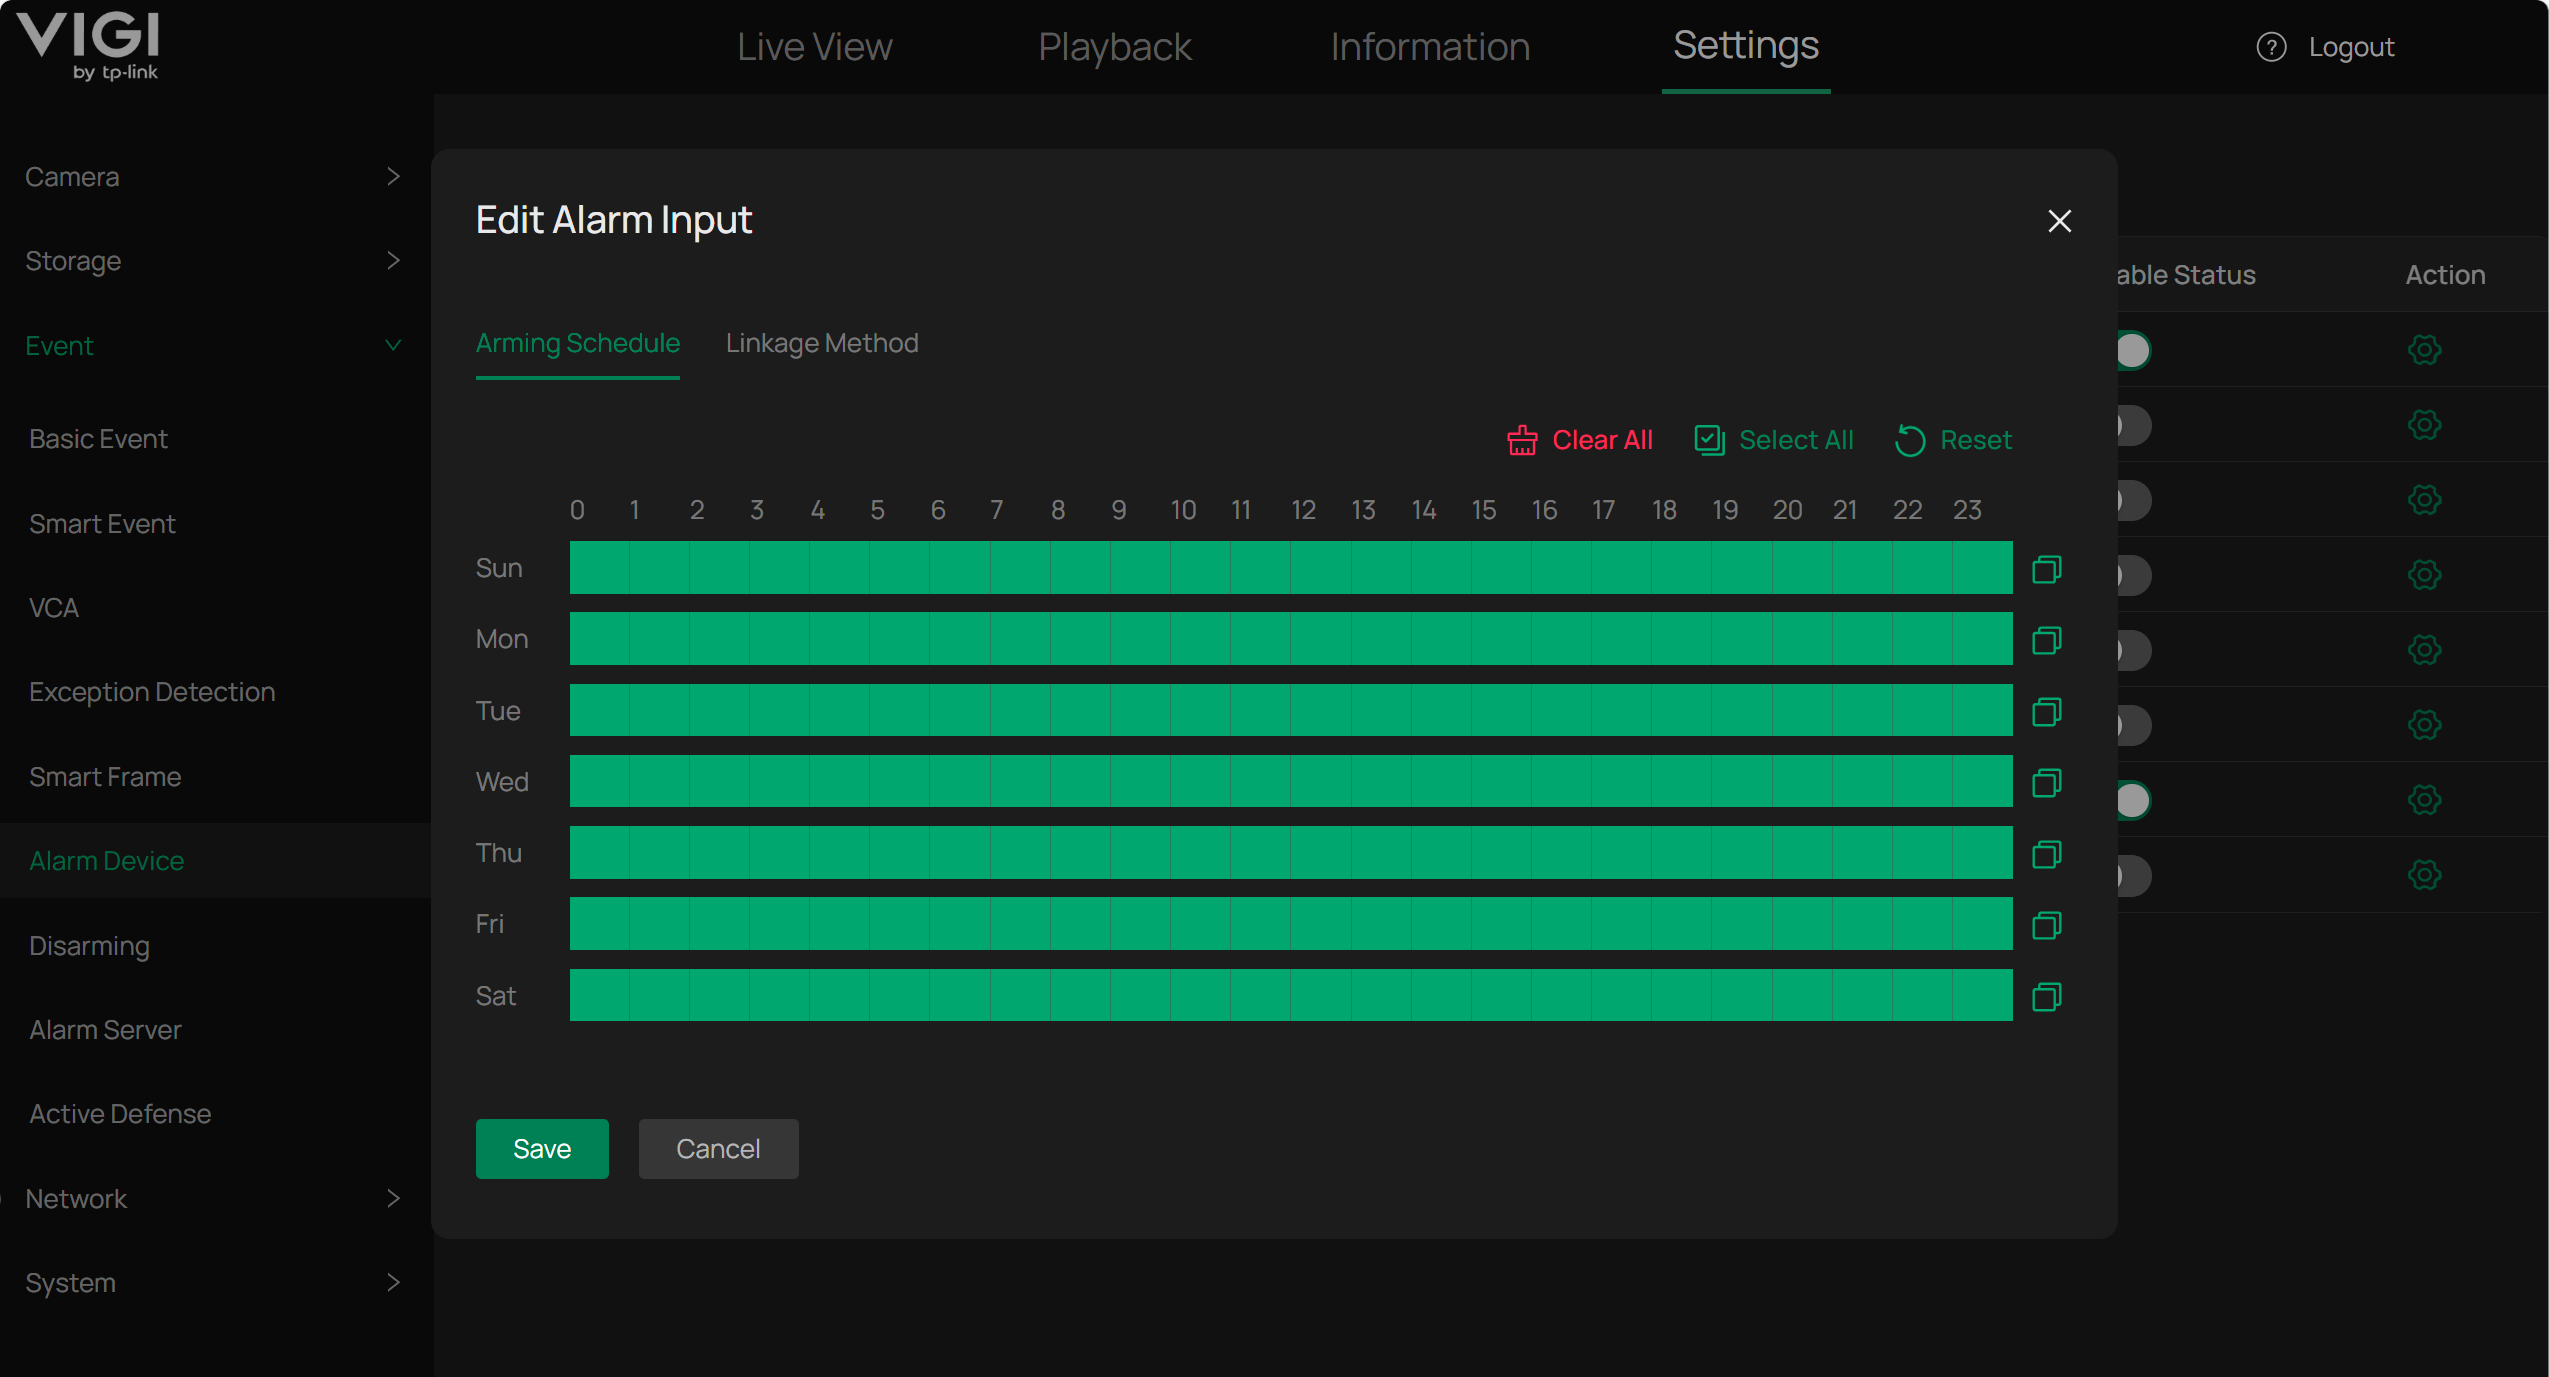
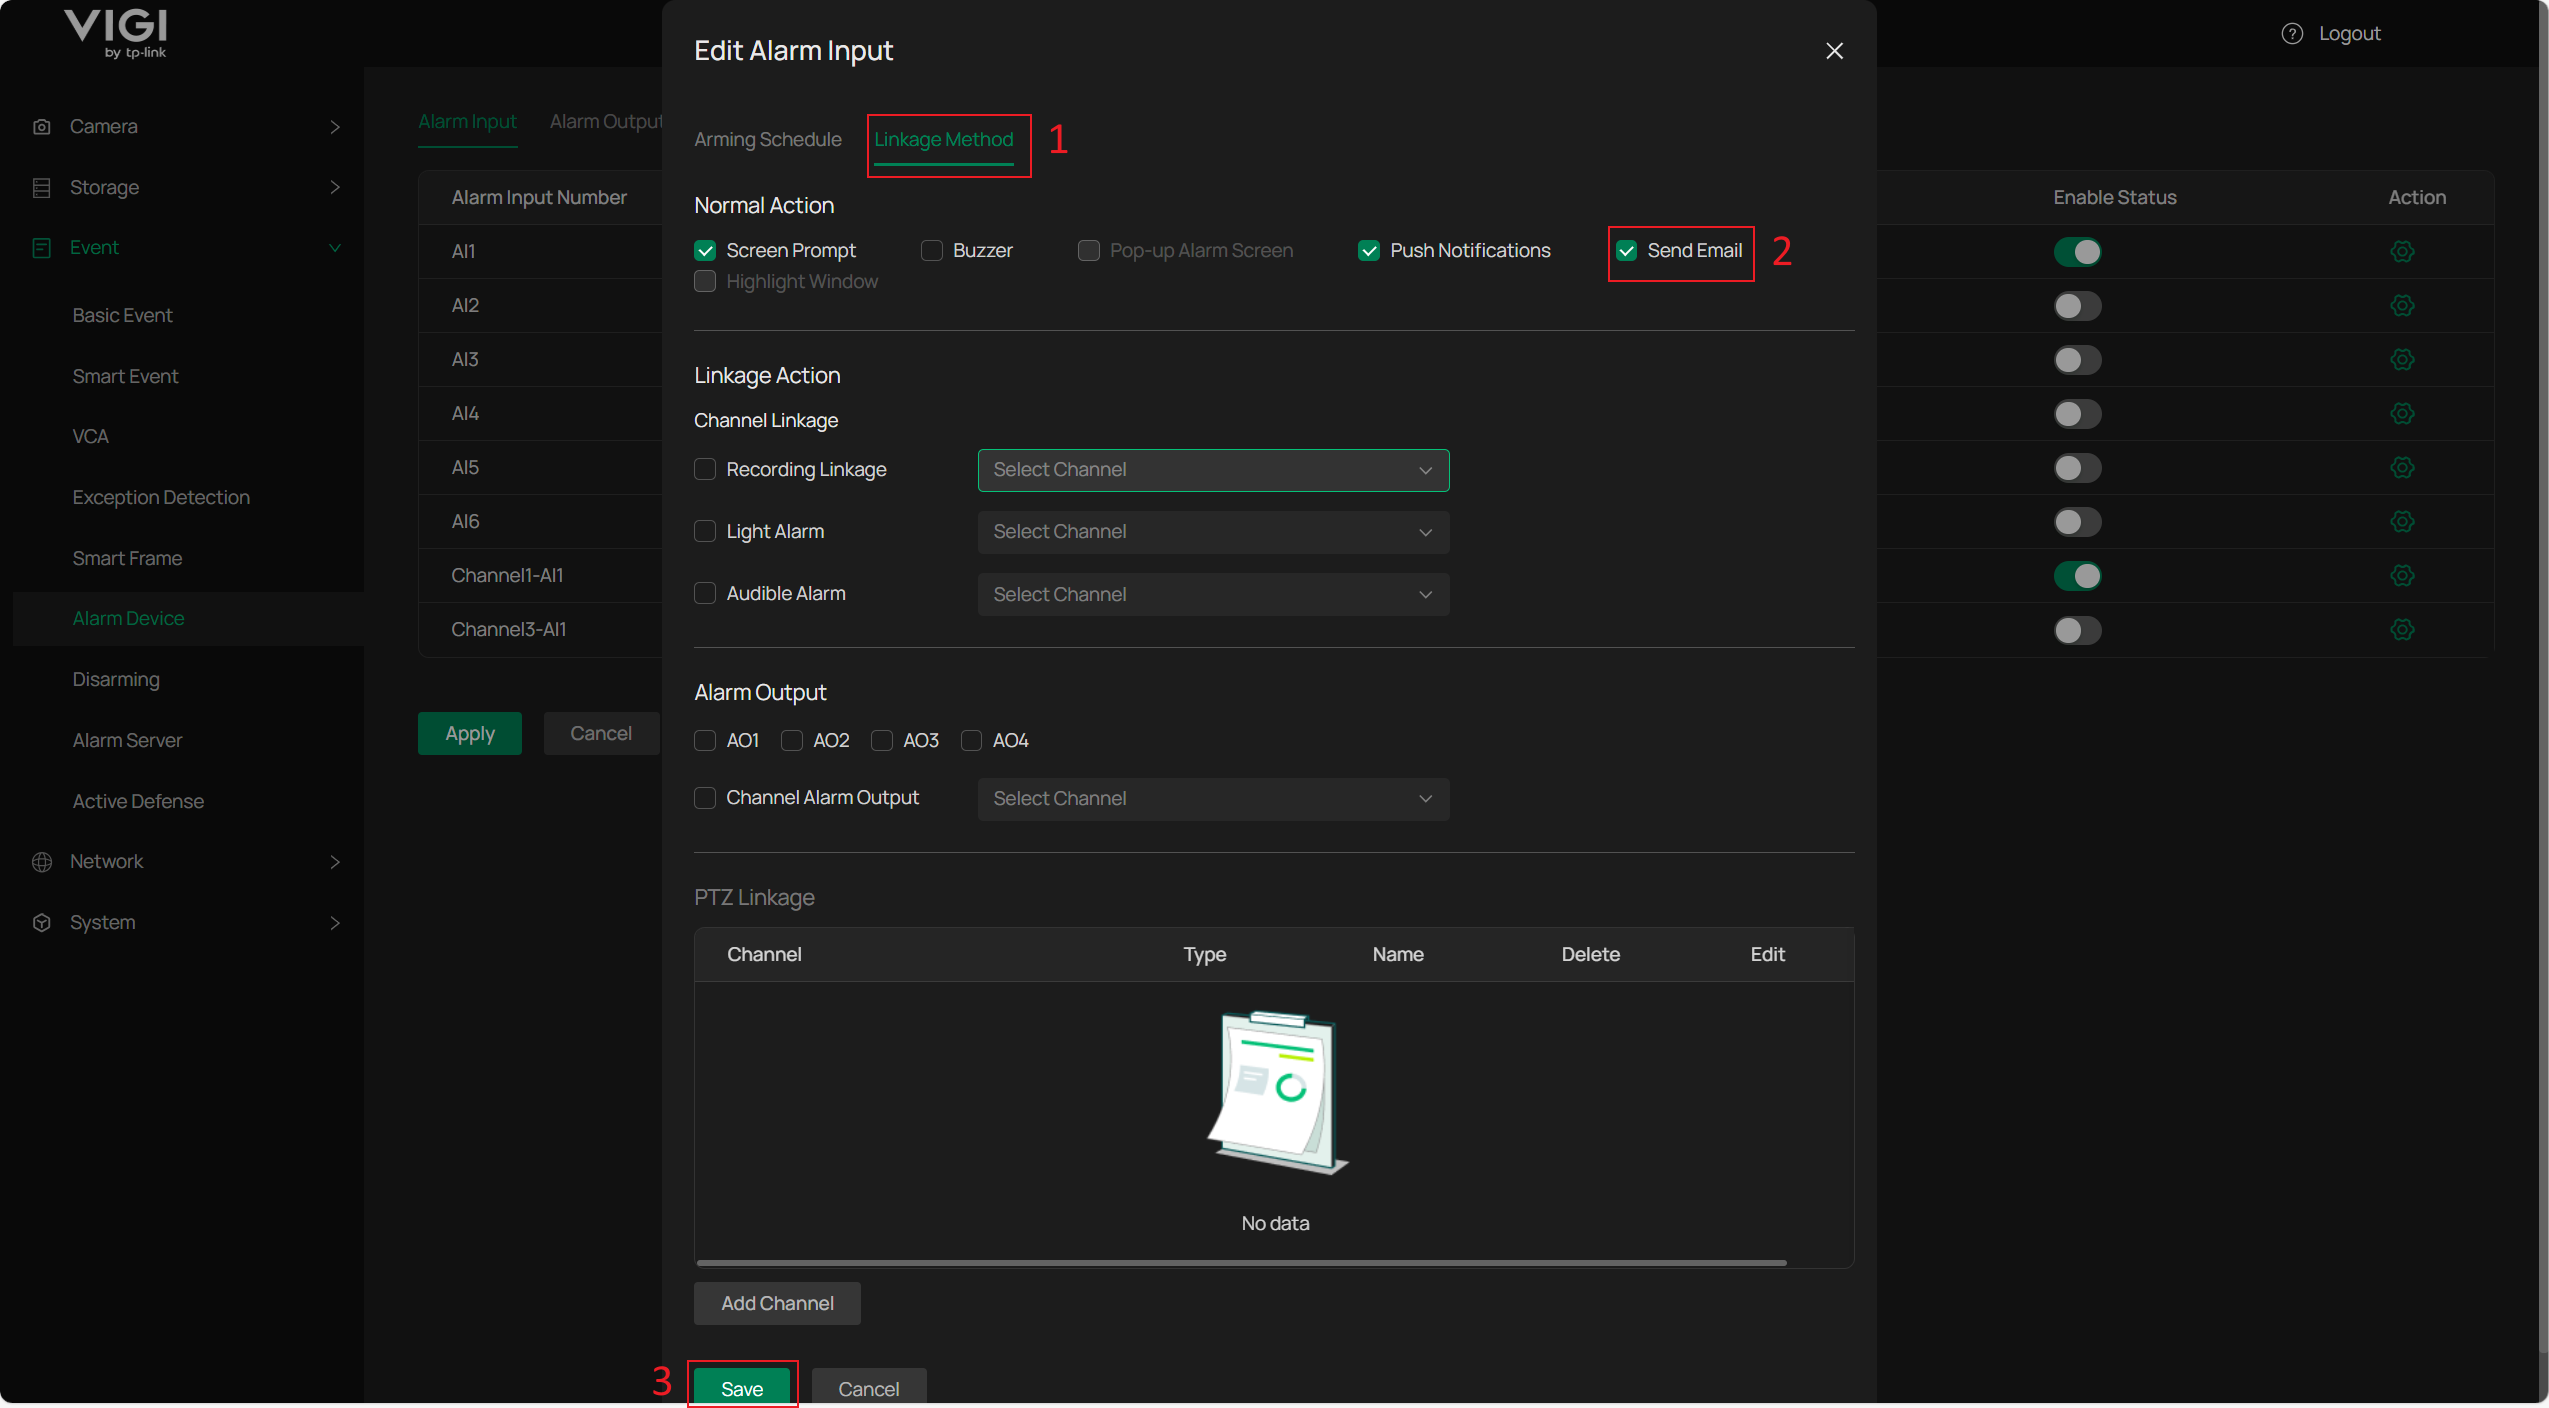
Click the Action button to the right of Al1 to configure the Arming Schedule and Linkage Method:
In the Linkage Method configuration, you can define the output types that Al1 will trigger. Here, check the Send Email option and click Save.
Verification
After configuring as described above, connect the sensor or other device to the Al1 and GND pins. Since the Alarm Type is set to Normally Open, the alarm will be triggered only when the switch closes upon an event. You can then check the configured email inbox for a notification similar to the following:

Conclusion
This article introduces the detailed steps and methods for configuring the Mail Server on an NVR, as well as using the Alarm Input function on the NVR to trigger email notifications.
Get to know more details of each function and configuration please go to Download Center to download the manual of your product.
Is this faq useful?
Your feedback helps improve this site.
TP-Link Community
Still need help? Search for answers, ask questions, and get help from TP-Link experts and other users around the world.