How to Configure Network Wired Connection on VIGI Camera
Contents
Objective
Wired network configuration is a common function of VIGI Camera. This article will take VIGI C345S as an example to explain how to configure wired network parameters.
Requirements
- VIGI Camera
- Optional:VIGI VMS / VIGI Config Tool / VIGI web management page
Configuration
VIGI camera support configure network parameters with VIGI VMS/VIGI Config Tool/ VIGI web management page.
VIGI Web Management Page
Step 1. Access to VIGI Camera web management page with VIGI Camera IP Address.
Step 2. Go to Settings > Network Settings > Connect.
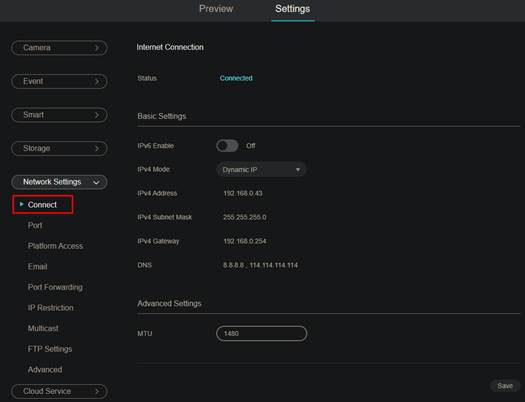
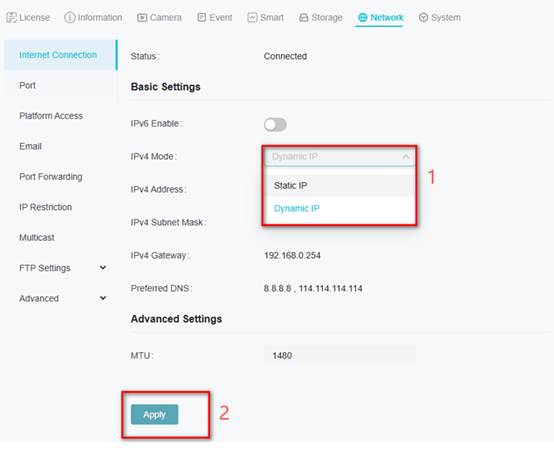
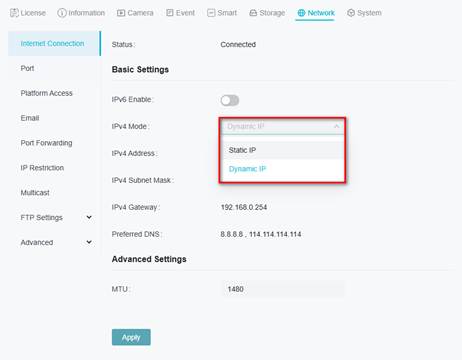
Step 3. Choose the IPv4 Mode. There are two IPv4 Modes you can choose.
Dynamic IP
Switch IPv4 Mode to “Dynamic IP”, and save configuration. Then your VIGI camera will get an IP address automatically from DHCP server.

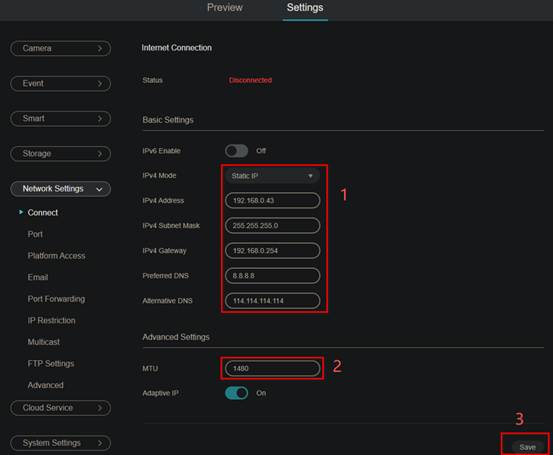
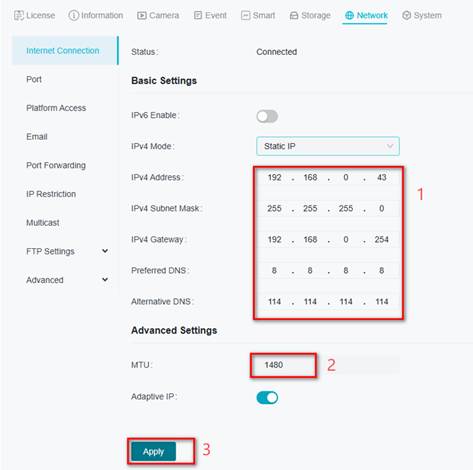
Static IP
Switch IPv4 Mode to “Static IP”. Configure the information, such as: IPv4 Address, IPv4 Subnet Mask, IPv4 Gateway, Preferred DNS, Alternative DNS and MTU. Then save the settings.

VIGI VMS
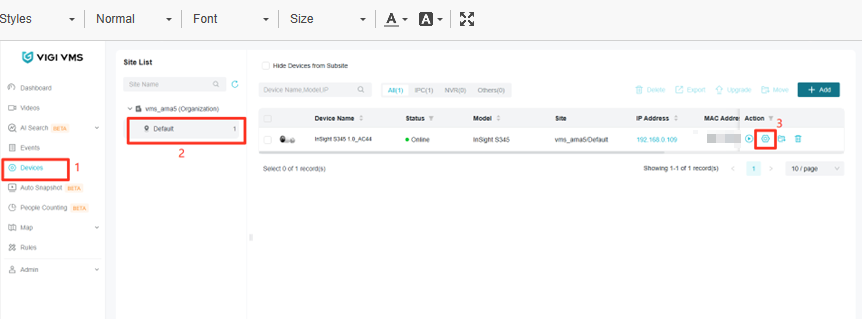
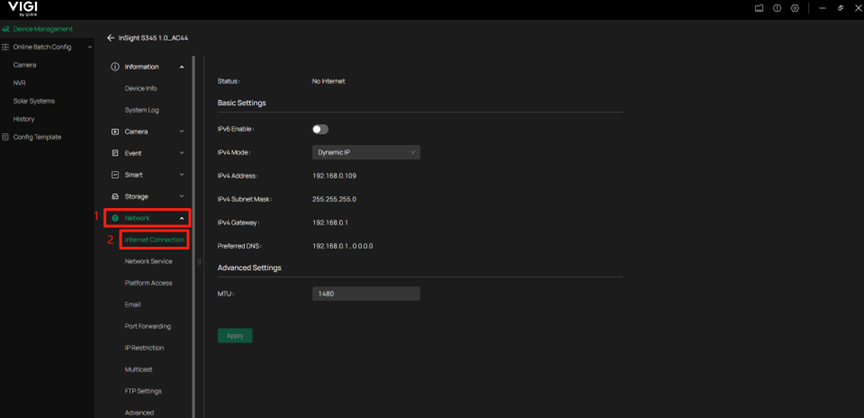
Step 1. Access to VIGI VMS. Go to Devices, choose the Site, then choose device which need to be configured, and click “Edit”.
Step 2. Go to Network > Internet Connection.
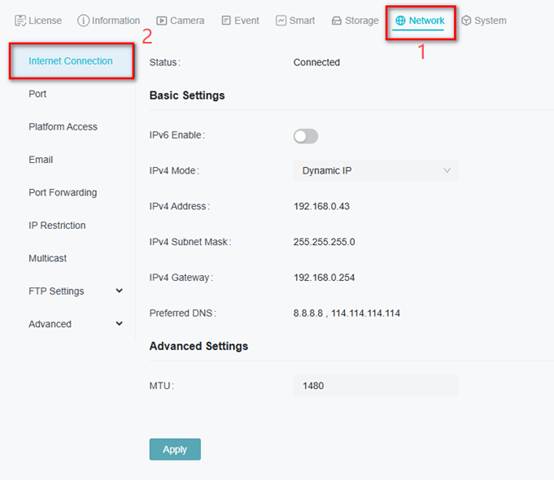
Step 3. Choose the IPv4 Mode. There are two IPv4 Modes you can choose.
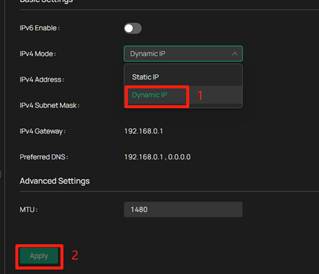
Dynamic IP
Switch IPv4 Mode to “Dynamic IP”, and save configuration. Then your VIGI camera will get an IP address automatically from DHCP server.
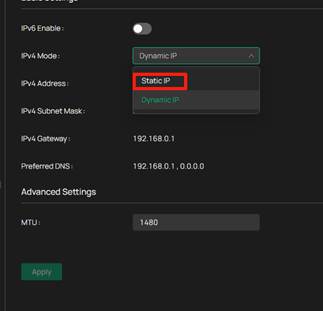
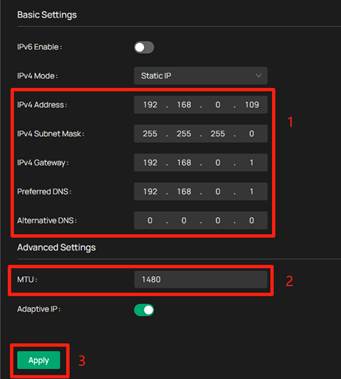
Static IP
Switch IPv4 Mode to “Static IP”. Configure the information, such as: IPv4 Address, IPv4 Subnet Mask, IPv4 Gateway, Preferred DNS, Alternative DNS and MTU. Then save the settings.
VIGI Config Tool
Step 1. Start VIGI Config Tool, choose device which need to be configured, and click “Edit”.
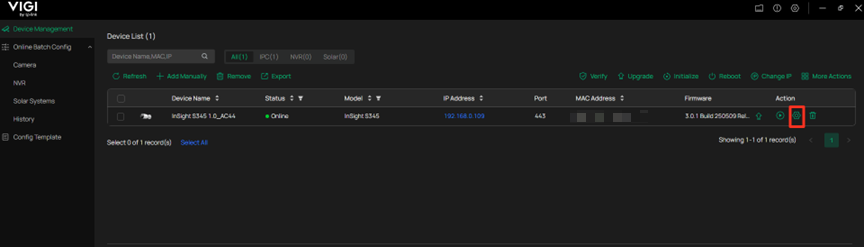
Step 2. Go to Network > Internet Connection.
Step 3. Choose the IPv4 Mode. There are two IPv4 Modes you can choose.
Dynamic IP
Switch IPv4 Mode to “Dynamic IP”, and save configuration. Then your VIGI camera will get an IP address automatically from DHCP server.
Static IP
Switch IPv4 Mode to “Static IP”. Configure the information, such as: IPv4 Address, IPv4 Subnet Mask, IPv4 Gateway, Preferred DNS, Alternative DNS and MTU. Then save the settings.
Conclusion
You have learned how to configure wired network parameters of VIGI camera.
Get to know more details of each function and configuration please go to Download Center to download the manual of your product.
Is this faq useful?
Your feedback helps improve this site.

TP-Link Community
Still need help? Search for answers, ask questions, and get help from TP-Link experts and other users around the world.