How to Configure Motion Detection on VIGI Cameras via the VIGI App
Contents
Configuration for enabling Motion Detection on the VIGI app
Configuration for notifications
Configuration for object classification
Configuration for detection zones
Configuration for arming schedule
Introduction
Motion Detection enables a VIGI camera to detect movement and trigger actions such as notifications, recordings, alarms, and object classification. This article explains how to configure Motion Detection and related settings using the VIGI App.
Requirements
-
VIGI App installed on a mobile device (Version 2.7.95 used in this example).
- VIGI Camera (VIGI InSight S385DPS used in this example). Feature availability may vary depending on the camera model.
Configuration
Follow the steps below to configure Motion Detection on your VIGI camera using the VIGI App. The available settings include notifications, object classification, alarms, detection zones, arming schedules, and sensitivity adjustments.
Configuration for enabling Motion Detection on the VIGI app
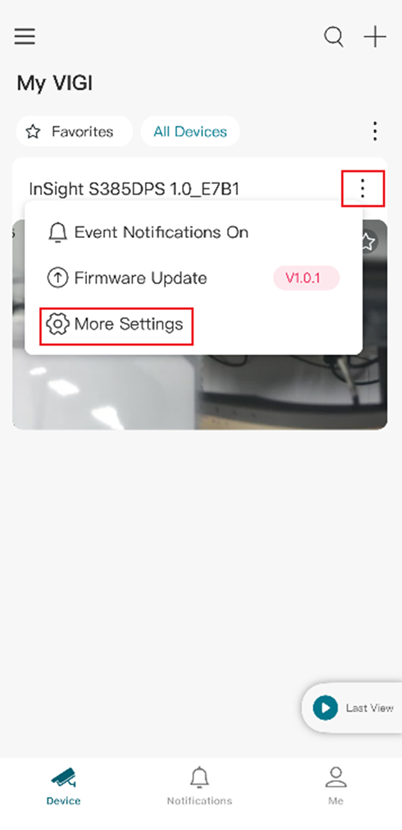
Step 1. Click the Three-dot menu in the top-right corner and choose More Settings.
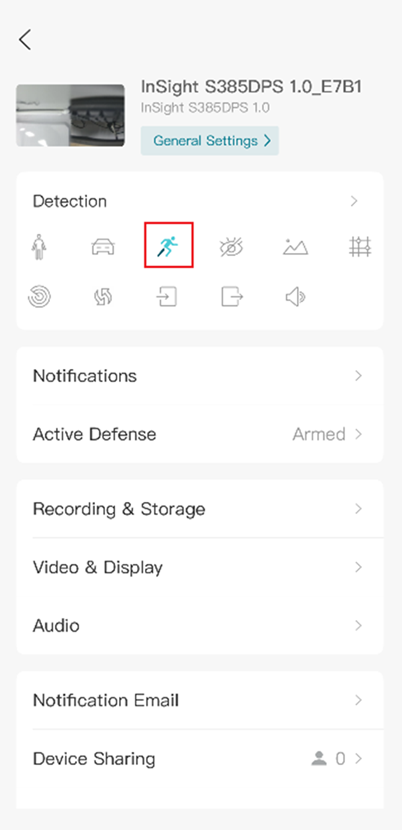
Step 2. Click the Motion Detection icon.
Step 3. Click on the Toggle button to enable Motion Detection.
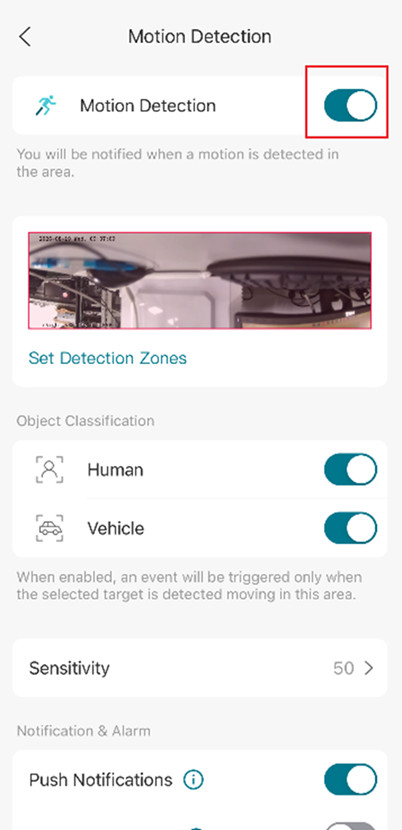
Note: Once Motion Detection is enabled, you will have access to Notifications, Object Classification, Set Detection Zones, Sensitivity, and other features.
Configuration for notifications
Prerequisites:
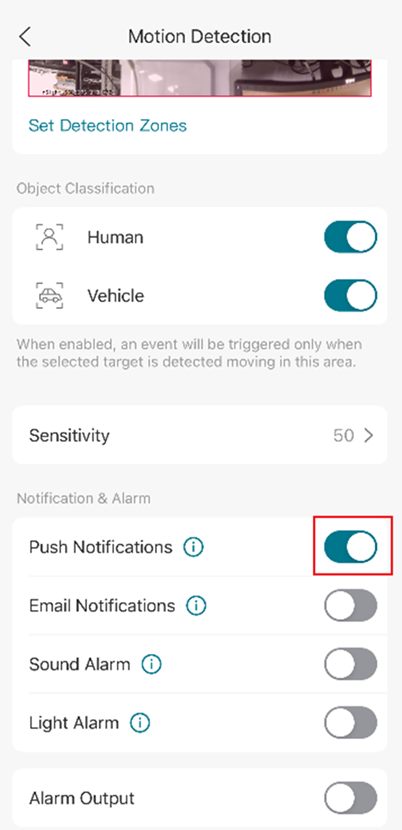
- To receive notifications directly on the VIGI App, select Push Notifications.
- To receive notifications via email, select Email Notifications.
Note: Email Notifications require an email account and SMTP server settings to be configured through the device's web interface.
Step 1. Enable Motion Detection to access this option.
Step 2. Enable your preferred notification method: Push Notification, Email Notification, or both.
Configuration for object classification
When enabled, motion events are triggered only when the selected target type is detected.
Step 1. Enable Motion Detection to access this option.
Step 2. Click the Toggle button to enable Human and/or Vehicle triggers.
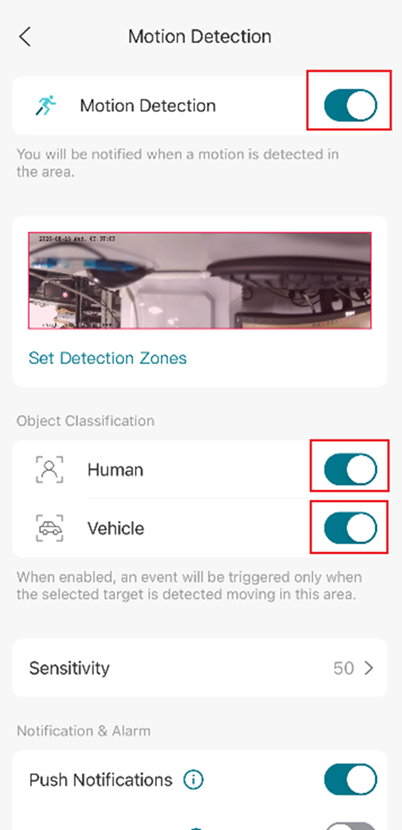
For this example – with both Human and Vehicle enabled, an event will be triggered when the camera detects humans or vehicles.
Configuration for alarm
Step 1. Enable Motion Detection to access this option.
Step 2. Click the Toggle button to enable Sound Alarm and/or Light Alarm.
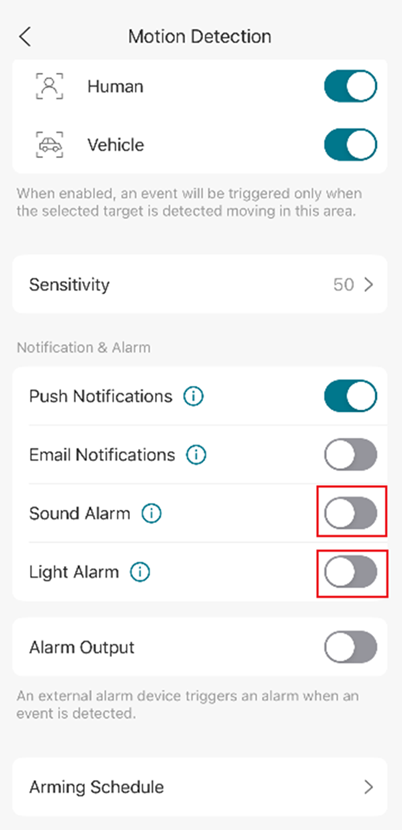
- Sound Alarm: When enabled, the camera emits an audible alarm when a human or vehicle is detected, based on the selected Object Classification settings.
- Light Alarm: When enabled, the camera flashes a warning light when a human or vehicle is detected, based on the selected Object Classification settings.
Configuration for detection zones
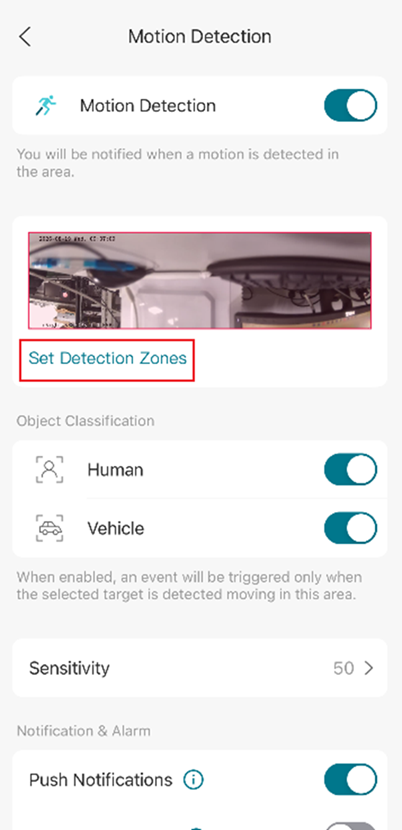
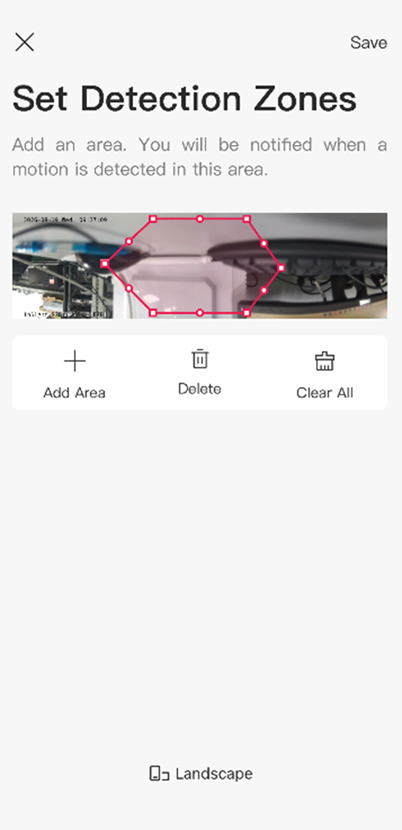
You can use this function to restrict motion detection to custom zones. The camera will not detect motion outside of these designated areas. The entire view is covered by default.
Step 1. Enable Motion Detection to access this option.
Step 2. Click on Set Detection Zones.
Step 3. Add an area.
You will be notified when motion is detected in this area.
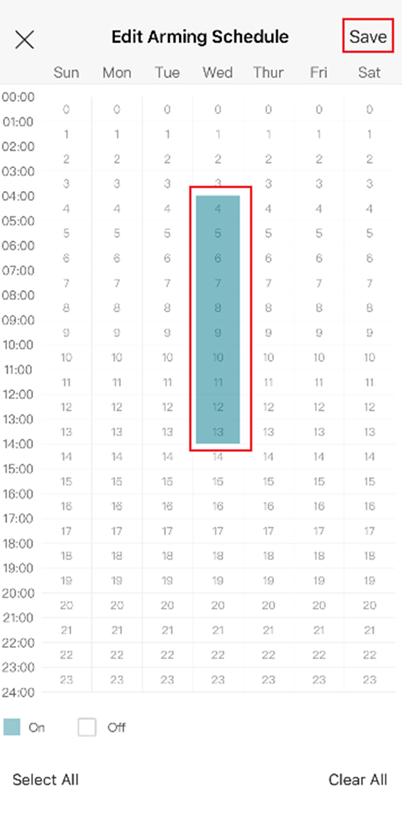
Configuration for arming schedule
Step 1. Enable Motion Detection to access this option.
Step 2. Click on Arming Schedule.
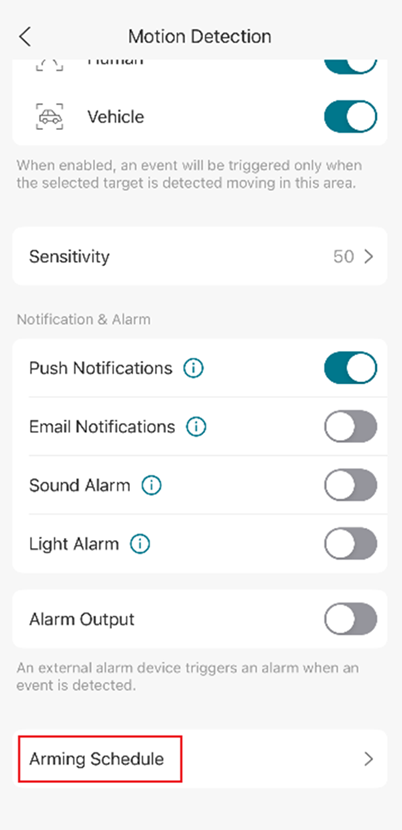
Step 3. Click on Edit.
You can also choose to disable arming from this menu.
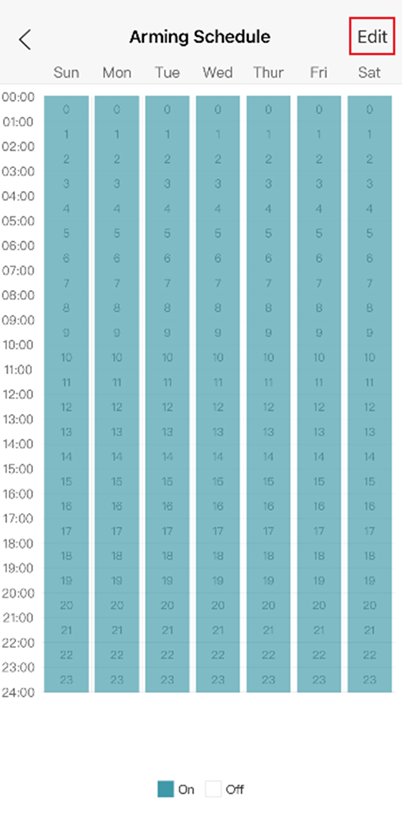
Step 4. Select the arming time period; it will be enabled 24/7 by default.
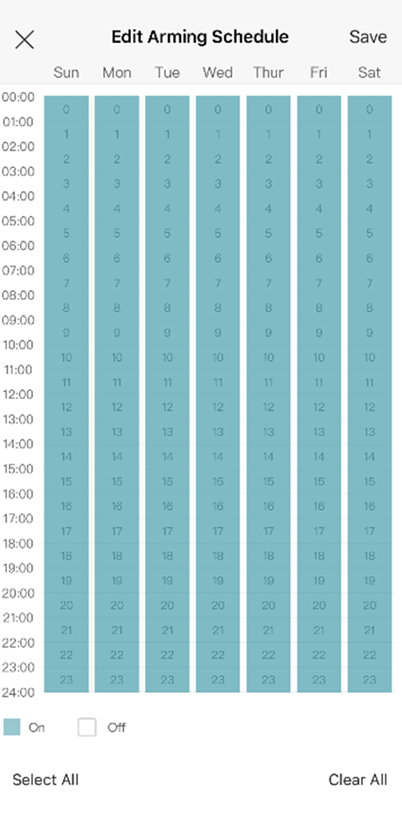
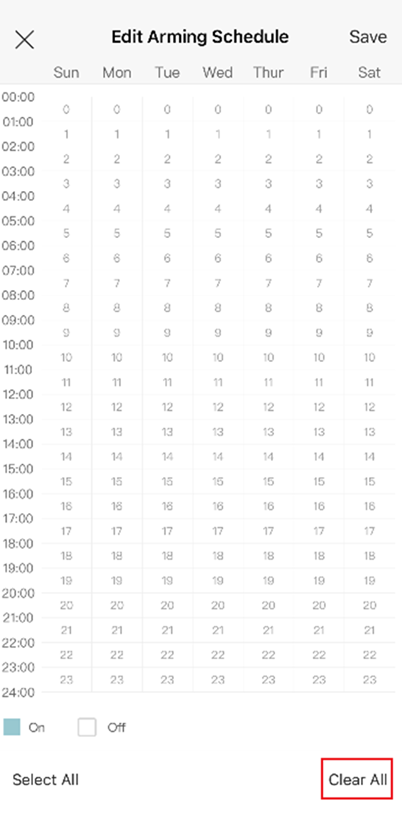
Step 5. Click on Clear All in the bottom-right corner, then long-press a column to select a specific day of the week. Click Save to apply the configuration.
Configuration for sensitivity
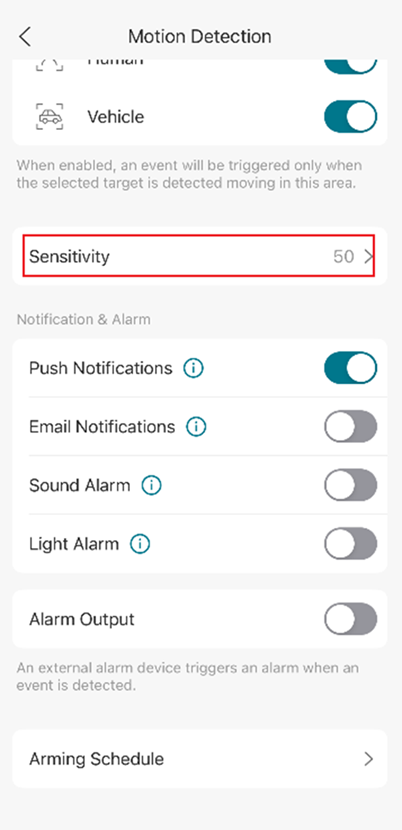
Step 1. Enable Motion Detection to access this option.
Step 2. Click on Sensitivity.
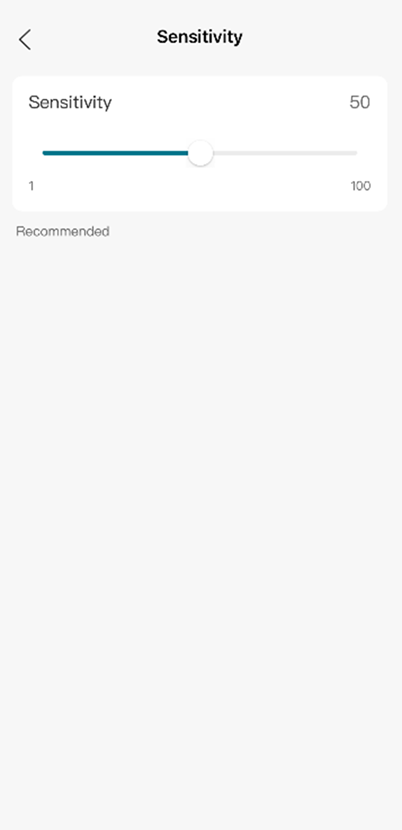
Step 3. Adjust Sensitivity.
Slide to adjust Sensitivity (Low/Medium/High) as needed. Increased sensitivity results in more recordings and notifications.
Verification
- Live view: Tap the camera to open Live View and monitor detection events in real time.
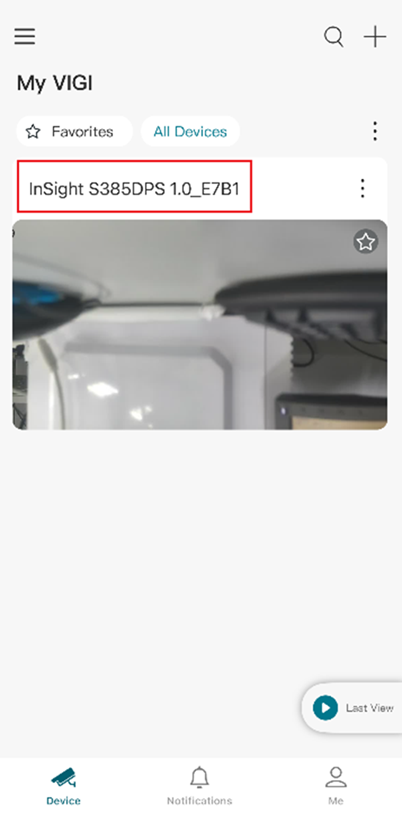
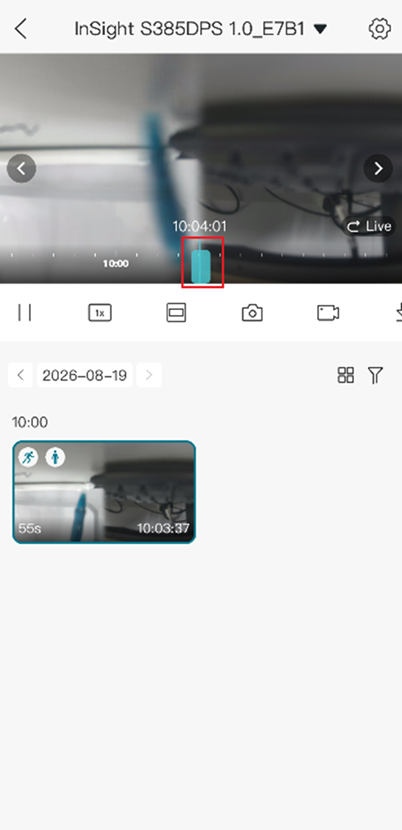
- Review Recordings: Ensure the camera is connected to an NVR or has a microSD card installed. Drag the timeline to review recorded footage and verify that alarm events have been captured.
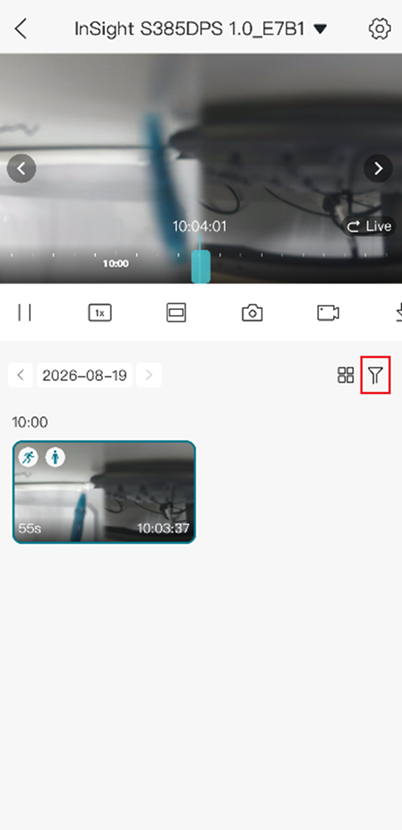
- Filter Event Recordings: Use the Filter function to quickly locate and review recordings associated with motion events.
Conclusion
You have now successfully configured Motion Detection on your VIGI camera using the VIGI App. By configuring notifications, object classification, alarms, detection zones, arming schedules, and sensitivity settings, you can customize how the camera responds to motion events.
To learn more about each function and configuration, please visit Support Home to download or check the manual for your product.
QA
Q1: What is required for motion detection playback and recordings?
A1: To view motion detection recordings and playback footage, a storage device is required, such as a VIGI NVR or a microSD card.
Q2: What motion detection settings can be configured in the VIGI App?
A2: The VIGI App allows you to configure motion detection notifications, object classification (human and vehicle detection), detection zones, and sensitivity settings to meet different monitoring requirements.
Q3: Why are no motion detection events appearing in playback?
A3: Motion detection events will only appear in playback if recordings are being stored on a VIGI NVR or microSD card. You can use the Filter function to quickly locate motion-triggered recordings and confirm that motion detection is working as expected.
Looking For More
Is this faq useful?
Your feedback helps improve this site.



TP-Link Community
Still need help? Search for answers, ask questions, and get help from TP-Link experts and other users around the world.